
Summer Starts Here - Save up to 70%
To see if this custom-fit item will work for you please tell us what vehicle you'll use it with.
Thank you! Your comment has been submitted successfully. You should be able to view your question/comment here within a few days.
Error submitting comment. Please try again momentarily.
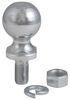
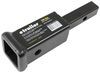
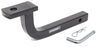
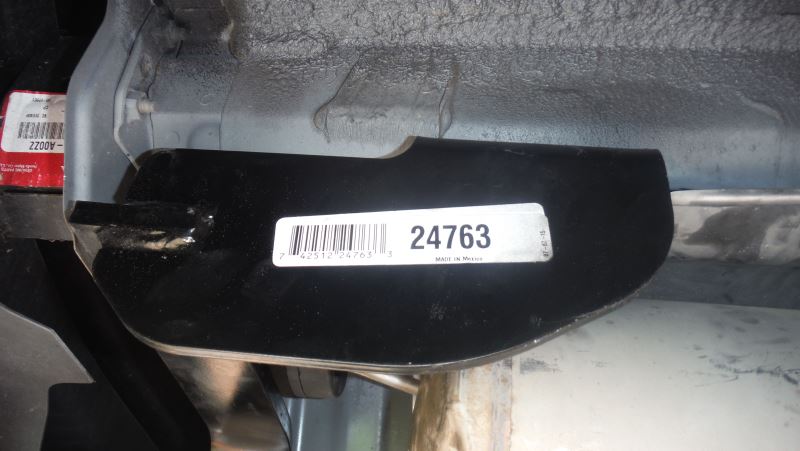
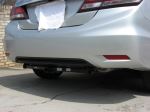
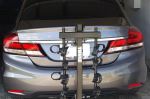
This fully welded, corrosion-resistant Honda Civic trailer hitch receiver is perfect for your light-duty towing needs. Draw-Tite's Tested Tough guarantee ensures that this hitch exceeds industry standards. Drawbar sold separately.
Features:
Specs:
Draw-Tite's Tested Tough program provides testing standards far superior to those outlined by the Society of Automotive Engineers (SAE), the go-to source for engineering professionals.
Each Draw-Tite trailer hitch receiver undergoes extensive fatigue testing and static testing with the ball mount that is either supplied or recommended for use with that particular hitch, thus ensuring results that are applicable to real life use. Fatigue testing is also conducted on hitches rated for use with weight-distribution systems.
In addition, Draw-Tite performs static testing on a simulated automobile, as opposed to the rigid fixture used for SAE testing, resulting in a more true-to-life scenario.
At etrailer.com we're committed to the products we sell, and to our customers. Our experienced and knowledgeable staff are available via both phone and email to address your questions and concerns for the lifetime of your hitch. The technicians at etrailer perform hitch installations on a daily basis, making them a valuable resource for do-it-yourselfers. The one-on-one, personal service you'll receive comes straight from an expert in the towing and automotive field. We've installed it, we've wired it and we've towed with it, so whatever your question, we can answer it.


Tech Tip
No drilling required for installation , Access holes may need to be enlarged by drilling, filing, or rotary tool , Exhaust must be temporarily lowered for installation , Minor heat shield modification may be required
California residents: click here
Videos are provided as a guide only. Refer to manufacturer installation instructions and specs for complete information.
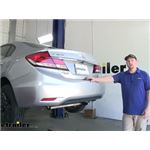
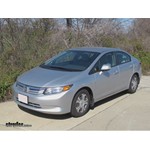
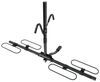
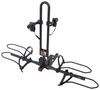
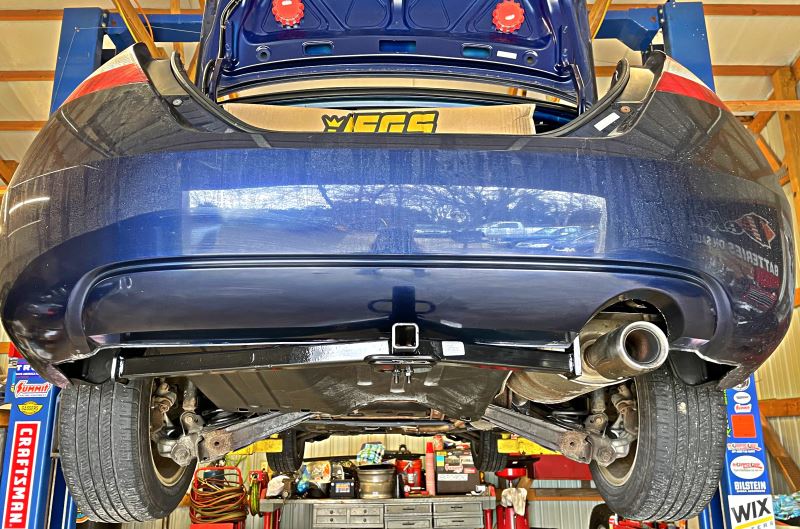
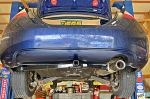
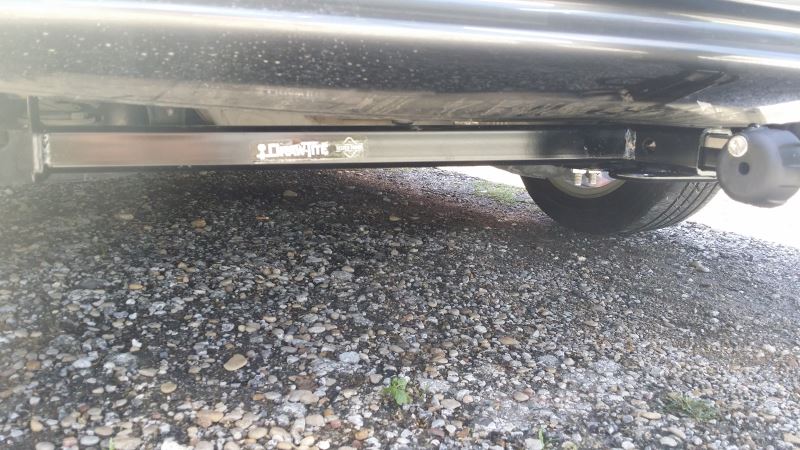
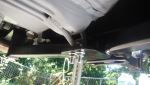
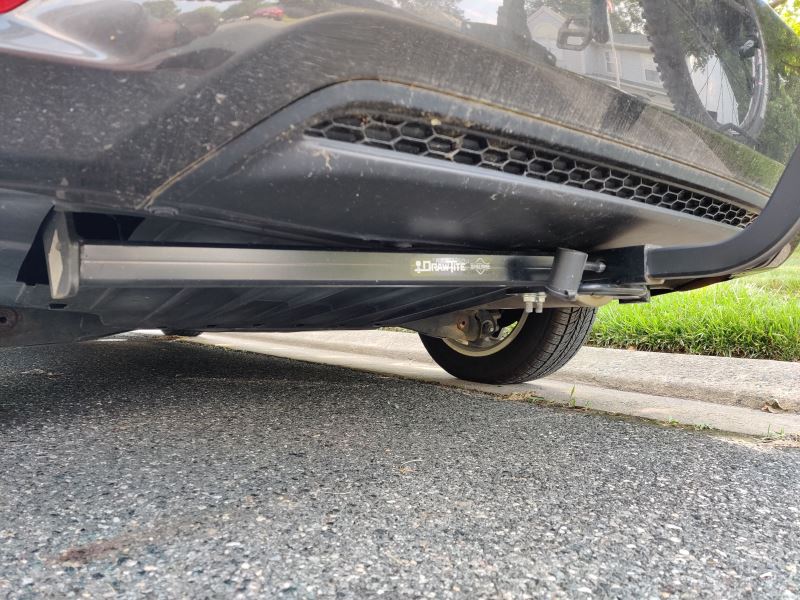
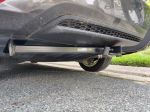
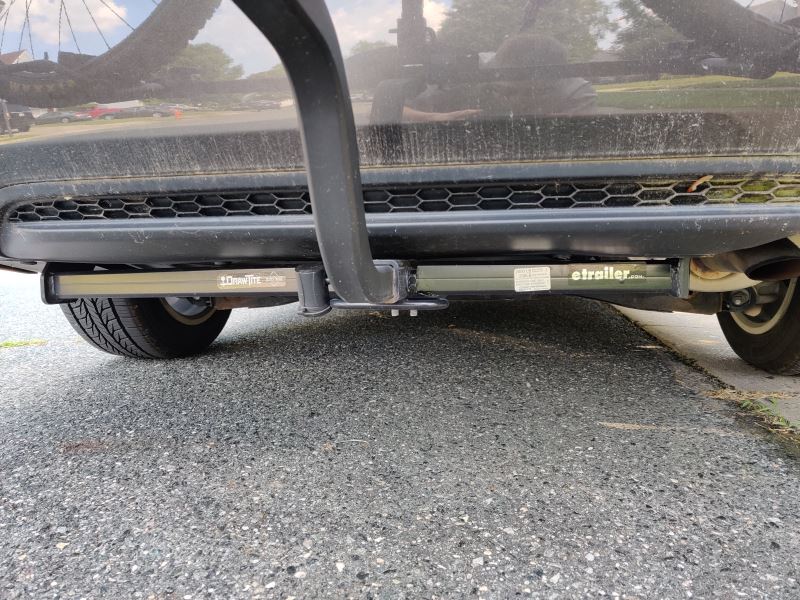
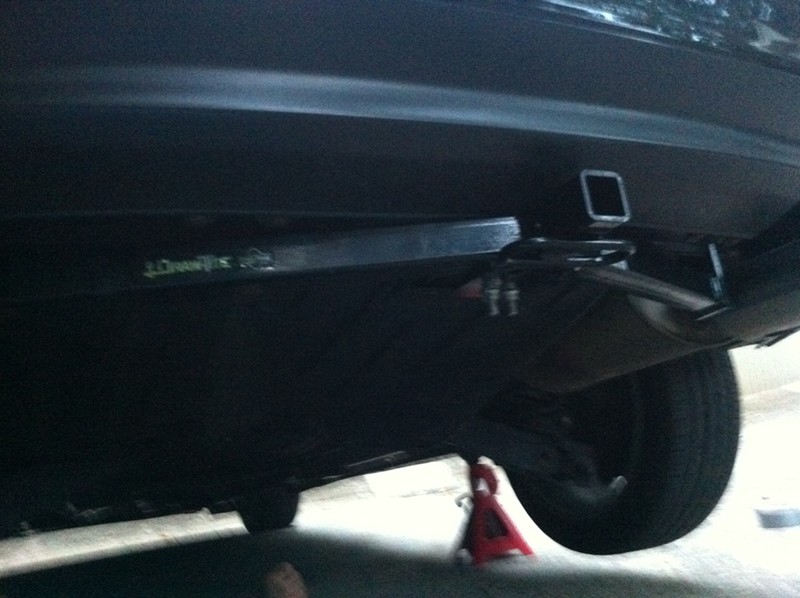
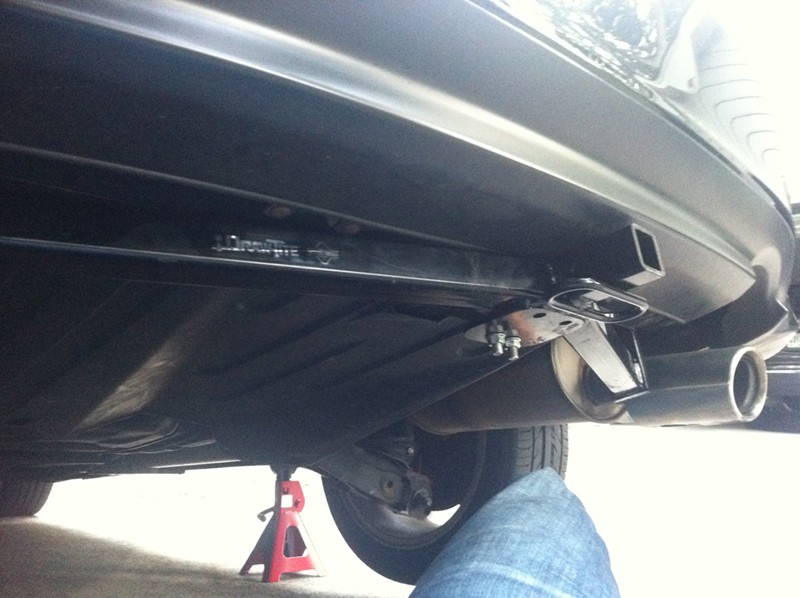
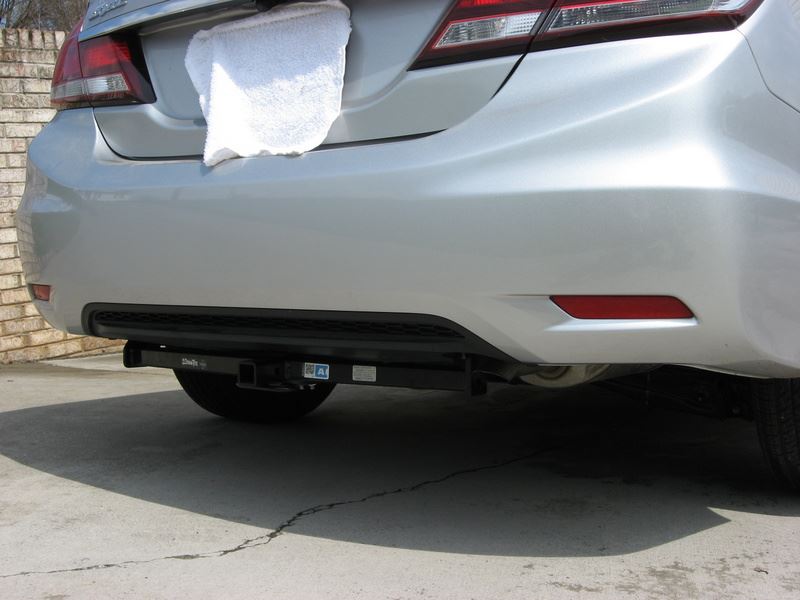
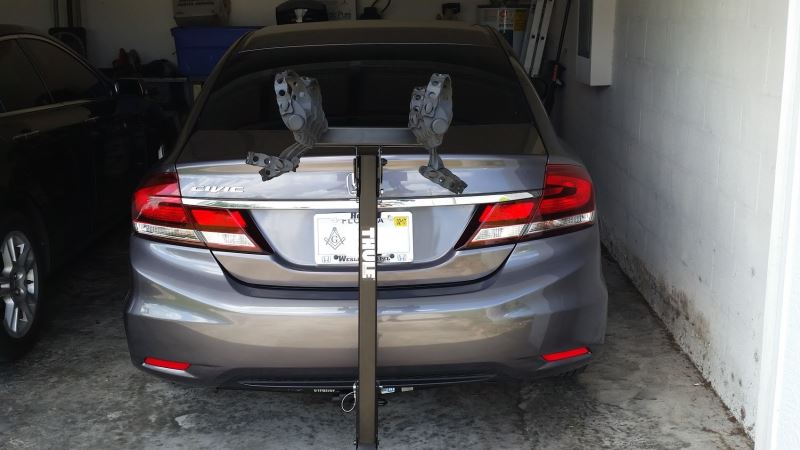
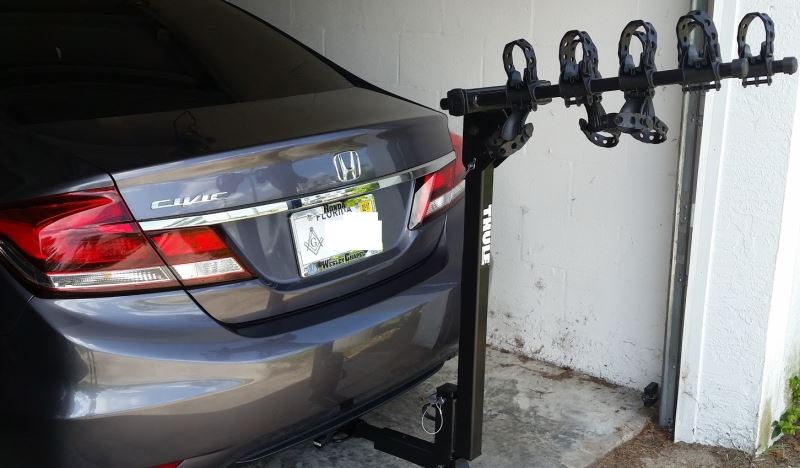
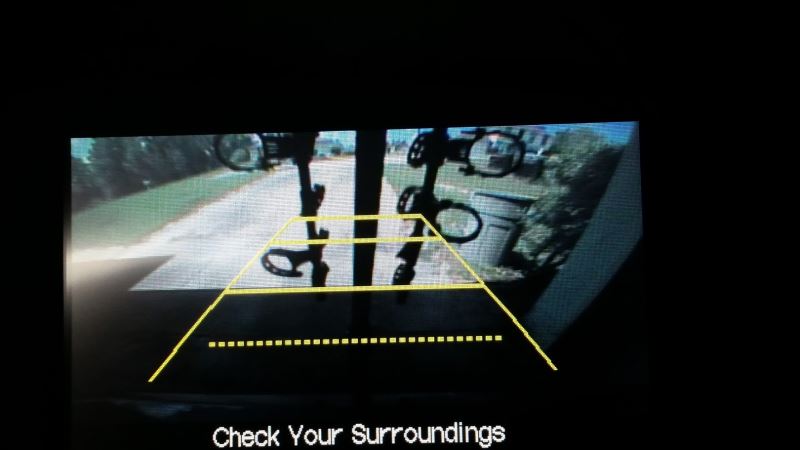
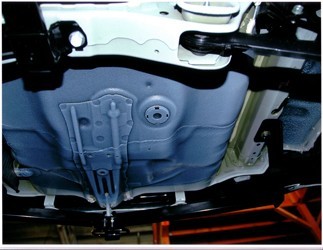
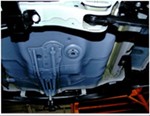
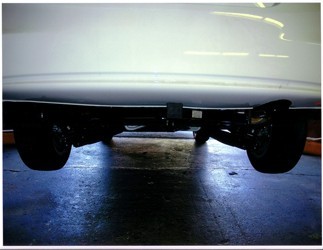
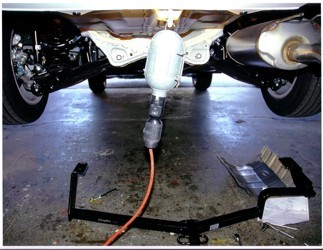
Hi there, Civic owners. Today on your 2015 Honda Civic, we're gonna be taking a look at and showing you how to install Draw-Tite's 1 1/4-inch trailer hitch receiver. This is a Class I 1 1/4 by 1 1/4-inch receiver. And here you can see it installed on the vehicle. The cross tube is gonna be a little bit visible, but it tucks up pretty nicely underneath and your Civic already sits pretty low, so you're really only gonna notice the receiver here at the back. And it's a nice small receiver that's gonna be great for your accessories, such as bike racks and very small cargo carriers potentially as well.
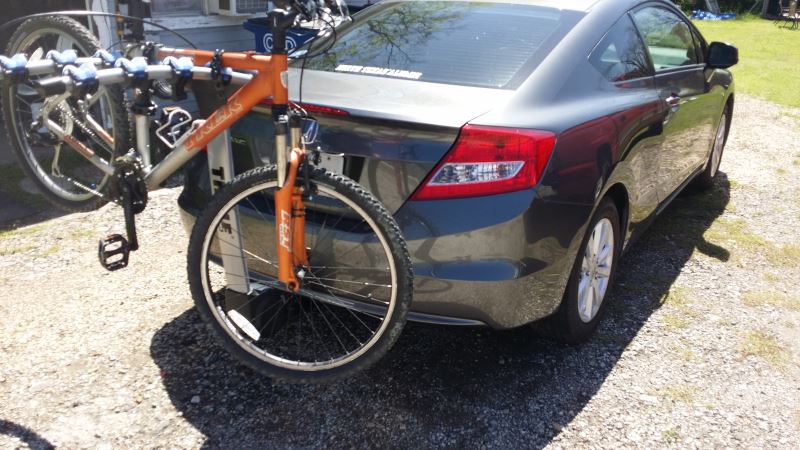
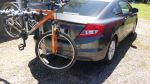
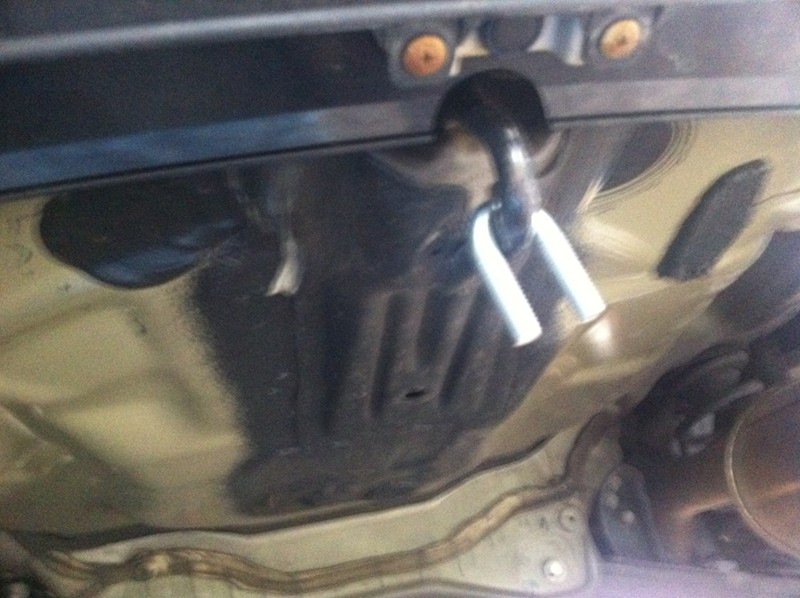
But this is really gonna be great for getting those bikes to your destination. You'll secure your accessories to your hitch using a half-inch hitch pin and clip. Now, one doesn't come included with the hitch, but we've got plenty of available here at etrailer, and I also would recommend locking ones to protect your investments. On bottom, we have loop-style safety chain loops with a very large opening that should accommodate just about every shape, size, and style of safety chain. Our little one has no problem.
And our big guy here also has no problem. This hitch features a 200-pound tongue weight, which is the force going down on top of the receiver. And this should be great for a two-bike platform rack loaded up. The rating here for your tongue weight of 200 pounds is any accessory you've got in there, so that includes your bike rack and any bikes that you put on it, so it can add up pretty quick. It also features a 2,000-pound gross towing capacity, and that's how much you can pull behind it.
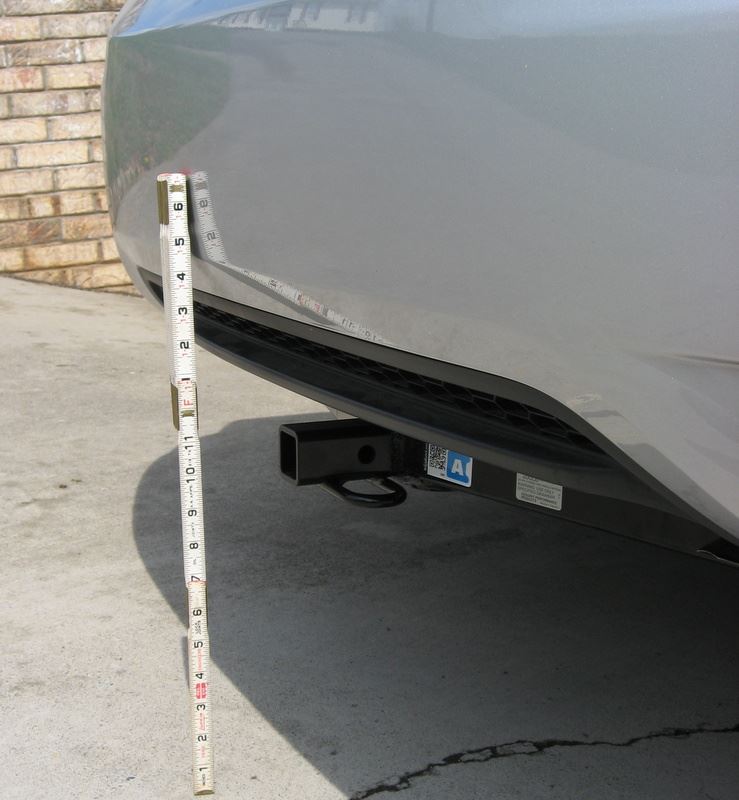
And that's gonna be enough if you've got a really small utility trailer if you need to get a little bit of work done, or maybe you've got a hot dog cart you wanna bring around. Now, as always, I recommend that you verify in your vehicle's owner's manual and ensure you don't exceed any of its towing capacities. Now, I've got some measurements for you to help you when deciding on accessories. From the center of our hitch pin hole to the edge of our rear bumper, we're looking at right at about 4 1/2 inches. And this is important when determining if your accessories will contact the bumper when placed into the receiver, and if you can put them in the upright storage position without contacting the bumper.
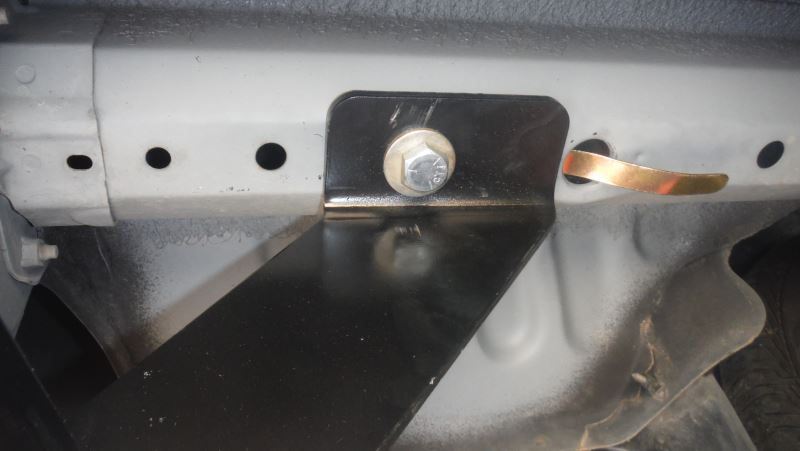
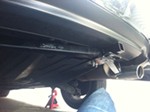
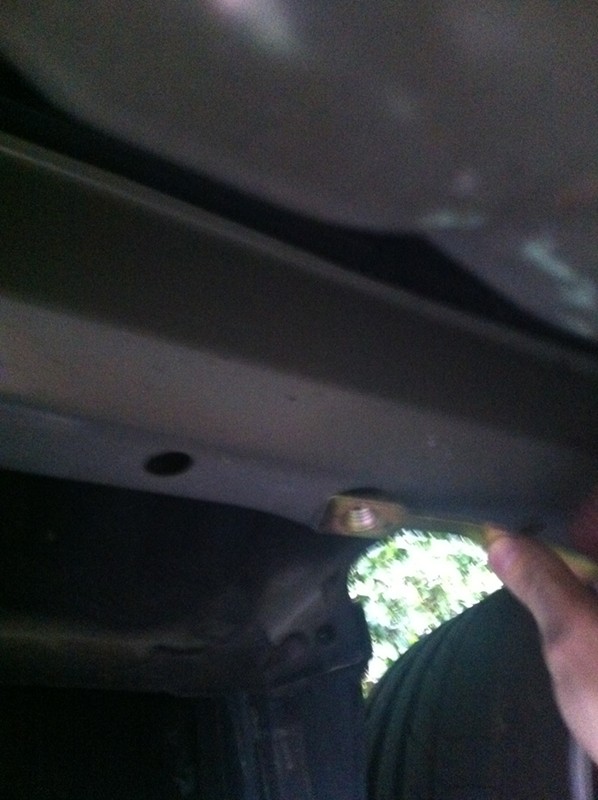
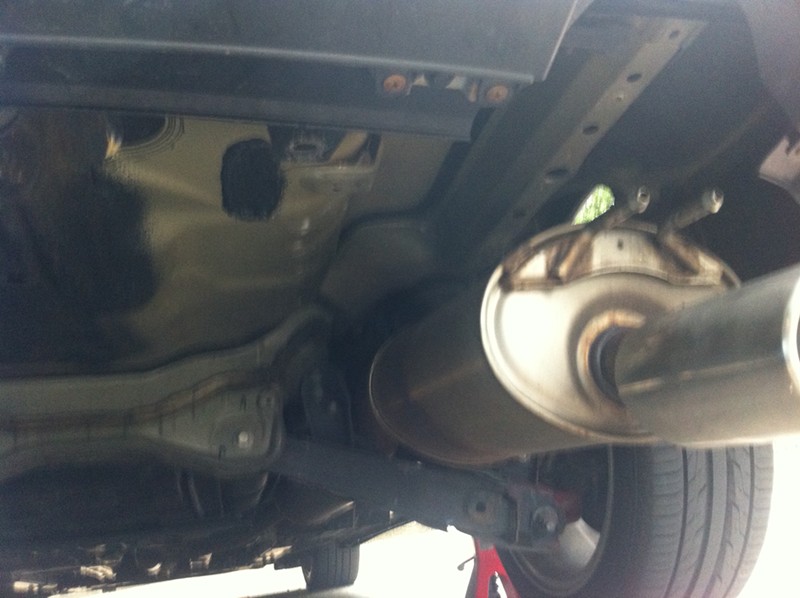
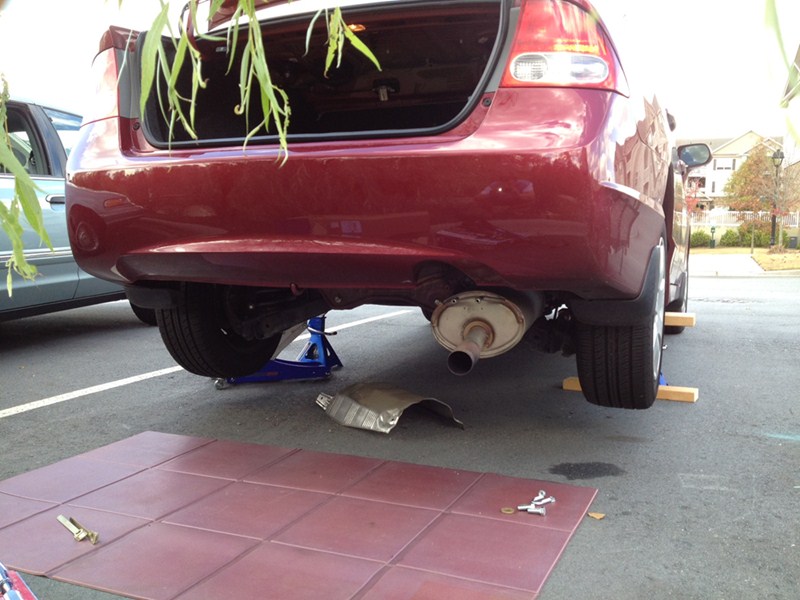
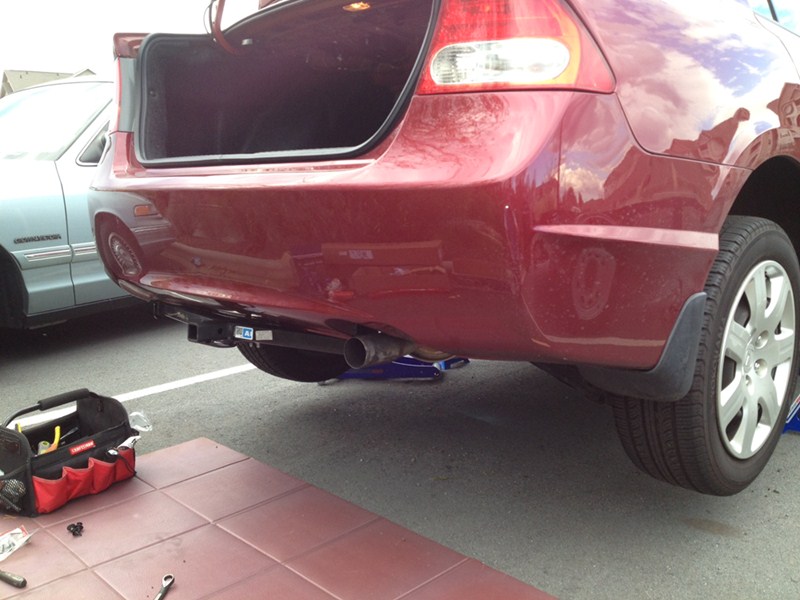
And from the ground to the top inside edge of our receiver tube, it measures right at about 12 inches. This is important when determining if you need a drop, a rise, or a raised shank on your accessories. And since this one does sit so low, I definitely recommend a raised shank on your accessories. Now, that we've covered some of the features of our hitch, why don't you follow along with us in the shop and we'll show you how to get it installed. It is a relatively easy hitch to put on. We are gonna have to trim a couple of components and lower down the exhaust a little bit, but it won't take that long. This is something you could probably do in your garage in about an hour and a half, maybe two hours, depending on the tools you have available and how high you can lift the vehicle up. 'Cause the shield underneath is kinda big, and an extra set of hands could also help you get your hitch up here a little bit faster to save some time. We'll begin our installation underneath the vehicle. We'll need to lower down some components, so we can get our hitch up. That's gonna include our exhaust, our heat shield and our cover here. We're gonna start with the exhaust. To get that out of the way, it'll rest on our suspension here, so we don't need to worry about supporting it. So we're just gonna take some spray lubricant, put it on the hanger here at the back. And then we'll use a pry bar to just pry that off of there. So back into one of the other holes. Now that we've got it loose from that one, we're just gonna work our way forward, remove the next one here. And then depending on the room that we've got, we may or may not remove one more further, but we'll take this one off and see what kind of room we've got. So this is gonna be very similar to how we took off the other one, just gonna pry it off as well. Sometimes it's almost easier to just do it with your hands depending on where you can pry. That spray lubricant usually does a pretty good job of assisting you. Sometimes you need to hit it from both sides. I'll pry it again. There it goes. And we're sitting on our suspension now, so there's no reason to remove any further forward because it's not gonna come down any further than that anyway. So now we can take out the heat shield. So we can move it out of the way to get to our fasteners. There's four fasteners that hold it in place. We've got two there in the back of the vehicle. We'll have another one here. And there's another one up here as well. The one located here is gonna be a bit of a trick to get to. You can see it's kind of covered. So we're gonna take out the other ones first, then we can probably bend the heat shield over a little bit out of the way to get to that one. I'll take that 10 millimeter socket and get these out of here. Now that last one there, after looking at it, this whole panel has to come down. So we're gonna take this panel down and then we'll come back to that last fastener. To lower down this panel, we're gonna remove the pushpins around the outer perimeter here. So you can see them there, there and there there's about four of them that run around, maybe five. To remove these, we're gonna take our screwdriver. We're just gonna push it in between the little opening there, and we're gonna give it a little bit of a twist. And that'll pop that center out of there. And we usually give it a little bit of a grab and a wiggle and pull it to pull up the rest of the way out. We'll repeat that for all the remaining fasteners that are on here. Then on the other side of our panels towards the front of the vehicle and we're gonna have some nuts or some bolts we're gonna need to remove. There's a 10 millimeter socket again. It's gonna take this one off here, kind of just to the inside of the wheel on the driver's side. And then if we head towards the middle, it's actually on the panel that's just in front of the rear panel, but those fasteners will also go through some little ears on this panel, so we need to get those out as well. We can now pull down on our panel. We're just gonna pull out kinda slightly on this to get it to clear there. Pull it straight towards the rear. If you get that out of the way, we can set that aside. And now we've got access to our single bolt there. We're just gonna zip that out of there. And we'll set this aside as well. Now we're gonna go ahead and put some of our hardware into place. Here at the back on your tow loop, you're gonna have a small U-bolt that's gonna drop down around it. Now we're gonna be raising our hitch into position. Now this is where you got a couple options. If you've got a friend with you, then you guys could easily lift this up and either start these, or you can do the fasteners that's gonna be over there. If you're by yourself, that's how I'm gonna show you how to do it if you're all home alone, we're gonna raise it up and get these started, so that way the weight's gonna be supported by this so we can get the side ones in all by ourself. So now we're gonna raise our hitch into position, and it's kind of strange how it's gotta go around here. Our hitch bar here needs to go above the exhaust, but below the attachments so we can get those back into place. The other side there on the driver's side is really not a big deal at all. There's nothing really in the way over there. So now we're gonna lift this up. Lining up our U-bolts with the holes in our hitch, just like that. And then we'll get our nut started on our U-bolt here. And that'll support the weight of our hitch so that way we can get the other fasteners installed. Next, we're gonna get our side fasteners in place, so take your bolt, put your conical tooth washer on it with the teeth facing towards the hitch. And we're gonna take our handle nut here. Our bolt's gonna go up through this hole, into the frame here, and it's gonna thread into this handle nut. So we're gonna hold this up here at relatively where that hole is, and then come back here. This is our access hole. We're gonna bend it at about this point. So that way we know when we go up through the access hole here, it's gonna lean forward, kind of rest right there with that hole. Now we'll just tip our hitch up a little bit here. Line it up in that hole. Maybe adjust our handle nut to fit, and then get this into position. Now this can be pretty tricky to do, so we're gonna probably take our one hand here and kind of like, force the hitch up with the one hand, stick our bolt through there, and then try to hold our handle nut in place as well so that way we can get it started. And once we get this one over here, we'll repeat the same process over on the other side. Now this can be a little tricky with our exhaust and everything here, and it's pretty tight on space, but you should be able to get it in here as well. We can now go back and tighten down our hardware. For our smaller bolts, we're gonna use a 14 millimeter socket and tighten these down. You want to kind of go back and forth to tighten them down evenly. And then for our larger hardware, we're gonna use a 19 millimeter socket. And then we can go back and torque our hardware to the specifications outlined in your instructions. If you need a torque wrench, we have them available here from Performance Tools in varying sizes. For this one, the smaller one would work. If you've got a truck at home, if you're wanting to put a hitch on as well, I'd recommend getting the bigger one. And we'll torque our smaller ones as well. Now we're gonna reinstall our heat shield, and trimming is not 100% required. This will fit up in there if you don't trim it. But the location where this extra part is here that I'm gonna trim off is right between the hitch that we just put up and the exhaust, and there's a very high probability that we're gonna have rattles occur if we leave this in place. So we're just gonna go ahead and get rid of this. So that way we can ensure that we're gonna not have any annoying noises bothering our neighbors. And now roll our heat shield back up into position and re-install the fasteners. We can see the little part that we cut out though. This will allow our shield to kind of clear the hitch here, so that way we don't have any kind of angle downward potentially hit on our exhaust. You don't have to worry about cutting out the hole for that attachment point. You can't reinstall it anyway 'cause your hitch covers it up. So we're not like, changing the functionality or fit of this by doing so. We can then go back and tighten these down with our 10 millimeter socket. So now at this point, we can get our under shield back in place. We are gonna have to trim it if we want to put it back on there. You could choose to just leave it off, but we're gonna go ahead and trim it out so it'll fit. This is gonna be over on the driver's side. We'll need to trim it out to fit around the hitch there. And this is for that little attachment at the center. We'll also need to remove the lip here going across the front to make it thin enough to be able to slide back into place. So we'll just trim out these sections and then I'll trim that lip off. So now we're just gonna slide this back into position. It is gonna be a very tight fit. So just take your time and work it into place. So what I found was with these bolts torqued, it was extremely difficult to get this to slide in there, so I did loosen these back up a little bit. So you may want to hold off on torquing these down until you get your panel slid up. But you will need to torque those side ones down first because the panel is gonna cover at least the one on the driver's side up. And now we can more easily slide this into position with those links. And then we'll just reinstall our fasteners. The two that are towards the center here are gonna be covered by your hitch. The hitch, once you torque these back down will hold that tight up in there, so it's not gonna be necessary to torque those down. And now that we've got our panel back up, we'll re-torque those bolts. And now the only thing left to do is we're gonna take that spray lubricant once again on our hanger there, we'll push that towards the front of the vehicle a little bit. I mean, towards the rear of the vehicle and we'll just raise our exhaust back up, and it should just slide right back on there. And with our hardware all the way torqued down, we're ready to load up our favorite accessories and hit the road. And that completes our installation of Draw-Tite's 1 1/4 trailer hitch receiver on our 2015 Honda civic..
Average Customer Rating: 4.7 out of 5 stars (308 Customer Reviews)
This fully welded, corrosion-resistant vehicle trailer hitch receiver is perfect for your light-duty towing needs. Draw-Tite's Tested Tough guarantee ensures that this hitch exceeds industry standards. Drawbar sold separately.Such an easy install. Did it on a 2009 Civic by myself on drive-up ramps. Did NOT totally remove or cut the heat shield, only remove 2 bolts towards the passenger side. Insert the hitch from the driver side, twisting over the tail pipe. Attach nuts on U-bolt and the rest is easy. Slight difficulties installing the rearward bolt on heat shield but I grabbed a longer bolt for that. This is my 2nd hitch install from Etrailer.com
The trailer hitch arrived in great condition and it was easy to install. I just have to say I was able to remove the heat shield and also install the hitch into the right position without having to do anything to the exhaust, just a-little helpful tip for anyone else. To install the hitch mount without removing messing with the exhaust, I tilted the mount in at an angle as I was putting it over the exhaust, passenger side first. Other than that, I would recommend this product.
I eventually got this trailer hitch installed, but it didn't go in easy. At first I was bummed, then frustrated, then I ripped it back out after giving up. Then I saw the problem.
I've installed two trailer hitches before - one on a 2006 Honda Civic, and another on a 2012 Honda Accord. They both installed easily. I'm not a beginner at this, though honestly when I finally realized the problem I'm a little embarrassed that I didn't see it earlier. I'm hoping that my difficulty (and solution) will help someone else out with the same issue without all the frustration, foul language, and general dismay.
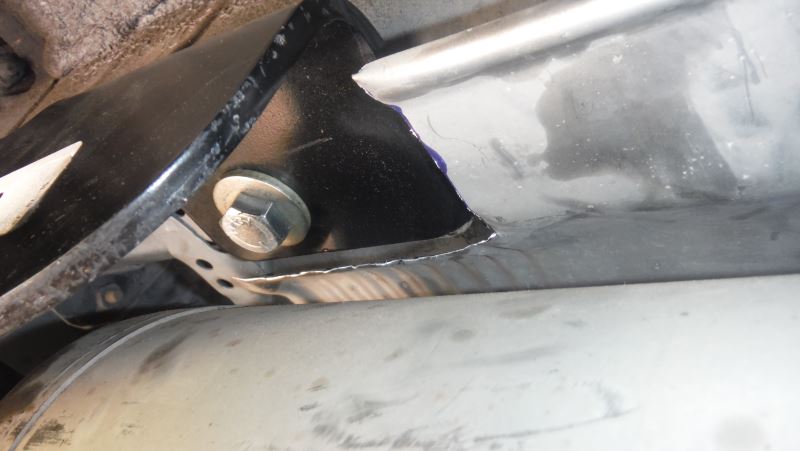
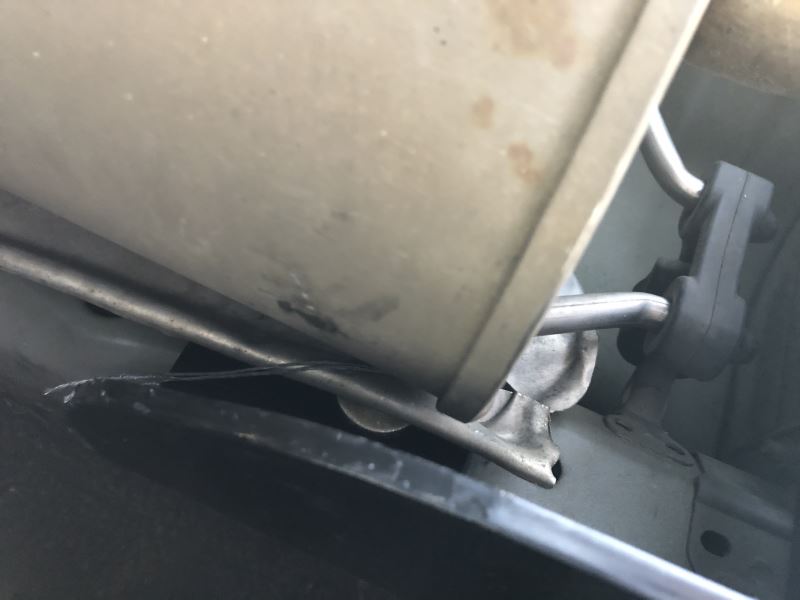
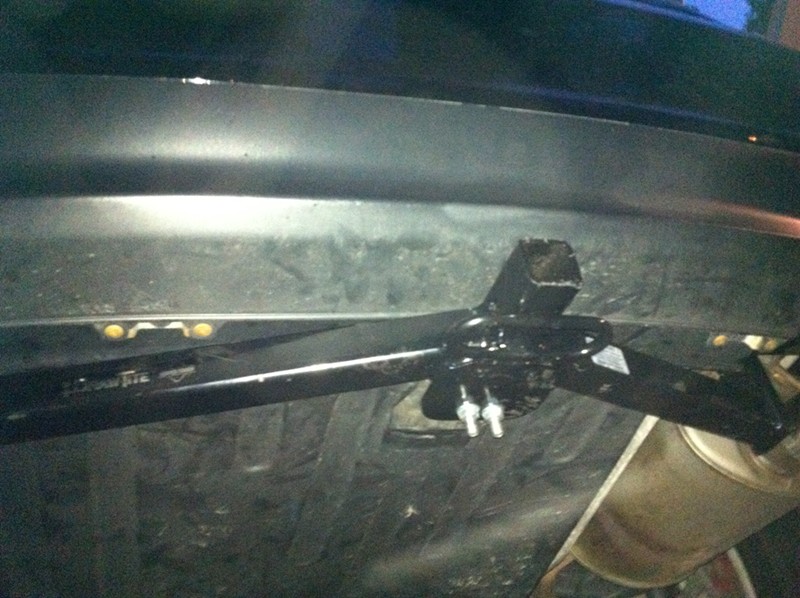
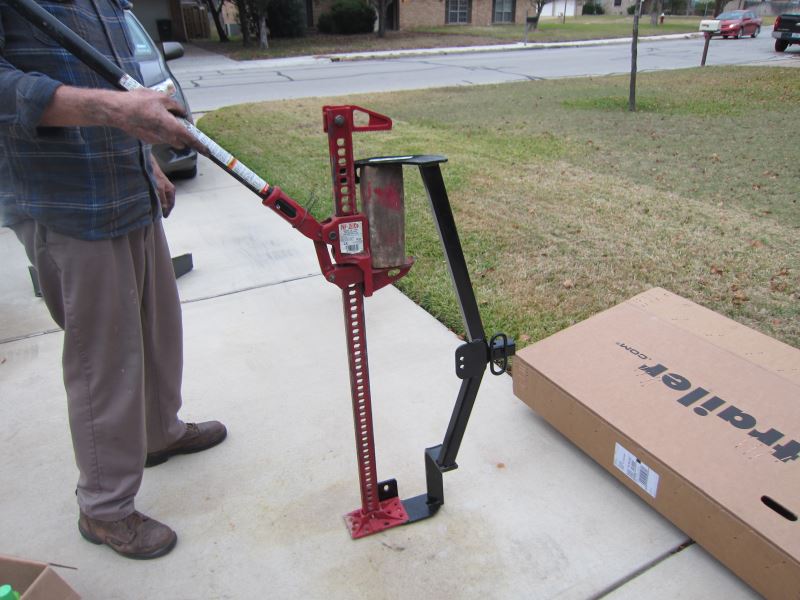
The problem: I brought the hitch up and fastened it to the center tow loop. I bolted up the passenger side near the muffler. No problem so far. Then I tried to bolt up the driver side. No way will this fit. The hole in the hitch misses the hole in the frame by ¾ of an inch. In other word the trailer hitch is too short by ¾ of an inch. This hitch just does not fit my car. I searched the internet. There must be a lot of 2010 Civic owners with the same problem, right? Nope, it seems I'm the only one in the whole world. Is my car just weird? How can it be? Cars are made by robots - they are all the same. I expect hitches are made by robots too. I gave up and removed the hitch. I stared at it sitting on the driveway. Then I saw it. The driver side end mount flange is bent (see the attached picture). You wouldn't see this with a causal glance, but bent it is.
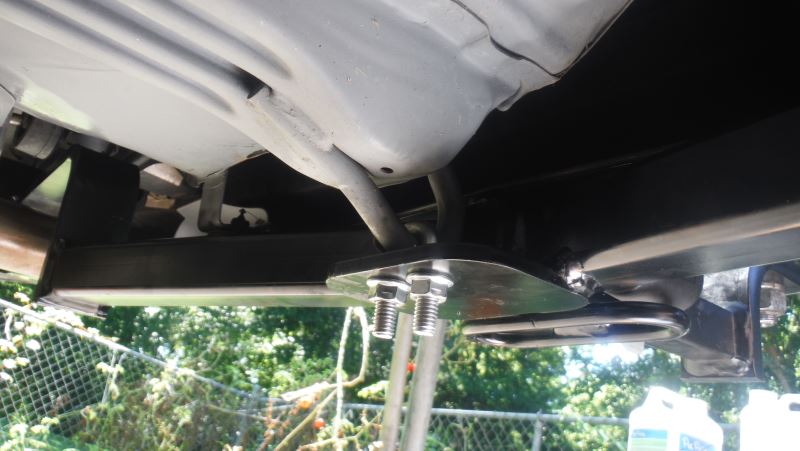
I have a heavy work bench with a lower shelf with a heavy cross beam 5 inches off the floor. With the tow hitch vertical I snagged the bent flange under the lower shelf cross bar and using the cement floor as a fulcrum I tugged the passenger side of the tow hitch (now chest high) back. The bent bracket bent back easily - surprisingly easy in fact. Before bending it back I measured the distance between end flanges at 36.5 inches. I bent it back to 37.25 inches (see attached photo). I reinstalled it. It fit perfectly.
So how did this get bent? Considering how easy it was for me to bend it back I expect it was bent in shipping. All someone had to do was drop the shipping box on its end. That would do it, and I expect it wouldn't harm the shipping box all that much. My shipping box looked OK.
So I'm happy - it fits and works great. In a few weeks I'm going to install a trailer hitch on my 2021 Honda Civic.
Basic hitch simple to install. A second set of hands a a few key moments make it easier but a floor Jack and a impact socket help.
Install the center bracket first then the side bolts make sure to put the exhaust mounts back before you bolt up the right side.
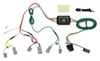
Wiring is plug and play super simple. If you are careful the retainers can be reused. Easier to just order new ones.
Went on fairly easy. Should do the job to hold a bike rack. The hitch arrived pretty scratched up.

Jenny N.
12/13/2021
I will have our customer service team reach out to you. I recommend touching up the hitch with a rust resistant paint which you will have on hand for regular hitch maintenance.
Helpful Links

Justin

12/11/2022
I have used this hitch 2-3 times a week for a year to haul my mountain bike. Does the job just fine!!
I love the nuts with long, flexible handles... They are much easier to use than bolts and lug plates with fish wire.
I bought the Draw Tite hitch (24763) for a 2012 Civic coupe a few weeks back and managed to get FREE 2 day shipping. That same day I ordered a Thule Apex Bike rack on a separate order (3-5 day shipping) and I was surprised to have them both two days later!
The ordered parts were all correct but I was a bit confused at first because the website differentiated between 2012 Honda coupe not Si and Hybrid although it seems it works for all models ( instructions provided information to include Si and Hybrid models). It took awhile to install and was relieved to find out I did not have to drill any holes or make them larger. If you buy this product and install it yourself make sure that the U-bolt part fits all the way up otherwise your arm bolts will be misaligned with the frame.
Since I thought I had ordered the incorrect product I called etrailer.com and spoke with Sam about the issue. He was able to help me out and provide more information on the product and order number. I was able to go to Draw Tite's website and get additional information to see if my model required drilling.
If you happen to lose the instructions, the Draw Tite website will give you a way to print out the instructions. I also recommend watching the youtube video to make it easier otherwise you will struggle like I did.
Overall the installation to about 2 hours since I had difficulty aligning the holes and trying to determine if drilling was required.
From start to finish I would recommend this company for their dedication to getting your product to your door in a timely manner. If any issues arise they are great at helping resolve your issues within minutes of placing the call.
I would definitely recommend this website to friends and any future customers that are researching etrailer.com for quality services.
Hope this review helps you all out!

Ac
4/22/2017
This is an awesome product! I have not had any issues with the trailer hitch. The only thing that I have done is checked the bolts to ensure that they remain tight. After a year of owing it I would definitely still rate it as 4 stars and recommend it to friends.

Easy to install and is working great with my Kuat Sherpa!
This hitch installed easier than my last one. It took me 1.5 hours by myself, with car up on ramps. Another set of hands just to steady things would have cut 30 minutes off the install. I had to trim the heat shield after the hitch was up. Much easier than I expected. Mark with a Sharpie and cut with tin snips. The metal was so thin, I think heavy scissors would have cut it.
I like the "U Bolt" attachment to the tow hook. It takes the weight off of your arms for the rest of the install. The "handle nuts" are a really great help. You can hold the handle nut while you screw the bolt up into the nut. Much easier than the "fishing wire" of my last Honda install.
No drilling required on my 2012 Honda Civic EX.

Mike C.
8/25/2016
All bolts still tight. Hitch is doing well! The little Civic pulls it like its not even there.
Installed this hitch on my 2011 civic lx sedan. I used two jacks with a 2x4 in between to lift the hitch into place, which made things much easier. The handle nuts were the reason I bought this hitch over others, and they were worth it. I did have to drill out the hole on the exhaust side. My biggest issue was that the hitch covered one of the exhaust heat shield screw holes, though that wasn’t supposed to be the case according to instructions. Since that screw is the primary one of the four that holds the heat shield off the muffler, that was a bit annoying. I ended up threading metal wire through that hole and around the hitch and twisting it tight to keep the heat shield off of the muffler. Shouldn’t be a big deal, but it did complicate the install. Probably should’ve taken the hitch back off and sandwiched the shield between the hitch and the frame. Overall, I’d give this hitch 4.5 stars if I could.

Robert
12/9/2021
Great!
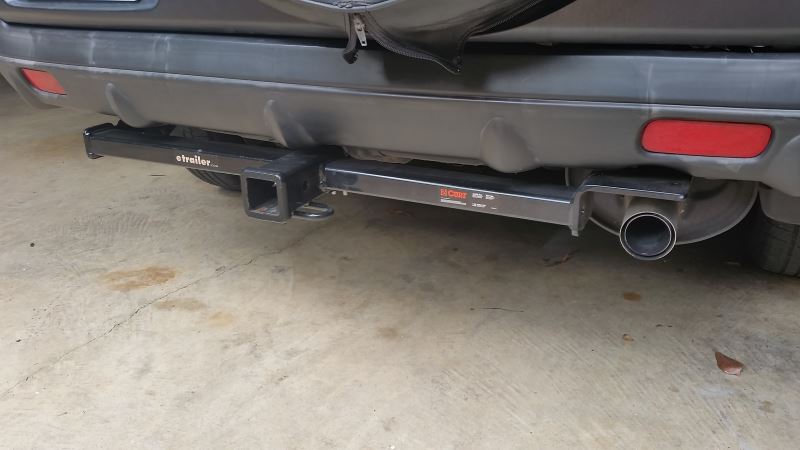
I bought this last year for my 2013 Honda Civic. Installation was pretty straight-forward. I watched the etrailer YouTube video as well as a YouTube video from another shop a few times each to make sure I had the process down before starting. It's been over a year since I installed it so I don't recall exactly how long it took me but I believe it was between an hour to an hour and a half from jacking up the car to being completely finished. I installed it by myself which made the process quite a bit harder in a couple of spots. If I had an extra set of hands I could have probably shaved 20 minutes or more off of that time. I've never installed a hitch before but for my car it wasn't too bad. I'm using it in combination with a Hollywood Trail Rider 2 Bike Rack and I've had zero issues with the hitch. I've added a couple of recent photos so this is what it looks like after a year of use.
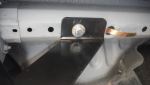
Hitch Receiver was a perfect custom fit. A little tricky to install by yourself, but I was successful. I would just add the following note to the installation instructions. In addition to removing the plastic push clip from the plastic cover on the driver side, you ALSO need to remove the 6mm (10mm head) bolt from the plastic cover same driver side to lower it
I installed the Draw-Tite Sportframe Trailer Hitch Receiver - Custom Fit - Class I - 1-1/4" on my 2004 Honda CRV. This is the second trailer hitch and wiring harness I have purchased from etrailer. The installation video made the installation easy.
The hitch fit perfectly and did a great job pulling a small Uhaul trailer. etrailer has a nice web site and I highly recommend them.
I am reviewing the trailer hitch receiver AND the etrailer customer service.
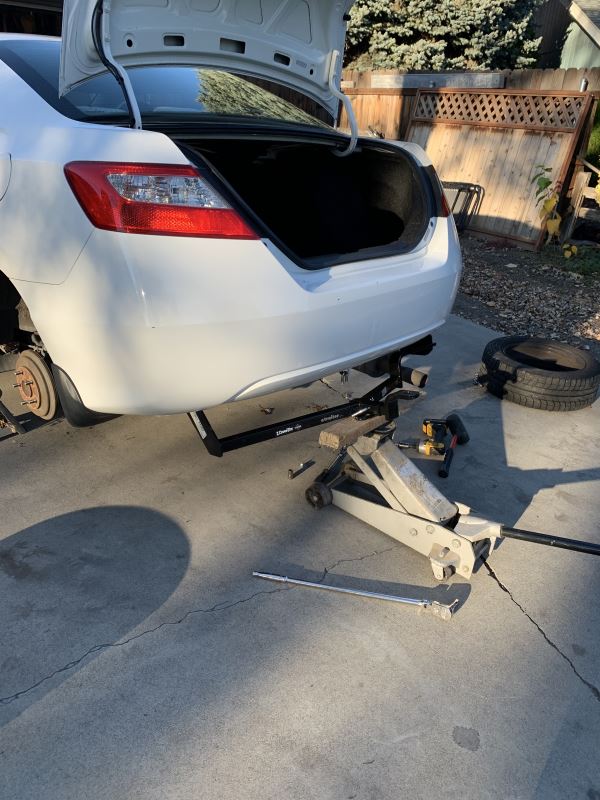
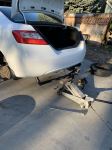
First off, the trailer hitch installation was straightforward, and the videos showed me exactly how to do it. I was able to install it myself, using my hydraulic jack at certain points to help me lift the hitch into position to bolt it in place. Please see the pics below.
The customer service at etrailer is phenomenal! My order was upgraded to express shipping as a nice unexpected treat. I ordered the hitch receiver and also a bike rack. Both items arrived two business days later! However, there was a problem: the bike rack didn't have the included hardware kit (bolts, nuts, pins, etc.). Here's where I was impressed- etrailer reps immediately rush shipped me the missing hardware kit, and were absolutely pleasant on the phone and in emails. I am extremely impressed with this company, and will be ordering again. I highly recommend etrailer.com! Thanks!
I bought this hitch to install on my 2008 Honda Civic LX. The instructions were good and the only problem we had in installing the hitch is that we had to use a farm jack (see attached photo) to spread the hitch out about 1 inch. We did this because the holes of the hitch were not lining up w/ the holes in the frame of the car. After spreading the hitch, it installed w/out difficulty. We had to cut a small piece of the plastic cover (I think it was the fuel tank cover) that the hitch goes underneath in order for the hitch to fit, but that was a simple cut. Took us about an hour to install. We have used the hitch/cargo carrier for 2 long distance trips and haven't had any trouble.
Took a bit longer than anticipated but the final results look good.
My 2014 Civic has about 6 plastic clips and three 10 mm screws that hold the plastic tray in place - more than is depicted in the video.
Thoughts:
1) Use silicone spray to help with muffler gasket removal. Yes, car is only 5 months old but I was able to easily remove and replace the gasket using only my hands.
2) Dry fit everything before attempting final install. Using hay twine to hang the hitch from the car hanger provides support AND movement.
3) Had to grind about 1/8 inch from the handle nut on the heat shield side. Appears to be a welded nut in the tube where the heat shield screw tightens and this was restricting a clear shot at the nut.
4) Hang a loop of string from the handle nuts so one can more easily initially thread the bolt into the nut. Pulling down on the string keeps the handle nut from slipping. This is especially important on the driver side as one has to reach up through the plastic tray.
Ordered the Draw-Tite 24763 for my 2015 Honda Civic Sedan, and was very satisfied at the speed and detail of not only the correspondence and email between etrailer.com but also the shipping speed and condition of packaging. I received this in six days from start to finish of order. I did not spring for faster shipping and was satisfied with this type of time frame considering the size and weight of packaging. I also got the Thule Hitching Post TH934XTR four bike rack and THSTL2 hitch lock anti-rattle device. I had planned ahead by watching all of the great videos on etrailer and printed out some instructions from the site. I guess I shouldn't have been surprised with their attention to detail that this was unnecessary as they included a copy of the same instructions I printed in the box. The install went exactly like the instructions/videos said it would and if I hadn't been interested in getting the beauty plastic underbody piece back on I could have been done in fifteen minutes with a lift and another set of hands. All in all a very easy kit to install, and thanks to etrailer for the speed, quality, and including all the necessary hardware and instructions. 5/5 would definitely do business with again and recommend.
I mount ed this hitch onto my 2014 Civic EX-L in about 2 hours. no problems at all. Directions were pretty straight forward. only hard part was bolting it above the muffler which had to be moved and bolted in dangling a bit. I was considering changing my bumper to the SI bumper. not sure if the hitch will still fit properly. One day I'll pull the measurements
The hitch installed. The job took a little over an hour and I saved $150 by doing it myself. Overall, it was pretty easy, but I'd recommend finding a buddy to help you hold the hitch in place when you bolt it to the frame. You'll also need a 3/4 socket for the frame bolts and I think either deep 7/16 socket or just regular wrench for the middle bracket bolts.
For 2009 Civic LX (not hybrid), NO cutting, drilling or other modifications required whatsoever. I just installed the heat shield and plastic shroud on top of the hitch.
Product arrived via UPS Ground on 8 Feb, perfect condition, necessary parts all there.
The installation took me just over 60 minutes. I would suggest you inform customers for this product on a 2012 Honda EX coupe of 2 prerequisites: one that a conventional shop-type vehicle lift is available and two that it be a 2 person job. I could have cut the install time in half with an assistant.
Everything fit okay, very tightly, no slack, but then who wants slack in a trailer hitch? I don't intend to be pulling any trailers, just using my bike rack in the receiver.
Working alone, it went together best for me to first fasten the U-Bolt (step 6 on your install instructions), then next the driver's side and the u-bolt loose then when all 3 fasteners are threaded tighten to torque specs one at a time.
3 sockets, a couple of extensions and a ratchet are required: 19mm for the 2 frame bolts, 15 mm for the u-bolt and 10 mm for the bolts holding the heat shield.
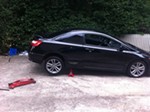
Photos show the job at the beginning, completion, and the view from the vehicle rear with the completed install.
The hitch receiver mounted perfectly. I discovered that you need to drill through the heat shield, or just clip it around the receiver. A self taping screw could be added through the shield if needed.
This hitch receiver looks good, and looks well designed, sturdy and unobtrusive. All the parts listed (and needed for the installation) were present and worked.
I got the trailer hitch receiver professionally installed. Although that was the first time they had installed this kit on a 2009 Civic, and had not watched the video, the installation was straightforward and took less than 1/2 hour.
Hi guys., this is the BEST Towing Hitch so far , it was aesy to put in my car , my car it is a Honda civic 2006 ex coupe , and the number of the Hitch it's 60822.
WOWWW I did myself without problems , Thanks again you guys from Draw-Tite , etrailer.com
Solid product, relatively easy install. No drilling required on my 2012 Civic Ex. It took me the advertised 1.5hrs to do the install. However, I could have had it done in about an hour if I had not originally installed it without the muffler tangs above the hitch...
My only gripe is that it arrived with some chips in the paint, see photos.
Easy install, less than an hour total. Would be easier with two people. No adjustments needed on 2006 Honda Civic EX Coupe. Free shipping was extremely fast, arrived 2 days after order was placed. Email updates kept me informed with tracking info. Overall a great experience and would recommend etrailer to anyone.

Do you have a question about this Trailer Hitch?
Info for this part was:
At etrailer.com we provide the best information available about the products we sell. We take the quality of our information seriously so that you can get the right part the first time. Let us know if anything is missing or if you have any questions.


Brian
11/5/2022
Perfect