


Thank you! Your comment has been submitted successfully. You should be able to view your question/comment here within a few days.
Error submitting comment. Please try again momentarily.
Note: Using this adapter will reduce the tongue weight capacity of your hitch by 50-percent.
Videos are provided as a guide only. Refer to manufacturer installation instructions and specs for complete information.
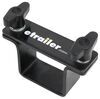
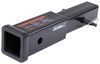
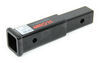
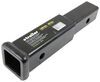
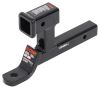
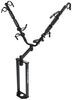
Randy: Hey guys, it's Randy here at etrailer.com. Today we're going to take a look at the Malone Dual Hitch.Now this is designed to fit into a standard 2 inch by 2 inch receiver tube opening. It then comes back from there and it's going to give us a dual receiver tube opening. The lower one is rated for accessories and towing, the upper one's going to be rated just for accessories. As you can see, we've got our Malone Micro Sport there on the bottom. We're also able to take our bike rack right along with us, we don't have to decide one or the other.Now also as kind of a side effect of getting the dual receiver tube, we also get a hitch extender here.
This is going to be 12 3/8ths of an inch from our original pinhole to our new pinhole location. That helps with clearing items like this, like the spare tire on the back of our Jeep or maybe an overhanging bumper. Now it offers really nice solid construction, which we'll show you a little bit more later but the weight ratings are important to take into effect.The ton weight rating on the dual receiver's going to be 400 pounds, that's the downward force we can put on it and it gives us a 4,000 pound gross trailer weight rating, but it's important to note that it also reduces your hitch capacity by 50 percent. You want to use whatever sets of numbers are lower. Now overall this dual receiver is really well constructed.
Just looking at all the welds that they have here, they're really nicely done and of course all of that's going to be wrapped up with that heavy duty black powder coat finish, so it should really look good for a very long time.Now a couple measurements that are going to be helpful in ensuring this is going to work for your application. We're going to start with the pinholes. From the center of our original pinhole to the center of the pinhole on the lower receiver it's 12 3/8ths of an inch. Now that matches what the rearward hole on the top receiver and then this hole's going to be 2 inches back from that, so this is at 10 3/8ths. Now another measurement I think is going to be key is the distance from the pinhole to the back of our upper receiver here.You can see with the spare tire if this we're larger we might run into interference, so just to ensure that you've got 9 inches from the center of your pinhole to the outer edge of anything that might interfere and then this will work in there for you.
It's going to be a 9 inch total from that pinhole to the back here. Then this offers a rise from the center of our lower pinhole, which should match that of your hitch, it's going to be 7 1/2 inches to the upper pinholes. Now all of our pinholes are going to be 5/8ths of an inch in diameter so you want to choose a pin and clip that's going to work with that.It's generally a Class 3 and each of the receiver tubes are going to be 2 inches by 2 inches. That's going to work with many of the Class 3 accessories out there for the upper and Class 3 ball mounts for the lower. Each of the receiver tubes are going to have the set screw we can tighten down and it really helps to eliminate the need for anti-rattle devices.Now when we install the dual receiver we want to ensure that the extra receiver is upward.
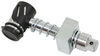
The lower receiver is rated for towing, the upper is just rated for accessories, so just keep that in mind. We're going to slide it in like any Class 3 accessory. We can take the provided pin, we're going to get that to slide through and then we'll use the provided clip to secure that. Once we have that pinned in place we get our anti-rattle device ready to go here. We'll first take our U bolt, that's going to slide up and around the shank of our dual receiver.Then we're going to bring our plate down. Now we're going to add a flat washer, a lock washer and a nut to each side of the U bolt. These are all provided. Now we want that U bolt to be sitting about 1/2 of an inch behind the end of our receiver tube. We'll bring that up just a little bit, right about there looks to be about 1/2 an inch in this gap right here. Get those snugged down and we're going to use a 3/4 inch wrench or socket. We want to get those tightened down. Now you can see, once we have that installed any of that movement or play is going to be eliminated.This can be installed in either direction so we can either have it with our U bolt legs facing up or down, we just have to move the plate to the bottom side if we rotate it the other way. To ensure it's generating the proper pressure, you can see the flat portion here it's going to be towards our factory hitch and the part with the angle is going to be towards our dual receiver. Now at this point we'll just place our ball mount in. This is going to install just like any other ball mount we're used to, line up the pinholes, secure it with a pin and clip.Now the pin and clip to hold the dual receiver to the hitch is included but for your ball mount or accessory you'll have to provide your own. Once we've got our pin in there we need to tighten down our screw right here or our bolt. We need a 12 millimeter socket. This is going to act as an anti-rattle device. See once we have that tightened down really no movement or play to speak of whatsoever. Now at this point we're ready to connect our trailer to our ball mount, latch and of course we'll want to pin it closed.Now one thing to keep in mind, we do have an extension that's just kind of a side effect of using our dual receiver. In most situations your safety chains aren't going to connect and your wiring is probably going to be a little bit short to make your connection once this is in place. Keep in mind extending these to make sure they connect is very important safety-wise. At this point our bike rack will go into place, cargo carrier, whatever you might be using it for and we're going to install this per the rack's instructions.If you're using a cargo carrier throw a pin and clip in there of course and we also recommend tightening down the screw that we have on top there, the bolt that we have on top there. Even though this does have an anti-rattle device included, tightening that down is just going to give it that extra little bit of security there. That's going to complete our look at the Malone Dual Receiver.
Customer Satisfaction Score:
94% were satisfied with this product
6% of customers were not satisfied
Ratings & Reviews


Chuck

6/30/2025
It works great. Just used it again this past week.
Stephen
4/19/2020
Rereading my review I think I may have misled some people. I meant to say that I can open my FJ rear door with the dual purpose hitch receiver in place, but not with the bike mounted. But it continues to serve me well. When not towing a trailer and hauling my bike, I have a stop light and protective bumper mounted in the two 2” receiver slots. Love it.
Lawrie D.
5/6/2022
I still love the product. Makes carrying my bike easy when I am pulling my jeep.
Laura
5/1/2025
The hitch receiver and the Yakima bike rack work great. We have had no problems with either.


Mike L.
3/5/2019
Be aware that as mentioned in the product description, the tongue weight capacity of the hitch is reduced by half when an extension like this part is used. You will want to ensure that the weight of the bikes and rack does not exceed 50 percent of the hitch tongue weight capacity.

Edward
11/6/2019
Working great. Use when ever loading bikes and cargo carrier or just want to have the cargo carrier higher off the ground.
Steve
11/26/2023
I bought this to give me the ability to attach my bicycle rack in addition to my tow bar. It has worked perfectly. After looking around and not being certain of what I would receive after ordering, I elected to order from Etrailer as they have always provided exactly what I was looking for. Keep up the good work.
Wiley
2/15/2023
GREAT! I’m 87 years old and I use the adapter often in a “flipped” position. This allows me to load my heavy ebike easily onto its rack. I love it!


Do you have a question about this Hitch Adapter?
Info for this part was:
At etrailer we provide the best information available about the products we sell. We take the quality of our information seriously so that you can get the right part the first time. Let us know if anything is missing or if you have any questions.

























Cardfan
5/24/2026
Still works as intended. Rusting continues to be an issue.