


What Converter do I Need for Lithium Batteries when Replacing My Magnetek 6345?
Updated 09/29/2025 | Published 05/07/2025
Question:
5-7-25 1.45 pm ARIZONA TIME Must replace MAGNETEK 6345. I BELIEVE I NEED THE PD4645V, WITH ITS FUSE BOARD and WIZARD and wiring harness WILL ALSO BE BUYING LITHIUM BATTERY to replace lead acid battery 685 MCA/140 RC/ 24DC-DL marine rv. I am in fact copying infoI do not have any knowledge of the aboveI am 75 and learningnever owned RV pleaseprovide me all the help you for me to get this task doneSUCCESSFULLYso I do not need to modifyjust install this new PD4645 unit. THE OLD 6345 MAGNETEK IS STILL ATTACHED TO RVI will label each wire as I actually do the removal. I will greatly appreciate your expertise and assistance so I may get this task done correctlythe first time...thanks again. m mabry
asked by: Mary M
Expert Reply:
Hello Mary,
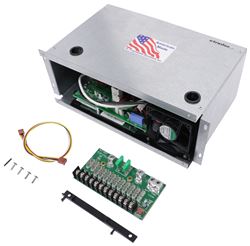
You’re replacing your old Magnetek 6345 converter with a new Progressive Dynamics # PD4645V, which is a great choice, especially since you're upgrading to a lithium battery. The # PD4645V is made to fit right into the old Magnetek box, and it’ll give you much better charging performance for your new lithium setup.
Before you touch anything, be sure to unplug your RV from shore power and disconnect your old battery, both the positive and negative wires. Safety first! Then, as you remove the old Magnetek 6345, go slowly and label each wire as you disconnect it. That’s a smart move and will save you a lot of confusion later.
Once you’ve got the old parts out, slide the new # PD4645V converter into the same lower compartment where the old one was. The new DC fuse board will replace the old fuse section, usually mounted in the door of the old box. The included wiring harness will connect the converter to the fuse panel, and from there you’ll just reconnect your AC and DC wires to the new board. Black wires are typically positive, and white are usually negative, but your labels will guide you.
The # PD4645V features a built-in jumper on its circuit board that allows you to easily switch between lead-acid and lithium charging modes (see the attached image for reference). Once you’ve set the jumper to the lithium position, you’re ready to install your new battery. Just be sure to connect it properly.
After everything’s hooked up, plug the RV back into shore power and turn it on. Check that your lights and appliances are working, that the battery is charging, and that the converter fan turns on (sometimes it takes a minute). If all that works, you’re in great shape!
Take your time, double-check your connections, and don’t hesitate to ask if something looks unfamiliar. You're doing a big upgrade that’ll give your RV a much more reliable electrical system for years to come.
I also attached a video that Kevin put together to help walk you through the install, you will even notice his nice blue tape and how he labeled along the way =)
Any big trips planned for when you tackle this big replacement? If so, where are you headed?


(click to enlarge)

Product Page this Question was Asked From
Progressive Dynamics Replacement Section for AC/DC Power Distribution Panel - 45 Amp

- Accessories and Parts
- Power Converter
- Converter Section
- 45 Amp
- Progressive Dynamics
more information >
Featured Help Information
Instructions
Miscellaneous Media


Continue Researching
- Shop: Progressive Dynamics Replacement Section for AC/DC Power Distribution Panel - 45 Amp
- Q&A: Recommended Replacement For A MagneTek 6345A Power Center Converter
- Shop: Replacement Section for AC/DC Power Distribution Panel - 35 Amp
- Video: Feature Review Replacement Section for AC/DC Power Distribution Panel
- Q&A: Best Converter Upgrade For WFCO 8935 With Lithium Batteries
- Q&A: Do I Need to Upgrade the Wiring When I Upgrade from a 32 Amp Converter to a 55 Amp?
- Q&A: Best Replacement For Magnetek Converter Series 6300 Model 6332
- Q&A: Is Charge Wizard Used with Progressive Dynamics PD4635V When Charging Lithium
- Q&A: Replacement Converter For WFCO 8935 Power Center
- Q&A: Will The PD4635V Work As A Replacement For The 6332 Converter
- Shop: Progressive Dynamics 4000 Series Mini RV Converter w/ Charge Wizard and AC/DC Distribution Panel
- Shop: Camco RV Power Defender Voltage Protector - 50 Amp
- Shop: Trailer Hitch
- Video: Installing the Progressive Dynamics Replacement Section in a 2012 Casita Spirit Travel Trailer
- Search Results: trailer tires and wheels
- Shop: Progressive Dynamics 9300 Series RV Converter Charger - 12V - 60A
- Video: Review of Progressive Dynamics Replacement Section AC/DC Power Distribution Panel - PD4645V
- Shop: Trailer Wiring
- Search Results: rv air conditioners
- Shop: Suspension Enhancement
- Search Results: equalizer
- Search Results: rv power converter
- Video: Review of Progressive Dynamics Replacement Section AC/DC Power Distribution Panel - PD4655V
- Shop: Brake Controller
- Video: Progressive Dynamics RV Power Control Center Installation - 2017 Airstream Flying Cloud Travel Trail
- Shop: Progressive Dynamics Replacement Section for AC/DC Power Distribution Panel - 55 Amp
- Shop: Base Plate for Tow Bar
- Search Results: progressive dynamics
- Search Results: pd4645
- Shop: Fifth Wheel Hitch
Kate F.
9/29/2025
Hi Mary, Did you have a chance to install the new converter and set it up for your lithium battery? I'd love to hear how it went and if everything is working smoothly with your RV's electrical system now. Your experience could really help others who are looking to make a similar upgrade!