Replacement Brake Control Plug-In Harness for Tekonsha and Draw-Tite Brake Controller 12" Long

 Arrives before Christmas

with factory Tow Package
without factory Tow Package
Will this fit?
To see if this custom-fit item will work for you please tell us what vehicle you'll use it with.
- All Info
- Reviews (725)
- Q & A (0)
- Videos (6)
- Photos
2009 GMC Envoy - Replacement Brake Control Plug-In Harness for Tekonsha and Draw-Tite Brake Controller 12" Long
- Trailer Brake Controller
- Wiring Adapter
- Plugs into Brake Controller
- Draw-Tite
- Universal
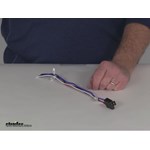
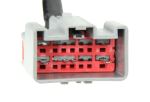
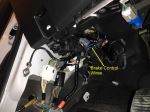
Tow Ready Replacement Plugin Harness for the Tekonsha P3, Voyager, Prodigy, and Primus Brake Controllers. Also works with Draw-Tite Intella-stop Xtreme, Intella-stop Ultra, Intella-stop Digital, and Activator III (5520) brake controllers.
- Wire lead length: 12"
- Wire functions:
- Blue: trailer brakes
- White: vehicle battery negative terminal
- Black: vehicle battery positive terminal
- Red: cold side of stoplight switch
8506920 Replacement Brake Control Plug-In Harness for Tekonsha and Draw-Tite Brake Controller 12" Long
Replaces 20127
California residents: click here


Videos are provided as a guide only. Refer to manufacturer installation instructions and specs for complete information.
Video Transcript for Trailer Brake Controller Installation - 1991 Ford F-150
Today on our 1991 Ford F150, we will be installing the Tekonsha PowerTrac electric brake controller, part number 39523 in conjunction with the ETBC7 Brake Controller wiring as well as the replacement brake control plug in harness for Tekonsha and Draw-Tite type brake controllers, part number 20127. We will begin our installation here at the rear bumper. We will need to install the bracket to the rear bumper that will hold our 7 pole connector. We will take the bracket and the hardware, put the bracket in place here in the redrilled holes. Slide the bolt through, put the washers on the other side and lock it down with the nut. With both bolts in, we can go ahead and tighten it down securing it to the rear bumper. We are now ready to put the 7 pole into the bracket. We will take our 7 pole connector and the hardware here, put the connector into place making sure that the wires pass through the bracket and with our connector in place, we will pass the bolts through the connector, through the bracket, put the nut on the other side and tighten them down.
With all four bolts in and tight, our 7 pole is secured to the vehicle and we are ready to wire it up. To wire it up, you will notice that the 7 pole has a 4 pole on the other side. This vehicle already has a 4 pole so we will simply plug it in to our new connector and lock it down with a zip tie. This will ensure that it never comes apart where we can then wrap it in electrical tape further securing it and keeping the elements out. With that connection made, we will go ahead and secure it back to our hitch here using a couple of zip ties. We will now move on to our ground and reverse light lead. The white wire here with the ringed eyelet our ground and the purple wire with the yellow butt connector on it is our reverse light lead.
We will not be hooking this up so we are going to go ahead and attach the purple wire to our white wire just to keep it out of the way. With that done, we will find a good grounding location and using a self starting screw, we will attach it here to the frame of the truck giving us a good ground. We will again make sure that all our wires are neatly tucked away and secured with some zip ties. We are now ready to work on our brake control wiring. We will take our duplex wire, remove the sheathing and attach the white wire to the blue wire here on our 7 pole. We will take the black wire and attach it to the black wire of our 7 pole.
With that done, we will go ahead and wrap it in electrical tape just to keep it out of the elements. We can then secure it to the hitch and begin running our wire up to the front of the truck. As we run it up to the front of the truck, we are going to try to stay away from anything hot such as the exhaust or any moving components such as the vehicles suspension or steering as we route the wire. Before we move back to the top side of the truck, we are going to take the included corrugated loom and wrap it around our 7 pole wiring just to give it a good look.Now that we are done underneath the truck here, we move up to the top side. Here in the engine compartment of the truck, we will route our duplex wire up where we can now cut the majority of the sheathing left off of the wiring.
Our white wire, we will route through the firewall of the truck and into the cab. The black wire will continue up the firewall and around to our battery. Here at our battery, we will need about an extra 8 feet of our duplex wire. This will be our power and ground for the brake controller. We will start here at the battery and work in the same way that we ran the black wire back to the firewall where we can then pass it through the same hole that we ran the white wire through. With that done, we will move into the cab where we will mount our brake controller.We will find a suitable location and using the self starting screws, we will attach the brake controller mounting bracket to the dash of the truck. With that done, we can now attach our brake controller to the bracket using the included screws coming with the brake controller. Now that we have our brake controller mounted, we will move over back to our wiring. We will take our replacement brake control plug in harness and the wires that we ran into the truck from the firewall. We will connect the white wire from the duplex wire to the white wire on the harness. We will connect the black wire on the duplex wire to the black wire on the harness. We will take the white wire that was by itself coming through the firewall and connect it to the blue wire of our wire harness. The red wire will need to make a connection at our brake light switch. We are going to go ahead and extend our red wire just to make sure we can route it without getting in the way of any steering components or other electric accessories.We will now locate our brake signal. Heres our brake switch where we will back probe our connector. We will want to connect to the wire that energizes when you press on the brake. Now that weve located it, we will now take the wire tap included with hour ETBC7 and connect the red wire to the solid green wire on our brake light switch. You may need to peel the sheathing from the brake light switch wiring in order to get enough wire to tap it. We will now go ahead and plug the harness we just assembled into the brake control harness and secure it up underneath the dash. With that done, we will just make sure that our wiring is all secured underneath the dash where we can reinstall the cover that we removed previously.With everything done there, we will move back out to the engine compartment. We will take our 20 amp fused breaker and attach it to the firewall here. We will have three wires, two black wires as well as one white wire. The black wire that is within the duplex wiring sheathing will cut off, strip it back, and attach our small ringed eyelet included with the ETBC7 kit. We can then take the ringed eyelet and put it over the silver side of the breaker. We will take the excess that we cut from the black wire and attach another one of the small ringed eyelets and we will put it on the copper side of our breaker. This wire will run to our positive terminal on our battery. We will take the 40 amp breaker included with the ETBC7 and attach it to the side of the truck here. We will now take the black wire thats by itself and attach a small ringed eyelet to it. With that done, we will take the small ringed eyelet and attach it to the silver side of our breaker. We will then take another piece of black wire, attach our small ringed eyelet and attach it to the copper side of the breaker. With both breakers in and all of our nuts tight, we will attach the large ringed eyelets to the other side of both black wires where we can now make our connections to the positive side of our battery. We will take the white wire and connect it to the negative side of our battery and with that done, our brake controller is in and we are ready to pull a trailer with brake.That completes our installation of the Tekonsha PowerTrac electric brake controller, part number 39523 in conjunction with the ETBC7 Trailer Brake Wiring Harness as well as the replacement brake control plug in harness for Tekonsha and Draw-Tite brake controllers, part number 20127 on our 1991 Ford F150. .
Customer Satisfaction Score:
98% were satisfied with this product
2% of customers were not satisfied
- Product did not meet expectations
- Wrong item was ordered
- Did not arrive in time
Ratings & Reviews
4.8
725 reviews
As good or better than OEM!
Worked perfect, just as advertised.
Received my order sooner than expected.
as described
EXCELLENT PRODUCT
Excellent product!!
Factory plug, good value.
Fast service,good price, got the right part
5 stars5 stars
excellent customer serviceworks great
Arrived as ordered on time and installed no problem.
shipping was free took 3 days and ever thing came in working order
seller was super fast and product works very well good investment
Received my brake controler in perfect condition, I installed it the next day and works fine.
recieved the product on time. bery happy with their service i will be using them in the future.
It worked very well with my truck and the electric brake
Needed an extra harness for another car. Works perfect!
Had to add wire it get it throught the firewall. this means pulling conectors throught the boot on the firewall.
Fits perfectly, works great
Wonderfully fast delivery. Excellent follow after the order and upon delivery as well; the product is as stated and just what I needed.
I've order from eTrailer in the past (Hopkins Engager Trailer BreakAway Kit with Charger and Tester) and was just as pleased with the product.
Thank you eTrailer.
Top notch products,Service and Customer service help line.
You guys know your stuff.
Thank you so much for the help everything went flawless and works perfect.
Thank you so much.
Terry
Bought as spare to use in other vehicle as needed. Plugs right into controller.
Should come with the brake controller. Makes installation easier.
Received harness in just a few days & worked fine. Would order again from etrailer
Parts were received quicker than expected and installation was easy after viewing the short video. Good job.
See what our Experts say about this Draw-Tite Accessories and Parts
- Most Economical Trailer Hitch Receiver and Wiring Harness For a 2023 Honda Pilot TouringOur etrailer Trailer Hitch Receiver # e27KR you found is our most economical custom fit receiver for your 2023 Honda Pilot Touring edition. For the wiring you can select from either the 4-Way # C48ZV or the 7-Way # C35ZV depending on the types of trailers you will be towing. If you have a trailer with a 7-way you are also most likely going to need a Trailer Brake Controller # 39510 along with the Wiring # 20127 to connect it. This is one of our most economical and reliable proportional...
view full answer... - My Vehicle has a 4-Pin Trailer Plug, but Trailer has 7-Pin Trailer PlugIf you just need a 4-pin to 7-pin trailer wiring adapter, then you can use part # C57672. This will plug into the 4-pin trailer connector on your brother's vehicle and give him the 7-pin socket for the trailer. Keep in mind, this will only give you trailer light functions. If your trailer has a 7-pin connector, then it likely has electric trailer brakes and an onboard battery. If you want a fully functioning 7-way trailer socket on his vehicle, then the installation will be a bit more...
view full answer... - Installing a Trailer Brake Controller on a 2012 Dodge Caravan with Tow PackageI spoke with a colleague who worked at Chrysler and he stated that they do not put the trailer hitch and 7-Way wiring on the Grand Caravan at the factory. That is something that the dealer installs. In any event here is what you will need to do. The brake controller will need to be hardwired into the vehicle. The white wire on the brake controller will need to get connected directly to the negative terminal on the vehicle battery. The black wire will need to connect to a 30 amp circuit...
view full answer... - Brake Controller Installation in 2019 Ford RangerWe have not yet (as of April 2019) had a chance to install any wired trailer brake controllers on a 2019 Ford Ranger so for guidance I checked with my most trusted brake controller expert at Tekonsha. Based on what I could learn about the truck if the Ranger has a factory-installed 7-way it should have a standard brake controller connection port above and to the left of your left knee when seated; this will be near the kick panel. You will want to look for a connector that matches the...
view full answer... - Brake Controller For A 2023 Ford Ranger With Factory 4 FlatHey Bill, You can absolutely use your Primus IQ on your 2023 Ford Ranger! The installation will be a bit different, since there is not a plug and play adapter for your vehicle it will need to be spliced in. If you do not have the universal harness it came with originally we do have a replacement, # 20127. This would just plug into the back of the controller and then splice into the vehicle. For your Ford Ranger, the 4 flat plug that is on it would be considered "without a factory tow...
view full answer... - What Are the Brake Controller Wire Colors for on a 1998 Dodge Ram 2500The factory electric trailer brake controller wires on a 1998 Dodge Ram 2500 are as follows: Power - Red/Orange Ground - Black/Orange Stop Light - White/Tan Brake Output - Light Blue For a brake controller, I recommend using the Tekonsha Voyager Trailer Brake Controller part # 39510. It sounds like the previous owner of your truck may have cut off the old brake controller port so you are also going to want to use the Replacement Brake Control Plug-In Harness for Tekonsha and Draw-Tite...
view full answer... - Brake Controller Installation on 2008 Chevy TrailblazerThe orange wire found under the dash that would provide power to the brake controller is already circuit protected, so you would not need an additional circuit breaker like the # 9506P you referred to. The wiring connections would be made as follows: Orange tow pkg wire connects to black wire on controller Dark blue tow pkg wire connects to blue wire on controller Light blue tow pkg wire connects to the red controller wire Black tow pkg wire connects to the white brake controller wire The...
view full answer... - Parts Needed to Install a Brake Controller in a 2021 Ford Explorer w/out the Towing Package Hey Scott! Congrats on the new vehicle! To install a Tekonsha brake controller you'll need the Replacement Brake Control Plug-In Harness for Tekonsha item # 20127. The 2021 Ford Explorer's did not come with a plug in port if you do not have any factory trailer wiring. I have linked an installation video below to show you exactly how to get it set up. Here are the rest of the wiring harnesses you'll need to set your Explorer up to tow a trailer with brakes: 4-Way Connector - Curt T-Connector...
view full answer... - Troubleshooting Red Flashing Light on the Curt Venturer Trailer Brake Controller # C74VVIf you check out the picture that I attached you can see that your Curt Venturer Trailer Brake Controller # C74VV that you installed is detecting an overload or short on the brake circuit of your 2008 GMC Sierra. The wiring adapter # C51515 that you also installed is the correct adapter so now we need to determine if the problem is on your Sierra or your trailer. If you have another trailer with brakes handy then you can simply hook up to that trailer and see if the same thing happens. Whether...
view full answer... - Recommended Fastway e2 Weight Distribution System for Coleman Trailer and Brake ControllerThe Fastway e2 # FA94-00-0800 has a weight capacity of 800 lbs as you mentioned, but weight distribution systems are rated for total tongue weight and have a range. The total tongue weight is the loaded trailer tongue weight plus any cargo weight behind the rear axle of your tow vehicle. If your loaded Coleman trailer is 540 lbs, then this system will work really well as your total tongue weight will be in the middle of its 400-800 lbs capacity. If you want slightly better ground clearance...
view full answer... - Troubleshooting the Pilot 2-6 Brake Electronic Brake Controller Part # 80550Can you send me a photo of the display you are seeing?
view full answer... - Weight Distribution Hitch w/ 7 Rise For 2021 Forest River Flagstaff E-Pro E15TBYour 2021 Forest River Flagstaff E-Pro E15TB has a GVWR of nearly 3,900 lbs, so a good estimate for your loaded tongue weight is going to be in the 450 lb - 500 lb range. For that tongue weight, what you will need for a weight distribution hitch that will give you the rise you need is one from Blue Ox: - Blue Ox TrackPro Weight Distribution w/ Sway Control - 7-Hole Shank # BLU36FR The TrackPro # BLU36FR has a maximum rise of 8 inch, and is for loaded tongue weights between 200 lbs and...
view full answer... - Least Expensive Trailer Hitch, Wiring Harness, and Brake Controller for 2009 Lexus RX 350I will give you a list of all the most budget-friendly parts for a complete towing set up for your 2009 Lexus RX 350. It sounds like you have a trailer with electric brakes, so you will need a hitch, 7-way, 4-way (which is needed because it plugs into the 7-way), ball mount, 2" hitch ball and brake controller. So here is the list of the most economical parts for you: - Curt Trailer Hitch Receiver # 13530 - Curt T-Connector Vehicle Wiring Harness with 4-Pole Flat Trailer Connector # C55563 -...
view full answer... - Is there a Tekonsha Vehicle Specific Pigtail for My 2013 GMC Sierra 1500?Hello Ric, I’m sorry, but I’m not showing that there is a vehicle-specific pigtail available for your 2013 Sierra 1500. You would need to splice in the brake controller. The Tekonsha Primus IQ Trailer Brake Controller - Up to 3 Axles - Proportional # TK90160 would be the correct brake controller for your vehicle, as it comes with a universal wiring pigtail. If you need just the pigtail, you can order # 20127. Is there a connector under your dash for a vehicle-specific pigtail?
view full answer... - Parts Needed to Install Prodigy P3 Brake Controller in 2018 Jeep Wrangler UnlimitedSince the 2018 Jeep Wrangler does not come with factory brake controller wiring you'll have to hardwire in your P3 part # 90195. You will need to start with a 4-way (if you do not have one). For that you would want the # C55124. From there you would need to convert the 4-way to a 7-way so that you can install the brake controller. For that you will want the Brake Controller Install Kit and 7-Way Adapter part # ETBC7. I attached installation instructions and an install video for this product...
view full answer... - Is Tekonsha Prodigy P3 Brake Controller Pigtail Wiring Harness Sold SeparatelyI can understand not wanting to undo the wiring and then re-do it, and the pigtail harness is available separately for the Tekonsha Prodigy P3 # 90195. The correct part is the following: - Replacement Brake Control Plug-In Harness # 20127 One end of this will plug into the P3 and the other end will hardwire to your new vehicle. In case you were interested in a new mounting bracket as well, the correct part for that is the Replacement Mounting Bracket Kit for Tekonsha Prodigy P3 Trailer...
view full answer... - What Hitch do You Recommend for My 2022 Subaru Forester?Definitely! The main factors that determine the hitch are hitch receiver opening size (either 1-1/4" or 2"), weight capacity offered, and how the hitch installs on your vehicle. For example, if you are looking for a hitch that is compatible with most accessories and provides you with the most weight capacity, I recommend going with a 2" hitch like the Curt Hitch - 2" # C13409. Not only does this hitch provide you with the most weight capacity we offer for your vehicle (525 maximum tongue...
view full answer... - Where to Splice Brake Light Wire From Brake Controller To Stoplight WireSince your vehicle does not have a brake controller port, you will want to use a universal wiring pigtail. For example, if you have a Tekonsha brake controller, you could use a Plug-In Harness for Tekonsha and Draw-Tite Brake Controllers # 20127. You will want to use a circuit tester, like # PTW2993, to test the wires at the stoplight switch at the back of your brake pedal to find the wire that only has signal when the brake pedal is depressed. Once you have found the wire that only produces...
view full answer... - Brake Controller Installation on 2006 Toyota Tacoma w/ 7-Way Trailer ConnectorToyota didn't offer a factory 7-way option for the 2006 Tacoma, so your 7-way was either aftermarket or dealer-installed. I'm assuming that your 7-way is already tapped into the lighting circuits. Look under the dash for a coiled up blue wire, if you find one, it's most likely the brake output circuit connected to the pin in the 5:00 position on your 7-way. You'd need to hardwire the controller, using a kit like our # 5506. If you use a Tekonsha brake controller like the Prodigy P2,...
view full answer... - Identifying Tekonsha Brake Controller that has Number N26802Sounds like you have a Tekonsha Primus IQ brake controller part # TK90160. I attached a link to this page that has the owners manual/install instructions and then for a replacement wiring harness you'd want the part # 20127.
view full answer... - Towing Setup for a 2017 Subaru Outback WagonAccording to my research, your 2017 Subaru Outback Wagon has a max towing capacity of 1,000 lbs if the trailer does not have brakes or 2,700 lbs if the trailer does have brakes. You can improve the towing performance/efficiency of your vehicle with a transmission cooler like part # D13503 but you cannot increase it's capacity. The tongue weight rating of 200 lbs is correct but I cannot recommend you go over this. In order to set your Outback up for towing a trailer with brakes you will...
view full answer... - Moving a Tekonsha Voyager Electric Brake Controller From a 2004 Chevy Silverado to a 2009 GMC SierraYour 2004 Chevy included a connector under the dashboard to plug in an electric brake controller. Unfortunately, GM went away with this feature in all of their trucks for the 2007 to 2014 generation. So there isn't an easy plug and play harness available and you need to hardwire in the Tekonsha Voyager, part # 39510. Luckily, the wires to connect the controller to are all run to the cab of the truck. If you need wiring you can use part # 20127 for a harness to hardwire in. The wires...
view full answer... - Recommended Trailer Hitch And Wiring For 2006 Toyota TundraFor your 2006 Toyota Tundra, I recommend the Curt Trailer Hitch Receiver - Custom Fit - Class III - 2" # C13180. This is a square tube design with a black powder coat finish over a protective base coat for superior rust resistance. This is a no drill installation. For your wiring, I recommend the 4 Pole Harness and Hardwire Kit - Includes Tester # C59496. This will give you a 4 way flat connection. Then you will need to get the Universal Installation Kit for Trailer Brakes # ETBC7....
view full answer... - Hardwiring Tekonsha Prodigy P3 Brake Controller in 2011 Chevy Traverse and 2015 Chevy ColoradoFor your Prodigy P3 # 90195 on your 2011 Chevy Traverse, if you have the factory 7-way then you just need wiring harness # 3026-P. If you don't have that then we recommend using the # ETBC7 kit that will have you hardwire from the battery using a circuit breaker. The circuit breaker used for the brake controller power is a 20 amp like # PK54520. I've attached a video of the 12V power wire connection, but it does not include the brake controller power connection that will be nearly...
view full answer...
Do you have a question about this Accessories and Part?
Info for this part was:





At etrailer.com we provide the best information available about the products we sell. We take the quality of our information seriously so that you can get the right part the first time. Let us know if anything is missing or if you have any questions.







Thank you! Your comment has been submitted successfully. You should be able to view your question/comment here within a few days.
Error submitting comment. Please try again momentarily.