


Worn locking pins let spring bars move when they shouldnt. This replacement kit restores proper retention on original SwayPro hitch heads so your setup stays secure when youre towing.

Videos are provided as a guide only. Refer to manufacturer installation instructions and specs for complete information.
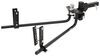
Hi, everybody, Andy here with etrailer. Let's take a quick look at these Replacement Locking Pins for your original SwayPro Weight-Distribution Hitch Head. Now, this kit is basically going to be a refresh for your hitch head on an older Blue Ox SwayPro Weight-Distribution Hitch. As you no doubt know, over time, the locking pins inside the hitch head can wear out, and when that happens, the spring bars don't lock in as securely as they should, so this replacement kit's gonna restore that original proper function. So, again, this is made specifically for the older original SwayPro Hitch Head models. That being said, this is not going to fit the newer redesigned version, so it is important to make sure that you have the early-style head before ordering this kit.
So, this kit comes with everything that you see here, everything that you need to fully replace both locking pins. You're going to get two new bar-pivot lock pins, four locking pin springs, and then two round head-screw rivets. And since this replaces both pins at once, you're essentially refreshing the entire locking system on the hitch head. On your screen, I just kinda wanna give you a brief overview of how easy these are gonna be to install. Obviously, you're going to remove the original pins and springs that you have in there, pin springs that you have in there, so after you remove that, you're gonna insert the locking pin into the bar pivot holes as you see there on the step, it's actually indicated as Step 2, but it's the first step there that we have there on your screen.
And then you're gonna stack two springs on top of each other and slide the springs into the slot of the bar pivot until the spring seats into the groove of the locking pin, and the rivet holes need to line up with the holes in the spring. And then once all that is in place, install the rivet into the hole through the locking pin springs and the bar pivot of the hitch head and you'll be good to go. Once installed, it's gonna help ensure that the spring bar stays securely locked in place while you're towing, which is gonna be key for maintaining proper weight distribution. You are gonna get an instruction sheet with that, and basically, it's gonna be identical to what I just showed you on your screen. But it's gonna be a real easy fix, real easy installation.
However, if you have any other questions, don't hesitate to reach out to us. We do wanna make sure that you're getting exactly what you need. Well, again, my name's Andy, thank you for joining me.
Ratings & Reviews

Fit as they should
This was quick and simple to replace the broken part.
Parts fit perfectly and were easy to in stall
As described thank you very much AAAAAAA++++++++ John 3.16 King James version
Work as intended.
Worked well. Easy to install. Glad to see there's a new and improved design on newer models though.
Repair kit worked great and was easy to install.
Great information describing this product and how to install it.
Every transaction I have had with Etrailer has been flawless
Great kit and trailer makes ordering ea sy...
Easy install. Instructions didnt say exactly how to install the rivet so Is used a hammer and then a center punch.
Replaced the broken original.
Info for this part was:
At etrailer we provide the best information available about the products we sell. We take the quality of our information seriously so that you can get the right part the first time. Let us know if anything is missing or if you have any questions.















Thank you! Your comment has been submitted successfully. You should be able to view your question/comment here within a few days.
Error submitting comment. Please try again momentarily.