
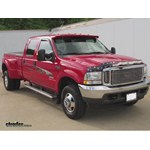
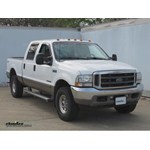
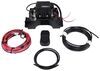
Firestone Ride-Rite Air Helper Springs - Double Convoluted - Rear Axle


To see if this custom-fit item will work for you please tell us what vehicle you'll use it with.


5,000-lb Capacity. Ride-Rite air springs enhance your factory suspension for safety and stability when you are hauling heavy loads. They reduce strain on your rear axle, keep your vehicle level, and adjust to load size for a consistently smooth ride.
Features:
Specs:
Note: The construction material of the fittings may vary.
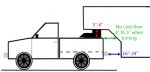
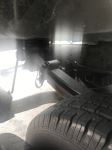
Firestone Ride-Rite springs are designed to increase safety and reduce the strain on your vehicle when you are hauling heavy loads or towing a heavy trailer. The springs partner with your existing rear suspension system to help keep your vehicle level, maintain even load distribution and increase stability. Hauling heavy loads or towing a heavy trailer can make the rear of your vehicle sag and the front end rise. This puts more strain on your rear axle and reduces contact between your front tires and the road, causing problems with braking, steering control and traction. By adding air springs to your rear suspension, you can help to level your vehicle and improve braking and handling. The air springs also help to level your headlight beams and reduce wear on your tires.
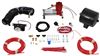
Adjustable Air Pressure
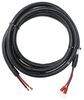
The air pressure in your Ride-Rite springs can be adjusted manually, side to side, to compensate for off-center loads. A centered load improves the stability of your vehicle by reducing body roll. The air springs will also help to absorb road shock and to soften contact between your axle and frame. This prevents bottoming out, thus improving ride comfort. Route the air line tubing for the springs to your vehicle's bumper to provide easy access to the manual inflation valves.
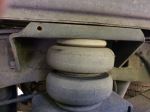
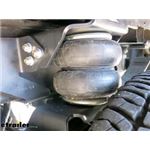
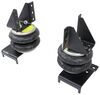
Air Spring Construction
Firestone's double-convoluted Ride-Rite air springs are designed to give you maximum load support and enhance the performance and ride comfort of your vehicle. The rubber springs provide cushioning between your suspension components and operate at up to 100 psi. The springs have four layers of reinforced rubber to ensure durability and enhance load support. A braided wire girdle creates the double-convoluted shape of each air spring, increasing the burst pressure of the spring. The rubber springs are attached to corrosion-resistant metal end plates with a time-proven, rolled crimp seal that keeps the bags securely anchored.
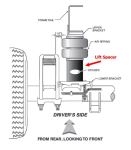
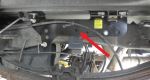
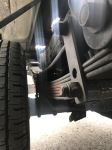
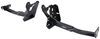
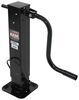
Air Spring Installation
Each Ride-Rite kit includes custom-fit brackets that connect to your axle and frame. The brackets provide the mounting points for the air springs. Drilling may be required for some applications.

California residents: click here
Customer Satisfaction Score:
89% were satisfied with this product
11% of customers were not satisfied
Ratings & Reviews

Do you have a question about this Vehicle Suspension?
Info for this part was:
At etrailer we provide the best information available about the products we sell. We take the quality of our information seriously so that you can get the right part the first time. Let us know if anything is missing or if you have any questions.


Thank you! Your comment has been submitted successfully. You should be able to view your question/comment here within a few days.
Error submitting comment. Please try again momentarily.