
To see if this custom-fit item will work for you please tell us what vehicle you'll use it with.
Thank you! Your comment has been submitted successfully. You should be able to view your question/comment here within a few days.
Error submitting comment. Please try again momentarily.


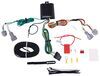
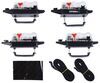
Fully welded vehicle trailer hitch is strong and durable. Draw-Tite's Tested Tough guarantee ensures that this hitch exceeds industry standards. The combination of an e-coat base and a powder coat finish provides excellent rust protection.
Features:
Specs:
Draw-Tite's Tested Tough program provides testing standards far superior to those outlined by the Society of Automotive Engineers (SAE), the go-to source for engineering professionals.
Each Draw-Tite trailer hitch receiver undergoes extensive fatigue testing and static testing with the ball mount that is either supplied or recommended for use with that particular hitch, thus ensuring results that are applicable to real life use. Fatigue testing is also conducted on hitches rated for use with weight-distribution systems.
In addition, Draw-Tite performs static testing on a simulated automobile, as opposed to the rigid fixture used for SAE testing, resulting in a more true-to-life scenario.
At etrailer.com we're committed to the products we sell, and to our customers. Our experienced and knowledgeable staff are available via both phone and email to address your questions and concerns for the lifetime of your hitch. The technicians at etrailer perform hitch installations on a daily basis, making them a valuable resource for do-it-yourselfers. The one-on-one, personal service you'll receive comes straight from an expert in the towing and automotive field. We've installed it, we've wired it and we've towed with it, so whatever your question, we can answer it.

California residents: click here
Videos are provided as a guide only. Refer to manufacturer installation instructions and specs for complete information.
Hello neighbors, it's Brad here from etrailer and today we're taking a look at installing the Draw-Tite trailer hitch receiver on a 2023 Nissan Kicks. And if you're wondering if you should add a hitch to your Kicks, I'm here to tell you it's well worth doing. Especially with a vehicle like this, if you're wanting to take a bike along with you or a cargo carrier on vacation or even tow a small trailer, your trailer hitch receiver is gonna be the first step. And it really does just open up the real estate as to what you can do with your vehicle. And the great part about this one is it's a two inch by two inch receiver tube opening. And what that means is all of your accessories, you're gonna wanna look for a two inch by two inch.
It's kind of the standard size when it comes to accessories, ball mounts, bike racks, whatever it may be. And the other hitch options for this vehicle are inch and a quarter, which still works just fine, but you are gonna be limited when it comes to those accessories. So going with this two inch option is definitely gonna be the one that I'd recommend. So if you're falling on this and you're not sure what to get, this two inch option is definitely the way to go. I think you'll be a lot happier when it comes time to find those accessories.
All of the accessories are gonna stay in place with a 5/8" pin and clip and that is not included with the hitch, but many times when you pick up accessories they'll have them included. Something I might recommend is if you plan on leaving your accessories on the back of your kicks long term, you might wanna get a locking pin and clip that becomes a really good deterrent for anyone walking by. They can't just take out your pin and clip and take those accessories with them. Now as far as safety chain loops, it's gonna be just a rolled style, pretty simple design here, but super easy to hook up. Larger clevis style hook or even just a standard S hook when towing those trailers.
And speaking of towing, you are gonna want adhere to the weight capacities of this hitch. 2000 pounds for that trailer is your gross trailer weight rating. That's gonna be the weight of the trailer plus the accessories loaded. But that's good enough for a small utility trailer, maybe some jet skis, kayak trailer, something along those lines. Your tongue weight is gonna be the downward pressure on the inside of this receiver tube opening.
You're really gonna wanna take that into account when you have your bike rack or cargo carrier loaded up with that weight, you are looking at maybe two bikes on a platform style bike rack. I don't know if you could really push for, unless they're kids' bikes, and cargo carrier depending on if it's aluminum or steel, you may not be able to load it up fully completely with a bunch of weight. Just keep that in mind when putting those accessories on that you're not overdoing it. Compare what the vehicle can tow with the hitch as well as the ball mount that you'll be using and take the lowest number so you stay safe. And when choosing accessories, sometimes you can get bike racks and cargo carriers that still in a vertical position. It's really nice 'cause it shortens the length of the vehicle. So if you're parking in a garage or something, you can get that space back but you do wanna make sure that it's gonna be able to work on this vehicle. So measuring from the center of our hitch pin hole to the furthest point of our fascia, it's about four and a quarter inches. And that's gonna be important because as that folds up we wanna make sure it's not gonna hit the fascia and that it's actually gonna be able to stow in that vertical position. So you can take a look at those measurements and compare that with the accessories you'll be looking at. You can also take a look at our test bits on products. A lot of times we'll have those accessories tested fitted on specific vehicles like the Kicks so you can see how it interacts and if it's gonna be a good option. Something to keep in mind though is as those are in those vertical positions, you're probably not gonna be able to open up your rear hatch without folding them. It's probably gonna block your license plate as well as your backup camera and potentially even your taillights. So just something to keep in mind when you're driving with those. Something else that's gonna be important is gonna be our ground clearance. And not that I think the hitch is gonna bottom out, but from the top of the receiver tube opening to the ground it's 12 inches. And that's gonna be an important measurement for getting a ball mount to tow a trailer. And the way that you get that proper riser drop necessary is get your trailer as level as possible measured from the ground to the top of the coupler and then compare that with the 12 inch measurement that we have from our hitch. And depending on that differentiating factor, that's gonna be your rise or drop. More cases than not with a 12 inch ground clearance, you're probably gonna end up with a small rise. And being that we do have our pin fairly far back, you might wanna look at something with a slightly longer shank that way that ball sticks out a little bit further, makes it a little easier to hook up that trailer and lowers the potential risk of scratching up your bumper in the process. Don't let the installation ever scare you off because really this one is not that bad to do. So if you're fairly mechanically inclined, you'll be able to knock this out. I'd give your shelf maybe an hour, hour and a half. And really what it comes down to in the installation is, you know, lower the muffler down, you'll take a heat shield, trim that up and then we'll have to enlarge some holes to get the hardware to drop in. But after that you really just put it up in place, tighten it down and torque it and then you're ready to go. If you are doing this at home by yourself, follow along, I'll walk you through all the steps, we'll make sure we'll get this hitch installed. But if you watch the video and say, I don't have the time place tools or even want to do that myself, not to worry, but I still want you to get your hitch installed but you can reach out to someone close to you to get it done by using our dealer locator. We have a network of dealers across the US and potentially even close to you. That way you can get that hitch installed and you can be out on the road enjoying your new hitch without having to worry about the install. So feel free to use that. But for you DIYers, stick around, let's get this installed. To begin our installation, we're really gonna just start opening things up to be gaining access to our frame rail where we're eventually gonna put our hardware and the first thing that's in the way is gonna be our muffler. So to pop this down is actually pretty easy. You're gonna have an exhaust isolator, which is just a rubber donut sometimes that they just pop on those studs. You're gonna have one here and then one on the backside. This one's gonna be easy to see here, so I'll get this popped off. And using a pry bar, generally if you just wedge it against the hanger that's on the exhaust and just pry back, you should be able to get this to pop off. Now if you're struggling to get this off, it's tighter, whatever, what you can do is kind of move this around, that'll loosen it and get this to the edge. Soapy water or silicone spray is also a good option if it's really fighting you. But we'll get this one popped off. And then as we get our rear one, just know that this is probably gonna drop down a little bit so just don't be right underneath it when you get this popped down. Now lower this down, it's gonna rest on our rear portion beam and that should be a good spot. The next thing we need to do is get our heat shield taken down and these just have some interesting collars that hold onto these studs, and they may look tricky, you can almost get them with a flathead, but your best bet is a 1516 socket. It probably doesn't take a whole lot here to just slightly loosen it and then you should be able to get to the rest by hand. So it looks like we have four total, one in each corner. So we'll get those taken down, and we're gonna start modifying our heat shield that way it's gonna have access to the holes where we're gonna be putting up hardware and it can go back up once the hitch is installed. The heat shield is gonna have a mark out in the instructions of where to cut it out and you can use really any cutting method that you may have. Just be careful this can get really sharp. Tin snips work really well here. So you can see I have the arrow that's gonna face this way, but cutting this out is gonna allow us to gain access to the frame rail where our hardware's gonna be. We still have both of our mounting points here so it's gonna go up with no problem. We are gonna wait until we are a little bit further in that way we can kind of make some modifications to the frame rail without this being in the way, but we'll just get this trimmed out for now. On our driver's side you may or may not have a carbon canister and we're gonna wanna lower this down because this rubber plug that we have is gonna become one of our mounting points for the hardware. The other one's gonna be behind this bracket so we're gonna get this lowered down. I have a 12 millimeter socket. We're gonna just loosen this up and get it removed. And there's one more attachment point on this. I'm gonna try to find it for us but I'm pretty sure it's tucked kind of far back here. So the best bet for this might be a ratcheting 12 millimeter wrench to get to it. It's just kind of located back here. I don't think I have a straight shot with my socket. So we're gonna go ahead and grab that ratcheting wrench and see if we can get this to drop down. Once you get that bolt taken down you should be able to slide the canister forward and you'll see that it'll drop down. It's just hanging on this bracket. Muffler down in our canister, we full access to be able to drill out these holes one on each side and that's gonna allow us to get our hardware in place. So the way that our hitch attaches is our carriage bolts go through the spacer block and they're gonna drop in through these holes but the issue is, well, and they don't currently fit in there. And that's where we're gonna enlarge this wide enough to be able to slide these in. So you'll see in the instruction manual and they kinda give you like a Saturn shape almost. Really what I end up doing is, yeah, just enlarging the the outer edges here. So this can slide in. The carriage bolt, you can put it in at a kind of an awkward angle, but as long as we can get it passed up in the frame rail, that's gonna be key. So in order to do that, and there's a few different ways, you can grab a Dremel and just run that wheel back and forth, just widening that out until you can get your hardware in. I'm using a burr bit so I'm just gonna grind both edges. You can use a step bit. Really whatever you have handy is gonna be the best method. So I'll enlarge this, test to make sure that my hardware can fit up there. And before we start passing hardware in, we are gonna be hitting this with a little bit of paint. So go and enlarge the most forward holes. So these ones here until we can get that hardware to pass in. (drill whirring) With that grounded out, I also kind of went on this top portion. The main thing is, normally if it's tricky to get these in, just put the head in first and just make sure that it's able to go in. So there is two pieces of metal here. You may notice that that inner one should be wide enough or close to it to feed both of them in. But for now I have that ground out. I'm just gonna hit it with some paint on those raw edges. It's gonna help prevent it turning into rust and corrosion long term. And we'll do that on both sides. And then we'll wait for that to dry. And then we can start getting our hardware in. Now we'll grab our fish wire and our hardware and we're gonna pass this back to that hole that we enlarged and get your finger on that coiled section. And if you want to, you can put a bend on this end just so it doesn't pull through. But what we'll do is we'll grab our spacer block and you can just feed this directly into the frame. And then on the coil then you'll just take your carriage bolt and thread this on. And just as I mentioned, sometimes it's hard to get these in, feel free to bend this around and kind of shimmy it to where you can get it to pop in. Our is pretty tight here. And it's okay if you cut. If you drill out a little extra, it's not a big deal 'cause once that spacer block is in place, it's gonna cover the span of that. So I was able to get this in earlier. Let's see. There we are. Slide that in. And then we'll pull this down until it drops through. Now keep your pull wire on. This is really gonna help when we raise the hitch. You can line those in the holes, and it's gonna keep this from pushing up into the frame rail and that's gonna cause a whole host of issues if you lose it in the frame. So we'll keep these in place and we're gonna just repeat the same process for the other holes. But on the back ones it's gonna be an easier process. This is a reverse fish wire technique. And so what we're gonna do is take our spacer block, just hold onto that, feed it onto your wire and then get your carriage bolt fed on. And then we'll just feed this directly in. And then the spacer block will follow. (metal clanging) And then that's gonna drop into place. We're gonna repeat the same process on the other side. So something that I noticed at this point we'd be ready to put our heat shield up. And yeah, I might have trimmed the other side. It's not gonna cause any issue. We're still maintaining our mounting points, but where we want to trim is gonna be where the arrow is facing forward. As I raise this up, you'll see the stud here and here. We wanna notch this section out. That way our hitch can go up and bolt up. So again, I didn't really need to cut this portion. We need to cut this side. So if you're watching this video before cutting, please do this side. So I'll make sure to get this cut out and then we will get this all mounted and then it might be worthwhile finding an extra set of hands 'cause we're gonna get ready to put our hitch up. So with hardware in hand we'll take our corresponding fish wires and just make sure that they go through the holes that we're gonna pass this up and just kind of pull those along as we raise it. Now you are gonna have to raise this up over the exhaust on the passenger side. And as I mentioned, we're just looking to get one of 'em in place and holding. So you should be able to get these to drop in and then pull off your pull wire. And what I tend to do is take my conical tooth washer and lightly put it up. Now again, we don't want to feed that into the frame, so use that washer to put pressure on there until you get a few threads started. And once you get one start on each side, it'll hold itself up. But we're just gonna repeat the same process on the rest of our hardware with that same conical tooth washer and nut combo. Once your hardware is all started, we're gonna snug them down using a 17 millimeter socket. And we're not gonna get too crazy here because we are gonna be coming back with a torque wrench. Now looking at this, the 17 is pretty tight. It's possible it could be a standard, but 17 is working here. So I'll just go through, get 'em snug down and then I'm gonna come back with my torque wrench. Torque wrench settings are found in the instruction manual, but that's gonna make sure that long term, this is gonna be torque down properly enough to tow all your accessories down the road but also not be too tight causing any damage or stress on the hardware. You don't have a torque wrench, you can get one here at etrailer, but generally you can go to an auto parts store and rent one for free. Once you get these torque down, that's really all you'll need this for, but it is gonna be a crucial step. Once we have these torque down, our hitch is gonna be officially installed. So all that's gonna be left to do, we're gonna get our exhaust put back in place, we're gonna hang back up our canister and then all you need to do is load up your accessories and hit the road. And that was a look and installation of the Draw-Tite trailer hitch receiver on a 2023 Nissan Kicks. Hopefully this video helped you get it installed and determine whether or not this is the right hitch for your Kicks. And once you get it installed, let us know how it went as far as install. If you had someone else do it, let us know how you're using the hitch. We wanna see neighbors out there on their adventures using the products we sell and really just making their journey that much more enjoyable. My name's Brad. Thanks for watching.

This is the 2nd hitch receiver that we have purchased from E-Trailer. The first was for our Rav4, but when we saw how well it worked and how easy it installed on the Rav, we decided that we needed one on my wife's new Nissan Kicks. However, the installation on the Kicks was much more difficult and time consuming, it's definitely a two-man job (my nephew helped me). When enlarging the two forward most holes, a die grinder is not necessary, but a power drill with a titanium step bit did the job, plus it is much easier to get a drill underneath the car than a die grinder.Also, the trim instructions for the 2024 kicks is not very good, you need to trim very near the right-hand hole the trim at about a 30 degree angle toward the right above the hole, and on the left side cut vertically but leaving about 4 extra inches to the right.
We use these receivers primarily with bike racks, we have a VelociRAX rack for 3 bikes, including my wife's heavy E-bike, and it works perfectly.

Install was good. I did have to open up 4 holes, not 2 like the instructions said. Still managed to get it installed in aboutv2 hours by myself.
Product is great! George J, Bay W, and Amy J were fantastic help when UPS lost my package. They gave me a fast solution! Great customer service. I will only buy from E Trailer in the future!
My salesman, Ed W, was very helpful in explaining that even though this hitch was listed as not compatible for this car (a 2023 Nissan Kicks, hitch was listed only for earlier model years), I could simply return it if it didn't fit. The hitch fit fine and I'm very happy with it. The hitch will only be used for a previously owned bike rack that needed a 2" receiver
Works great! Easy to follow directions, very clear. Took me about two hours to install on my wifes 2021 Nissan Kicks. Dremmel tool with a grinding disk to enlarge the holes. I used a motorcycle jack to raise receiver into place as I didn't have any help available. Whoever made the fish wire is a genius! Thanks for a great product!
Has worked out great - no issues and very durable. Would recommend.
I love it. We can now haul my husbands scooter where ever we go. Very satisfied with our purchase,
Very good instructions and easy to inst all
The hitch is well made with all the parts needed to install.
definitely needed some help to hold the weight of this up to the car for bolting in. the system to fish the screws was very helpful and easy to use.
My suggestion would be to cut the heat shield around the template much larger, following the supposed size to cut still left heat shield under the rear bolt area. which made threading the bolt through a lot harder until you were able to smoosh the heat shield underneath it down and have the nut catch to the very tip of the bolt thats exposed. then you need to tighten harder to smoosh the heat shield underneath the rest of the way.
The draw tite hitch came with several bad dings with large places with no paint.

Katrina B.

10/14/2022
Im sorry to see that your hitch has received some scratches on it due to shipping. This does tend to happen and when it does, we recommend using a Rust-oleum type paint to cover up any scratches and prevent corrosion in the future during use. I have a link below for your reference. I have also sent this information over to our Customer Service Department for them to get into contact with you.
Helpful Links
Product I received is as described. Waiting for better weather to install. I watch YouTube video on installation and everything I received looks the same. I'm sure there will be no problem.
Easy to install
A little hard to put on at first, but once I had correct tools, it only took 45 minutes to install
The hitch looks good
Easy install
Do you have a question about this Trailer Hitch?
Info for this part was:
At etrailer we provide the best information available about the products we sell. We take the quality of our information seriously so that you can get the right part the first time. Let us know if anything is missing or if you have any questions.


Gwendolyn Y.
5/7/2025
That does sound like a job for 2 but it sounds like you had a great helper, Dave! Also, thanks for sharing all that you learned about the install. I know someone will find this super helpful and be glad you shared it!