
 Product Experts Available Now!
Call 1-800-940-8924


To see if this custom-fit item will work for you please tell us what vehicle you'll use it with.


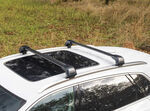
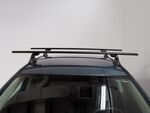
The Yakima SightLine FX roof rack keeps things clean and integrated. Its flush design means the crossbars don’t stick out past the towers, giving the roof a tight, factory-style look. The bars sit close and level, so it feels like part of the vehicle instead of an add-on. The aluminum construction in black keeps the look sharp and modern.
Wind noise can wear you down on long drives. These aero-style crossbars use a streamlined shape to cut drag and reduce the hum you get from air rushing over the roof. Push-down rubber strips fill in the top channels to quiet things further by sealing off gaps that cause vibration. The result is a smoother, more peaceful ride during highway travel.
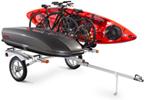
Whether you’re hauling kayaks to the lake, skis to the slopes, or a cargo box for a road trip, this rack is ready for it. The SightLine FX bars work with accessories that mount in the top channels or clamp around the bars. That flexibility makes it easy to swap between different setups without extra parts or tools.
When you load up for an adventure, you want gear that feels solid. These aluminum crossbars are built for strength and stability, supporting up to 165 lbs of evenly distributed weight. They balance lightweight construction with sturdy performance so you can carry canoes, paddleboards, or camping gear confidently.
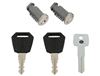
You can add Yakima Same Key System (SKS) lock cores (sold separately) to help deter theft of both the rack and your mounted accessories. It’s a simple upgrade that gives peace of mind when you park at the trailhead or stop overnight on a trip.
 Alternate Instructions
Videos are provided as a guide only. Refer to manufacturer installation instructions and specs for complete information.
This is Curt with etrailer and today we're gonna be taking a look at the Yakima SightLine FX Roof Rack for your 2025 Kia Telluride with flush roof rails. We're out on a trip, you know, especially if we have a full compliment of passengers, we can often find ourselves in a situation where we've just got too much cargo, be it luggage equipment, whatever it is, to fit in the cargo area comfortably. And sometimes, we've got things that just won't fit in the car at all. A roof rack is a great way to be able to transport those items. You can use things like such as rooftop baskets and cargo boxes, kayak carriers, ski and snowboard carriers, even bike racks, all sorts of things that you could use to utilize your roof rack. And the SightLine FX from Yakima is a really nice set in that, one, it's stylish.
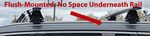
There's not a whole lot of frills to it. I like the kind of black on black. Still makes a statement without screaming at you. This is a set that is a flush roof rack and what that means is that the crossbar does not extend out past the towers and that's why it has such a streamlined and clean look. What it does make you do though is it does kind of force you to load things up to toward the middle of the vehicle.
Luckily though, where you have them positioned puts you right in between the door threshold here of your second row. So you can use that threshold to get up and manage that cargo pretty easily. They have a 165-pound weight capacity, but you always wanna double check your owner's manual for the vehicle's rooftop capacity. If it's lower than 165 pounds, then that'll end up being your weight limit up on your roof. This is an arrow style bar.
So what that means is it's got this kind of more aerodynamic shape. This cuts down on vibration and wind resistance, so you're gonna have a lot less road noise than you would with those round or square bars. From up here on the roof, I was just gonna take a few measurements, but I also wanted to point out that before we installed these, we wanted to open up the sunroof to make sure we had the clearance. So these do sit high enough that you can open up the sunroof completely. You can open it up with just the tilt.
However, my opinion when you have it opened up completely, I probably wouldn't do it if I had anything loaded up on the bars at the time. There are a lot of rooftop accessories that kind of dip over the bars and dip down a little bit. And depending on the cargo that you're carrying, I just wouldn't want anything to happen to your sunroof glass. The tilt function works perfectly fine as well. Again, plenty of clearance there. We're gonna take a look at a couple of other measurements and just kinda see where this sits up here. On the flush rails, like we have today, Yakima has very specific placement of them. So that placement is gonna give us a crossbar spread of 32 inches and that, to me, is kind of perfect, that 32 inches, because every rooftop accessory has a minimum and a maximum crossbar spread allowable in order to use it and 32 inches falls right into that slot on just about any rooftop accessory that I can think of. The other thing I'm gonna double-check is clearance under the bar. So clearance under the bar comes to about 3 1/4 inches. That's pretty generous. More than enough room I feel like to get those clamp-mounted accessories on it. And as far as how much height it's gonna add to the bar, that's gonna be closer to about 4 1/4 inches. So it doesn't add that much height. It's probably not something you're gonna have to worry about too much when you're in relation to garages and things like that. But if you're trying to determine or calculate your overall height when you have an accessory on here or anything like that, having that measurement is gonna come in really handy. It's also important to note that we've got this shark fin antenna back here. And with the height of that antenna, it does come below the top of the bars here. But just like with this sunroof, I would be conscious, you know, a little bit of the accessories that I put up here just to make sure it clears that. It might be that you can move the accessory forward a little bit to clear it if you need to. The other thing I want to take a look at is how much bar space do we really have to work with The bar is wider up here in the front than it is in the back and that's because these rails taper as they get toward the rear of the vehicle. So our overall bar space that we're gonna have to use, I'm gonna measure from the second bar and that's gonna come out to about 35 1/2 inches. Still more than enough room to put just about anything you want to up here, minus a few exceptions. But being a flush roof rack, it doesn't really give you an opportunity to put two different rooftop accessories side by side. Now, I had mentioned a little bit about the installation and how these go on and how they go in a specific spot. I'm gonna show you exactly how we got these up on the roof of our Telluride right now. The method of installation on the front bar and the rear bar are the same, but there are two different bar lengths and you need to put them in the spot that it's for. The front bar which we've already installed is going to be the bar that's in the box marked XL. The rear bar, which we're gonna walk you through right here, is gonna be in the box marked LG. Now, the reason that the bar in the back is shorter than the one in the front is because the rails on the Telluride, like on most vehicles, taper as they get toward the rear of the vehicle. So you don't need as much bar length back there. But with that being said, we've got our base clips installed here on our passenger side. We're gonna show you how they go in on the driver's side. It's an identical installation, same as on the front bar. So first thing we're gonna do is remove our end cap. We'll do that by pinching in and just removing it there. We're gonna take our flathead screwdriver and we're gonna unlock this cover just like that. And we're gonna pull this off kind of over to the side just like so. Now, at this point, I'm gonna go ahead and turn it over and you can see what we're working with here. So the first thing I want to do is put on this base pad and we're gonna do that onto this bar right here. And we want to do it so that this gap or this arrow is pointed outward. So I'm just gonna pop that on just like that. Now, at this point, you're gonna have an inner and an outer clip. The inner clip is marked R17 and that is gonna go in underneath this bar right here and it's gonna kind of slip into place like that. Now, sometimes like with right now, I'm having a little bit of trouble getting past this block. So I'm gonna take the tool that Thule provided us. And through this bolt on the outside, I'm gonna loosen it up just a little bit, try to give myself a little bit more clearance because what I wanna do is get this on there so that this block ends up in this square and these two tabs right here end up in these two little squares. Now, every once in a while, this spring keeper that's in here, it's easier to kind of pop this out. We're gonna pop it out on the sides here, clear it out of the way. And sometimes, it's easier to put this in like this, and then reattach the springs to hold it in place. I'm gonna do the same thing here with my outer clip. The outer clip is marked with an R21. Let's take this opportunity before we get into this next step to talk about the instructions and the measurements that you're given. So they're called M measurements. You'll have M1, M2, M3, M4. M1 and M2 are in regards to your front crossbar. M1 is going to be the distance between our towers. M2 is gonna be a measurement from the top of your roof to the front of your tower. Now, your M3 measurement is gonna be how far apart you need to be on your second bar. So they mark the exact center of the bar for you. But from this bolt here to this bolt here is where you're gonna need to measure that M3 measurement. And there's another little slot on that table right behind it that says position C. Front bar is position B. That's in regard to this bolt right here. Now, that is to control the pitch of your bar. So by having this bolt directly in the center here on our front bar, it makes that perfectly level, which makes sense 'cause the rails are level right there. But as you get toward the back of the vehicle, you'll see that the rail slopes down some. And if we put this on in the B position, we'd have a flat rail in the front and a slanted one in the back. So we're gonna adjust the pitch on our second bar to position C and that's gonna bring us even with our front bar. So in order to do that, you could take your tower and find the front of your bar, which is the wider end. And if you twist it, you'll get it kind of closer to this position here rather than dead in the middle of that slot. Once you have your measurement, your M3 measurement done, get this into that position. Sometimes, I just like to keep kind of twisting it a little bit and start using your Yakima tool to go ahead and tighten it down. Now, this is a torquing tool. So once you get it to the correct torque, you're gonna hear a pop just like that coming out of your tool and we've got that secured. We're gonna go ahead and make sure we get that done on our other side here. Now with that done, we're gonna use our M4 measurement to determine the distance between the bars and that measurement is taken from the center of the front bar to the center of the second bar. Once you determine your M4 measurement and the location of your second bar, double-check that measurement on both the driver and the passenger side. We really wanna make sure that our bars are gonna be perfectly parallel to each other. And the best way to do that, like in the front here, we measured from the windshield to the front of our tower. I took that same measurement on the passenger side to make sure that that was the same. We're gonna do the same with this from bar to bar. But once you've got it in that position and everything measures up, go ahead and grab the tool from Yakima. And through this bolt right here, we're gonna start tightening it down. Now, what I'm gonna do right now though is I'm just gonna get this a little bit flush. I don't want to tighten this down too much. If you tighten one side down completely without doing anything to the other, it's inevitably gonna pop that other side out of place 'cause it's not tight and you're gonna undo everything and start all your measurements over. So my recommendation would be to tighten it down, maybe three or four turns on the driver's side, go do the same on the passenger side and just bounce back and forth until you get 'em tightened down completely. You're gonna hear us that same click out of the tool that we heard over on the table. We can go ahead and reattach this kinda locking door that we have here. But we saw earlier that you can just open this up with a flathead screwdriver. Doesn't seem like the most secure thing if you're worried about thieves coming along and taking your roof rack. Yakima has what they call their SKS or same key system. To get metal lock cores with keys for all of your towers, you can get them all keyed alike. And not only that, if you have other Yakima accessories like a bike rack or a rooftop cargo box that you want to use this rack with, you have the opportunity to get it keyed alike to those as well. But we're just gonna put this on by slipping this opening over this tab right here, and then bringing it around, pressing it firm. I'll then take my flathead screwdriver and we'll get it locked into place. Once you've done that, you could just grab your tower cover and pop that arm into place as well. And with that, your installation is complete. It is something that you could definitely do on your own if you felt like it. But if you wanted some help doing the installation, let us help you find someone near you that we can work with to make sure that we get this on your roof safely and securely. Once again, this is Curt the etrailer. Thanks for stopping by.
Ratings & Reviews


Do you have a question about this Roof Rack?
Info for this part was:
At etrailer we provide the best information available about the products we sell. We take the quality of our information seriously so that you can get the right part the first time. Let us know if anything is missing or if you have any questions.




















Thank you! Your comment has been submitted successfully. You should be able to view your question/comment here within a few days.
Error submitting comment. Please try again momentarily.