
Thule WingBar Evo Roof Rack for Rain Gutters - Aluminum - Black - Qty 2
- All Info
- Reviews (1)
- Q & A (0)
- Videos (1)
- Photos
Thule Roof Rack - TH74RA
- Aero Bars
- 60 Inch Bar Space
- Thule
- Black
- Overhang
- 2 Bars
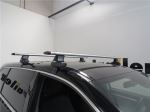
This Thule roof rack lets you carry cargo and gear on your vehicle. Aerodynamic crossbars with split rubber strips in top channels work with channel-mount and clamp-on accessories. Installs to the rain gutters on your vehicle's roof.
Features:
- Complete roof rack system includes 2 WingBar Evo crossbars, 4 Rapid Gutter feet, and a custom fit kit for your vehicle
- Aero-style crossbars work with accessories that mount in the top channels or clamp around the bars
- Compatible with most bike, watersport, snow, and cargo carriers
- Top channels with split strips let you easily slide accessories into the tracks - no trimming required
- Strips help reduce wind noise and vibration while you're driving
- Thule One-Key System locks (sold separately) deter theft of the rack and channel-mount accessories
- Custom installation to the rain gutters on your roof
Specs:
- Crossbar dimensions: 60" long x 3-1/8" wide x 1" tall
- Top channel dimensions: 3/4" wide x 1/8" tall x 3/8" opening
- Weight capacity: 165 lbs
- Always observe your vehicle's maximum roof load capacity
- Color: black
- Construction: aluminum
- Limited lifetime warranty
711520 Thule WingBar Evo 150 Aluminum Crossbars - Black - 60" Long - Qty 2
387101 Thule Rapid Gutter High Roof Rack Foot Pack - Qty 4
Installation DetailsCalifornia residents: click here


Videos are provided as a guide only. Refer to manufacturer installation instructions and specs for complete information.
Video Transcript for Thule WingBar Evo Roof Rack Kit Installation Guide - 2021 Jeep Wrangler Unlimited
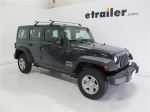
Hi, everyone. Jesse here with etrailer. Today we'll be taking a look at and I'll show you how to set up the Thule WingBar Evo roof rack kit on our 2021 Jeep Wrangler Unlimited. This roof rack's a great way to add some extra storage to those adventures that you plan on going on. You can throw up accessories, for example, a cargo carrier like that Yakima SkinnyWarrior we have on top of ours. And as you can see, even with that installed, we have plenty of room for other accessories, for example, a kayak carrier or anything like that.
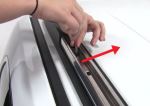
I really like this kit because it doesn't involve drilling holes or permanently installing anything. It's temporary and very easy to get installed. It just simply clamps onto the gutters of your roof. We'll take a closer look at how it actually clamps on. As you can see, you have a rubber strip here that's gonna go into your channel and then a rubberized clamp that's gonna squeeze that together and keep it nice and tight.
I did say that installing this is easy. It in fact does not involve any tools at all. This is just a hand knob that you can turn and tighten down. There is an optional lock that you could purchase separately in case you wanted to keep this a little more secure. Just keep anybody from coming in and stealing a roof rack.
And our crossbars are the WingBar Evo. They're very aerodynamic, as you can see. They're kinda shaped like an airplane wing. It's gonna cut down on wind noise and just be more aerodynamic than some of your other options, for example, square bars. As far as the weight capacity, it really depends on the roof of your vehicle.
So make sure that you check with your owner's manual or your manufacturer what their weight rating is so you don't exceed that 'cause you don't wanna damage it or have anything unsafe on top of your roof. Really, that's about all there is to it. In my opinion this is the easiest way to get some extra storage onto the hard top roof of your Jeep. If you have any questions or concerns about this roof rack or anything else we offer here at etrailer, feel free to reach out to us. We'd be happy to get you pointed in the right direction. But otherwise, let's get this pulled into the shop and I'll show you how to get this installed. We'll begin by building our crossbar. As you can see, we already set up and installed the rear crossbar, so we'll be working on the front one now. It's the same process with both of them, but we'll start by adding our rubber to our little foot here. And this just slides in. You want this bump to be on the outside. It'll kind of show you that in the instructions. This can be a little tricky to get slid into place. It is pretty stretchable, so you can just work it on there. We'll do that with both of our feet. Now with that rubber pad on, we can assemble the rest of our foot here. I'd like to start with these plastic caps that just simply slide over. You'll kind of see they have a dimple on the inside that'll match up with this here. So that will just slide right over, and once you get it to click down into place, it'll hold itself there just like that. And then we'll take this piece here. You'll notice it's rubberized. This is gonna slide right into there with our bolt going through the back. Just slide it up with both those slots, get a washer and our nut. I'm gonna leave this pretty loose to get everything hooked up. As far as the rubber strip that goes into our channel on top of our crossbar, we already have this one cut to fit because this is a crossbar that we use for demonstration purposes. But essentially you'll just push your stripping in along all the way to the end and then cut off any excess that you have. And after that, we'll move on and flip over our crossbar here. We'll pop off our end cap by pushing in that tab and taking it off. And then our foot is going to slide right into that channel. It can be kind of tricky to get it started, but usually once you're started, it'll slide pretty freely. While we're here, you may notice this measurement strip here. That's so we can make sure that both of our feet are evenly spread out. So whenever you get both installed, try to make that measurement even. Now we're ready to take our assembly and install it onto our roof. Just make sure you have the more round, thicker side on the front and we'll just kind of get our rubber feet placed into our gutter here. And then I'll go over to the other side and get that one set up. And I'd recommend having a second set of hands to help you safely place it on the roof. But then as you can see, our rubber foot just kind of stays in our gutter here. And then this rubberized clamp will be on the outside. So what we'll do is get our crossbar spread measured out. They say you can measure or you can have it spread out up to 60 inches. It really just depends on your accessories and where you want it to be. So we'll get ours set up and then I'll start tightening it down. Now before you tighten down the knob, just make sure you have all your measurements where you want 'em to be. And that includes the distance sticking out on your crossbars. 'Cause when we tighten this down it's also going to lock that crossbar into place along with clamping it down to the roof. So now we'll just snug this up. They give you a torque spec, but I don't really see a way to get that exact torque spec. I think just snugging it up by hand will be good enough. Once you get everything tightened down I like to give it a nice shake test, make sure it's all nice and tight. But other than that, you're ready to throw your accessories on and go out on your adventure. So that's gonna do it for our look at an installation of the Thule WingBar Evo roof rack kit on our 2021 Jeep Wrangler Unlimited.
Ratings & Reviews
4.0
1 reviews
See what our Experts say about this Thule Roof Rack
- Are Thule AeroBlade or WingBar Evo Bars Compatible With Older Thule Hullavator?The Thule AeroBlade bars are being discontinued, but if you already have them they will work with the Thule Hullavator Pro Kayak Carrier and Lift Assist with Tie-Downs # TH898 (even if it is an older model). That is provided the bars are long enough. The Hullavator needs at least 4-8 inches of crossbar length beyond the feet of your roof rack to ensure clearance on the side of your vehicle when lowered. If you don't already have the crossbars, I recommend the new Thule WingBar Evo...
view full answer... - Thule Roof Rack that Fits Jeep Wrangler With One Touch Roof We've had customers come back and tell us that the 8 inch Rapid Gutter Feet for Thule Crossbars # TH33ZR are the perfect feet to use on the Wranglers with the One Touch roof as it gives the perfect amount of clearance for the roof to still open. Then for crossbars you'd also need the part # TH711520 and you'd be set.
view full answer... - Thule Roof Rack Availability for a 2019 Toyota Highlander LE Without Roof RailsYes, we do have the ability for you to add all of the parts for the Thule AeroBlade roof rack for your 2019 Toyota Highlander with one click of the button! I have added links to both the Black option and the Silver option with takes you directly to the product page. Simply click the "Add to Cart" button and it will add the 60" bars # TH711520 (Black) or # TH711500 (Silver) along with the Rapid Traverse Foot Pack # TH480R, and Fit Kit # THKIT1803 for a complete roof rack system! If you...
view full answer... - Looking For Thule Evo Raised Rail Feet And Crossbars For 2024 Subaru Outback WildernessHello Shannon, thanks for reaching out. We do have the 710405 Thule Evo Raised Rail Roof Mounted Railing Foot Pack as part # TH710401. We do not offer the 59" ProBars. I recommend instead going with the 60" WingBars part # TH711520 as these are also compatible with the Hullavator.
view full answer... - Can 60 Thule AeroBlade Bars be Used on a 2015 Jeep Grand Cherokee with the E Group PackageTo determine if you can use the 60" WingBar Evo Crossbars, part # TH711500 or part # TH711520, will fit on your 2015 Jeep Grand Cherokee you first need to measure the center to center distance between the mounting holes where the Podium feet will sit. I have attached a picture showing where you want to measure. If this measurement falls between 46-1/2" - 59-3/4" then the 60" bars will fit. For your E Group package you also need the Podium Foot Pack # TH460R and the Fit Kit # THKIT3142 to...
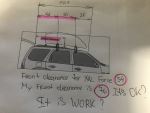
view full answer... - Installing Thule Gutter Feet on 2013 Jeep Wrangler Unlimited Hard Top and Two KayaksThe Thule Rapid Gutter Feet for AeroBlade Crossbars are compatible with your 2013 Jeep Wrangler Unlimited (4 door) hard top. The feet need to be 20 inches apart on center. You can see in the attached photo that the front rail can be centered above the front doors if desired. The max capacity for this system is 165 lbs. If you don't already have crossbars, the 60 inch Wingbar Evo # TH711520 is a great option. You can also add locks to secure your rack using # TH450400. These locks...
view full answer... - Can XXL Thule Roof Cargo Box Fit on Roof of 2015 Dodge Durango R/TI checked with Thule and you can install the Thule Force XXL cargo box # TH6359B on the roof of your 2015 Dodge Durango with a naked roof currently once you install a roof rack. This is a longer box at 90-1/2 inches but due to the longer length of your roof it would not hang over the glass. For that I recommend the Thule Wingbar Evo part numbers # TH711520, # TH480R, and # THKIT1616 which gives you a great looking and aerodynamically shaped roof rack confirmed as a fit for your vehicle....
view full answer... - Thule Wingbar EVO Roof Rack that Fit 2019 Dodge Grand CaravanThe Thule WingBar Evo part # TH711520, # TH480R, and # THKIT1043 is a confirmed fit for your 2019 Dodge Grand Caravan. The overall weight capacity of the roof rack is 165 lbs.
view full answer... - Will Thule Hullavator Pro Fit 2021 Hyundai Palisade Factory Roof RackHi Ben; unfortunately, the Thule Hullavator Pro # TH898 will not fit your Hyundai factory roof rack. The Hullavator requires crossbars that extend 4" - 8" beyond the feet for proper clearance so you will need to put on an aftermarket rack to meet these requirements. Sticking with Thule, I recommend the WingBar Evo rack. You will need the Evo Flush Rail Feet # TH710601 and the Fit Kit for Thule Evo Flush Rail Roof Rack Feet # TH83CE. Thule typically recommends the 50" bars but they won't...
view full answer... - Best Low Profile Roof Rack and Best Roof Bike Rack for a 2018 GMC YukonThe Rola Sport REX Series Roof Rack 59685 is a great roof rack but I have a different recommendation for you. The highest weight capacity roof rack that we have is from Rhino-Rack with a 220 lb weight capacity. Typically vehicles do not have roof weight ratings this high so you probably wouldn't be able to max it out anyways. I recommend going with the Thule AeroBlade Edge, parts # TH7604B-TH7604B and # THKIT4041 for black or parts # TH7604-TH7604 and # THKIT4041 for silver, for a few...
view full answer... - Parts Needed to Add a Roof Rack on a 2018 Honda RidgelineIf you would like to stick with the Thule theme that you have going then I recommend using a Thule roof rack system that uses the AeroBlade bars. For your 2018 Honda Ridgeline you will need 60" crossbars which is part # TH711500 for Silver or part # TH711520 for Black along with the Rapid Traverse Foot Pack # TH480R, and the Fit Kit # THKIT1811. The WingBar Evo bars have an aerodynamic design that cuts down on wind noise and drag compared to traditional bars. If you prefer the more traditional...
view full answer... - Thule Roof Rack that Fits 2018 Ford F-150 with SunroofI checked with Thule and for your 2018 Ford F-150 their roof rack like the Aeroblade kit part # TH711520, # TH480R, and # TH145177 do not have any fit exclusions for versions of the truck that have the sunroof so this will fit and work great.
view full answer... - 2024 Ford Explorer Roof Rack Recommendation to Fit with Panoramic Roof and Raised RailsWe have a few options compatible with the raised rails and panoramic glass roof on your 2024 Ford Explorer, and out of those options I recommend going with the Thule WingBar Evo system which includes the following parts: - 60" WingBar Evo Crossbars # TH711520 - Evo Raised Rail Feet # TH710401 - Lock Core Kit # TH450400 (optional) These are easy to install and high quality which is why I really like to recommend it.
view full answer... - Roof Rack With Black Crossbars for Pace Edwards BedLocker Rails on 2019 Ford F-350Hi Michael; you can use the same fit kit # THKIT3101 and mounting feet # TH460R. However, the longest WingBar Evo is 60" # TH711520 which probably won't be long enough for your truck bed. That is why Conner originally chose the # TH713700 which are 79" long. For bars that are black I recommend switching to a Yakima setup. You will need the following: -Landing Pad 1 for Yakima SkyLine and Control Towers # Y00221 -SkyLine Towers for Yakima Crossbars # Y53TR -Yakima CoreBar Crossbars -...
view full answer... - Thule Roof Rack Options for Carrying Bike Rack on 2017 Ford F-350 Crew CabSounds like you're just needing a roof rack for your 2017 Ford F-350 so you can use your bike rack. We actually do have Thule options for you! You just need to use one of the 60" crossbar options listed below along with the Evo Clamp Feet # TH710501 and the Fit Kit # TH145177: 60" Crossbars WingBar Evo Black - # TH711520 WingBar Evo Silver - # TH711500 SquareBar - # TH712500 Don't forget to add lock cores for your roof rack with the 4-Pack # TH450400, or using the 6-Pack # TH450600 or...
view full answer... - Roof Rack Recommendation for 2019 Ford Explorer to Carry Two Thule Hullavator Kayak CarriersTo fit two of the Thule Hullavators # TH898 on the roof of your 2019 Ford Explorer with flush rails you'd want longer crossbars so that you can fit everything easily. So for that the Thule Wingbar Evo roof rack part # TH711520, # TH460R, and # THKIT3151 that has 60 inch long crossbars would be your best option. This rack is a custom fit for your Explorer, is a very high quality rack that is also easy to install.
view full answer... - Roof Rack Crossbar Spreads for a 2017 Infiniti QX80Each roof rack for your 2017 Infiniti QX80 will have its own specific crossbar spread that works best with your QX80. The range of crossbar spreads from the roof racks that we carry are from 45" to 47" from the middle of the front to the middle of the back crossbar. If you don't already have a roof rack on your QX80 I highly recommend going with the Thule WingBar Evo system. This option consists of the 60" WingBar Evo Crossbars, part # TH711500 for Silver or part # TH711520 for Black,...
view full answer... - Can Acessories Be Mounted To The Bottom Channel Of The Thule Wingbars?Hello James, interesting question. The Thule Wingbars like part # TH711520 do have a bottom channel, but this is only for mounting the bars to the feet. The bottom channel should not be used for mounting any kind of accessory since they are not rated to be used in this way. What accessory were you wanting to mount to the bottom of the bar? You piqued my curiosity since I have never been asked about this before.
view full answer... - Roof Rack for 2018 Jeep Wrangler JL Unlimited Hard Top to Carry Thule Hullavator Pro Kayak CarrierThere are a couple options for a roof rack on your 2018 Jeep Wrangler JL Unlimited with a hard top, from Yakima and Thule, with both allowing you to use the Thule Hullavator Pro Kayak Carrier and Lift Assist with Tie-Downs # TH898. The parts you need for the Yakima roof rack consist of: - Yakima JetStream Crossbars # Y00426 (Black) - SkyLine Towers for Yakima Crossbars # Y53TR - Landing Pad 6 # Y00226 The parts you need for the Thule roof rack consist of: - Thule WingBar Evo Crossbars...
view full answer... - Does Thule Roof Rack Fit Kit For Laredo Roof Rails on a 2015 Jeep Grand Cherokee Leak WaterThere are two variations of the flush rails on the 2015 Jeep Grand Cherokee. If the rails have a stainless steel strip that runs down the bars you have the Group E Laredo package and would need the Thule part numbers # TH7602-TH7602, and # THKIT3142. This roof rack setup does require threading an allen bolt through a bracket into the channel of the rack. I attached a picture that shows how all of the pieces should look when assembled and torqueing everything down. Without seeing a picture...
view full answer... - Recommended Roof Rack And Kayak Carriers For 2 Kayaks On 2014 Honda Odyssey With Factory RailsThe roof rack I recommend for your Odyssey is the Thule WingBar roof rack system. This system features the 60 inch WingBar crossbars which are some of the quietest on the road. The roof rack has a weight capacity of 165 lbs, but you will want to make sure you do not exceed the roof weight capacity of your Odyssey. To order this roof rack you will need part # TH710401, and part # TH711500 for silver or # TH711520 for black. If you do not have carriers for your kayaks I recommend using...
view full answer... - Recommended Roof Rack For 2014 Kia Soul with Side RailsThere are 3 different roof options on a 2014 Kia Soul. There are the ones with no rails, there are others with factory side raised rails, and there are flush mounted rails. I know that you have one of the two rail options based on your description. If you have the rails that have space under them, I recommend the Thule WingBar Evo Load Bars - 47" - Qty 2 # TH711220 and the Evo Railing Foot Pack # TH710401. Then the locks # TH450400. If you have the flush rails, I recommend the Thule...
view full answer... - Recommended Crossbars and Feet for a LEER Camper Shell with Thule TracksOk Sean, so I was able to track down some info about your LEER camper shell and it looks like you ordered it with the Thule tracks already installed. So, if that's the case, you can then use either the Thule Tracker II feet with the Thule WingBar Crossbars # TH711520, or you can use the Rhino-Rack Vortex Aero Crossbars # RRVA165B-2 with the Rhino-Rack Quick Mount Legs for Vortex Aero Crossbars # RRRLT600 for a more cost-effective non-Thule setup.
view full answer... - Thule Aeroblade Roof Rack Recommendation to Fit Pace Edwards Tonneau Cover ChannelWe have just what you need to install a roof rack in the channels of the tonneau you have. You will need the Thule roof rack system with the fit kit part # THKIT3101, the podium feet part # TH460R and crossbars part # TH711520. This will fit the 3/4 inch channel you have on the cover.
view full answer... - Thule Roof Rack that Fits Jeep Wrangler With One Touch Roof We've had customers come back and tell us that the 8 inch Rapid Gutter Feet for Thule Crossbars # TH33ZR are the perfect feet to use on the Wranglers with the One Touch roof as it gives the perfect amount of clearance for the roof to still open. Then for crossbars you'd also need the part # TH711520 and you'd be set.
view full answer... - Roof Rack and Cargo Carrier that Fits 2023 Jeep Wrangler Unlimited with Sky Touch RoofFor a roof rack that fits your 2023 Jeep Wrangler Unlimited Willys with the Sky Touch Top we have the Thule Wingbar Evo rack part numbers # TH711500 and # TH33ZR which would work really great. This is a very high quality rack that is also very quiet. Then for a hitch cargo carrier we have the Curt part # C18110 that sits low enough that the rear gate of your Wrangler would still be able to open.
view full answer... - Can Rooftop Tents be Used With Thule Rapid Gutter FeetHi Mir; Rooftop tents cannot be used on a roof rack system that uses the Rapid Gutter Feet for Thule Crossbars # TH33ZR. Tents need a roof rack where the feet are attached to either side rails or fixed mounting points.
view full answer... - Thule Roof Rack Capable Of Clearing Sky One-Touch Roof Top on a 2024 Jeep Wrangler 4XeI have included a image below showing one of the Thule roof racks installed on a Jeep Wrangler having the Sky One-Touch roof. They used the Crossbars # TH711520 with the 8" Tall Feet # TH33ZR. I could not find any images with the roof open but you can take a measurement from your rain gutters to the top of your fabric as it folds to verify the 8" feet are going to give you the necessary clearance. We also have the 11" Tall Feet # TH93ZR if you are going to need even more clearance.
view full answer... - Recommended Roof Rack For A 2023 Jeep Wrangler Sahara 4xe With Sky One-Touch Power Roof We have a couple of different options that will work with your Sky One-Touch power top but I'd say the best option is going to be with Thule's aerobar setup. You'll need the following components: Thule WingBar Evo Crossbars # TH711520 Rapid Gutter Feet for Thule Crossbars # TH33ZR These feet are designed to attach to the rain gutters and are tall enough for the aerobars to clear the roof so that you can still open it. Aerobars are going to give you the least amount of noise compared...
view full answer... - Aero Bar Roof Rack that Fits 2023 Jeep Wrangler UnlimitedYes, we have the Thule Wingbar Evo roof rack part numbers # TH711520 and # TH33ZR that fits your 2023 Jeep Wrangler Unlimited that has the one touch roof. The Wingbars are the quietest and most aerodynamic bars out there so we recommend them highly.
view full answer... - Recommended Roof Rack for Sky OneTouch Roof on 2023 Jeep Wrangler UnlimitedWe have a few different roof racks that provide enough clearance for the Sky OneTouch roof on your 2023 Jeep Wrangler Unlimited, but out of that selection I recommend the Thule WingBar system because it's easier to install and looks better. Here are the parts you'll need: - 60" WingBar Evo Crossbars # TH711520 - Rapid Gutter Feet # TH33ZR - Lock Core Kit # TH450400 (optional)
view full answer... - Recommended Roof Rack And Towers For A 2022 Jeep Wrangler 4XE W/ A Jeep Sky One Touch RoofThat is correct, the Thule WingBar Evo Crossbars # TH711520 with the Rapid Gutter Feet for Thule Crossbars # TH33ZR does have the static capacity you need to use the rooftop tent like the Thule Tepui Explorer Kukenam 3 Rooftop Tent - 3 Person # TH8001KSK05. These crossbars measure 60" long x 3-1/8" wide x 1" tall, has a maximum weight capacity of 220-lbs and have a quiet low-profile design. I have attached a couple of product videos for you to check out as well.
view full answer... - Roof Rack System for a Jeep Wrangler Unlimited with a OneTouch Skytop To accommodate the OneTouch Skytop on your 2022 Jeep Wrangler you will want to go with a Thule roof rack system. To start out with I recommend the Rapid Gutter Feet for Thule Crossbars - Rain Gutters - 8" Tall - Qty 4 item # TH33ZR. Then you can use the Thule WingBar Evo Crossbars - Aluminum - Black - 60" Long - Qty 2 item # TH711520.
view full answer... - Roof Rack Recommendation for 2022 Jeep Wrangler 4xe with Sky One-Touch TopThank you for all of the info! I recommend using the Thule WingBar Evo roof rack on your 2022 Jeep Wrangler 4xe because it's arguably the easiest to install and has a dual rubber insert for the top channel so it's a breeze to install an accessory in the t-slot. Here are the parts you'll need: 60" WingBar Evo Crossbars - # TH711520 Rapid Gutter Feet - # TH33ZR Lock Core Kit - # TH450400 (optional) The weight ratings you mentioned are for the individual components. If you look through...
view full answer... - Recommended Roof Rack for Sky One-Touch Power Top on 2020 Jeep Wrangler UnlimitedFor a roof rack to be compatible on your 2020 Jeep Wrangler with Sky One-Touch Power Top, it can't be mounted on the top of the roof and it needs to be high enough for the folding roof to clear. What you need are tall gutter-mounted roof racks. While I do have some options for you and I've seen them being used on other JLUs, they aren't confirmed fits by the manufacturers for use with Sky Power Tops. Please note first that your Jeep needs to have gutter mounts. If it is a full soft top,...
view full answer... - Compatible Roof Rack for 2021 Jeep Rubicon With Sky One Touch Soft Top?One thing that may cause confusion is determining whether your Jeep has a hard Top or a soft top. If it has rain gutters, then technically, your 2021 Jeep Wrangler Rubicon has a hard top with a Sky One Touch Power Soft Top. The following recommendation is NOT a fit for Jeep Wranglers with total soft tops. That being said, yes! There's a Thule rack that can fit your vehicle! The confirmed fit is the Thule System with 60" Long Wingbar Evo Crossbars # TH711520 and 5" Gutter Feet # TH300R,...
view full answer... - How Far Apart Should Artificial Ran Gutters Be Attached for a Roof Rack for a Thule Cargo CarrierThe Thule Artificial Rain Gutters # TH542 are designed to provide you with an attachment point for Thule gutter feet like the # TH65BJ for 5" tall feet, # TH33ZR for 8" tall feet or # TH93ZR for 11" tall feet. The gutter feet will the provide the attachment points needed to use Thule Crossbars like the Thule WingBar Evo Crossbars # TH711520 for 60" bars or # TH711320 for 50" bars. The cargo carriers then attach to the crossbars. The distance you should spread your gutter feet apart will...
view full answer... - Thule Roof Rack Fit on 2022 Jeep Wrangler Unlimited 4xeGood question, and I verified directly with Thule that you do have the correct crossbars for your 2022 Jeep Wrangler Unlimited 4XE, which are the 60 inch WingBar Evo bars: - Thule WingBar Evo Crossbars # TH711520 The only other thing you will need is the correct foot pack, and that is going to depend on if you have the hard top or the Sky One-Touch top: - Hard Top: Rapid Gutter Feet for Thule Crossbars - Rain Gutters - 5" Tall # TH65BJ - Sky One-Touch Top: Rapid Gutter Feet for Thule...
view full answer... - Roof Rack Capable of Clearing Sky One Touch Roof Top On a 2022 Jeep WranglerYes, due to the way the material folds you need a roof rack with tall feet so that the Sky One-Touch Roof will operate properly on your 2022 Jeep Wrangler Rubicon. The Thule Rapid Gutter Feet # TH33ZR are 8" tall to give you the clearance needed for the sliding roof. I recommend pairing these feet with the Thule WingBar Evo Crossbars # TH711500. The Aero design of the cross bars will help to cut down on the wind noise that is created. The Thule One-Key System Lock Cylinders # TH450800...
view full answer... - Thule Awning for a 2019 Chevrolet Express 3500 VanI contacted the manufacturer to see if the Thule HideAway Awning for ProMaster or Sprinter # TH620001 would work for your 2019 Chevrolet Express 3500 van, they informed me that this particular awning would not work. They also stated that there is not an awning made specifically for your vehicle. You would need to use a wall mount awning like the Thule HideAway Awning - Wall Mount # TH490011 and mount it directly to the side of your van. Or you can use a roof rack awning like the Thule...
view full answer... - Recommended Rooftop Tent and Crossbars for a 2022 Jeep Wrangler 4XE W/ One-Touch Sky Top RoofFor your 2022 Jeep Wrangler 4XE with the one-touch sky top roof, I recommend going with the Thule WingBar Evo Crossbars # TH711220 with the Rapid Gutter Feet for Thule Crossbars - Rain Gutters # TH33ZR. This crossbar setup will allow you to mount a rooftop tent like the iKamper SkyCamp 3.0 or the Thule Tepui Explorer Kukenam 3 Rooftop Tent - 3 Person # TH8001KSK05 onto the roof of your 2022 Jeep Wrangler 4XE. Additionally, these crossbars have a maximum dynamic weight capacity of 165-lbs,...
view full answer... - Will The Exposed Racks Roof Rack Allow The Sky One-Touch Roof On 2024 Jeep Wrangler 4xe?The Exposed Racks Roof Rack # ER84FR will fit with the Sky One-Touch roof on your 2024 Jeep Wrangler 4xe but the roof was not intended to be opened with the rack installed. If you are wanting to open the roof you are going to want to look at options like the Thule # TH711520 with the 8" # TH33ZR or 11" # TH93ZR tall legs. I always recommend measuring the height your roof material sits above the gutter rails and also considering how the kayak carrier is going to mount on the crossbars. Because...
view full answer... - Can a Thule ProBar Evo Crossbar Be Mounted Using Thule Rain Gutter Mounted Feet? Yes, the 69" Thule ProBar Evo Crossbars # TH713600 will mount to the Thule Rapid Gutter Feet. We have them 5" Tall # TH65BJ, 8" Tall # TH33ZR or 11" Tall # TH93ZR depending on the height needed for your boat. We also have the 79" ProBar # TH713700 if you are looking for the longest bar you can get.
view full answer... - Recommended Thule Rain Gutter Foot And Kayak Carrier For 2015 Jeep Wrangler Willys JK 2 Door HardtopThe Rapid Gutter Feet for Thule Crossbars - Rain Gutters - 8" Tall - Qty 4, part # TH33ZR, you attached to your question are my preferred height. They are the Rapid Gutter feet, so you will need the the Thule SquareBar Evo crossbars, they have an underside channel. If you have the old Thule square crossbars, you will need to replace them with the Thule SquareBar Evo Crossbars - Steel - 60" Long - Qty 2, part # TH712500. This roof rack has a weight limit of 165 lbs. You will be able to...
view full answer... - What Rain Gutter Roof Rack Has The Highest Weight Limit For My 2020 Jeep WranglerMy recommendation is the Thule rain gutter mounted roof rack system. It has a weight limit of 165 lbs. It consists of the following: Thule WingBar Evo Crossbars - Aluminum - Black - 60" Long - Qty 2, part # TH711520, Rapid Gutter Feet for Thule Crossbars - Rain Gutters -8" Tall - Qty 4, part # TH33ZR, and the Thule One-Key System Lock Cylinders - Qty 4, part # TH450400. These crossbars are elliptical in shape to help with wind noise and aid with fuel efficiency. In addition, they also...
view full answer... - Roof Rack For OneTouch Skytop On A 2020 Jeep Wrangler UnlimitedTo clear the OneTouch Skytop on your 2020 Jeep Wrangler you'll need these 8" tall gutters # TH33ZR. Then you can use either the Wingbar # TH711520 or something smaller like the Thule Probar Evo # TH713600. I'm not sure how your specific light mounts. If it wraps around the crossbar any of these would work, but if you want to install it using a t-bolt like # 853-0782 both crossbars have a slot at the top to do so.
view full answer... - Recommended Roof Rack for a 2023 Jeep Wrangler Unlimted With a Sky One Touch RoofI'm happy to say that you are not SOL and the Thule WingBar Evo Crossbars # TH711520 with the Rapid Gutter Feet for Thule Crossbars # TH33ZR will work great. These bars measure 60" long x 3-1/8" wide x 1" tall and has a max weight capacity of 220 lbs.
view full answer... - Which Gutter Feet Will Work With My 2021 Jeep Rubicon With One Touch Sun Roof?If you have a 2021 Jeep Wrangler Unlimited with the one touch canvas roof, you can use the Rapid Gutter Feet # TH33ZR and it will clear your roof! The knobs have dumby cores in them out of the box, but you can get these locking cores # TH450400 to get a lock on every knob. If this system for some reason does not work or you just simply do not want them anymore, our customer service team will work with you to get them returned. I've included a video to show you how to replace the locking...
view full answer... - Recommended Roof Rack for a 2022 Jeep Wrangler 4xe w/ a Sky-One Touch RoofHey Ed, thanks for the information. The Thule WingBar Evo Roof Rack for Rain Gutters item # TH74RA in black or item # TH87ZA or silver are going to be the best roof racks for your 2022 Jeep Wrangler 4xe. These Thule systems attach to your Jeep's ran gutters so you can still use your Sky One roof top. The crossbars sit high enough that the material will fold up beneath them. The crossbars measure 60" long x 3-1/8" wide x 1" tall and have a 165 lbs capacity. What are you planning on using...
view full answer...
Do you have a question about this Roof Rack?
Info for this part was:


At etrailer.com we provide the best information available about the products we sell. We take the quality of our information seriously so that you can get the right part the first time. Let us know if anything is missing or if you have any questions.




Thank you! Your comment has been submitted successfully. You should be able to view your question/comment here within a few days.
Error submitting comment. Please try again momentarily.