bing tracking image
  1. Electrical Tools
  2. Performance Tool
  3. Testers
  4. Multimeter
  5. Yellow
Digital Multimeter with 42" Long Test Leads - XL LCD Display
Performance Tool

Digital Multimeter with 42" Long Test Leads - XL LCD Display

Part Number: PT29ZR
In Stock
ChristmasTree SantaHat Arrives before Christmas SantaHat ChristmasTree
$40.16
Retail:$72.81
You Save: 45%
Electrical Tools
zoom in icon
slider vertical icon
zoom out icon
Comment field cannot be left empty.
Name field cannot be left empty.

Thank you! Your comment has been submitted successfully. You should be able to view your question/comment here within a few days.

Error submitting comment. Please try again momentarily.

Product Images

Videos

Need help with installation?
Locate installers near me
1-800-940-8924 to order Performance Tool electrical tools part number PT29ZR or order online at etrailer.com. Free expert support on all Performance Tool products. Great prices and Fastest Shipping for Digital Multimeter with 42" Long Test Leads - XL LCD Display. Electrical Tools reviews from real customers.
  • All Info
  • Reviews (5)
  • Q & A (0)
  • Videos (1)
  • Photos

Performance Tool Electrical Tools - PT29ZR

  • Testers
  • Multimeter
  • Performance Tool
  • Yellow


  • Performs all standard automotive electrical tests on the car or bench troubleshooting
  • Measure and set typical automotive functions with the tach and dwell setting
  • Test electrical components for faulty wiring and voltage
  • Check starting, charging, fuel delivery system voltage, and diode function
  • Extra-large, easy-to-read digital LCD with UL-listed leads and probes
  • Automatic reverse polarity indication with overload protection on all ranges
  • Test lead length: 3-1/2'

W2972 Performance Tool Digital Automotive Multimeter - XL Display


California residents: click here


Video of Digital Multimeter with 42" Long Test Leads - XL LCD Display

Videos are provided as a guide only. Refer to manufacturer installation instructions and specs for complete information.


Video Transcript for Checking Out the Digital Multimeter with 42" Long Test Leads

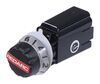
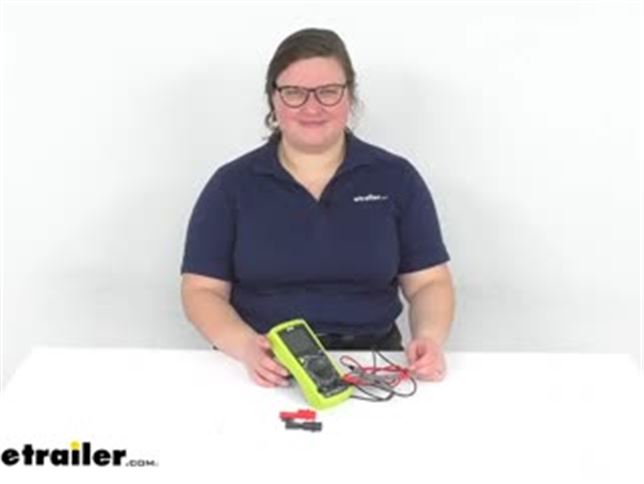
Hey everybody. I'm Ellen here at etrailer.com.And we're going to be taking a quick look and talk about some of the features of this multimeter. The nicest thing about this is that it does have a nice large LCD display. So it gives you a really easy readout of any of your metrics so that you can see what's going on, make sure that your wiring is working properly. You can test functions to make sure that you're getting the right connections made and that everything is coming through as it should. So I'm going to test it out on a couple of different things just to show you how well it works.So I've got a battery here and also a tester with some wiring on it, just to give you a couple of different scenarios of things that you can test with this.

Of course, you just always want to follow the directions as far as how to use it.If you're trying to read any kind of amps, you always want to use the fused ports, but most of the time, you're probably going to be using these two ports. It's typically the most common use for these guys, but let's take a closer look and I'll put it through some of those tests.So turning it on, you can see that nice digital display makes it really easy to see what's going on. There's also a hold button here. So if you want to hold it at the.. whatever it's reading out, you just press that.

It's actually kind of a little weird because a lot of other multimeters are set so that whenever you press the hold button, and then you go to test something, it'll just hold at the highest readout. But for this one, it just holds at whatever the metric or the number is when you press that button. I'll just untangled my leads here and put them on this battery but as soon as I do, nothing happens. Just stays right there. So, that's because that hold button is on.As soon as I take it off and then actually get things connected and turn it over to the right setting on DC volts, now you can see we're getting a readout of 12 volts as we should.

Going to hit hold, take my leads away and it stays there. But if I try to go do something else, it's just going to stay static. So it's something to keep in mind. When we we're first playing with this here in the shop, we we're afraid that it wasn't working, but we didn't realize that that hold button was on. The easiest way to figure out if it is, there's a little tiny H that pops up whenever hold is in use.

So if it's not working, you notice that little H is there, press the hold button to make sure that you clear that.Also got some little alligator clamps. So this also makes it pretty nice. If you're wanting to test out a battery or you want to test something and kind of hold onto it, rather than having to hold it with the little prongs or hold it with your hands, you just kind of want to make sure that you get those pushed in all the way. There's a couple of little spots in there. I know it's going to be hard to see, but you just kind of want to make sure that you get it all the way seated in the housing to get a good connection. And then again, can just clamp on to be able to test, so it makes it a little bit easier. But as you can see, these clamps can also come off. So I'm just going to pop that back in there. No big deal.Now the other big function that you'll use a multimeter for is to test out wiring, to make sure that the ports are what you want or that everything is hooked up correctly. So I've got some six pole wiring here and a tester box connected to it. So I can run some functions, turn that on, put my ground in place. And then you can just go around to test whatever's live to make sure that you know where that signal is coming through. And again, this is where that little kickstand is really handy. So you can just set this and you don't have to hold onto it. You can just see what's going on. So you can switch to a different signal, go through my pins again to figure out which one this signals coming through.So, really for any kind of wiring, this is just a handy accessory to have. It's the safest way to test any wiring. The most accurate, instead of just guessing, color coding, you can't always trust because some people go off of a different metrics or sometimes they just don't even color code things at all.So, having a multimeter for redoing any kind of wiring or double checking, anything, it's just a good thing to have for all kinds of automotive uses at home, or again, just any kind of electrical job that you might have. All in all, I think this is a pretty nice one, just because of how big that display is. The little kickstand is also nice. The hold button is maybe my least favorite thing, just because it can end up being a little bit confusing. One other thing I do like is that if you happen to want to use it for some of the different functions, maybe you want to check the amps, it will tell you which ports to use down here at the bottom. So, that's kind of nice that it gives you a little indicator of which ones you need to connect to. You probably won't end up using this side very often, but if you do, it's just nice to have that. kind of as an easy indicator of which ones you should connect it up to. Because it can sometimes be a little bit confusing with these guys.That's pretty much it for our quick look at the digital multimeter. I hope that this has been helpful in deciding if this is the right one for you. We do have a couple other options available here at etrailer.com, as well as a lot of other wiring accessories and parts. So if you need anything else, definitely check us out. Thanks for watching..

Ratings & Reviews

5.0

5 reviews

by:


by:


by:


by:


by:


5
5

See what our Experts say about this Performance Tool Electrical Tools

  • How To Install The Roadmaster Brake-Lite Relay Kit On A 2022 Jeep Wrangler Limited Sport
    To install the Roadmaster Brake-Lite Relay Kit for Towed Vehicles # RM-88400 on your 2022 Jeep Wrangler Limited Sport, you will start by: 1. Start by confirming that you have the right wire, you 'll want to confirm this by using a multimeter like # PT29ZR to check the wire only has 12 volts when the brakes are pressed. 2. Then you'll continue by removing the vehicle's brake light fuse located in the fuse panel. 3. Continue by cutting the brake light wire a few inches down from the cold...
    view full answer...
    Image 1 for
  • Troubleshooting Trailer Brake Module Fault on 2008 Ford F-250 w/ a Factory Controller
    Are you talking about the factory brake controller? If so it sounds like you may have a short in the wiring on your 2008 Ford F-250. You can use a Multimeter like item # PT29ZR to check this at your 7-way by checking for continuity with the brake wire and any other wire on the 7-way. You can see the terminals in the image below. If this is a factory controller, I recommend checking with your local dealer as well to see if there are any required re-flashes needed for it. Have you checked...
    view full answer...
  • Troubleshooting Integrated Trailer Brake Controller In 2019 GMC Sierra Not Applying Trailer Brakes
    I would be happy to help, but that is not a good way to test if your brakes are working or not. I recommend first checking the make sure that your trailer brakes are adjusted correctly, as if you have not adjusted them and have some miles on the trailer the adjustment is probably incorrect. I included a link a help article that goes over how to adjust the brakes. Next would be checking the brake magnets of with a multimeter like # PT29ZR. You will need to test each brake magnet and see...
    view full answer...
  • Is Increasing Redarc Brake Controller Setting for Trailer Brakes a Problem?
    Hey Barry, thanks for reaching out! It's not uncommon for people to change their controller setting over time as they fine-tune how it interacts with their setup, but if you feel like your trailer brakes were needing to be at a higher setting to get the same amount of braking then it would be worth using a multimeter like part # PT29ZR to see if you're seeing a high amount of voltage drop when it gets to your trailer brakes. Let me know what you find out either way!
    view full answer...
  • Troubleshooting Vent Lid On MaxxAir MaxxFan 4500K Not Opening With New Circuit Board and Lift Motor
    I reached out to MaxxAir as I was stumped since you had replaced both the parts already. Their tech said you will want to first check the voltage going into and coming out of the Circuit Board # MA10A21275K with a Meter # PT29ZR where the lift motor plug is on the circuit board. If the voltage is not 12 VDC coming out of the board then the board is bad. Then you can also get a separate power supply like a 9 volt battery and run some lead to the lift Motor # MA10-20270 to see if it rotates...
    view full answer...
  • After Installing The Fan-Tastic Fan Upgrade Kit The Remote Wont Program
    I spoke with Dometic and they reccommend that you triple check that you have followed the instrucitons exactly they way they are as there is a jumper cable that is meant to be installed if you have the pancake style motor, and if left out you will experience exactly what you're experiencing. I have attached an image that shows this for you to check out. Additionally, you're going to want to verify that you have a 7350 series fan, as the upgrade kits # FV807359 & # FV807357 are designed...
    view full answer...
    Image 1 for
  • Troubleshooting Water Heater and Kitchen Outlets Not Working on a Vanleigh Vilano 5TH Wheel Camper
    The Converter Section # PD4575CSV for your PD4575K18LS8 power center should only affect the 12volt portion of the electrical system on your 2024 Vanleigh Vilano 5th wheel. This might explain the water heater issue as the control board is often powered by 12 volt power. Your wall outlets are generally 120 volt power and should not be an issue with 12 volt power. What may have happened is kitchen outlets should be GFCI which may all be linked to one outlet either in your kitchen or bathroom....
    view full answer...
  • Troubleshooting Slide Out Switch To Controller Wiring Issues
    Yes, the Lippert Slide-Out Switch Assembly # LC117461 is going to work with the Lippert Controller 2.070 x 1.5 - PART 10665 # LC135666. The wiring harness # LC135696 that connects to the controller is going to have a green and a yellow wire for the in and out functions of the slide out switch. The yellow wire both this harness and the switch wiring harness is for the out function and the greens are for the in function. I recommend first checking that these wires are spliced together correctly...
    view full answer...
    Image 1 for
  • Troubleshooting A Non-Operating Advent Air RV Air Conditioner
    The condenser unit for the Advent Air RV Air Conditioner w/ Air Distribution Box and Wall Thermostat # ADV94FR requires 115v service and the thermostat requires 12v service to properly operate. If all of your wiring is correct, as you stated, then either the power sources aren't meeting the requirements for the unit to operate or the unit is defective. I recommend checking the power source at condenser unit and at the thermostat with a multimeter like # PT29ZR to ensure that you're getting...
    view full answer...
  • Troubleshooting One Rear Jack Of HappiJac Truck Bed Camper Jacks LC736515-ELKIT Clicking
    Sorry to hear that! First things first check that you're getting a full 12v (really 12.8v) from the battery to power your Happi Jac electric jacks # LC736515-ELKIT, which you can do with a multimeter # PT29ZR set to read dc volts. If you're not quite getting 12.8v you can run into clicking as there's not enough power for the motor. If you find you're getting enough power then test the connector for the motor in question to see if you're getting power to the connector. If you are then...
    view full answer...
  • Troubleshooting the Curt Spectrum Brake Controller
    It sounds like you are not getting enough power to your Curt Spectrum Trailer Brake Controller item # C51170. You will want to take a multi-meter like the Item # PT29ZR and ensure you are getting power to your controller. You should be getting 12 volts on the black power wire and when you hit the manual over ride you will get 12v on the blue brake controller wire. If you aren't getting full power you will have a loose connection somewhere and you will want to start at your fuse and work...
    view full answer...
  • Load Resistor For Correcting LED Trailer Running Lights That Light Dim When Vehicle Is Turned Off
    The Load Resistor Kit # DI34ZR is rated for up to 50 watts of power per resistor. While it is likely that all the LED running lights on your trailer use less than 50 watts of power you will want to verify this for all of your lights. You can use a Multimeter # PT29ZR to find your amperage being pulled for the running lights and find the wattage(Watts = Amps x Volts). Depending on your power consumption this will tell you how many and where the resistors need to be placed. It appears...
    view full answer...
    Image 1 for
  • Lippert Solera Awning Instantly Blowing Fuse
    If your fuse for your Solera Smart Arm 12V Power RV Awning # LC517517 is blowing as soon as you replace the old one, then there is a short circuit somewhere, or there is an unusually high amp draw. Since you're saying the fuse blows immediately, then it is almost certainly a short circuit, because a high amp draw will allow the load to run a bit and then blow. I recommend running through all your wires and ensure they are in good working condition and not frayed or there is exposed wire...
    view full answer...
    Image 1 for
  • Why Does Only One Of My Trailer Brakes Lock Up When Driving But All Will Stop When Adjusting Brakes?
    You may have some bad magnets in your brakes. It seems odd that 3 of the 4 would go bad but I have some tests that you can run to determine if they are bad or if the 1 magnet is bad and drawing more power than it should be. The wiring in series in normal for trailer brakes and does not explain why you are having the issue. The first test you should run is to see what power your brake controller is putting out when your trailer brakes are applied. For this you will need a Multimeter #...
    view full answer...
  • Troubleshooting Thermal Fuses On An Everchill RV Refrigerator That Does Not Work
    For your Everchill RV Refrigerator w/ Freezer # 324-000119 I believe they're referring to the thermal fuses which are internal to the refrigerator and won't be on the fuse panel with the rest of the fuses. If you refer to the rear of your refrigerator, you'll find a wiring diagram which I've also attached to show where the two fuses are located. In order to test your thermal fuse, you're going to need use a multimeter # PT29ZR and locate the wires that connects to the thermal fuse. Then...
    view full answer...
    Image 1 for Image 2 for
  • Troubleshooting A Furrion Chill A/C That Wont Turn On After Installation
    Sorry to hear about the troubles you're experiencing! Since your Furrion Chill Replacement RV Air Conditioner for Coleman Setup # FR42PV is not switching on at all, that usually means one of 3 things. 1. The voltage is too low - In this case, you're going to want contact an authorized service agent to have them come and check it out. 2. No supply voltage is connected - In this situation, you're going to need to check the power supply and ensure the unit is getting the proper operating...
    view full answer...
  • Furrion Tankless Water Heater Improperly Heating To The Temperature Its Set To
    There may be a couple of reasons your Furrion RV Tankless Water Heater # FR93FR is heating up hotter than what the set temperature is. More than likely it's something as simple as your thermostat being set too high, or you have a malfunctioning thermostat. You can verify if the temperature is set too high, by checking your thermostat and set it lower if it's necessary and check to see if the issue persists. Alternatively, you can use a multimeter # PT29ZR to monitor the continuity as...
    view full answer...
  • Trailers Electric Brakes Not Functioning, But Show 12V at Brake Signal Wire on Brake Assembly
    Since full power is reaching your trailer's brakes, but they are not working properly, I recommend checking the ground for each brake assembly. It is important that the brakes are grounded to a clean, bare metal surface of the trailer. Dirt, corrosion, and rust can all interfere with a ground. If they are not already, I recommend grounding all of the brake assemblies to the trailer's main ground. You can use 10-gauge wire # 10-1-1, to route all of the brake assemblies' grounds to the...
    view full answer...
  • How To Determine What A Good Ignition Source To Install A Firestone Extreme Duty System Is?
    In order to determine the correct 12v, 30 amp, ignition activated power source for your Command I Xtreme Duty Compressor with Analog Gauge, Air Tank, and 25' Hose # F2543, you will need to physically test with a multimeter # PT29ZR, or refer to your owner's manual for which circuits come on with the ignition, and which ones are at 30 amps. Unfortunately, we cannot tell you which circuits those might be, as these will vary from vehicle to vehicle. I have attached a piece of the wiring...
    view full answer...
    Image 1 for
  • Troubleshooting A Jensen JWM70A RV Stereo System With A Non-Functioning Display Light
    I would first start by checking the power with a multimeter # PT29ZR at your Jensen RV Stereo # JWM70A to ensure that it's receiving 12v DC. If it's receiving less then it can still work but not fully function how it should. If it's not then you'll want to retrace your wiring and ensure that you don't have any damaged wire, kinks/bends, that the power source (battery) is fully charged, and that your ground wire is making a solid connection with a bare metal surface. More often than not...
    view full answer...
  • Troubleshooting Electric Trailer Brakes That Don't Activate Simultaneously
    For testing this I recommend a Multimeter # PT29ZR to check the different components of the braking system. You can test the continuity of your wiring from the 7-Way to each individual brake magnet. It can help you identify if there is damage internal to wiring that you cannot see. If that checks out you should test the magnets in the brakes themselves. We have a great Article for this linked below. For your brake magnets each one should have 3.0-3.8 Ohms of resistance. Then to determine...
    view full answer...
  • Weak Brakes on One Axle of Tandem Axle Trailer
    So the first thing you'll want to do is just check the brake magnets to see if there is proper power getting to them, which you will need to do with a multimeter like the Digital Multimeter # PT29ZR. I've added a link below to a help article which explains how to do this, but you'll want 3.2-4.0 Max amps at 12-13 volts. If that's fine, it is possibly the ground being weak at the rear axle. I'm not sure where your ground is, but you can try and relocate the ground wires from the magnets...
    view full answer...
  • Troubleshooting Curt Spectrum Brake Controller # C51170 in a 2021 Chevrolet Silverado 2500HD
    We have not yet been able to install a Brake Controller # C51170 on a 2021 Chevrolet Silverado 2500. The thing that I do not like to hear is when you replaced the controller your issues changed. I would begin by checking the Curt Custom Wiring Adapter # C51525 for the ensure that it is receiving the correct power from your Silverado. You can use a Test Light # PTW2992 or Multimeter # PT29ZR to test the adapter wiring. With the ignition on you should have constant 12 volt power to the...
    view full answer...
  • Troubleshooting Trailer Running Lights Operating at 5 volts With Curt 4-Way On a 2019 Mazda CX-5
    You are correct that there should not be any power to the running lights/tail lights when your headlights and running lights are off on your 2019 Mazda CX-5. It sounds like you have a short in the wiring. You can use your Multimeter # PT29ZR to test the power going into and out of the Curt T-Connector # C56377. This is the most likely culprit as the only power inputs on the trailer for a 4-way are the running lights, brake lights and turn signals. If Curt is unhelpful for resolving your...
    view full answer...


< Previous


Do you have a question about this Electrical Tool?


Info for this part was:

Employee Kathleen M
Installed by:
Kathleen M
Employee Wilson B
Updated by:
Wilson B
Employee Matthew S
Written by:
Matthew S
Employee Daron K
Edited by:
Daron K

At etrailer.com we provide the best information available about the products we sell. We take the quality of our information seriously so that you can get the right part the first time. Let us know if anything is missing or if you have any questions.


Product Experts Available Now!
Call 1-800-940-8924
<