
 Product Experts Available Now!
Call 1-800-940-8924


To see if this custom-fit item will work for you please tell us what vehicle you'll use it with.


Thank you! Your comment has been submitted successfully. You should be able to view your question/comment here within a few days.
Error submitting comment. Please try again momentarily.


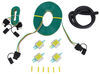
Wiring a trailer doesn’t have to mean cutting into your vehicle’s wires. The Curt T-Connector Vehicle Wiring Harness with 4-Pole Flat Trailer Connector plugs inline with the tail light assemblies using matching gray connectors. It gives you a factory-style connection that’s ready to go—no guessing, no splicing, just plug it in and it works.
To keep your trailer lights powered and protected, the harness uses an integrated powered converter. You attach the included black power wire to the positive battery terminal and ground the white wire to a clean metal surface. That direct power feed keeps the trailer lights from overloading your vehicle’s lighting circuits and makes sure they stay bright and consistent.
The harness installs right at the back of the car’s tail light assemblies, so you don’t have to run wires all over or take apart interior trim. Once the connectors are in place, it’s just a matter of routing the 4-flat lead where you need it for towing. Most folks can have it done in about the time it takes to watch a short install video.
The built-in 4-flat connector handles running lights, turn signals, and brake lights—everything you need for small trailers. It gives a secure, weather-resistant connection that stays out of sight when you’re not towing but is ready whenever you hook up your trailer.

Videos are provided as a guide only. Refer to manufacturer installation instructions and specs for complete information.
Rob: Hey everybody. It's Rob here at etrailer.com. And today we're going to be taking a look at the CURT T-connector Vehicle Wiring Harness on our 2018 Chevrolet Cruze. Now here's what our wiring harness is going to look like once we have it installed, it is going to provide us with a 4-pole flat trailer connector. So whenever we are pulling a trailer, we have all the required lights to get down the road safely.Like our turn signals, our stop lights and our tail lights. Now a 4-pole connector is going to be one of the most common connectors on trailers, especially with some smaller utility trailers and boat trailers.
But our wiring harness is compatible with adapters in case your trailer has a larger, maybe a six, 7-way connector on it. It's definitely adaptable. So you can use it with those connectors as well. You just need an adapter that is sold separately.Now our wiring does come with a dust cap, which keep all that dirt and debris out of it. But you also notice that our wiring is actually coming out of our trunk and that's because whenever we're not using it, the wiring harness is actually going store inside of our trunk.
Typically, a good spot to keep it is underneath this panel down by your spare tire. That way, whenever you do need it, you can grab the bundle of wire. We can drape it out the back. As long as we stay away from the latch mechanism, the weatherstripping here provides plenty of cushion where the wire not going to get damaged or anything like that.And it's really nice to have it on the inside, especially if you don't tow a whole lot, because then the elements aren't going to beginning to our wiring, we're not going to have to worry about the sun damaging the insulation or the rain getting to the connectors causing corrosion buildup. It'll be nice and protected inside of our car.
And again, whenever we do need it, we can just drop it out the back hatch, stay away from the latch mechanism, close it up and we're ready to hook up.Now fortunately for us on our Cruze, the installation is actually really straightforward. We're just going to have a T-connector that's going to go in line between each one of our tail lights and accessing the wiring is really easy too. Everything is going to take place inside the trunk. So we'll just remove these panels, get back there and make our connections. But the nice thing also is that our CURT wiring harness is powered.
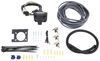
So it's not going to be taking too much power away or overloading our Cruze's tail light circuits, because it's going to have its own power wire that's going to go directly to the battery.And again on our Cruze, our battery's in the trunk. So it's really easy to access. We're not going to have to worry about running a wire into the engine bay. The CURT T-connector harness is also going to have a converter box to take the working signal from our Cruze and turn it into a trailer signal for our connector. But the converter box is also going to help protect our wiring. In case there's a problem on your trailer, it's going to prevent it from backfeeding and causing any kind of electrical issues.Now, some customers do you want to mount their wiring to the outside by their hitch and we have tons of brackets available. So you can mount this up, have a really clean look on the outside, but it is designed to stay on the inside. If you have enough slack in your wiring, there is a grommet underneath the threshold panel here towards the driver's side, and we should be able to sneak the wire out. But I think there's more benefit to keeping the wire on the inside so it's protected and out of the elements.But now that you've seen what it looks like and gone over some of the features, let's show you how to get it installed so you're going to have the confidence to do it at home. To begin our installation, we want to open up our trunk and we're going to remove all the floor coverings. So there'll be a big panel that's covering the spare tire. We'll pull that out, set it aside. Then also underneath that panel, we're going to have these foam panels. We're going to pull these out and set these aside as well.Now, the very back of the trunk opening, right where the threshold is, we want to follow that panel till we get to the bottom so we can grab the bottom of the panel and we want to lift straight up. There should be some clips. Once you get it broke loose, you kind of want to just grab the edge, start working your way across till we get all those clips release and pull the panel out. And again, we'll set this aside.Now, that we come over to the passenger side, right as you come to that fill panel with the carpeting, we'll have a push pin down here at the lower corner. And then also one closer to the tail light on the upper corner. We're going to pull those push pins out. Easiest ways to get yourself a flat blade screwdriver or a trim panel tool. We just want to pry those out. You kind of have to work at them a little bit, they have these little tabs to kind of hold pressure to keep them in. So let's pry those out. Pull the bottom one out. We want to pull the liner back. Just kind of push it out of the way for now we're going to be exposing the connector right here.So we don't need to push it too far, but you want a little bit of room to work with. Since we're on the passenger side, we want to grab our wiring harness and we're going to be looking for the T-connector that has the green wire on it. So we can come to our factory connector. We'll press down on this tab and we'll pull the connector apart and you'll notice that our new harness is going to match up. So we just want to plug the male into the female and the female into the male.That way it'll come from our light, go through a harness and back out to the tail lights. If you come down on the wiring harness a little bit, you'll find a white wire with a ring terminal on it. This is going to be our ground. Now they do provide you with a self-tapping screw so you can screw it into the body. But I would prefer not to put any more holes than we have to. So we have a stud with a nut right next to our tail light plug. So I'm going to use that. We'll just use a 10 millimeter socket to remove the nut.We'll take our ring terminal, slide it over the stud. And we just simply reinstall that nut and tighten it back up. Now we want to find the T-connector that has the yellow wire on it. This is going to connect over on the driver's side the same way. So you just want to run our wire along the back of the threshold here. That way it will not interfere with anything else inside and it'll be protected once we put our threshold back in place. But if we come over to the driver's side panel, we're still going to have that lower push pin. But instead of having a push pin up here, we have this tie down hook and there's a bolt on the bottom that we're going to have to remove to pull this panel out.And to pull that tie down hook out on the bolt, we use a seven millimeter socket. Once you have those removed, you simply just fold the panel out of the way, just like the other side. We'll take our yellow connector, bring it over and plug it in over here. So now if we come back to the passenger side where our converter box is, we should still have one more wire coming off of it and it's going to be the black wire. And this'll be our power wire. So this needs to run up to the battery. Now, fortunately for us, our battery is just a little bit forward in the trunk, but this wire is not long enough. So we'll get one of the butt connectors out of our kit, slide it over to the stripped end and we'll crimp it in place.We can grab the length of wire out of our kit. Now this is more than enough wire, but like I said, this isn't going to reach the battery so we can just leave all that excess on there until we know exactly how much we need, but we'll strip back the end of the length of wire. Then we can crimp it into that butt connector. Give it a quick tug, make sure it's secure. And we want to find a spot in this area that we can mount our converter box.Now there's a couple different ways we can do it. We can use some zip ties and wrap it around, find something to zip tied to or we can use the double-sided sticky tape and stick it directly to a panel back here so it won't be in the way. I'm just going to pull the backing off of one side of the tape, stick it directly to the converter box, press on there so it has a good, solid connection. We'll remove the other side of the backing.Now, really you want to find the flattest spot you can so the tape has enough surface area to stick to. So I think I'm actually going to go right behind this panel on the backside that way our fill panel will go back in and we don't have to worry about it interfering. So we'll just come to the backside of this panel, we're just going to stick it directly on there and kind of press to make sure it sticks good.Now we want to take some of this excess black wire and I'm going to run it along the inside of this panel and then kind of poke it out towards the back of the battery there so we can make our connections. There's no reason why we need to have it in this area so we can hide as much of the wire to keep it protected. And then again, just kind of jump over to the battery area. Tuck the panel out of the way, start feeding our wire back towards the back.Once you have your wire towards the battery, again, we really don't need all this wire. So I'm going to go ahead and trim the excess off. I do like to give myself a little bit of slack. We'll trim the excess off and we want to strip back the end of the wire. Grab another butt connector from our kit, slide it over and crimp it down. We're going to grab the fuse holder out of our kit. And this is already pre-stripped, we just have to pull the insulation off the ends. We'll take the free end, put it into the butt connector and crimp it down.With the other end of our fuse holder, we're going to grab the ring terminal out of our kit, slide it over and crimp it in place. You kind of want to just route your wire towards the positive post of the battery, which should be towards the driver's side. We can grab a 10 millimeter socket. I'm going to pull the bolt out right on top here. You do want to be mindful because there is another ring terminal attached there. So you want to make sure that goes back in place if it does come off. We'll take our ring terminal, slide it so the bolt goes through, and we simply just tighten it back down.I do want to mention when you're connecting it, you want to leave the fuse out of the fuse holder so we don't cause any shorts. Now that it is connected, we can take that 10 amp fuse, put it into the fuse holder and close up the lid. We can start working on putting all the panels back in place. You're going to push these push pins back in and it's a little bit of a snug fit, but we're just going to push them and make sure they're fully seated. It's all there really is to it.And again, I am going to tie up my yellow wire here to some of these panels before I put my threshold back in. That way I know it's not going to interfere and it'll be nice and protected behind it. We can finally put our floor covering back in place. You just want to make sure you leave that 4-pole wire accessible, have it come out the panel on the side here, because then whenever we're not using it, we can store it in the trunk.But the last step is going to be testing our wiring to make sure all the circuits work properly. So I'm going to grab a tester, hook it up and verify all the lights do work. So if I turn on my headlights, we can see that my tail light function is working. My left turn signal, my right turn signal, my brakes and my brakes and both turn signals. All we have to do now is hook up to our trailer and hit the road. But again, I'm Rob here at etrailer.com and that'll finish up your look at the CURT T-connector Vehicle Wiring Harness on our 2018 Chevrolet Cruze.
Customer Satisfaction Score:
89% were satisfied with this product
11% of customers were not satisfied
Ratings & Reviews


Jameson K.

2/8/2020
A year or so later this thing is still working well. I haven’t blown the fuses with the trailer wire yet. Simple and clean install and the wires don’t interfere with my trunk space. I still plan to buy another of this style for my next vehicle.
Matthew
5/24/2025
The left side stopped working a few weeks ago. I verified it is the harness with a multimeter. Since the harness is not repairable. I will now have to purchase another. Not sure if Ill order this one again. Not happy.

Cp3
9/30/2023
Still working 100


Do you have a question about this Custom Fit Vehicle Wiring?
Info for this part was:
At etrailer we provide the best information available about the products we sell. We take the quality of our information seriously so that you can get the right part the first time. Let us know if anything is missing or if you have any questions.





















Tom
7/28/2020
Year later. Still working.