
# 1
Rhino-Rack Ski and Snowboard Carrier - Locking - 6 Pairs of Skis or 4 Boards
Great product at a great price. Fit an adult snowboard, two sets of adult skis (one set stacked, one set side by side because of how close the bindings were to the roof), and a set of youth skis. Fit snug. Only got up to about 73mph on the highway, but no issues. Some normal fluttering on the snowboard/skis. If you have a torque meter to tighten the bolts that's ideal but I didn't. I just got them snug enough to where I pulled back and forth on the rack and it didn't move.

Works awesome with the snowboards, easy to attach/detach, and durable. Locks and holds fine, initial ordering was confusing and hard to figure out since it’s not a package, and had to get individual components. Rhino rack could definitely improve that! Otherwise it would be 5 star.
# 2
Rhino-Rack Ski and Snowboard Carrier - Locking - 3 Pairs of Skis or 2 Boards
etrailer ships fast and has great prices! While the rhino track is plastic and not fancy, I’m able to attach 2 snowboards and it works. You have to help it with the hand to get it aligned to lock (maybe due to new stuff rubbers?) but I’m pretty happy and took about 15 minutes to install. If you want something on the cheaper side, this is a great option and these guys will ship FAST
We bought these to go alongside a roof box and they work great, freeing up space in the roof box for all the other stuff you need for skiing. They are sturdy, don't wobble on our Thule bars, and the lock mechanism works well. They would fit 3 pair of x-country or narrow alpine skis; with wider alpine skis you only get 2 pair (there is about 300mm of room on the rack and while many skis are <100mm underfoot, they are 15-35mm wider at the widest part so you can only fit 2 pair).
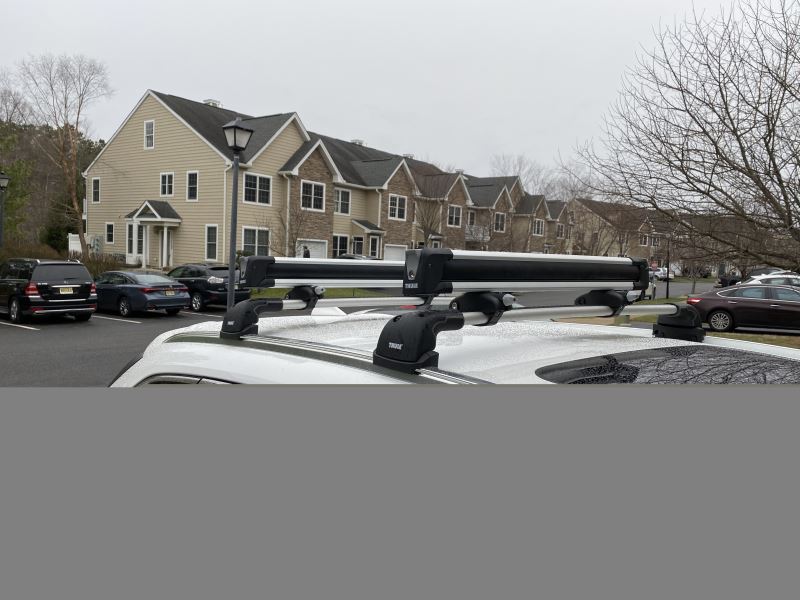
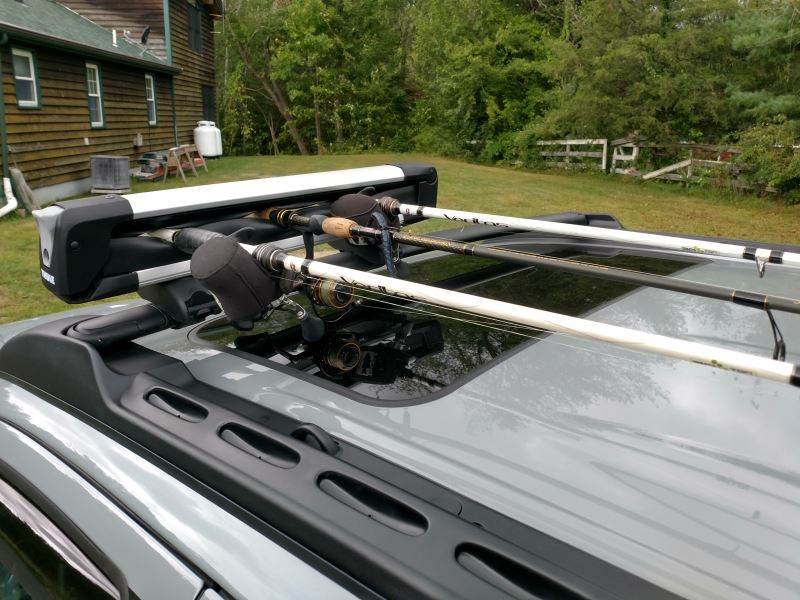
# 3
Rhino-Rack Ski and Fishing Rod Carrier - Locking - 2 Pairs of Skis or 4 Fishing Rods
This rhino product was the perfect solution for me. With a roof rack nearing capacity, I still wanted an accessory for my fishing rods AND ski’s. This rhino product filled that need! Super easy to install in the T-track. Thanks agan!
Last year I purchased Rino ski racks from etrailer and they work great . The hardware fit my roof racks and all the fittings are tight. Ordering was easy. Shipping was fast and I even got a follow up personal email from George a year later asking how I liked them - which was impressive! I would definitely recommend etrailer as an honest and good outdoor gear company!
# 4
Yakima FatCat EVO 4 Ski and Snowboard Carrier - Locking - 4 Pairs of Skis or 2 Boards
Very well built. I like it so much I purchased the larger EVO 6 model too for when the this one isn't enough.
I actually ended up buying a second set so I can fit a total of 8 pairs of skis on my jeep. I love the quality and ease of installation. It’s an easy to use system and love that my skis are secured.
# 5
Rhino-Rack Ski and Snowboard Carrier - Locking - 4 Pairs of Skis or 2 Boards
Decent rack for the money. The locks are a bit finicky due to the metal/composite combination. They definitely require graphite lubricant regularly. I've only used it with 2 pair of skis and it works well.
Howzit etrailer.com & staff. the rack itself is sturdy and more aero than comparable units. For my 2017 Subaru Crosstrek (OEM) Aero Bars, it was necessary to shim the (rear) lower/leading edge clamp assembly with two 1/8” x 1.5” x 1.5” (EPDM) rubber pads. The bars are shaped like a wing – and these shims helped to level the rear rack with the one in front. Overall - it looks very clean and functional. I might screw on some rubber ends over the ends of the mounting bolt to complete the project. Time to make some turns. Thank you!!
# 6
Thule SnowPack Ski and Snowboard Carrier - Locking - 6 Pairs of Skis or 4 Boards - Silver
So easy to install onto Thule AeroBlade. Quality materials and convenient design. No significant noise noticeable from wind resistance when driving. etrailer provided great shipment/notification support and was great resource for how-to videos, commentary.
Better than I expected. Only comes with four core locks so be aware of that if you want six like I did. Bought two more locks from Thule with the same key #. Mounted this carrier on my Rhino Rack. Perfect fit and looks great. Would highly recommend.
# 7
Yakima FatCat EVO 6 Ski and Snowboard Carrier - Locking - 6 Pairs of Skis or 4 Boards - Black
Just got my Yakima Fatcat EVO 6 ski carrier (black finish) and I am stoked. Note that this is different than the Fatcat 6 (non-EVO, previous generation) carrier. This is my first ski carrier, but I and/or my kids ski about once a week at Alta and Snowbird when the lifts are running, so I expect it to get lots of use. Etrailer shipping was fast and item was packed in a sturdy secondary box. PROS: 1. I love the sturdy build and quality finish of the carrier. 2. The design allows many micro-adjustments to fit to your vehicle and to fit the skis. For instance the spring-loaded hinge on one end and the lock on the other end can naturally accommodate different thickness skis. 3. Carrier has a usable width (i.e. width of skis side by side) of 32.75 inches (832 mm). For those that are not skiing on 75-mm-wide skis from 30 years ago, this carrier might actually allow you to fit 6 pairs! 4. Separate mounting brackets for aero or for square/circle cross bars. The aero brackets fit securely on my Acura/Honda OEM cross bars. The flat part of your skis will be about 3 inches (76 mm) above your cross bars. 5. A built-in lift bracket that lifts by an additional 3 inches (76 mm) the hinged end of the carrier, if you have really tall bindings (I don't think I'll need to use it). 6. The aero brackets use a rubber coated steel strap to wrap under your cross bars. This strap has a quick release cam on one end that can be operated when the carrier is not key-locked. This means you can remove or install the carrier without tools in about 4 minutes, once you've done the initial install-related tuning. While the carrier seems sturdy enough to leave on the vehicle all winter, I expect I'll only install it on ski days. This feature really sets this model apart and for me was its biggest selling point. 7. Yakima packages the carrier in a nice-looking sturdy cardboard box with a flap lid. I can fit the two parts of the carrier in the box, with the brackets/straps still installed, for convenient storage (see picture). CONS: None so far, though I haven't yet actually hauled skis up the mountain! After this ski season is over and eTrailer asks me for a follow-up review, I'll let you know. I'm also thinking about seeing if the ski carrier can be attached to my small hitch-mounted cargo carrier. That would make loading and unloading the skis easier than on the roof.
First off...you can't beat the service of etrailer.com. I was looking for a ski rack for my son's 2012 Subaru Impreza with the factory roof rack (base model not the sport). I could find no reviews of anybody installing one of these on one of those. I took the plunge and will say that I am very happy with the outcome. The installation is a bit tricky and four hands help, but after the first one was installed we had the hang of it and the second one went on very quickly. Even with the expedited shipping this rack was about $50 cheaper than the Subaru ski rack. Again the etrailer.com service is fantastic. I have purchased products here before and will do so again.
# 8
Yakima FreshTrack 6 Ski and Snowboard Carrier - Locking - 6 Pairs of Skis or 4 Boards
Looks great on the vehicle. Had a little struggle tightening onto the cross bars but adapted and overcame!
It's a ski rack so its not all that exciting. I like that it is small for storage reasons when not using it. The fastening system to my Toyota Highlander factory rack is secure but a little cumbersome to apply and take off. I like to take it off when not using it to preserve my gas mileage. The boards and skis fit fine although they are stacked in order to get 4 peoples worth of equipment up there. A small price to pay for their compact size on the roof or in the garage.
# 9
SeaSucker Ski and Snowboard Carrier - Vacuum Cup Mounted - 4 Pairs of Skis or 2 Boards
Quite an amazing product. When it arrives, you think, "Oh man, how is this going to make it the whole trip?" But I can tell you that I traveled from Fort Worth to A-basin/Keystone and back with no issues. That's 1640 miles there and back at speeds up to 85 mph and at least 3 of the world's climate zones on just this one trip. It is best practice to give each of the suction plungers a few taps every time you gas up, but I forgot a few times and it still caused no issues. Simple assembly with 4 suction cups and 2 of the high-density plastic racks that connect to each other with an included alan key and headless screw. Also includes the high tension straps you'll need to fasten skis/boards at the front and rear of your gear. When I say this rack was solid, I mean like I'd touch it to test for stability while driving and gassing up and it felt like it was sitting in hardened cement. Absolutely rock solid. And, there's a spare strap and plunger included. A couple minor things worth noting (but none of these could justify taking away from the 5-star rating I gave this product): - The suction cups require a clean surface, so don't take this lightly. I took mine to a car wash right before mounting. - The clean surface must also be smooth and seamless. I didn't notice until I started mounting that my truck has a grooved roof, so I had to put 1 rack on the bed cap roof. It worked great. - I wish there was an option just for skis b/c these racks were about 1" too tall to fit in the garage while mounted to the roof, and it's obvious the height of this product is to also accommodate snowboarders. Like I said, minor stuff. 5-stars all the way. You won't regret it!
After using this rack for a whole season, I’m very satisfied with it. Works exactly as expected. Very unique design that allows me to carry 2 boards on any car. You might be able to squeeze 4 if you can line it up so the bindings don’t touch. You do have to be careful mounting the rack on your car to make it stick. It’s important to wipe any dirt off and moisten your roof with a little mist of water, but after you do that it sticks really well. No problem driving 70-80mph with it. I really like having a sunroof to mount the front suction cup on because it allows me to watch the vacuum gauges to make sure that the rack is firmly attached from inside my car. So thankful to seasucker for making a product for those of us who drive sports cars and ski/board!
# 10
Thule SnowPack Extender Ski and Snowboard Carrier - Slide Out - 6 Pairs of Skis or 4 Boards - Black
Game changer! I don’t have to climb on the car to put our skis on the rack or take them off. It’s also easy to put the rack on the car and take it off. I’m got sure you could get six pairs of skis on the rack, but I haven’t tried. It’s certainly no problem getting four pairs.
I am so thankful I spent the extra money and ordered the one that pulls out to easily load/unload skies. I’ve had several opportunities where I have had 6 pairs of skies to transport. I have had others approach me to see if I would trade.
# 11
Thule SnowPack Ski and Snowboard Carrier - 4 Pairs of Skis or 2 Boards - Silver
Very nice racks perfect for my fishing rods, I like buying from etrailer there are first class company.
Excellent customer service and tracking. From ordering to delivery, this is the best experience it have ever had with an actual n line order. Highly recommend Looking forward to ordering in the future
# 12
Thule SnowPack Ski and Snowboard Carrier - Locking - 6 Pairs of Skis or 4 Boards - Black
This rack easily fits 5 sets of skis for my family. It is FAIRLY easy to take on and off (could be faster if we didn't have to turn turn turn the dials). My biggest complaint is that as soon as my skis are out of it, I HAVE to remove it from my car (SUV). The noise of it empty on my roof is so loud when I am on the highway it is AWFUL! It's like it vibrates my whole car and is super loud. It only does it when there are no skis in it. It is frustrating since it would be way easier just to leave it on all winter taking my skis on and off when we need to, not the entire rack.
Just put this snowboard rack on my 2011 4runner mounted to Thule Aeroblade roof rack. Easy to install and use. Quality seems good. Like the look. No noise issues when driving. No complaints so far. Overall satisfied!
# 13
Inno Ski and Snowboard Roof Rack - Dual Angle - Locking - 6 Pairs of Skis or 4 Boards
# 14
Yakima FreshTrack 4 Ski and Snowboard Carrier - Locking - 4 Pairs of Skis or 2 Boards
I love this ski rack and the service I got while making the purchase from etrailer! This rack securely holds up to 4 pair of skis and is super easy to put on and take off of the roof. I would highly recommend this rack to anyone. I would also highly recommend purchasing this product and any other rooftop rack needs from etrailer
We added two more racks to the two we already had on our Jeep. Easy to install and use
# 15
Inno Gravity Ski and Snowboard Carrier - Clamp On - Locking - 3 Pairs of Fat Skis or 2 Boards
Easy to setup. Installing and removing is very easy.
Great product, can fit 2 pairs of wide powder skis and poles in easily. No issues, left the carrier on year round
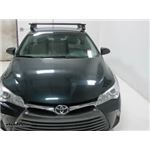
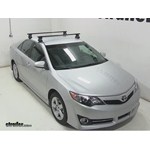
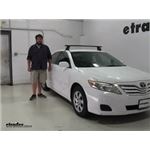
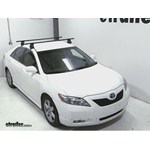
Mount: Custom DK Fit Kit for 4 Rhino-Rack 2500 Series Roof Rack Legs on a 2017 Toyota Camry
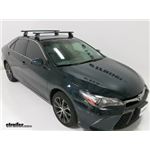
Today on our 2017 Toyota Camry, we'll be taking a look at the Rhino-Rack Vortex Aero roof rack. Part number for our crossbars today is RRVA118B-2. For our Rhino-Rack 2500 series legs, we're using RRRLKVA. For our custom fit kit for our Camry, we're using DK321. The Rhino-Rack Vortex Aero crossbars are an aerodynamic aluminum crossbar that will be perfect for your vehicle's roof. It's going to allow you to carry many roof rack accessories on your vehicle's rooftop. The roof rack system allows for channel mount accessories.
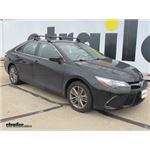
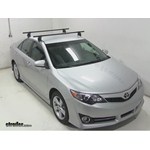
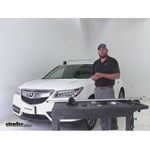
DIY 2017 Toyota Camry Installation for the Inno Aero Flush Roof Rack for Naked Roofs

Today on our 2017 Toyota Camry, we'll be taking a look at the Inno Aero Roof Rack System. Part number for our cross bar is INXB108-2, for our Inno Flush Feet we're using INXS200, and for our custom fit for our Camry we're using INK872. The Inno Aero Cross Bars are low profile, aerodynamic cross bars that allow you to carry any roof rack accessory on your vehicles roof. The cross bars help to reduce wind noise and drag giving you a smooth and quiet ride. The weather strip on the inside allows for use of channel mounted accessories. You would just push the weather strip down to insert that in which is also going to help reduce that wind noise and drag when you have those accessories on top. These cross bars also accommodate the clamp-on style accessories as well. The Inno Cross Bars allow you to open up space inside your vehicle by carrying all of your accessories on your vehicle's roof.
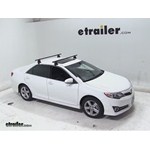
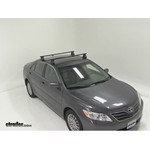
Install: Yakima RidgeLine Roof Rack for Flush Rails on a 2016 Toyota Camry
Speaker 1: Today on our 2016 Toyota Camry we're going to be test fitting the Yakima Core Bar Roof Rack System. The Yakima Core Bar Roof Rack System is great for carrying a wide variety of accessories on your Camry, such as bike racks, cargo baskets, and cargo boxes. It combines two things. It combines the strength of the round or square bars with the aerodynamics of your aero bars. While it is aerodynamic, it is going to cut down wind noise or drag. However, you cannot use T-track accessories with these bars.
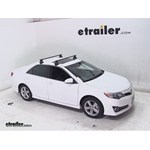
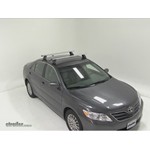
Thule Traverse Roof Rack Installation - 2016 Toyota Camry
Today on our 2016 Toyota Camry we're going to be test fitting the Thule square load bar roof rack system consisting of part numbers THLB50, those are the Thule square load bars 50" long, part number TH480 this is the Thule traverse roof rack foot pack, and part number THKIT1438, this is the Thule fit kit for the Camry. The Thule square bar roof rack system is great for carrying a wide variety of accessories and freeing up space inside your vehicle. It is a clam on style, very easy to install and comes with its own tightening tool which can go with you to each location. If you choose, you do have the option of adding Thule lock cores to the end caps here, so once it's installed you can actually secure it to your roof. These are sold separately and you can find them on etrailer.com. The square bars are very nice and sturdy bars to put on your roof, and with the pair they have a carrying capacity of 165 pounds, although you always want to double check with your vehicle's manual to ensure your roof can withstand that weight. Now that we've gone over some of the features of the roof rack, let' go ahead and show you how it installs. We already have our front bar installed.
DIY Install: Custom DK Fit Kit for 4 Rhino-Rack 2500 Series Roof Rack Legs on your 2016 Toyota Camry
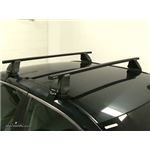
Today on our 2016 Toyota Camry, we're going to be test fitting the Rhino-Rack 2500 Roof Rack System, part number DS118B, these are the square crossbars 46" long, and part number DK321, and this is the custom fit kit for the Toyota Camry. The Rhino-Rack square bar roof rack is great for carrying a wide variety of accessories on your roof while freeing up space in your vehicle. It can carry anything from a bike rack to a cargo basket to an enclosed cargo box to ski and snowboard carriers and water sport carriers such as kayaks or canoes. The square bars are light-weight and durable and have a combined carrying capacity of 165 pounds, although you always want to double-check with your vehicle's manual to make sure it can withstand that weight. All four of our legs have these locking end caps, so once you install this onto your roof, it will be secured to your roof as well. Now that we've gone over some of the features of the roof rack, let's go ahead and show you how this goes on. We already have the front one installed, and we have the rear one in place here, which is partially assembled already. We'll start by flipping the bar upside-down and installing our leg. Here's our leg.
Set up: Inno Square Bar Roof Rack for Naked Roofs on a 2016 Toyota Camry
Today on this 2016 Toyota Camry, we're going to be test fitting the Inno Square Bar Roof Rack System consisting of part numbers INB127, these are the Inno Square Crossbars 50 inches long; part number INSU-K5, these are the Inno feet for the square crossbars; and part number INK872. This is the custom fit kit for the Camry. The Inno Square Bar Roof Rack System is great for creating a wide variety of accessories on your roof while freeing up space in your vehicle. Our self-tensioning knobs here at the end will lock into place. Once this is attached to your roof, it's secured to your roof as well. The square bars are nice and sturdy and have a carrying capacity of 120 pounds, although you always want to double check with your vehicle's manual to make sure it can withstand that weight. Now that we've gone over some of the features of the roof rack, let's go ahead and show you how it installs.
Rhino-Rack RS 2500 Vortex Aero Roof Rack Installation - 2016 Toyota Camry
Today on our 2016 Toyota Camry, we're going to be test fitting the Rhino Rack RS2500 Roof Rack System, part number RRRS346B. This also comes in silvers, part number RRRS346. The Rhino Rack RS2500 Series Roof Rack System, is great for carrying a wide variety of accessories on your roof, and freeing up space in your vehicle. It can carry bike racks, cargo baskets, cargo boxes, water sport carriers, ski and snowboard carriers. All of our legs come with these locking end caps, so once you install this to your roof, it's actually going to be secured to your roof as well. With the two bars combined, it has a carry capacity 165 pounds. You always want to double check with your vehicle's manual to make sure it can withstand that weight though. Let's go ahead and show you how this installs.
How to Install: Inno Aero Roof Rack for Naked Roofs on your 2016 Toyota Camry

Today, on our 2016 Toyota Camry, we're going to be test fitting the Inno Aero roof rack system consisting of part numbers INXB130-2, these are the Inno Aero crossbars, 51-inches long, part number INXS250, and these are the Inno through feet for the Aero crossbars, and part number INK872, and this is the custom fit kit for the Toyota Camry. The Inno Aero roof rack system is great for putting accessories up on your roof and freeing up space inside your vehicle. With removing our end cap here, you can see it has this nice rubber strap along the center here. Now, that coupled with the aerodynamic features of the bar will cut down wind noise and drag. Also, by pushing down on this, you can install T track accessories for your roof rack. Now, a lot of other roof racks will require you to remove the rubber strip and cut it to length, but this, all you have to do is push it down. Then reinstall your end cap. All of our through feet have these locking end caps here, so once you install this onto your roof, it's going to be secure to your roof.
Setting up the Custom DK Fit Kit for 4 Rhino-Rack 2500 Series Roof Rack Legs on a 2016 Toyota Camry

Today in our 2016 Toyota Camry, we're going to be taking a look at the Rhino Rack Vortex Aero roof rack system consisting of part number RRVA118B-2. These are the Vortex Aero cross bars 46" long. We'll also be using part number RRRLKVA. These are the 2500 series legs for the Vortex Aero cross bars. And part number DK321. This is the custom fit kit for the Toyota Camry.
Installation Guide for the Inno Aero Flush Roof Rack for Naked Roofs on a 2016 Toyota Camry
Today, on our 2016 Toyota Camry, we're going to be test fitting the Inno Aero crossbar roof rack system consisting of part numbers INXB108-2, these are the Inno Aero crossbars, 42-inches long, part number INXS200, these are the Inno flush feet for the Aero crossbars, and part number INK872, and this is the custom fit kit for the 2016 Toyota Camry. The Inno Aero roof rack system is great for carrying accessories up on your roof and freeing up space in your vehicle. Our bars have a rubber strip in the center and if you push this down, it'll enable you to use T track accessories for your roof rack. The rubber strip combined with the aerodynamic shape of the bars will also cut down wind noise and drag while you're driving. Now, when you push down to install your T track accessories, this is a bit of an advantage against other racks where you usually have to either cut or remove them to install these. These have locking end caps, so once you install this onto your roof, it will be secure to your roof, as well. Both bars have a combined carrying capacity of 165-pounds, although, always double check with your vehicle's manual to make sure it can withstand that weight. Now that we've gone over some of the features of the roof rack system, let's go ahead and show you how it installs.
Does the Rhino-Rack Vortex Aero Crossbars Suit Your 2014 Toyota Camry

Today on our 2014 Toyota Camry, we're going to be test-fitting the Rhino Rack Vortex Aero Roof Rack System in silver. We'll begin our test-fit by assembling one of the fit kits. We've got our Aero Blade here, part number RRVA118S-2. We have our Foot Pack, part number RRLKVA, and our Fit Kit, part number DK321. We'll go ahead and assemble this for you. That way you've got an idea how to do it at home.
Fit Check: Testing Rhino-Rack Vortex Aero Crossbars on a 2014 Toyota Camry
Today on our 2014 Toyota Camry we're going to be test fitting the Rhino-Rack Vortex Aero Roof Rack System in black part numbers RRVA118B-2 for our Aero Bar RRRLKVA for our foot pack and DK321 for our fit kit. We went ahead and assembled an installed the rest of the foot packs but I'll go ahead and show you how to do it on this one. The arrow here on the bottom of the bracket is going to face toward the outside of your vehicle. You also have an arrow on your pad here and that's going to be facing the front of the vehicle. We'll go ahead and press this on and move our bolt here, lay our clip in place and re-install our bolt. With that done we'll go ahead and turn our bar over here, remove the end cap, we'll then take and slide the block here into the channel. With that done we need to get our strip length. These will be included with your kit.
Thule Traverse Roof Rack Installation - 2014 Toyota Camry
Today on our 2014 Toyota Camry we'll be test fitting the Thule Traverse Roof Rack System using part numbers THLB50, TH480 and THKIT1438. With everything assembled according to the included instructions, we'll begin our test fit with the front doors open on our car. We'll place the front load bar onto the front of our roof and we'll need to measure 9 inches from the first part of the glass here at the front window to the leading edge of our foot pack. We'll need to make this measurement on both the passenger and driver's side of the vehicle to ensure the front bar is perpendicular to the roof of our Camry and the pads contour to the roof line. With the bar in position, we can use the included tensioning tool to tighten down the silver bolt on the inside of the foot which will bring the clips up tightly against the roof line. Now, we'll need to alternate tightening down each side a little bit at a time so the bar doesn't favor one side of the vehicle. Once that's tightened down and secure, we can place the rear bar onto the rear of our roof. We'll then need to measure the load bar spread.
Yakima Q Tower Roof Rack Installation - 2014 Toyota Camry
Today on our 2014 Toyota Camry we're going to be test fitting the Yakima Q Towers Roof Rack System using the 58" Round Bars. We'll use part numbers Y00409, Y00605, Y00716 and Y00124. With our rack assembled according to the manufacturer's instructions, we'll begin our test fit by opening our front door and placing the front half of our roof rack onto the front roof line. Per the Yakima fit guide we'll measure 8" from the rear edge of our windshield to the leading edge of our foot pack. We'll do this measurement on both sides to be sure we have our feet in line with each other. With both of our feet in line we'll now pull down on the black lever located on each foot pack to secure our clips around the underside of our roof line. With the front half of our rack secure we'll close our front doors, open our rear doors and grab the rear portion of our rack. We'll place it onto the rear portion of our roof.
Install: Yakima RidgeLine Roof Rack for Flush Rails on a 2014 Toyota Camry

Today on our 2014 Toyota Camry, we are going to be test fitting the Yakima Q Towers roof rack system using the 48 inch round bars. We'll use part numbers Y00408, Y00605, Y00716 and Y00124. With our roof rack assembled according the manufactures instructions, we'll begin our test fit by opening the front doors of our Camry and grabbing the front half of our rack. We'll place it on to the front roof line of our vehicle. For Yakimas fit guide, we are going to measure 8 inches from the rear edge of our wind sheield to the front edge of our foot peg. We want to take this measurement on both sides to be sure that we have our feet in line with each other. With our measurement done on both sides, we'll now pull down on the black levers which will tighten our clips around the underside of our roof line securing our rack to our vehicle. With the front hatch secure, we'll shut our front doors, open our rear doors and grab the rear half of our rack. We'll place it on to the rear portion of our roof.
Yakima Q Tower Roof Rack Installation - 2012 Toyota Camry
Today on our 2012 Toyota Camry, we'll be test fitting the Yakima Q Towers with Round Bar Roof Racking System, Part Numbers Y00409, Y00605, Y00716 and Y00124. Now, with our fit kit, our crossbars and our Q towers already assembled according to the included instructions, we'll begin our test fit by placing the front cross bar on to the front of the vehicle. We'll then measure from the first part of the glass to the first part of the tower. We'll measure this on both the passenger and driver side of the vehicle, ensuring that the front crossbar is perpendicular and the pads at the bottom of the Q tower are contoured to the roof line of our Camry correctly. Once we've established this position, we can then tighten down the silver hand bolts on the inside of the Q towers and clamp down the black lever securing the front crossbar to the front of the vehicle. We'll now place our rear crossbar on to the rear of our roof. We'll then measure the crossbar spread. Now, the crossbar spread is an important measurement when choosing roof rack accessories. The roof rack spread is the measurement from the center of the front crossbar to the center of the rear crossbar.
Thule Traverse Roof Rack Installation - 2012 Toyota Camry
Today on our 2012 Toyota Camry we'll be test fitting the Thule Traverse Roof Rack System, part numbers thlb50, th480, and thkit1438. Now with our feet, fit kit and load bars already assembled according to the included instructions, we'll place the front load bar onto the front of our roof. We'll then measure from the first part of the glass to the first part of the foot. We'll measure this on both the passenger side and driver side 9 inches. This will make sure that the load bar is perpendicular to the vehicle and the rubber pad on the bottom of the feet contour to the roof line correctly. Once we've established this position, we can use the included torque tensioning tool to tighten down the feet to secure it to the vehicle.
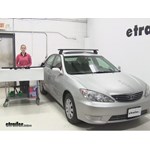
Fit Test: Custom DK Fit Kit for 4 Rhino-Rack 2500 Series Roof Rack Legs with 2011 Toyota Camry
Today on our 2011 Toyota Camry we're going to be test-fitting the "Rhino-Rack Roof Rack System." This consists of part numbers RRVA118B-2. Those are the "Vortex Aero Crossbars," part number RRRLKVA. Those are going to be the "Rhino-Rack 2500 Series Legs" for the crossbars. Then, part number DK114, that's going to be the clamp that attaches it to your actual vehicle. We have the front one installed already. As you can see, the bar has a nice aerodynamic shape to it. That is going to cut down wind noise and drag while you're driving.
Thule Roof Rack Review - 2011 Toyota Camry
Today on our 2016 Acura MDX we're going to be test fitting the Thule rapid traverse roof rack system. This consists of 3 different part numbers. We've got to start with our bar. This is the aero blade. Part number is THARB53. We've got our rapid traverse foot pack.
Thule Traverse Roof Rack Installation - 2010 Toyota Camry
Today, on this 2010 Toyota Camry, we are going to do a test fit of a Thule Traverse roof rack. Well be using Thule Traverse foot pack and a 50-inch Thule square low bars. We have our low bars pre-assembled according to the instructions, so Ill mount them up onto the vehicle and test them out. Well start off with the doors open and place the front low bar onto the roof. To properly position the bar, well measure from the trim edge of the wind shield to the leading edge of the foot pack. Always go by the instructions, in this case we will use the measurement of 9 inches.
Rhino-Rack Aero Roof Rack Installation - 2010 Toyota Camry
Today on this 2010 Toyota Camry we're going to install the Rhino Rack Roof Rack. Product number DA118 for the crossbars and DK114 for the clamp kit. For our quick test fit we went ahead and assembled the crossbars as described in the instructions and we'll just place them on the vehicle and see how it looks. We'll start off with the front crossbar. Let's lay it on the roof and we'll move it into its final position. To place the front rail we're going to measure from the center of the rail over to the center of the door jamb.
Thule Traverse Roof Rack Installation - 2008 Toyota Camry
Today on our 2008 Toyota Camry well be installing the Thule Traverse Roof Rack System using part numbers THLB50, TH480 and THKIT1438. Now weve already gone ahead and preassembled our roof rack system according to the instructions found within the fit kit so were ready to fit it to the vehicle. Well start by placing our front crossbar on top of the roof, well then measure from the windshield edge back on our roof 9 inches. This will be the location of the leading edge of the front crossbar feet. With our crossbar in place well open the door as the clamp will clamp to the inside of the door opening. We can then tighten down the two feet for the front crossbar using the included torque tool found within each foot.
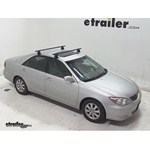
Rhino Rack Roof Rack Review - 2006 Toyota Camry
Today on our 2006 Toyota Camry, we're doing a test fit of the Rhino-Rack Vortex Aero Crossbars. Part number for our crossbars today is RRVA126B-2. For our foot pack, we're using RRRLKVA, and for our fit kit, we're using DK028. Now we already have our front bar on. We've got one of our foot packs on our back bar, which, let me show you this last one and then how to install it onto your vehicle. The first thing we'll do is take our foot pack here, and we're just going to undo this bolt and set it off to the side. Now we can take our clamp, place it onto our foot pack, and then tighten down that clamp into that foot pack, just enough so that it doesn't slip out. That's going to stay in place there as well. Then we'll take off the bottom portion here, and we want this arrow to face out on the outside of the foot pack.
Yakima Q Tower Roof Rack Installation - 2002 Toyota Camry
Today, on our 2002 Toyota Camry, we'll be test fitting the Yakima Round Bar Roof Rack System using part numbers Y00409 for the 58 inch bars, Y00639 for the Q39 Q Clips for the Yakima Q Towers, and part Y00124 for the Yakima Q Towers Roof Rack Feet for the Naked Roof. With our Roof Rack System assembled according to the instructions, we'll begin our test fit by opening both front doors. We'll grab our front bar and place it on to the front part of our roof. To ensure that we have this bar in the correct location we need to measure nine inches from the leading edge of the windshield to the closest point on our foot pack. We'll do this measurement for both sides of the vehicle to ensure that our feet are in line with each other. Once we have this set, we can use our thumb screw to snug our clamp to the roof line of our vehicle.
Thule Traverse Loadbar Installation - 2002 Toyota Camry

Today on our 2002 Toyota Camry, we'll be test fitting Thule Traverse Roof Rack System using part numbers THLB50, TH480, and THKIT1261. Withour roof rack assembled according to theinstructions, we'll begin our test fit by opening our front doors. We'll place our bar onto the front part of ourroof. We'll make sure that thepads are fitting correctly and then we need to take a measurement to make sure we have it in the correct location. Weneed to measure 9-1/4 inches from the leading edge of the windshield to the closest point onour foot pack. We'll do this measurement on both sides of the vehicle to ensure that our feet are in line with each other.


What our customers are saying:
"I like the easy of navigation through the site. It only took me a couple of minutes to place my order. Thank You I will shop this sight again in the future."