
To see if this custom-fit item will work for you please tell us what vehicle you'll use it with.


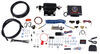
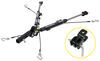
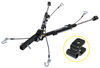
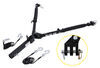
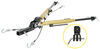
Designed specifically for heavy-duty applications, direct-connect brackets install onto your vehicle's frame to provide attachment points for a motor-home-mounted tow bar. Front arms are easily removable when not in use.
Features:
Note: Direct-connect base plates will work only with the Roadmaster tow bars that slide into a trailer hitch, such as the Nighthawk, Sterling, Blackhawk, Blackhawk 2, Falcon, and Falcon 2. These base plates will not work with tow bars that require a hitch ball.
Direct-connect brackets do not require a crossbar because of the heavy-duty nature of your vehicle's frame. Thus, installation is simplified, the hookup process is faster, and the total appearance is enhanced.
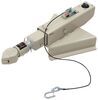
Note: The EZ Hook safety cables included with Roadmaster's Sterling tow bars will not work with direct-connect base plates. These cables connect to an anchor plate on the Quick Disconnect crossbar, which will not be present when you are using these base plates.
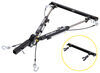
The drawbars, or front arms, on the direct-connect base plate kit are simple to mount and remove, easily securing with pins. Once the drawbars have been removed, the remaining brackets are virtually invisible. On most automobiles, the brackets are mounted within the grille, where they remain not only unseen, but protected from scrapes and scuffs as well.

California residents: click here
Videos are provided as a guide only. Refer to manufacturer installation instructions and specs for complete information.
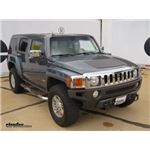
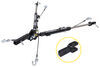
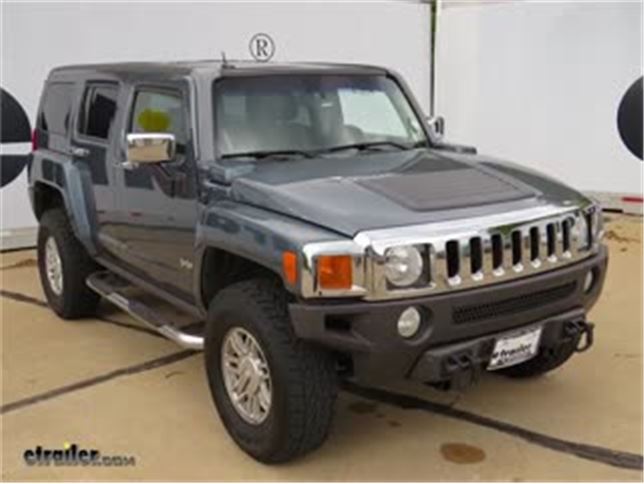
Today on our 2006 Hummer H3, we're going to be taking a look at and installing the Roadmaster MX baseplate Kit with removable arms, part number 2505-3. Here's what this base plate is going to look like once it's installed on the vehicle. It's pretty well hidden and doesn't really add much to the front of the vehicle unless you get down to where you can see it mounted underneath here. This is the receiver that the removable arm will go into. Right there is the pinhole for a 1/2" pin and clip to go through. Right over here, we've got our safety chain connection point. Then this smaller hole, on this side, is actually when you got the removable arm in place, it has one just like it that will line up to this one.
If you want, you can actually put a lock through there if you're wanting to leave your arm in. That way you don't have to worry about it being stolen. Installing this baseplate is a fairly easy installation. It bolts to the frame using existing holes that are already there in the frame. To install our removable arm we'll simply slide it into place. You can take your pin and clip and slide it through.
First thing we'll need to do to begin our installation is we'll need to remove this rock guard that's underneath here. It's going to be held in with four 13mm bolts. Then I'll reinstall the two bolts that held up the front of this other rock guard. At the sway bar here we'll need to take the 10mm bolts out of both sides of our strap that hold it up into place. Then we'll move to the other side, do the same thing in order to let the sway bar hang down out of the way away from the frame. Here on the driver side on the inner fender well this push pin that goes in just above the frame here, we'll need to remove that so that we can pull that fender liner out a little bit off of that frame.
You can take a flat head screwdriver and begin working that out of there. If it's not wanting to come very well you can take a pair of sidecutters and work them behind the edges so you can pull the center of it out. Once you've got the center pulled out you can pop the body of it out and it will be loose. Then there's one on the other side. It will just be right up here instead of along the side here. Now we'll take one of our long 1/2" bolts, along with one of our plates, put the bolt through.
Then we'll pull our fender liner back and then insert that bolt from the outside of the frame, going through the frame and coming out the inside. The hole that you want to be sure that you use is the one that's just behind this body mount bolt right here. Now we'll take our baseplate bracket and we'll slide it up into position here. You'll need to get it between the edge of the radiator and the inside of the frame. You'll want to be sure that you're using the one on each side so that this plate is on the inside edge of the frame. Then you can pull that bolt back through a little bit just so that you can slide the plate up over and reinsert the bolt all the way back through. On all of the bolts that we'll be installing in order to secure our baseplate to the vehicle we'll be installing red Loctite. You can get that on our site, part number LT37420. Then we'll install a 1/2" split lock washer and hex nut. We'll just leave those finger tight. Now on the inside of the frame we'll line up the two holes that are on our bracket with the holes in the frame. Then we'll take our longer 1/2" bolts and insert them from the inside of the frame rail so that they go through the hole on the outside. Now we'll take our angled bracket and we'll take the two holes that are spaced further apart and we'll put that on the outside of the frame over those two bolts that have come through. You'll want to make sure that the angled portion with the two holes that are closer together will line up with the two holes that have the weld nuts on the back of them on the baseplate itself. Then with that up in position, on each one we'll install a lock washer and hex nut. Next we'll take two of our 1-1/2"-long 1/2" bolts with a lock washer on them and thread them into the weld nuts that are built into this angled portion here on the baseplate. Then we'll repeat that process for the other side. Once we've got both sides up into place, then we can take our crossbrace and set it right on top here in order to get it lined up with the holes. You want to make sure that the weld nuts are on the top side of that brace when you put it up there. Then on each side we'll put in our 1"-long 1/2" bolts with lock washers. Now we can take our swaybar and put it back up into position and get it lined up with the holes. Then we'll use the new, longer 10mm bolts that come with the kit with flat washer and lock washer in order to begin securing it in place. Now we'll want to make sure that everything is even and squared up. Then we'll be able to use a 3/4 socket to begin tightening all our hardware. Now, in order to tighten up the bolts for our swaybar, we'll just need an 11/16 socket. Then we'll torque all of our bolts to the specification found in the instructions. That's going to complete our look at and installation of the Roadmaster MX baseplate kit with removable arms, part number 2505-3, on our 2006 Hummer H3.
Ratings & Reviews

Info for this part was:
At etrailer we provide the best information available about the products we sell. We take the quality of our information seriously so that you can get the right part the first time.


Thank you! Your comment has been submitted successfully. You should be able to view your question/comment here within a few days.
Error submitting comment. Please try again momentarily.