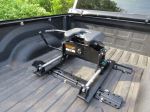
Curt A20 5th Wheel Trailer Hitch w/ S20 Slider for Ram - Dual Jaw - 20,000 lbs

 Arrives before Christmas

2014 Kia Forte5
Will this fit?
To see if this custom-fit item will work for you please tell us what vehicle you'll use it with.
- All Info
- Reviews (494)
- Q & A (0)
- Videos (7)
- Photos
CURT 5th Wheel Hitch - C76FJ
- 20000 lbs GTW
- Above Bed Rails
- CURT
- Sliding Fifth Wheel
- Standard - Double Jaw
- 17-1/2 - 21-1/2 Inch Tall
- Cushioned 360-Degree
- 5000 lbs Vertical Load
- 12 Inch Fore/Aft Travel
Heavy-duty 5th-wheel trailer hitch has interlocking jaws, a torsion head, and a color-coded lock indicator for safety and security. Non-binding slider ensures proper clearance during slow turns. Rails and installation kit included.
Features:
- 5th-Wheel hitch mounts in your truck bed so you can tow your 5th-wheel trailer
- Interlocking 2-jaw system provides 360-degree jaw-to-king-pin contact
- Less rattle and more security than slide-bar models
- 3-Point indicator system - color coding tells you if hitch is ready to uncouple, couple, or tow
- Lock indicators visible from cab
- Fully articulating torsion head for controlled coupling and a stable, quiet ride
- Self-aligns for easy hookup
- Suppresses road shock
- Reduces bothersome towing noise
- Non-binding slider provides clearance required for short-bed pickups to turn safely at slow speeds
- Prevents trailer from hitting the cab of your pickup during sharp, slow-speed turns
- Automatically latches in both directions so you only have to exit the truck once
- Designed for use on trucks with beds shorter than 8'
- Not recommended for use on truck beds shorter than 6'
- Lockable handle lets you easily secure trailer to hitch with padlock (sold separately)
- Single-throw operation
- Self-resets to the ready-to-couple position after you uncouple your trailer
- 2 Built-in zerk fittings for easy lubrication
- Fast 1-pin head removal makes it easy for 1 person to remove hitch
- Included plastic lube plate lets king pin glide smoothly into hitch during hookup
- 4" Height adjustment
- Simple installation with included base rails and mounting kit
- Sturdy steel construction with durable, carbide powder coat finish
Specs:
- Gross towing weight: 20,000 lbs
- Vertical load limit: 5,000 lbs
- Slider travel: 12" front to back
- Hitch height: 17-1/2" - 21-1/2"
- Limited lifetime warranty
Secure, Interlocking Two-Piece Jaw
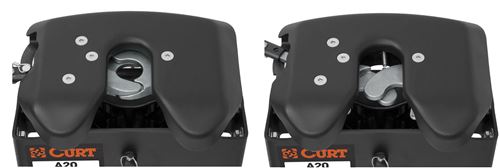
Unlike slide-bar models, the rounded, interlocking, two-piece jaw on this fifth-wheel trailer hitch inhibits rattle and movement by securely wrapping around your trailer's king pin, resulting in easier hookup and a safer, quieter ride.
Three-Point Indicator System

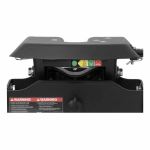
Get peace of mind with Curt's color-coded lock indicator. Just look at the indicator - either the one on the handle or the one on the hitch itself - to determine whether the jaw is in the correct position to uncouple (red), couple (yellow) or tow (green).
S20 Slider
Most often used on trucks with 6' and 6-1/2' beds, this slider helps to eliminate clearance problems during slow-speed turns. When you are towing a fifth-wheel trailer, your hitch must be situated on the cab side of your truck's rear axle. However, at slow speeds you can use a slider to slide the fifth-wheel hitch (and the trailer) toward your truck's tailgate and past the rear axle, creating enough space between the cab of your truck and the trailer to permit less-restricted turning.
16531 Curt A20 5th Wheel Trailer Hitch w/ S20 Slider - Dual Jaw - 20,000 lbs
16540 Curt A20 Fifth-Wheel-Trailer Hitch Head Unit
16564 Curt S20 Fifth-Wheel Slider - 20,000 lbs
16204 Curt Universal, Carbide Fifth Wheel Base Rails
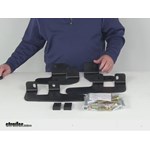
16427 Curt Custom Bracket Kit for Fifth Wheel Trailer Hitches - Dodge Ram
Installation DetailsCalifornia residents: click here


Videos are provided as a guide only. Refer to manufacturer installation instructions and specs for complete information.
Video Transcript for Complete Breakdown of the Replacement Head Unit for Curt A20 5th Wheel Trailer Hitch
Hi everyone, Aidan here at etrailer. Today we're gonna be taking a look at and showing you how to install this replacement fifth wheel head for the Curt A20. This is going to be just the head assembly here today. So if you already have a sliding base or the legs for it, and you're looking to replace a broken or damaged head, or maybe you're just adding it to a sliding base, like the S20 we're using today, then this is gonna be the one for you. If you need the full kit, be sure to check out one of those full kits on our website. But as for this replacement head, let's check it out.
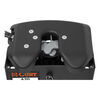
This is gonna operate just like your standard A20 fifth wheel head with the 360-degree dual jaw design. It's gonna get full contact around the kingpin here and those jaws are controlled by this lever on the outside of the fifth wheel hitch. We can unpin this handle right here. The pin could be swapped out for a padlock, if we wanna keep it secured when you're not around. Pull the handle out and back to open up those spring loaded jaws, and then we can back up to our fifth wheel.
That will drop into place. The kingpin will slide in. And it'll snap into place and you can see that 360-degree contact. Repin that handle or relock it back up to secure it, and then we're ready to hit the road. Now as we're hooking up, you probably saw a lot of movement in the fifth wheel head here.
Now it's by design. It's got a torsion system built into it, which gives us front to back, side to side, and even diagonal movement, really all around in a 360-degree motion. It can move around and adapt. So what it's gonna do is a number of things. It's gonna help guide the kingpin in so if we're not perfectly backed up to our trailer, this can kind of move and meet the kingpin where it's at to make hookup a lot easier.
But then when we're driving too, that's gonna act as a shock absorber, helping to reduce the hitching and just any of that road shock we're experiencing going down the road, but also limiting noise. To keep things operating smoothly, we've got our Zerk fittings located on the jaws here, so you can apply grease and keep them operating smoothly for a long time. The indicator at the back, visible from the cab of the truck will let us know if we're properly latched and coupled ready to tow. So we right now, we've got it locked in ready to tow. I'm gonna pull the handle out and back. And you can see right now we're in the coupling mode. And as I bring that dummy king pin back in, it's not fully coupled yet. And when it finally snaps in, (wheel head snaps) you can see it's got that green indicator. We can pin it in place and then we're ready to tow. So it's nice that you have that built-in and then it's visible from the cab of the truck. As for your weight capacity here, the fifth wheel itself can handle 20,000 pounds of gross towing weight and 5,000 pounds of your vertical load limit. Be sure to check on if you're using a sliding base like this one that it can handle that weight as well as your truck and go by the lowest rating component in your whole system. All around, you got a very durable steel construction with a carbide powder coat finish on top to help it resist rust and corrosion over time. Now that doesn't make it immune to things like scratches because that can scratch away the finish and cause it to rust and corrode quicker. But your kit does come included with a grease plate here that will slide in between the head of the fifth wheel with your kingpin in the middle here and help reduce that metal and metal contact. Keeping the head of this hopefully looking new for a lot longer and keeping those scratches and scuffs away. If you don't wanna leave this in your truck bed all the time, getting it removed can be a bit of a pain because of how heavy it is, But the head will separate from the main body here with this pin and a very large pin running through the center of everything. That is completely removable so that we can take the head on its own and lift it from the main body. So it's a lot easier to get in and out of the truck bed on your own like this. And if we look a little closer there where the pin runs through, you can see those rubber isolators that help dampen that impact and act as shock absorbers when we're going down the road. Now whether you're upgrading or replacing your existing head, it is going to be a very straightforward installation process. You will need a torque wrench for it, but aside from that everything's pretty straightforward and easy to do straight out of the box. So let's check out that process now. It comes pretty much fully assembled in the box. You will only need to attach the handle to the head, but I chose to also separate the head from the main body here, just to lighten the load a little bit and make it easier to attach. For our application today, we're attaching it to our sliding base here, the S20. So I'm just gonna get it dropped in place. And then, loosely get these bolts installed, line them up through the outer holes at whatever height setting we want, (metal clanging) and then attaching the nuts on the inside. (metal clanging) And at this point, once you've got it set to your proper height, you can tighten it down and torque it to the specifications found in your instructions. (metal clanging) (wrench rattling) If you don't have a torque wrench at home, they are pretty easy to rent, or you can find them here at etrailer. And repeat that process for all your other hardware. And then the head simply drops in place in the center and secures with the large pin feeding in through the back to the front. And then secures in there with this pin and retaining clip at the front. Now you're ready to hook up. And as far as the replacement head for the Curt A20 goes, that's really all there is to it. It's a very simple installation process. It comes with all the hardware you need. So if you already had an A20 fifth wheel hitch and you're just looking to replace a broken or damaged head, this is gonna drop right into place and do that for you. Or maybe you've got the S20 slider like we do here and you've got one of the kits maybe with the A16 and you're looking to upgrade the head to really max out the weight capacity potential of the slider itself. You can do that too. Like you see it is dropped in place Bolt it in with the included hardware and you're good to go. But that'll do it for our look at an installation of this Curt A20 fifth wheel head replacement. Thanks for watching.
Ratings & Reviews
4.8
494 reviews
See what our Experts say about this CURT 5th Wheel Hitch
- 5th Wheel Hitch Options For 2019 Ram 2500 Short Bed With RamBox For Light 5th WheelWe can get your 2019 Ram 2500 short bed with RamBoxes set up with a 5th wheel hitch, and you'll need a fixed hitch instead of a slider because your 5th wheel trailer will require a Sidewinder rotating pin box. A Sidewinder moves the pivot point from the hitch jaws to the turret, and without it you won't be able to make turns because a standard pin box will contact your RamBoxes. That said, since you asked for options, for a 5th wheel hitch, here is one that I highly recommend for a light...
view full answer... - Recommended 5TH Wheel Hitch For a 2022 Ram 2500 With Ram Box BedWith your 2022 Ram 2500 having the Ram Box storage in the bed you will need to use a fixed hitch with a pivoting pin box like the Sidewinder # RP34FR. You will not be able to use use the Pull Rite/Demco Autoslide type hitches as they will not clear the bed sides. The pivoting pin box changes the turning point from the 5th wheel hitch to the attachment point on the 5th wheel trailer. This prevents the chance of damage to your bed rails and allows you to make full jackknife turns without...
view full answer... - Will Airbags Work with the Articulink Rear Suspension on a 2017 Ram 2500 Power WagonThe articulink rear suspension on your 2017 Ram 2500 Power Wagon will not cause any issues with a set of airbags or a 5th wheel hitch because they all install in slightly different locations on the vehicle and do not counteract one another. For a set of airbags, I recommend using the Air Lift LoadLifter 5000 Air Helper Springs part # AL57289 because they do not require any drilling into the truck frame and they do not interfere with the brackets for a 5th wheel hitch. The Air Lift LoadLifter...
view full answer... - How to Tow Fifth Wheel Trailer with 2018 RAM 2500 w/ Ram Box and Air SuspensionThe only way you can safely tow a fifth wheel trailer with a Ram truck that has a Ram Box is with a Sidewinder pin box replacement as the pin box would no longer swing to the sides in the truck bed and hit the narrower bed rails. Sidewinders are pin box specific so you will first need to know what pin box you have now in order to pick out the correct one. There should be a sticker or a stamping on the OEM pin box of the trailer that will list the pin box number that is on the trailer. Once...
view full answer... - Which Custom Fit Curt Fifth Wheel Rail Kit Fits 2014 Ram 2500 Short BedThe Curt rail kit that does fit your 2014 Ram 2500 short bed is the part # C16427-204 or just part # C16427 for the brackets alone. The # C16420 does not fit your truck.
view full answer... - Can B and W Patriot Hitch be Used with 2022 Ram 2500 Long BedHey Matthew, since the Blue Ox Patriot hitch part # BWRVK3255 is designed to fit above bed rails all you'd need to install it in your 2022 Ram 2500 is a custom fit set like the Curt part # C16427-204 which are also perfectly compatible with the Patriot hitch since all of the rails in this style are made to the same dimensions. Then for a 7-way kit the part # 41157 will allow you to add a 7-way up in the bed of your truck for easier access to your trailer.
view full answer... - Which Curt Fifth Wheel Rail Kit Fits 2025 Ram 2500 Hey Antonio, yes the Curt fifth wheel rail kit part # C16427-204 that you referenced does fit your 2025 Ram 2500 short bed. Do you have a fifth wheel hitch already?
view full answer... - Fifth Wheel Towing Capacity of 2018 Ram 2500 4WD with Short Bed, 6.4L V8 and 3.73 Axle RatioIf your 2018 Ram 2500 4WD with a 6.4L V8 engine, short bed and 3.73 axle ratio is a Crew Cab your fifth wheel towing capacity is 12,630 lbs and if it is a Mega Cab it has a fifth wheel towing capacity of 12,240 lbs. This means that yes, you will be able to tow the fifth wheel trailer with a GVWR of nearly 12,000 lbs like you wanted. To tow this trailer you are going to need a sliding hitch to accommodate a short bed, and the best option for a fifth wheel hitch for your '18 Ram 2500 is...
view full answer... - Fifth Wheel Hitch Setup for 2020 Ram 2500 Mega Cab with Ram BoxesFor all cab styles of the 2020 Ram 2500 that have the Ram Boxes the only solution to tow a fifth wheel trailer is with the Sidewinder pin box replacement as it moves the pivot point up high enough not to interfere with the narrower bed rails of the Ram Boxes. You'd need a fixed hitch like the part # RP30047 with a custom rail kit for your truck like the Curt # C16427-204 which fits your truck and the Reese hitch. Sidewinders are pin box specific so you will first need to know what pin...
view full answer... - Curt Custom-Fit Base Rails For A 2020 Ram 2500 Tradesman Hey George, The Curt Custom Fifth Wheel Installation Kit for Ram Truck - Carbide Finish # C16427-204 would be a compatible fit for your 2020 Ram 2500 Tradesman with a 6.5' bed. If you plan on installing this yourself then I recommend following along with Conner's installation video below.
view full answer... - Would A Sliding Fifth Wheel Hitch Or Rotating Pin Box Be Better For A 2021 Ram 2500 6-1/2' BedHey Connor, A typical sliding 5th wheel hitch is going to give you 12-14" of travel for extra turning clearance while a rotating pin box like the Reese Sidewinder will move the pivot point of the trailer back 22". Rotating pin boxes give you the best chance of making a 90 degree turn without the nose of the trailer hitting the cab of the truck. With a rotating pin box you won't have to get out of the truck at each tight turn to move the hitch into the maneuvering position and then again...
view full answer... - Best 5th Wheel Rail Kit For 2020 Ram 2500 With Husky 5th Wheel HitchHey Steven, thanks for reaching out. Your Husky hitch uses industry standard 5th wheel rails, correct? If so, we do have a kit you can use to add industry standard 5th wheel rails to your new 2020 Ram 2500. For that I recommend the following: - Curt Custom Fifth Wheel Installation Kit for Ram Truck - Carbide Finish # C16427-204 This includes everything you need to add rails to the bed of your truck. You get the rails, frame brackets and hardware. The rails are standard and will work with...
view full answer... - Is There Curt Fifth Wheel Rail Kit that Fits 2022 Ram 2500 Hey Lyle, so there aren't any universal style fifth wheel rail kits that fit your 2022 Ram 2500 so your best option is the custom install Curt rail kit part # C16427-204. Not only will this be much easier to install but it's actually not more expensive than most universal rail kits so it's by far the way to go.
view full answer... - Will the 5th Wheel Mounting Brackets on a 2020 Ram 2500 6.4 Hemi Mount on a 2014 Ram 2500 Diesel?It is possible that your industry standard rail system in your 2020 Ram 2500 may fit in your 2014 Ram 2500 Diesel but without knowing which brand or part number you have I can not say for certain. You will want to use all new hardware if you are able to transfer the kit over. Below are the 5th wheel industry standard rail kits that fit both of your trucks: Reese Quick-Install Custom Outboard Installation Kit w/ Base Rails for 5th Wheel Trailer Hitches item # RP56009-53 Reese Quick-Install...
view full answer... - Can A Hitch For Ford Pucks Be Converted To Fit Ram Pucks?Hi Jim! There is most likely a way to do what you are wanting to do, but I want to be absolutely sure before just flat out saying yes. Is there a way you can send a few pictures of the hitch's head unit to [email protected]? Specifically any labeling on it. Odds are you just need the Curt OEM 5th Wheel Hitch Legs for Ram Towing Prep Package - 25,000 lbs # C16021 and you will be good to go, but this doesn't fit all the Curt head units and I would strongly dislike giving you bad info.
view full answer... - Rail Kit For Attaching A B&W Patriot Slider To A 2021 Ram 2500We can definitely help you with that, Brian! For your 2021 Ram 2500, you will want the Curt Custom Fifth Wheel Installation Kit for Ram Truck - Carbide Finish # C16427-204. This will work with the 6-1/2' or 8' bed and the B&W Patriot will drop right into them, so no issues there. Now if you meant you have the Ram factory pucks in your bed, there will be no way to adapt the Patriot hitch, unfortunately. The head on the Patriot # BWRVK3270 is smaller than that of the B&W Companion OEM 5th...
view full answer... - Recommended 5th Wheel Rails for a 2022 Ram 2500 No, they will not but I have a custom fit set that does. They are the Curt item # C16427-204. This set of rails is industry standard so they will work great with your Curt Q20 Slider. The brackets are custom fit and install in pre-existing holes in your Ram's frame. This not only saves you on installation time but it also means you don't have to drill holes in your truck's frame. I have linked an installation video below to show you how to get these rails installed. To make towing with...
view full answer... - 5th Wheel Base Rail Kit For 2024 Ram 2500While we do have a fit for 5th wheel base rails for a 2024 Ram 2500, the B&W kit has not been verified to fit the '24 Ram. What you can use instead if you like is a kit from Curt, with the correct part number being the following: - Curt Custom Fifth Wheel Installation Kit for Ram Truck # C16427-204 This is a nice option as it does not require any drilling into your Ram's frame, which is both great for your truck and a big time-saver.
view full answer... - Recommended 5th Wheel Base Rails for a 2024 Ram 2500 Congrats on the new truck! To add a set of 5th wheel rails to your 2024 Ram 2500, I recommend the Curt Custom 5th Wheel Installation Kit for Ram Truck item # C16427-204. These rails install with custom fit brackets that install in pre-drilled holes in your Ram's frame. This kit fits both the 6-1/2' and 8' bed lengths. I have linked an installation video below to help you get these rails set up. To make towing with a 5th wheel easier, I recommend adding the Curt 5th Wheel/Gooseneck Custom...
view full answer... - Can the Reese Goose Box be Used on a Short Bed 2016 Ram 2500The correct Reese Goose Box 5th-Wheel-to-Gooseneck Air Ride Coupler Adapter for a Lippert 1621 pin box is part # RP85FR which is rated for up to 20,000 lbs. With that being said, it is not recommend to use the Reese Goose Box on a short bed truck due to limited turning clearance. They do make an offset gooseneck ball adapter for the Hide-A-Goose Underbed Gooseneck Trailer Hitch part # 9467 on your 2016 Ram 2500, the 5" Offset Ball part # 19308 but this still is more than likely not enough...
view full answer... - Will Pullrite Super Glide Work With Curt or Reese Fifth Wheel Base Rails on 2018 Ram 2500The only Pullrite Super Glide fifth wheel hitch that will work with either the Curt # C16427-204 or Reese # RP50054-58 custom base rails is the Pullrite that is the ISR Series (the ISR stands for "industry standard rails"). Though we do not carry these hitches I believe that would be the 2700 or 2900 models of Super Glide. As for the price difference there are regular fluctuations based on a number of factors but it isn't quality or hardware. Both these install kits come with the hardware...
view full answer... - Recommended 5th Wheel Hitch for 2018 Ram 2500 without OEM Prep Package and 6-1/2 Foot BedThere are a lot of great options available for your 2018 Ram 2500, but I recommend using the B&W # BWRVK3400-5W and the underbed mounting kit # BWGNRK1384-5W, which has a 20,000-lbs capacity. The # BWRVK3400-5W is a sliding hitch that will install into a gooseneck hitch # BWGNRK1384-5W to give you a truck bed that is free of rails, so it will allow you to freely use your truck bed when the hitch is not being used. B&W make some of the most reliable and high quality hitches on the market,...
view full answer... - How To Mount Valley/Husky 7054 5th Wheel Hitch on a 2021 Ram 2500In order to mount the Valley/Husky 7054 5th Wheel Hitch on a 2021 Ram 2500 without in-bed prep package you'll need a kit such as the Curt Custom Fifth Wheel Installation Kit part # C16427-204. I was able to install this kit and if you'd like to see that video, take a look below. If you do have the factory prep package then you'd need an adapter such as the Reese 5th Wheel Rail Adapter part # RP30154. I'm not sure if you were looking to reuse some old above bed rails or not but we don't...
view full answer... - Reese 5th Wheel Hitch & Sidewinder Needed For 2021 Ram 2500 & Lippert 1116 Pin BoxThanks so much for that information, and from that I was able to verify with Lippert that what you have is a Lippert 1116 pin box. So I'll go ahead and list out the set up for your 2021 Ram 2500 with Ramboxes, consisting of the Reese 5th wheel hitch, rails, and wiring harness, along with the correct Sidewinder to replace the Lippert 1116 pin box: - Reese M5 5th Wheel Trailer Hitch # RP30928 - Curt Custom Fifth Wheel Installation Kit for Ram Truck # C16427-204 - Curt 5th Wheel/Gooseneck...
view full answer... - Best Adapter to Convert Curt EZr Gooseneck to Sliding 5th Wheel Hitch for 2019 GMC Sierra 2500Let's start with the adapter you need for the Curt EZr Double Lock Underbed Gooseneck Trailer Hitch # C611-624 in your 2019 GMC Sierra 2500 short bed, which is the Curt X5 5th-Wheel Base Rail Adapter Plate for EZr Double Lock Gooseneck Trailer Hitch # C16220. This adapter will fit into the EZr hitch and give you above-bed fifth wheel rails for a number of compatible 5th wheel hitches. Among those that will work, the best sliding 5th wheel hitch for your 13,500 lb fifth wheel is the Curt...
view full answer... - Can Curt 5th Wheel Hitch be Used with Demco Rail Adapter and 2020 Chevy Silverado 2500 OEM Rail KitYes the Demco adapter part # DM6333 does fit your 2020 Chevy Silverado with an OEM rail kit and would work great with either the Curt hitch # C23DR or # C55DR that you referenced.
view full answer... - Is Sliding 5th Wheel Hitch Needed For 2021 Ram 2500 6-1/2 Foot Bed & Puck SystemHi Nic, Generally yes, for a truck bed under 8 feet long like on your 2021 Ram 2500 you do need a sliding 5th wheel hitch. That said, there are 5th wheel trailers that have a tapered nose designed to allow the use of fixed 5th wheel hitches as they won't contact the cab on right turns, so if that's the type of trailer you have, then a sliding hitch isn't needed. With that in mind, the hitch I love for your 2021 Ram 2500 with the puck system is the Curt A20 due to its ease of use and...
view full answer... - Full 5th Wheel Hitch Set Up For 2025 Ford F250 Short Bed Without Factory PucksHi Alex! We can definitely get your 2025 Ford F250 6-3/4 bed set up for towing a 5th wheel. I have everything you will need listed below: Curt Custom Fifth Wheel Bracket Kit for Ford # C87VV Curt Universal Fifth Wheel Base Rails - Carbide Black Finish # C16204 Curt A20 5th Wheel Trailer Hitch w/ S20 Slider - Dual Jaw - 20,000 lbs # C55DR We do have a 16k slider, but it's basically the same price as the 20k. Being a little over rated with something like this is never a bad thing. The...
view full answer... - Curt A20 Sliding 5th Wheel Hitch or Convert-A-Ball Adapter For HeightHi Tony; that's a good question and unequivocally the better option is the Curt A20 5th Wheel Trailer Hitch w/ S20 Slider # C55DR. This will not only give you extra height, but won't void the warranty on your trailer frame like the Convert-A-Ball adapter does, gives you better turning clearance, and is just a more secure overall set up than what is essentially two different adapters. The # C55DR is also just a really good hitch overall with a superb interlocking jaw system for a tight...
view full answer... - Will the Demco 5th Wheel Rail Adapter for Chevy/GMC Work w/ a Curt A20 Slider? Hey Darren, that's quite the gift. The Demco 5th Wheel Rail Adapter for Chevy/GMC OEM 5th Wheel Towing Prep Package item # DM6333 will fit any 5th wheel hitch that attaches to industry standard rails, including the Curt A20 5th Wheel Trailer Hitch w/ S20 Slider item # C55DR. The only exception to this is the B&W Patriot Slider item # BWRVK3270 because it sits too low and hits the adapter when sliding. Please note that the Demco 5th Wheel Rail Adapter item # DM6333 only fits the GMC puck...
view full answer... - How Can I Get My Pin Box Higher and My 5th Wheel Hitch Lower so I Can Have Level Towing?Hello Mike, Let’s get you level so your towing experience can be much more enjoyable. Since you have the Curt A20 slider, it’s important to note that it should not be used in combination with the Reese Revolution. You want either a sliding hitch or a rotating pin box, not both, as combining them can create unsafe towing conditions. You're on the right track with the Curt Flex Air 5th Wheel Pin Box - Lippert 1621 - 18,000 lbs # LC328492. Replacing your Revolution with the Curt will likely...
view full answer... - Comparing the Curt A20 and B&W Companion 5th Wheel Hitches Jaw SystemsHey Heath, thanks for reaching out! The Curt A20 # C55DR and the B&W Companion # BWRVK3670 you're looking at are both excellent 5th wheel hitches, but I have to go with the Companion in this case simple because it is more robust and has a better build quality. It's true that the Companion uses dual jaws, but those guys are 1" thick jaws so they will still hold the king pin nice and securely. The Curt has the interlocking jaws (which I really like) but it just doesn't have the same quality. Please...
view full answer... - Options For Installing 5th Wheel Hitch In 2019 Ram 3500 without OEM Puck System They do not make an aftermarket puck system kit for your 2019 Ram 3500, so you have a few options to get a 5th wheel hitch installed. The standard way is installing above bed rails # C16430-204 to use a sliding 5th wheel hitch # C55DR if you have a 6-1/2' bed, or a fixed 5th wheel hitch # C16140 if you have an 8' bed. If having the permanently installed above bed rails is a buzz kill for you, then another option is installing the B&W Turnoverball # BWGNRK1320-5W will allow you to install...
view full answer... - 5th Wheel Rails Needed to Use a Curt Sliding Hitch on a 2019 Ford F-250 Short BedThe exact part that you need to use your Curt sliding 5th wheel hitch, like part # C55DR, in the short bed of your 2019 Ford F-250 depends on if you have the OEM prep package or not. If you do have the OEM prep package then you simply need the Elite Series Underbed Rail Adapter # RP30156 which drops into your puck system. If you don't have the OEM prep package you need a base rail kit like part # RP50074-58 which doesn't require drilling for the install. Both of these options give you...
view full answer... - Availability of Aftermarket Puck System for 2023 GMC Sierra 2500At this time, the Curt # C16429-204 above bed rails are the only confirmed fit for the 2023 GMC Sierra 2500. This would allow you to use a 5th wheel hitch like the # C55DR if you have a short bed or # C16140 for a long bed. For an underbed system, it may be possible to use the B&W Turnoverball Underbed Gooseneck Trailer Hitch # BWGNRK1020. However, B&W only has reports of some customers and dealers successfully installing the hitch so we cannot guarantee it will fit. This would allow...
view full answer... - Can A Curt A20 Be Used In Both Long And Short Bed Trucks With OEM Ford Puck System?This is basically just the way our fit guide is set up. We will always recommend a fixed hitch (non slider) like the Curt A20 # C16140 for trucks with an 8' bed. We recommend a sliding hitch like the Curt A20 slider # C55DR for the 6-3/4' bed like yours. The Ford puck system will be identical for long bed and short bed models. We just recommend the slider for short bed, and fixed hitch for long bed. We recommend sliders for short bed to gain additional clearance on tight turns. In many...
view full answer... - Curt Custom 5th Wheel Base Rails & Installation Kit That Fits 2020 Ram 2500 With 6-1/2 Foot BedWe do have Curt custom 5th wheel base rails and installation kits that fit your 2020 Ram 2500 with a 6-1/2 foot bed, but they are a bit different than the part number you mentioned. The two kits that fit have the same brackets, but you can choose from the gloss finish like the part number you asked about, or a carbide finish: - Gloss Finish: Curt Custom Fifth Wheel Installation Kit for Ram Truck # C16427-104 - Carbide Finish: Curt Custom Fifth Wheel Installation Kit for Ram Truck # C16427-204 Both...
view full answer... - Will Curt A20 5th Wheel Hitch Work on a 2021 Chevy 2500 With 6 Foot 9 Inch Bed?The Curt A20 5th Wheel Trailer Hitch w/ Slider # C55DR will fit your 2021 Chevy Silverado 2500 with a 6 foot 9 inch bed, and you'll need adapter # C88KR as well.
view full answer... - Can The Andersen Ultimate 5th Wheel Hitch Fit In The Bed Of A 2023 GMC Sierra 2500 The Andersen Ultimate Connection 5th Wheel Trailer Hitch System with Adapter # AM3200 would technically fit in the bed of your 2023 GMC Sierra 2500 if it had base rails, but with the bed not being a full 8' you might run into some turning clearance issues. You would want to use a hitch with a slider base like the Curt A20 5th Wheel Trailer Hitch w/ S20 Slider # C55DR. This hitch can slide back 12" in the maneuvering position to allow for more clearance during tight turns so that you don't...
view full answer... - Lighter Weight Slider Fifth Wheel Hitch Solution for 2024 Chevy Silverado 3500 Short BedHey Douglas, the Curt A20 with slider part # C55DR weighs 211 ls and the GM adapter part # C88KR weighs 88 lb. The B and W Companion Slider part # BWRVK3775 weighs 250 lbs so it weighs a little less in total. The head of this comes off pretty easy too to save weight by making a couple trips to split up the weight. The head weighs 70 lbs. Based on this it would be the easier to install and remove solution.
view full answer... - Parts Needed To Install Sliding 5TH Wheel Hitch In 2019 Chevrolet Silverado 3500 With Curt GooseneckIf you have the Curt Double Lock # C607-604 gooseneck hitch on your 2019 Chevrolet Silverado 3500 you will be able to use the Rail Adapter # C16210 for installing a 5th wheel hitch. If you have the Curt EZr Double Lock # C611-624 you will need the Rail Adapter # C16220. These rail adapters will allow you to install their A20 Sliding 5th Wheel Trailer Hitch # C55DR.
view full answer... - Custom 5th Wheel Installation Kit for 2022 Ford F-250 Super DutyThe custom brackets for your 2022 Ford F-250 that are compatible with the Curt A20 5th wheel hitch item # C55DR are the B&W Custom 5th Wheel Installation Kit for Ford item # BWRVK2402. These rails are designed to work with 5th wheel hitches that fit in the industry standard rails like the A20.
view full answer... - 5th Wheel Hitch For 2023 Ford F-250 Super Duty Standard/Short Bed With Standard RailsHey Carrey, We can get you a great 5th wheel hitch for your 2023 Ford F-250 Super Duty with the standard/short 6'8" bed. Since you have a short bed a sliding hitch is what you'll need, and my favorite option that fits your standard bed rails is from Curt: - Curt A20 5th Wheel Trailer Hitch w/ S20 Slider # C55DR I really like the A20 # C55DR because it gives you a steadier, more fluid ride than other 5th wheel hitches, and is among the easiest 5th wheel hitches to use. It uses an interlocking...
view full answer... - Is The Curt A20 5TH Wheel Hitch For 2022 Chevy Silverado 3500 Compatible With Rotoflex Pin Box? Yes the Curt A20 5th wheel hitch is compatible with the Rotoflex pin box. As I see you have a 2022 Chevrolet Silverado 3500 you will need one of the following hitches depending on your bed length and if you have the factory prep/puck system. Factory Prep/Puck System 6-3/4' Bed # C55DR With Adapter # C88KR 8' Bed # C84FR Mounting To Industry Standard Rails # C16429-204 6-3/4' Bed # C55DR 8' Bed # C16140
view full answer... - Does Curt A20 Slider Hitch Fit Same Fifth Wheel Rails as Reese HitchYes, the Curt A20 fifth wheel hitch part # C55DR does fit the Reese above bed rails you have installed in the bed of your truck.
view full answer... - Tips for Choosing the Best Truck to Tow a 5th Wheel TrailerStarting with the truck series itself, I would go with a 3/4 ton or 1 ton. Ultimately a 1-ton would be better. Between gas and diesel I would choose a diesel if it were me. They are capable of more power and torque than gas motors. The cab style does not matter all that much but the bed size does. You will want to avoid a step side bed and a Dodge model that has a Rambox feature because they cannot have a 5th wheel hitch installed. Long beds are the way to go. A short bed can cause issues...
view full answer... - Will Curt 5th Wheel Install Kit Fit a 2016 Ram 2500 Short Bed with Factory Air SuspensionHello Chad. Yes, Curt 5th wheel installation kit # C16427-104 will fit your 2016 Ram 2500 short bed with the factory air suspension and without the factory prep package. I have included a link to the installation instructions for you. If you do not already have a hitch I recommend the Curt A20 5th Wheel Trailer Hitch rated for 20,000 lbs # C55DR 425 Review. This is a slider hitch with 12 inches of travel so you can make tighter turns without the trailer hitting the truck cab. It also...
view full answer... - 5th Wheel Base Rails For 2022 Chevy Silverado 2500 For Curt A20 Sliding 5th Wheel HitchWe do indeed have 5th wheel base rails that fit your 2022 Chevy Silverado 3500 and work with a Curt 5th wheel hitch. The base rails and install kit are also from Curt, and I verified with the manufacturer for you that they fit your truck; you can also choose from either a gloss finish or a carbide finish for the rails: - Carbide Finish: Curt Custom Fifth Wheel Installation Kit for Chevy/GMC Truck # C16429-204 - Gloss Finish: Curt Custom Fifth Wheel Installation Kit for Chevy/GMC Truck...
view full answer...
Do you have a question about this 5th Wheel Hitch?
Info for this part was:


At etrailer.com we provide the best information available about the products we sell. We take the quality of our information seriously so that you can get the right part the first time. Let us know if anything is missing or if you have any questions.










Thank you! Your comment has been submitted successfully. You should be able to view your question/comment here within a few days.
Error submitting comment. Please try again momentarily.