Reese Quick-Install Custom Installation Kit w/ Base Rails for 5th Wheel Trailer Hitches
2016 Hyundai Santa Fe
Will this fit?
To see if this custom-fit item will work for you please tell us what vehicle you'll use it with.
Thank you! Your comment has been submitted successfully. You should be able to view your question/comment here within a few days.
Error submitting comment. Please try again momentarily.
- All Info
- Reviews (40)
- Q & A (0)
- Photos
Reese 5th Wheel Hitch Rails
- Above the Bed
- Custom
- Reese
Custom brackets reduce the amount of drilling and time required to install your fifth-wheel trailer hitch. Brackets, base rails and hardware included.
Features:
- Custom brackets mount beneath your truck bed to provide attachment points for 5th-wheel rails
- Base rails sit in truck bed and allow installation of 5th-wheel trailer hitch
- Vehicle-specific brackets mount to existing holes in your vehicle's frame
- Minimizes drilling and measuring
- Cuts installation time in half when compared with universal bracket systems
- Kit includes custom brackets, rails and hardware
- Will not work on 2010-2011 models with gas engines and overload springs
- Compatible hitches: Curt, Draw-Tite, Hidden Hitch, Reese, Valley and Husky
- Will not fit Reese Elite Series (Signature Series) or Valley UBS hitches
- Black powder coat finish resists corrosion
- 5-Year limited warranty
50065-58 Reese Custom 10-Bolt Quick Installation Kit
Replaces 50065-58058
Installation Details
This Product Fits The Following Vehicles
- 2010 - 2012 Ram 2500 6-1/2 Foot Bed
- 2010 - 2012 Ram 2500 8 Foot Bed
- 2010 - 2012 Ram 3500 6-1/2 Foot Bed
- 2010 - 2012 Ram 3500 8 Foot Bed
- 2006 - 2008 Dodge Ram Pickup 1500 - 6-1/2 Foot Bed - Mega Cab
- 2003 - 2012 Dodge Ram Pickup 2500 - 6-1/2 Foot Bed
- 2006 - 2009 Dodge Ram Pickup 2500 - 6-1/2 Foot Bed - excluding Mega Cab
- 2006 - 2009 Dodge Ram Pickup 2500 - 6-1/2 Foot Bed - Mega Cab
- 2003 - 2012 Dodge Ram Pickup 2500 - 8 Foot Bed
- 2003 - 2012 Dodge Ram Pickup 3500 - 6-1/2 Foot Bed
- 2006 - 2009 Dodge Ram Pickup 3500 - 6-1/2 Foot Bed - excluding Mega Cab
- 2006 - 2009 Dodge Ram Pickup 3500 - 6-1/2 Foot Bed - Mega Cab
- 2003 - 2012 Dodge Ram Pickup 3500 - 8 Foot Bed
California residents: click here
Ratings & Reviews
4.4
40 reviews
Exactly what I needed. Great customer service.
the service was excellentI was extremely pleased with the service I recieved fro E Trailer
Was just the right part I needed. Call the tech support before buying and they were the best helped make sure I got the parts called for my truck.
Great customer service. I installed this on a saturday and it took most of the day. An old fat man with basic hand tools.
The installation went pretty much as described in the instructions for my 2009 Ram 2500. It was not a two hour job, but I did it myself in about 5 hours. I went slow and measured several times before drilling.
Service was fabulous -received the product very quickly. The communication with emails was excellent - the kit itself was a little difficult. Brand new 2012 dodge 3500 crew cab dually laramie longhorn - had to remove exhaust pipe and the mount over gas tank (drivers side front) did not fit right, but made it work.
The fit of the brackets is not as good as they could be. They cover the mounting holes for the factory wiring harness, as well as interfere with the e-brake cable support. About half the nuts are next to impossible to get a standard torque wrench on, and the directions were obviously written by someone who has never installed one of these.
Hitch installed in less time than anticipated! Quality product and worked like a charm pulling the camper.
Overall happy with the kit for my 2012 Ram 2500. Video on etrailer’s website was helpful even though where they put certain hardware contradicted what the written instructions say. Make sure you check that you have all the hardware before you start. I was missing hardware in the bag (1/2” nuts, washers, some carriage bolts, rectangular thick washers with offset hole). Could have pulled it all back out, and sent it to etrailer to have them send the right bolts, but couldn’t wait for shipping to receive the right items so I sourced the hardware locally instead.
Service was excellent, making sure I got the right hitch for my truck.
Ordered hitch on Friday afternoon and was here on Tuesday.
Only problem I had was the u bolts for the rail kit were a little short on the thread length as my Dodge Ram 2500 HD is a little thicker in the frame near gas tank then it is in the rear. But I did manage to get flat washer on a then prick punch the threads, as was not enough room for flat washer and lock washer. Just got it all done and will be hauling a D17 Allis Chalmers tractor,a few hundred miles. Thanks for the great service and what looks to be a great hitch.
Item arrived fast. Supplied video was a good primer for installing. Took about 2 1/2 hours to install with 2 people. Clean and neat install with no drilling of the frame of the truck. This was in A 2012 Ram 3500 DRW
I installed this hitch on my 2012 dodge ram 2500 diesel. I want to say first off I have owned and used many reese products in the past, and have installed several similar kits on new ford super dutys. I have also installed a universal mounting kit on the same dodge as I own. All of those products are great installation was a breeze. HOWEVER, this product needs to be redesinged. I am a pretty mechanical guy with plenty of experience in this field. I took me over seven hours to install this product. Most of the nuts on the bottom side are close to impossible to access with your hands. I was only able to get a torque wrench on one, and an impact on two. The rest were a quarter turn at a time with the open end of the wrench and finger tips to turn it. (that is once you figure out how to get the brackets up against the frame i.e. it's a great puzzle) to sum it up this particular product it A WASTE OF TIME AND MONEY! Buy the universial kit for this vehicle, It's $100 cheaper, and 1.5 hous to install. The same kit for a ford is great 45 min install. I just hope that my review will steer people in the right direction. I read the reviews and didn't listen. I thought it couldn't be that bad, well it is, believe me. Etrailer was a great place to buy, lowest price, free shipping, and fast, had it the next day.
Mike
2/14/2016
Either one of these two kits: http:/www.etrailer.com/Fifth-Wheel-Installation-Kit/Dodge/Ram Pickup/2012/RP30035-186.html?vehicleid=201210901http://www.etrailer.com/Fifth-Wheel-Installation-Kit/Dodge/Ram Pickup/2012/RP30035-023.html?vehicleid=201210900They do require drilling into the frame of the truck, but it saves a lot of time and headache. If you already have the rails, I do believe you can buy just a hardware kit, but Im not totally sure.
The kit is about 95% accurate and the instructions are about 60% complete. First remove spare tire, shield, tail pipe, inner fender liners and support. Second there are 2 types of brackets: welded and bent. The bent brackets go in the back, weilded brackets up front. Third, the front driver side bracket needs to be modified to allow for a bracket mounting location and a ground stud. As for torquing to 72lbs...well good luck
Jeff
2/1/2013
Two more things: 1. Whenever you drill or grind any metal, make sure you re-coat the bare metal with a rust inhibiter. 2. There is a harness on the inside of the driver side frame. It actually needs to be disconnect from the factory mounts in 3 places. Also makes sure it does not chaff on the bottom post of the newly installed U-bolt.


The rails and mounting kit worked great. Installation went as instructed on my '05 Dodge diesel, and the 5th wheel base slipped right onto it. Etrailer staff were very helpful and accurate when I had questions (as they always have been).
Carl F.

6/1/2017
Working great. After a year, just a little lubricant on the king-pin lock, again on a trip to NC for a wand we hooked up to the 5-th wheel and drove to NC for a week and then back to Daytona.
Great kit took me and my son in law 2 hours to install was pretty straight forward. Would recommend to anyone thank you
I purchased this kit for my '09 Dodge 2500 Quad cab with a short bed. While a pro could probably install this in the 2-2.5 hours Reese claims, I did it myself (and I'm admittedly a bit anal), so spread it out over a couple of days. The instructions were very clear, and the parts fit my truck perfectly. Some of the fitting locations did make it impossible to properly torque them with a torque wrench, so I had to revert to the way we did it before we had such a thing. After a 6000 mile trip everything is still tight, and ready for our next adventure!

Excellent product and installation instructions. My only recommendation would be to label the type kit that is shipped. I had to count each part and based on quantities provided I was able to figure out what model was sent to me.

This has been a very good hitch. However, it can be a bit sticky when it is time for it to slide. Often need to chock the wheels to get it to slide. I do like the color coded indicators. It lets you know that the hitch is locked up solid.

Product is holding up good. Install was a bit of a pain, there could be a few improvements made here and there such as the spacers that go between the bed and frame, but overall it fits good. Have towed approximately 40,000 lbs including my trailer and no warps, breaks, or unusual wear of any kind is detectable.
Got the boxed but forgot to put the bolts for the Install Kit, I called them and they where shipped the same day. I think they need to see that everything is in the box before they seal it up to be shipped
Steve

2/17/2019
once I got all the parts they didnt ship bolts then it all went in fairly easy
Fast shipping, didn’t fit as seamlessly as I had hoped. A couple of small spacers were missing from the box, but luckily I had somethings laying around here that would work. I had to do a little grinding and minor modification to get the brackets to fit like they should. All in all, not a bad deal. Would of been a lot tougher to install without some mechanical knowledge and tools to do so.
The installation kit came with all that was need for the job. It does take longer that 2-1/2 hrs though. I was working alone and I had experience doing a similar install. The hard part is reaching where a couple of the nuts are located to get them into position and tightened. But unless you want to pay your local shop $300-$400 to put it in for you, it's a job you can do if you READ THE DIRECTIONS THOROUGHLY!!
Etrailer is always super to deal with and ships very fast.
Worked great to put my 5th wheel hitch in my truck. Quick delivery.
All the parts were there but no installation instructions so it made it a bit to install. Also it said 4 hour project, figure a bit more time than that. the lack of instructions was my biggest gripe.
Product was orginally shipped with to left side U brackets. Etrailer corrected the order and saved the day.
See what our Experts say about this Reese 5th Wheel Hitch Rails
- Why Can't Demco Recon Fifth Wheel Hitch Be Used with Sidewinder Pin BoxSince Sidewinder pin boxes pivot and twist in a different way from standard pin boxes they require fifth wheel hitches to be attached to the truck in four points around the perimeter of the hitch. That's why you can't use a Sidewinder with a Demco Recon # DM8550045 since it connects to the truck via a gooseneck ball only which is right down the middle of the hitch. If you can get me the year/make/model of your truck I can recommend best hitch setup to tow a trailer with a Sidewinder pin box.
view full answer... - Recommended Gooseneck Hitch For 2005 Dodge Ram 2500For your 2005 Ram 2500, I recommend the B&W Turnoverball Underbed Gooseneck Trailer Hitch w/ Custom Installation Kit - 30,000 lbs, # BWGNRK1313. This is a custom fit for your truck that will give you a gooseneck hitch that will keep your truck bed clean when not in use. If you want 5th wheel rails, I recommend the Reese Quick-Install Custom Base Rails and Installation Kit for 5th Wheel Trailer Hitches # RP50140-58. This is a custom fit system for your truck. If you want a gooseneck...
view full answer... - Recommended Base Rails to Install on a 2012 Ram 2500 to Use With a Reese Sliding 5th Wheel HitchWe have a couple of different options for you to install base rails in your 2012 Ram 2500 to use with your Reese sliding 5th wheel hitch. The difference between the rails is how they are installed on your Ram. The Reese Semi-Custom Base Rail and Installation Kit # RP30035-186 is the most generic of the options that I have for you. The semi-custom brackets will let your install your 5th wheel hitch if your Ram has the overload springs, but it is not compatible with the Reese Elite Series,...
view full answer... - Installation Kit for Fifth Wheel on a 2009 Dodge Ram 2500 and Replacement Legs for Reese 16K HeadThe proper installation kit for your 2009 Dodge Ram 2500 is part # RP50140-58. These brackets that mount to the frame underneath the bed, and the rails that are in the bed for the Fifth Wheel to attach to. You do not necessarily have to remove the sliders and replace them with fixed legs, but if you want to, Reese part # RP30727 are the legs to fit DrawTite and Reese 15K, 16K and 18K heads.
view full answer... - Would Reese 30031 Fifth Wheel Hitch Fit Industry Standard Fifth Wheel RailsThe Reese hitch part 30031 that you referenced is designed to fit the industry standard fifth wheel rails like what come with the part # RP50140-58 that you referenced. The two would work well together.
view full answer... - Extended Pin Box Fit Option for a 1999 Jayco Deluxe With a Leland AF 7910 Pin BoxIt is important that you check with Jayco or your trailer dealer to make sure it is okay to install an extended pin box on your trailer. Extended pin boxes create more stress on trailer frames and trailer manufacturers do not recommend using extended pin boxes on certain trailers. The 5th Airborne pin box that you referenced was designed to fit the Leland 7920 pin box. It has the same bolt pattern as your Leland af 7910 pin box and may work for you, but it will only provide an additional...
view full answer... - Location of 5th Wheel Hitch on a 2055 Dodge Ram 2500 with 6-1/2 BedThe head unit of your 5th wheel hitch should sit above or slightly in front of the rear axle on your 2005 Dodge Ram 2500 with the 6-1/2' bed. The exact location though will be determined by where your base rails sit. We have a few different options of base rails with the difference being the difficulty of installation. With all of the kits the distance from the back of your cab to where the king pin sits will be about 36" which you can use to get an idea for where your hitch will sit. If...
view full answer... - Recommended Fifth Wheel Installation Kit For 2010 Dodge Ram 2500 With Or Without Overload SpringsYou can tell if you have overload springs easily. Just take a look at your rear leaf springs, and if you see an extra leaf as shown in the attached drawing you have the overload spring option. The Reese Fifth Wheel Hitch, part # RP30047, will work with your 2010 Dodge Ram 2500. The difference would be in the installation kit. The custom installation kit like part # RP50140-58 will not work with gas engines and overload springs. If you find you do not have the overload springs, then this...
view full answer... - Installation Instructions for Reese 5th Wheel Trailer Hitch Install Kit for 2004 Dodge Ram 2500It depends on which installation kit you have. The 2004 Dodge Ram 2500 short bed could use # RP30035-023 (but will not work on trucks with overload springs), kit # RP50140-58, kit # RP30035-186, or kit # RP56011-53. I have included links to the installation instructions for all of these kits for you. The mounting hardware is not meant to be reused. After torqueing down the hardware it will stretch and so it cannot be re-used. For replacement hardware I would need to know which kit you...
view full answer... - Fifth Wheel Hitch Recommendation For 2012 Dodge Ram 2500 With 6 Foot BedThe Reese Revolution pin box has features like a Sidewinder and as explained in the attached helpful article, cannot be used with a sliding fifth wheel hitch. When executing turns it would have two moving pivot points and could cause damage to the trailer, truck, or both. You can install a sliding fifth wheel hitch if you lock the hitch so that it will not use the sliding feature if your trailer has a Reese Revolution or Sidewinder. For that reason we recommend using a fixed fifth wheel...
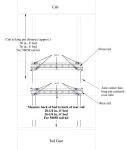
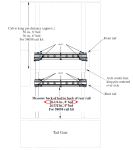
view full answer... - Can I Keep My Toolbox/Fuel Tank with a 5th Wheel Hitch on my 2012 Ram 2500For starters, the correct kit that you will need to install a Reese 5th wheel hitch such as the Reese 5th Wheel Trailer Hitch part # RP30083 for short bed (6-1/2') trucks or part # RP30928 for long bed (8') trucks is the Reese Quick-Install Custom Installation Kit w/ Base Rails part # RP50140-58. In order to determine if the toolbox/fuel tank you have can be used with the above kit installed you will need to measure from the back edge of the bed floor forward. The base rail closest to...
view full answer... - How to Install a Reese 16K 5th Wheel Hitch on a 2006 Dodge Ram 1500Do you already have the frame brackets? If so then all you need is the Reese Universal Base Rails for 5th Wheel Trailer Hitches part # RP58058 (inboard only). If not then in order to install the Reese 5th Wheel Trailer Hitch with Slider part # RP30051 on your 2006 Dodge Ram 1500 you have two options, a custom install kit like the Reese Quick-Install Custom Installation Kit part # RP50140-58 for mega cab models or part # RP50040-58 for non-mega cab models and a semi-custom install kit like...
view full answer... - Can I Pull And Turn A 5th Wheel With A 100 Gallon L-Shape Transfer TankIt certainly is possible to pull and turn a fifth wheel with a transfer tank in the bed of your truck. The main concern is clearance on sharp turns. I do not know the width of your toolbox/fuel tank combo so you will have to do some measuring to know with certainty that they will fit together. I recommend placing your 5th wheel hitch in the bed of your truck and measuring from the cab side of your hitch to the cab of your truck to ensure you have enough clearance for your tank. Generally...
view full answer... - Can A Fifth Wheel Hitch Be Installed on a 2004 Dodge Ram 3500 by a Do-It-YourselferWe offer a custom rail kit for your 2004 Dodge 3500 Dually that requires no drilling of the frame to install. It is Reese Custom Fit part # RP50140-58 and can be viewed online. There are links below to the installation instructions so you can see if this installation would be something you would be comfortable doing yourself. We also have a video of the Reese # RP50140-58 being installed on a 2004 Ram 2500 for you to review as well.
view full answer... - Fifth Wheel Rail Kit Recommendation for 2006 Dodge Ram 3500 Short BedFor a set of above-the-bed fifth wheel rails confirmed as a fit for your 2006 Dodge Ram 3500 the Reese kit part # RP50140-58 would be what I recommend. This is a custom fit kit for your truck that would fit and work well. Down the road this would work well with a Demco Hijacker Autoslide 18k part # DM8550034. I really like this hitch as it slides back automatically as you might tight turns.
view full answer... - Fifth Wheel Recommendation for a 2006 Dodge Ram 3500 Long BedTo put a hitch in your 2006 long bed Dodge Ram 3500 you are going to first need a fifth wheel installation kit to put rails in the bed of your truck. For that I recommend a custom install kit like the Reese Fifth Wheel Installation Kit # RP50140-58. This custom kit will install in about half the time as a universal kit and will minimize drilling. For a hitch I would recommend the Reese 22k Fifth Wheel # RP30033. This is a similar fifth wheel hitch to the # RP30084 that you referenced with...
view full answer... - 5th Wheel Trailer Hitch Installation Kit for a 2008 Dodge Ram 2500 and Reese Pro Series HitchThe kit I recommend is the same one you have referenced, # RP50140-58. This is a custom installation kit. The custom kits install quicker when compared to the universal kits because there is much less drilling involved and the brackets are designed to fit the frame rails on your truck. I have included a link to the instructions for you.
view full answer... - 2003 Dodge Ram 2500 Fifth Wheel Hitch and Rail Kit RecommendationI would love to help you pick out a fifth wheel hitch and rail kit for your 2003 Dodge Ram 2500 with a short bed and Cummins engine. First lets start with a rail kit. A custom install kit will cut install time in half and will minimize drilling over a universal kit so I would recommend that route. For that I would recommend the install kit part # RP50140-58. The only Rams that have interference issues caused by overload springs are the newer Rams so that isn't an issue for you. I attached...
view full answer... - Fifth Wheel Rail Kit Options for 2006 Dodge Ram 3500I attached a link to this page that has all of the fifth wheel rail kits we offer for your 2006 Dodge Ram 3500 but I would recommend going with a custom rail kit like the # RP50140-58 if you were looking for a standard fifth wheel rail kit since this will minimize drilling and install time over a universal option. Another great option is the B and W Turnoverball style hitch like part # BWGNRK1313 which is and underbed style that doubles as a gooseneck hitch. You'd also be able to use what...
view full answer... - Placing Fifth Wheel Hitch Install Bed Rails in Bed of 2003 Dodge Ram 3500 Long BedThe distance from the rear edge of the truck bed (NOT the tailgate) to the rear edge of the rear bed rail of the Reese # RP50140-58 fifth wheel hitch install kit is 28-1/4 inches. You can find this information on page 4 of the installation instructions, which I've linked for you. If you need a 7-way trailer connector installed in the truck bed, you can do so using part # HM42137. I've also linked you to install videos for the fifth wheel rails and the in-bed 7-way trailer connector.
view full answer... - Can 2006 Dodge Ram 1500 Mega Cab Tow Fifth Wheel Yes, a 2006 Dodge Ram 1500 with a Mega Cab and a 6-1/2 foot bed does have fifth wheel rail kits made for it so it could easily tow a fift wheel hitch. From my research it looks like the towing capacity is 7,300 to 7,800 lbs so you'd need to confirm that though and stay under the capacity. So since you have a truck bed shorter than 8 feet you'll need a slider hitch to get you the clearance needed. For that we have the Pro Series 16k Hitch part # PS30121 which is a slider hitch and would...
view full answer... - Drilling Holes in Truck Bed to Install 5th Wheel Trailer Hitch Installation Kit on a 2005 Dodge RamIt looks like you are referring to step 7-d of the installation instructions for the 5th wheel trailer hitch installation kit # RP50140-58, linked for reference. Step 7 refers to installing the rear frame brackets under the truck. The holes drilled through the bed are there so you can attach the above bed rails to the under bed brackets. The holes need to be enlarged because you will be inserting tube spacers with the bolts (step 10). The bolts for the center of the rails do not require...
view full answer... - Towing Capacity of 2006 Dodge Ram 3500 DieselLooks like you'd be good. I pulled up the towing capacity of your truck and it's rated for 15,350 lbs trailer weight and your trailer would weigh at most 12,995 lbs. The M5 Series hitch part # RP30928 that you referenced has a 20k capacity and would be a great option. For a rail kit to install it in the bed of your truck you'd want the # RP50140-58 which is a custom install kit. This means the install time would be minimized as well as no frame drilling.
view full answer... - How To Use a Reese 15K Hitch 30046 On a 2012 Ram 2500In order to mount the Reese 15K 5th Wheel Hitch 30046 on your 2012 Ram 2500, I recommend using the Reese Quick-Install Custom Installation Kit part # RP50140-58. This kit is a custom fit so no drilling is required and it comes with everything that you will need. I have attached an install video for you as well. If you want to save some money then we do have another option for you in the Reese Semi-Custom Base Rail and Installation Kit part # RP30035-186 but this option will require you...
view full answer...
Do you have a question about this 5th Wheel Hitch Rail?
Info for this part was:





At etrailer.com we provide the best information available about the products we sell. We take the quality of our information seriously so that you can get the right part the first time. Let us know if anything is missing or if you have any questions.






Jackie
2/8/2016
Hi Mike can you tell me which universal kit I should get