
Best 2013 Ford Taurus Bike Racks
change vehicle# 1
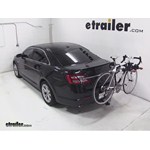
Thule Passage Trunk Bike Rack for 2 Bikes - Hanging Style

- view all Trunk Bike Racks
- Frame Mount - Anti-Sway
- 2 Bikes
- Non-Retractable
- Locks Not Included
- 6 Straps
- Adjustable Arms
- Hanging Rack
- Thule
More Information >
by: Jean 03/16/2023 Ford Taurus
Ford TaurusI purchased this for my son to be able to transport his bicycle to and from college with his Ford Taurus sedan. It was just what we needed and provided safe and durable transport. This email is in response to etrailer's follow-up one year after purchase. I really appreciate the concern their customer support puts forth in making sure the customer is pleased and well cared for. I would highly recommend this product!
View More
View Less
by: Jennifer06/14/2020
Excellent and prompt customer service! When I first ordered my product it wasn’t in stock— staff were quick to let me know and offered me comparable products. I ended up waiting for my original order and shipping quick and they stayed in touch with ideas! Thule: The instructions could be a little more detailed. I ended up watching YouTube videos to help me instal. Overall it was easy, and this was the first rack I’ve ever installed and I did it by myself! I was surprised to learn the bike rack is in no way secured inside your vehicle, so.. I store it in my garage when it’s on.

View More
View Less
# 2
Swagman XTC2 Bike Rack for 2 Bikes - 1-1/4" and 2" Hitches - Frame Mount

- view all Hitch Bike Racks
- Platform Rack
- Folding Rack
- Frame Mount
- Locks Not Included
- 2 Bikes
- Class 2
- Fits 1-1/4 Inch Hitch
- Fits 2 Inch Hitch
- Fits 1-1/4 and 2 Inch Hitch
- Swagman
More Information >
by: Scott05/21/2020
Very solid hitch. Arrived in perfect condition with all the hardware needed. I watched the installation video for installation on my 2013 Taurus which was a big help. The installation went perfectly with only slight drilled hole modifications for bolt alignment. I did the installation by myself, and did not have the car on a lift, so it took about an hour and a half which was not bad, as most of the time was just disconnecting the exhaust and positioning the hitch. I would not hesitate buying another hitch for my Chevy and if i do, it will come from etrailer. Great company, EXCELLENT communications, and very fast shipment. Couldn't be happier. By the way, I also purchased the locking hitch pin, a bike rack, and padlocks all from etrailer. Very happy with these purchases too!!!!! If you are looking around for a better deal, just stop, and buy here, you won't regret it.
View More
View Less
by: Ray06/10/2016
Much easier to load on to my car and load the bikes on to it. Much lighter. I love it.
View More
View Less
# 3
Swagman XC2 Bike Rack for 2 bikes - 1-1/4" and 2" Hitches - Frame Mount

- view all Hitch Bike Racks
- Platform Rack
- Folding Rack
- Frame Mount
- Locks Not Included
- 2 Bikes
- Class 2
- Class 3
- Fits 1-1/4 Inch Hitch
- Fits 2 Inch Hitch
- Fits 1-1/4 and 2 Inch Hitch
- Swagman
More Information >
by: Michelle Robinett06/15/2017
The product arrived on time and has been installed. All seems great so far just need the bike rack so I can test it out. The Swagman is on b/o.The team at etrailer notified me right away and gave me an option of a refund. I will wait.
View More
View Less
by: Steve01/19/2023
I like the overall design of this rack, but unfortunately after hauling a couple bikes around for a while the point where the crossbar connects has apparently rounded off so the rack swings back and forth. I've used rope to tie the ends of the rack to the car to stop this from getting worse, but it's inconvenient. Note: the hitch connection itself is good and solid, but the point where the crossbar connects to the bar coming from the hitch has gotten loose and there's no way that I can see to tighten it.
View More
View Less
# 4
Thule T2 Classic Bike Rack for 2 Bikes - 1-1/4" Hitches - Wheel Mount

- view all Hitch Bike Racks
- Platform Rack
- Folding Rack
- Tilt-Away Rack
- Wheel Mount
- Hitch Lock
- 2 Bikes
- Class 1
- Class 2
- Fits 1-1/4 Inch Hitch
- Carbon Fiber Bikes
Electric Bikes
Fat Bikes
Heavy Bikes - Thule
More Information >
by: James04/17/2018
Great product, I've been happy with the previous Thule, and am happy to see I dont' have to mess with feeding the Thule cable through my bike to lock it anymore
View More
View Less
by: Mike P07/10/2017
I have to get a trailer hitch extension in order for the bike rack to fold up when not in use. Definitely will go through etrailer for this item.


View More
View Less
# 5
Swagman Chinook Bike Rack for 2 Bikes - 1-1/4" and 2" Hitches - Frame Mount

- view all Hitch Bike Racks
- Platform Rack
- Folding Rack
- Tilt-Away Rack
- Frame Mount
- Bike and Hitch Lock
- 2 Bikes
- Class 1
- Class 2
- Class 3
- Fits 1-1/4 and 2 Inch Hitch
- Fits 1-1/4 Inch Hitch
- Fits 2 Inch Hitch
- Swagman
More Information >
by: Capt Jim03/21/2017
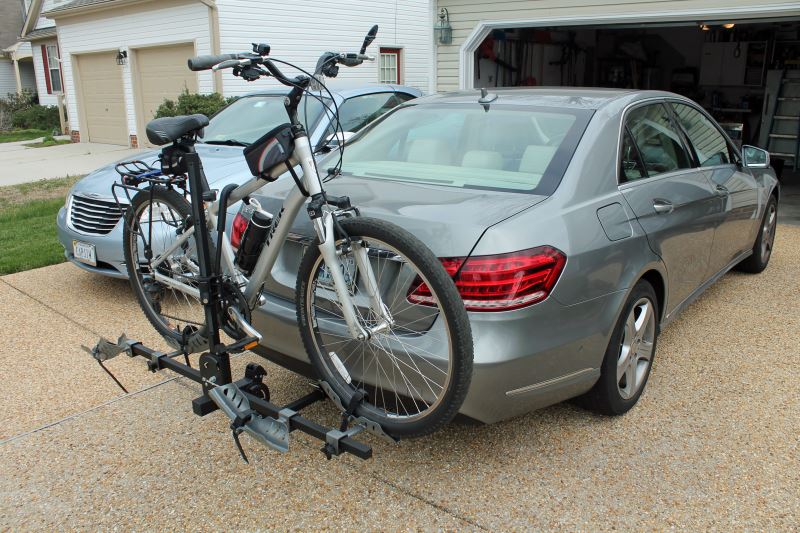
I ordered the Swagman Chinook 2 Bike Platform Rack on line from etrailer and so far have been very satisfied. The bike rack was delivered in less than a week. Unpacking the rack and assembly was fairly straightforward. I have read some reviews that complained the assembly instructions were a bit vague. I didn't have a problem but can see where others without a mechanical background get confused. The rack is very sturdy, but there is some side to side play in the tilt mechanism. I'm not sure this can be avoided with a rack that folds down. Installing the Curt trunk stabilizing strap takes most of the sway out of the rack. Installation is fairly easy and quick. It takes me 6 - 7 minutes to install the back on my hitch, and to install the bike and be ready to drive away. That seems reasonable to me. So far I've only loaded 1 bike. I've included pictures of my installation on a 2014 Mercedes Benz E350 sedan. Clearance between the bikes, the rack and the car are good. With the bike loaded in the inside, most forward position, I have 6" clearance between the pedal and the bumper. With the bike removed, the center support folded flat and the rack folded up in the storage position, I have 4" clearance between the closest part of the bike rack (the fold down hinge assembly) and the back bumper of the car. I am able to open the trunk of the car without removing the bikes or using the tilt feature, but I do have to remove the stabilizing strap first. Overall, I'm very pleased with the bike rack and think it will serve me much better than my old strap on rack. Since the weather has been cool since getting the bike carrier, I haven't taken any long trips to give it a real workout.


View More
View Less
by: Steve H.05/08/2018
Truly grooving on my wife's new Swagman Chinook bike rack. She wanted to be able to transport her nice road bike easily without throwing it in the back of her car, and since a roof rack is out of the question, this Swagman model fit the bill perfectly. It arrived quickly on the anticipated date. Kudos to etrailer.com for the email updates to keep me informed of my purchase. Within one hour, it was installed on my wife's 2014 Mazda3 hatchback. The Swagman is heavy and solid, which is reassuring as it makes me feel confident that it will keep the bikes secure. It also makes me feel like I got my money's worth. A ratchet wrench and Phillip's head screwdriver were the only tools required for the easy install. I did my research before purchasing the Chinook model as I was also eyeballing a very similar Thule rack that was slightly more expensive. I spoke with an etrailer.com expert who gave me the lowdown on both models. Ultimately, the Swagman won out because it has a smaller 'footprint' while extended or folded up ... and also can tilt away from the car for easy access to the hatchback area. Very convenient! FYI: Mazda doesn't make a trailer hitch for the Mazda3 as it's a small car with a small engine and has no business towing anything. Thankfully, the Curt company makes an aftermarket frame and trailer hitch that fits the Mazda3 hatchback perfectly with no drilling. Stupidly, I purchased it from another online company thinking I was getting a good deal. Turns out etrailer.com had it for less with FREE shipping. Oh well ... live and learn. Now I know that etrailer.com is one-stop shopping for bike racks AND trailer hitches. (Full disclosure: I had the garage down the street install the frame as it's easier with a lift) Only snafu: the shipment contained an extra set of keys that I assumed was for the hitch bolt lock (there was also a set of keys on the bolt itself). I spent 15 minutes using those keys trying to figure out how to remove the lock from the bolt to install it on the hitch. The keys just wouldn't turn in the lock. I called etrailer.com and Kevin told me to try the other set of keys ... and they worked. So an extra set of keys came with it that did absolutely nothing ... weird! Obviously, I can't speak to the longevity and durability of the Swagman Chinook 2 Bike Platform Rack as I just installed it. What I can speak to is the sturdiness of it, the ease of the installation and my complete satisfaction with the good folks at etrailer.com.


View More
View Less
# 6
Curt 2 Bike Platform Rack - 1-1/4" and 2" Hitches - Frame Mount - Tilting

- view all Hitch Bike Racks
- Platform Rack
- Folding Rack
- Tilt-Away Rack
- Frame Mount
- Bike Lock
- 2 Bikes
- Class 1
- Class 2
- Class 3
- Fits 1-1/4 and 2 Inch Hitch
- Fits 1-1/4 Inch Hitch
- Fits 2 Inch Hitch
- CURT
More Information >
by: Ian 05/09/2024
Bike rack has been great. We've taken it on several road trips. It makes taking the bikes somewhere close to the house an option now. Before this we had one of the strap on racks that take 15 minutes to get the rack and bikes onto the car, the thought of going anywhere with the bikes was really annoying. This thing takes 2 minutes to get on or off, so taking the bikes somewhere is a breeze.
View More
View Less
by: Paul10/29/2023
I installed this rack onto a Curt trailer hitch which is mounted onto a 2017 Honda Fit. I have been using it intermittently for several months, probably about 5 times with one bike and twice with two bikes. I give some pros and cons below and then elaborate. Pros: easy to assemble, easy to mount and dismount bikes, easy to lock and unlock, how to put the rack into different positions is intuitive Cons: inconvenient to put the rack into different positions, inconvenient to mount the rack onto the hitch, rack protrudes about 15 inches from bumper when in flipped up position (seems very vulnerable to someone backing into it in a parking lot, very inelegant looking I say the repositioning is intuitive because there is really only one way you could possibly place the pins for each position. But removing and replacing two pins is much less convenient than turning a knob or a lever, like some racks do. Also many racks fold and flip in such a way as to look very unobtrusive when in non-use mode. This one looks like kind of a monstrosity. That does not really bother me but it might bother some owners. The part that does bother me is how far it protrudes from the car. I back into parking spaces whenever possible to avoid someone bumping into the rack and damaging it (which happened to a friend). My number one suggestion for Curt is related to mounting the rack onto the hitch. Make it easier to tell when the holes are lined up so that the bolt/pin will fit and thread. As it is now, if you insert the rack as far as it can go it is way too far in. Ideally, it would be exactly lined up. Failing that, maybe some kind of click or other feedback to know at least that you are in the neighborhood. It would also be great to have an attaching device that is easier to fasten and unfasten than is the bolt/pin. Tip for mounting the rack onto the hitch: I assumed that it would be awkward to hold, what is it 46 pounds?, while trying to line up the rack probe with the receiver. If you have a garage with exposed collar ties, my solution could work well for you. I looped a cargo strap over a collar tie. Then I hooked both hooks of a bungie onto that loop. The idea is that you hook one of the bike frame holders of the rack onto the bungie, suspending the rack a few inches off the garage floor. This takes most of the weight of the rack so that you can just pull up or down and forward until you line up with the receiver. Tip for mounting bikes. Don't put the little screw into the post that prevents you from completely removing the bike frame holders. Remove both holders. Position the first bike, slide the holder into place, position the second bike, slide the holder into place. I found this makes it much easier, because you avoid parts of the bike hitting the holder as you are trying to get the wheels into place. The trick is that if you are mounting only one bike, don't forget to put the second holder back on - or maybe just stick it inside the car right away.


View More
View Less
# 7
Kuat NV 2.0 Bike Rack for 2 Bikes - 2" Hitches - Wheel Mount - Gunmetal Gray

- view all Hitch Bike Racks
- Platform Rack
- Folding Rack
- Tilt-Away Rack
- Wheel Mount
- Bike and Hitch Lock
- 2 Bikes
- Class 3
- Fits 2 Inch Hitch
- Carbon Fiber Bikes
Electric Bikes
Heavy Bikes - Kuat
More Information >
by: Douglas08/23/2022
This thing is built like a tank! It is of the best fit and funtion I have seen in a bike rack! Solid as can be, fits my bikes perfectly and looks awesome! Plus it folds completely out of the way to access the rear liftgate on my 2022 Rav4!


View More
View Less
by: Cheryl08/25/2021
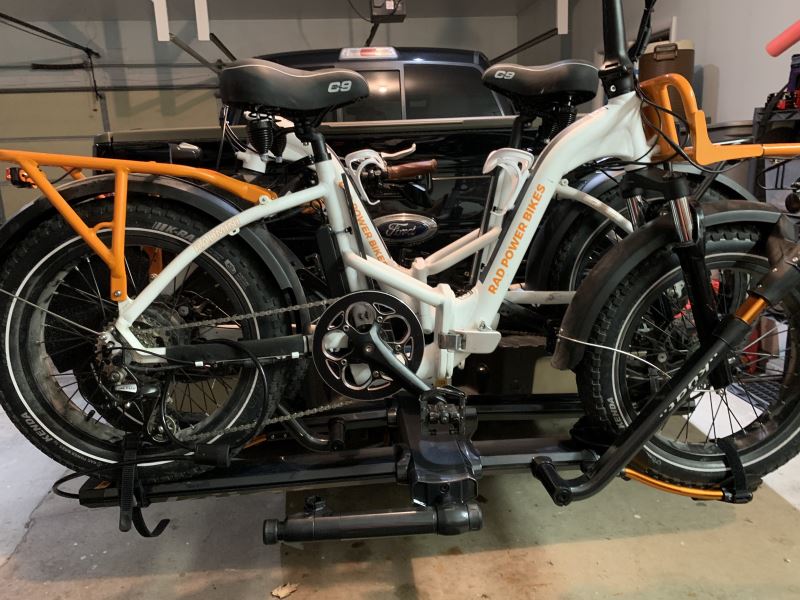
Great service from etrailer and the rack arrived as expected. Fairly easy assembly. OK video on Kuat’s site, but didn’t cover the foot pedal. Really glad we got the 2” hitch. It tightened up and we’re impressed with the quality and the stability of the rack. We haven’t done a road test yet, but look forward to putting it to the test. We have a Ford F-150 and it works great. The bikes were fairly easy to load with the batteries out and two people. We do need the strap extenders for our RadMini Step Thru’s. The tires are too big for the ones that come with. Only one set of extenders came with the bike and one adapter for a smaller tire. It’s okay, but since it’s a two bike unit, would have been nice to have both extenders. Otherwise, we are really liking the look and stability.
View More
View Less
# 8
Swagman XTC4 Bike Rack for 4 Bikes - 2" Hitches - Frame Mount

- view all Hitch Bike Racks
- Platform Rack
- Folding Rack
- Frame Mount
- Bike and Hitch Lock
- 4 Bikes
- Class 3
- Fits 2 Inch Hitch
- Swagman
More Information >
by: Jeff03/14/2024
So far I’ve just assembled it and took a quick test drive around the block. My initial thought is this thing is perfect. It’s super sturdy and easy to use. My only gripe and it’s not fault of the rack, but it’s heavy…


View More
View Less
by: Chuck Matsoff01/20/2013
If you've done any research or read any of the other comments on either this rack, or this seller...rest assured they really are as good as everyone says! I ordered my rack on around 4pm est on a Friday afternoon and within an hour I received an email that said they have shipped my product AND upgraded to priority shipping. Can't say enough positive things about the customer service! When the rack arrived, it took me a little over half an hour to get it set up. Probably would e been faster if I were even slightly mechanically inclined (or if didn't I didn't have to borrow a socket wrench from my neighbor). We finally had an opportunity to load up the bikes and head out for a ride today. As others have said, the first time you load up your bikes, it's kind of like a puzzle to get them situated. Took about 15 minutes. This rack is awesome! Very sturdy and the bikes were very secure. Only racks I have had in the past were rooftop fork mount racks. This is so much easier! On e we got to the trail (over an hour drive) getting the bikes off was a piece of cake. Afterwards, it was time to load them back up and it was less than 5 minutes to get them all on and ready to hit the road. There were other 4-bike racks on the website, but this one had enough great reviews that I felt comfortable making the purchase. After the fact, I'm very glad I did! I can't imagine the $800 rack can be that much better than this, and I highly recommend this for anyone looking for a 4-bike platform rack. I will definitely recommend this rack and etrailer.com to everyone I know.


View More
View Less
# 9
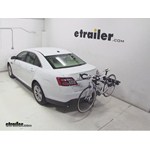
Saris Freedom Bike Rack for 2 Bikes - 1-1/4" and 2" Hitches - Frame Mount

- view all Hitch Bike Racks
- Platform Rack
- Folding Rack
- Frame Mount
- Locks Not Included
- 2 Bikes
- Class 1
- Class 2
- Class 3
- Fits 1-1/4 Inch Hitch
- Fits 2 Inch Hitch
- Fits 1-1/4 and 2 Inch Hitch
- Electric Bikes
Heavy Bikes - Saris
More Information >
by: Scott11/20/2021
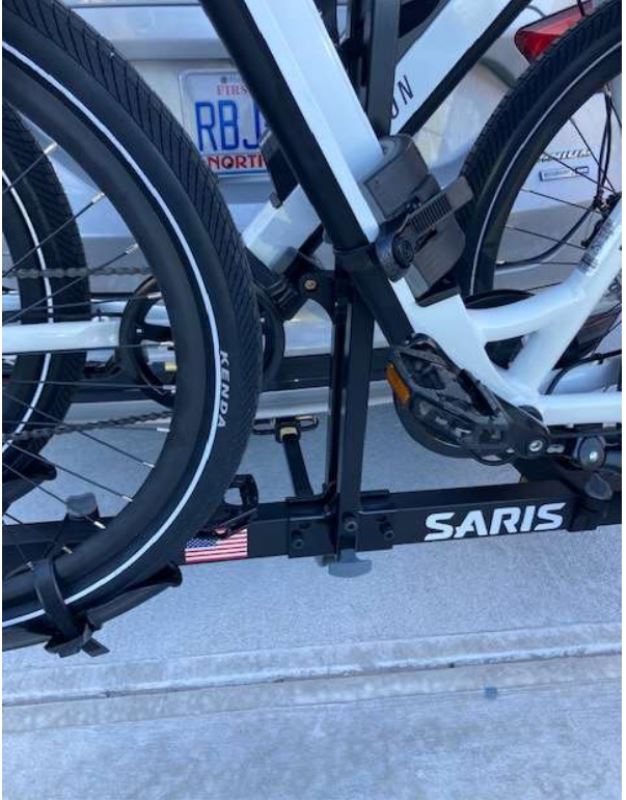
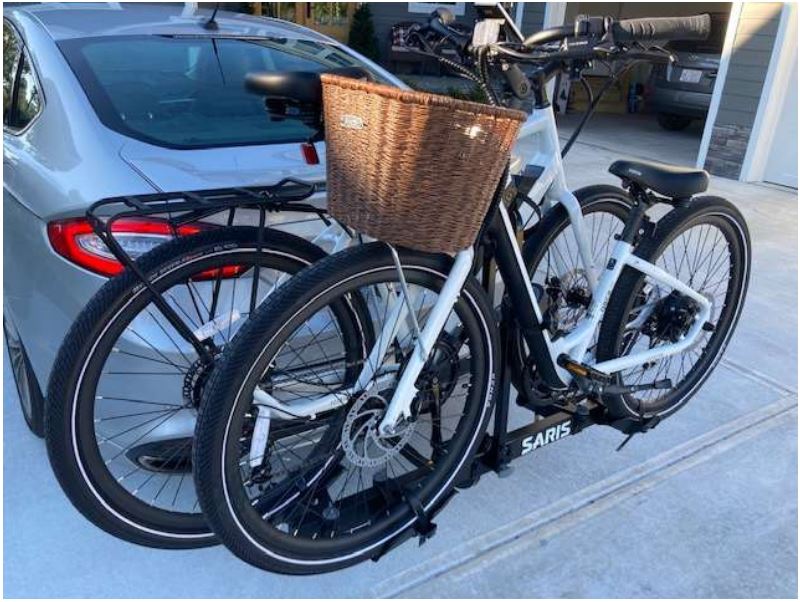
I had to put my electric bikes into this rack, backwards, to make them fit. Not ideal, but it works.The receiving 'trays' that are intended to provide support for holding the bikes, by being placed under the bike tires, are forced to be moved to a location that is not directly under the bottom of the bike tires. While it works in this manner, it is not ideal.For the support that attaches to the diagonal bike frame, we had to remove it from the vertical rail of the rack. We reinstalled it, upside down, because that's the only way we could make it fit, or 'grab', the bike frame. Again, we made it work, but it's not ideal. We chose to keep the rack because it was so much less expensive than the Thule rack we considered buying. The bike shop owner didn't agree with us. He observed that we are putting $3000 worth of bikes on the rack and risking that investment. So far, no problems, other than the ill-fitting installation.


View More
View Less
by: Robbin04/18/2024
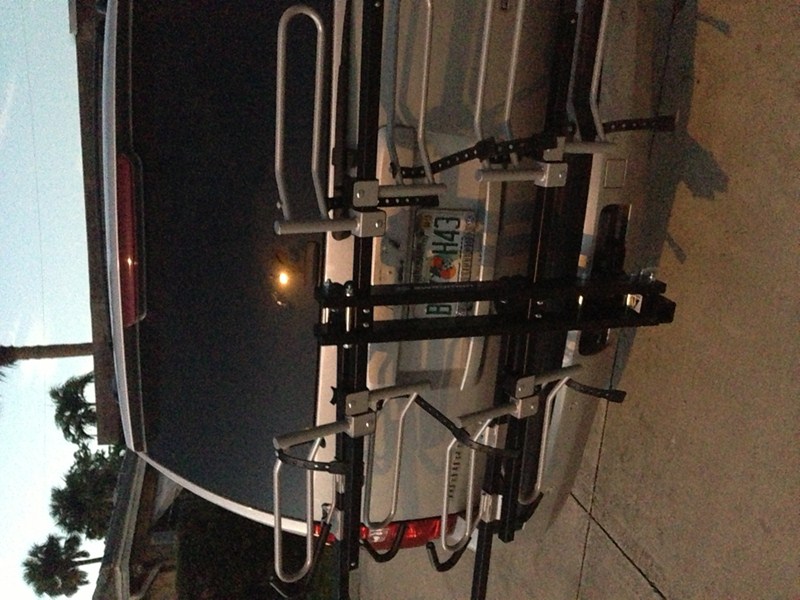
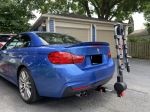
Loved our Saris rack that went on the trunk but love having the bike rack on a hitch even more! Now we can take the bikes AND put the top to the convertible up and down as we please :)
View More
View Less
# 10
Yakima RidgeBack Bike Rack for 4 Bikes - 1-1/4" and 2" Hitches - Tilting

- view all Hitch Bike Racks
- Hanging Rack
- Folding Rack
- Tilt-Away Rack
- Frame Mount
- Hitch Lock
- 4 Bikes
- Class 2
- Class 3
- Fits 1-1/4 and 2 Inch Hitch
- Fits 1-1/4 Inch Hitch
- Fits 2 Inch Hitch
- Yakima
More Information >
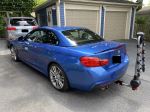
by: Ryan06/12/2022
Check out my other review on the hidden hitch for a 2015 BMW 4 Series for the majority of the review, but this thing is great. Easy setup and install, does all the things it's supposed to do. Mounting and removing bikes is a snap with the included clips (big difference from some of the cheaper variants with nylon ratchet straps). Fits very snugly in my 2" receiver, and pretty solid on the highway and over bumpy roads.


View More
View Less
by: Michael E.05/31/2022
First trip with 3 bikes. Nary a wobble. The anti-sway strips appear to make a big difference.


View More
View Less
# 11
Thule Hitching Post Pro Bike Rack for 4 Bikes - 1-1/4" and 2" Hitches

- view all Hitch Bike Racks
- Hanging Rack
- Folding Rack
- Tilt-Away Rack
- Frame Mount
- Locks Not Included
- 4 Bikes
- Class 1
- Class 2
- Class 3
- Fits 1-1/4 and 2 Inch Hitch
- Fits 1-1/4 Inch Hitch
- Fits 2 Inch Hitch
- Thule
More Information >
by: Matt08/30/2022
The good: I like the way the bikes are held in and the ability to add the upright adapters to the bike frame holders. The straps are quality too. For a jeep with a spare tire, this is the perfect length to clear it. This rack is 5 stars from the bike holders to the base of it. The bad: the 2"receiver adapter and bolt are insufficient. I wish they made this in a solid 2" hitch. The entire setup is held into the receiver by a very short bolt. It only goes about half way into the receiver tube. So your hitch is only "secured" on one side. A hitch pin or bolt should go through the receiver tube completely imo so it can be secured on the other end with a retaining clip or nut. Because this only goes in the one side, the entire weight of the rack plus bikes are held tight to one side of the receiver by the undersized bolt and washer. A few bumps down the road and that bolt loosens. Now instead of distibuting the weight of the rack and bikes on the receiver and post, it's completely up to the bolt to keep you from losing the rack. The bolt threads get damaged too. I took this down a dirt road and nearly lost everything. I had to buy my own bolt with hd fender washers and lock washers to correct this. Thule should've provided this from the start. The current short bolt design where only one side of the receiver secures the rack is unacceptable. This rack is 1 star at best for the connection to the receiver.


View More
View Less
by: Alena07/03/2018
I bought this bike rack back in April but wanted to make sure I used it to give the best review. First I want to say I did a lot of research on bike racks and found this one to be the best one to fit my needs. The best price I found was on etrailer.com, at the time it was When I called the customer service to place my order, I spoke to Dan. He was very pleasant on the phone and took the time and listened to what I needed and understood my concerns. I ordered the bike rack and also ordered the Thule Snug Tite Hitch Lock and Anti-Rattle Device and the Thule Cable Lock w/ One Key System Lock. Dan suggested I also get the Thule Bike Adapter Bar, which I never even thought of getting. Delivery was in about two business days, which was really fast and at the time of order they were running a special free delivery over $99. When I went to put it together I noticed I was missing the flat cap screw M6 x 16mm, part number #853-5787-02. I emailed Dan and within 24 hours received an email that the part was sent out and also in the email their was a link to track the order. After I received the part I did notice that the flat cap screw was actually in the 2 inch adaptor sleeve. The instructions were very easy to read, and it took me about 20 minutes to put together. I did have an issue when I positioned the stinger into the cradle, with the 8mm locking nut, it was not staying tight and when I took it off I noticed the threads inside were gone, so I ended up going out to Lowes and buying a new one and its holds perfectly fine. I also had a question about that part because it is not a locking part and was worried someone would try to steal the rack. I contacted etrailer.com to find if they make a locking device for this and they said no but I can contact Thule to double check, I'm still waiting for an answer back from Thule. The weather finally broke and we installed the rack onto my hitch, tightened it and it doesn't rattle. When I finally used the rack and put my bike on, it did sway a little but at 50 mph I was very happy with it. The trailer comes out just enough away from my car that I do not have to fold completely out and I can open my trunk with no issues. I am very happy with my purchase and had a great customer experience with Dan. Would highly recommend ordering from them to anyone.


View More
View Less
# 12
Thule Passage 3 Bike Carrier - Trunk Mount

- view all Trunk Bike Racks
- Frame Mount - Anti-Sway
- 3 Bikes
- Non-Retractable
- Locks Not Included
- Fits Most Factory Spoilers
- 6 Straps
- Adjustable Arms
- Hanging Rack
- Thule
More Information >
by: Jean 03/16/2023Ford Taurus
Ford TaurusI purchased this for my son to be able to transport his bicycle to and from college with his Ford Taurus sedan. It was just what we needed and provided safe and durable transport. This email is in response to etrailer's follow-up one year after purchase. I really appreciate the concern their customer support puts forth in making sure the customer is pleased and well cared for. I would highly recommend this product!
View More
View Less
by: Kelly11/20/2017Ford Edge
Ford EdgeFits perfectly on our Lexus CT200h. Only on the old LS400, the side straps have to be fastened to the wheel arch edge, since the upper trunklid gap is to narrow for inserting the strap hooks. Mounting of two bikes is (with some routine) quickly done, and they stay safe even for longer and faster routes. For transporting three (mountain) bikes, though, the design doesn't seem big and robust enough. Nevertheless, the price-benefit-fun ratios are way better than reasonable.

View More
View Less
# 13
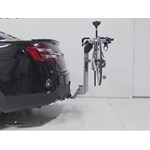
Rhino-Rack Bike Rack for 2 Bikes - 2" Hitches - Tilting

- view all Hitch Bike Racks
- Hanging Rack
- Folding Rack
- Tilt-Away Rack
- Frame Mount
- Locks Not Included
- 2 Bikes
- Fits 2 Inch Hitch
- Rhino Rack
More Information >
by: Jane 01/24/2024
I purchased this bike rack a year ago and I use it A LOT. I had to buy and install a stabilizer because without it, the unit would sway back and forth even without a bike on it (very noisy). This makes removal more cumbersome but since I keep the hitch on year round it doesn't matter to me. The tilting function is fabulous allowing easy use of my RAV4 hatchback. I can even tilt it down with a bike on it. I got the 2 bike hitch. Plenty of room for two bikes to fit without rubbing. Lastly, the hitch has a sizable through-hole on the bottom to thread a good sized cable so I can lock my bike up. Sturdy. I highly recommend.
View More
View Less
by: Mark 04/11/2024
The unit ‘s simplicity is a real plus. It takes less than 3 minutes to put the rack on the vehicle. It is well built and very durable and has a nice feature that allows you to open the rear hatch for SUV owners without removing the rack.
View More
View Less
# 14
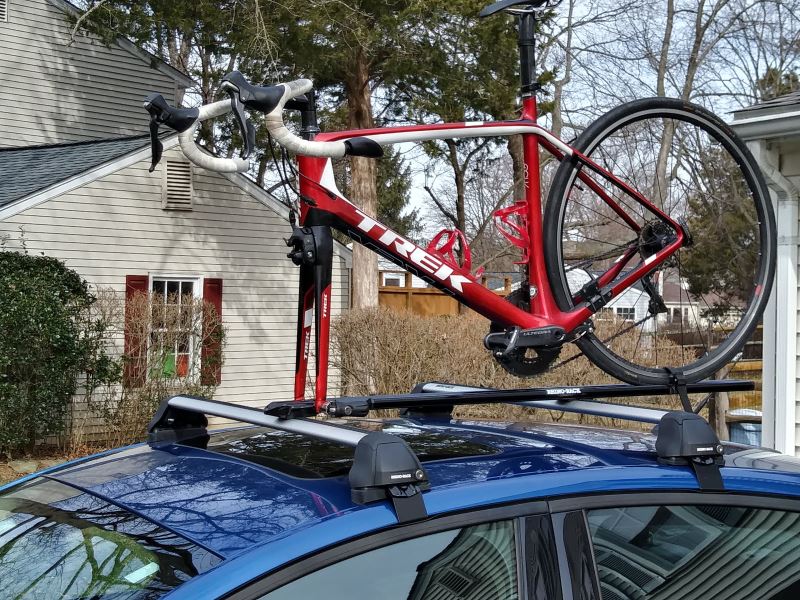
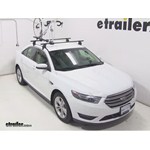
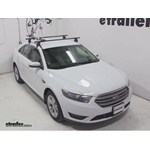
Rhino-Rack Road Warrior Rooftop Bike Carrier - Fork Mount

- view all Roof Bike Racks
- Fork Mount
- 9mm Fork
- Bike and Rack Lock
- Aero Bars
- Disc Brake Compatible
- Clamp On - Standard
- Black
- Rhino Rack
More Information >
by: Scott02/06/2020
This bike carrier has a clean design and it assembled and attached to the roof rack easily. A locking front cover prevents it from being detached from the roof rack and the tray has a cut out in the front for a disc brake if my next bike has one. Once everything is snug, the bike feels solid and there's no slop.

View More
View Less
by: Tracy02/27/2024
Had the rack on the truck for a year No issues bat all Holds the bikes great, never bhad an issue with the bikes up on top
View More
View Less
# 15
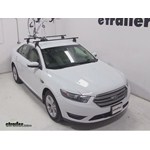
Kuat Trio Roof Bike Rack - Fork Mount - Clamp On - Aluminum - Black and Polished Chrome

- view all Roof Bike Racks
- Fork Mount
- 15mm Thru-Axle
- 20mm Thru-Axle
- 9mm Fork
- Bike Lock
- Aero Bars
- Factory Bars
- Round Bars
- Square Bars
- Disc Brake Compatible
- Clamp On - Standard
- Black
- Kuat
More Information >

by: Michael P.01/22/2023
Installed all products after having watched videos and read through pdf instructions. The Yakima JetStream roof rack system is outstanding (with one exception) - instructions and videos facilitated the installation. The Yakima system is the only one I could find for my car (Mercedes E450 Coupe), as the car's panorama roof glass extends to the edges near the fixed mounts. The Yakima system is quiet, thanks to the ability to modify the crossbar pitch angles, and has a high-quality appearance that complements my car. And it is rock solid. The Kuat Trio bike tray is an outstanding low-cost, simple solution - well-designed and well-executed and installs to the Yakima JetStream bars flawlessly. I would recommend that Kuat include a 12mm x 100mm thru-axle in the Trio kit, as I had to purchase that part separately. Only disappointment is in the Yakima Landing Pad Covers that ship with the Landing Pad 22 (LP 22) kit. The covers do not snap tightly into place, and appear as if they were designed for a different Landing Pad. In summary, my Yakima/Kuat bicycle roof rack system exceeds expectations (except for the LP 22 Covers), operates flawlessly, looks great, and stores easily. It has given me high confidence in Yakima, in Kuat and in etrailer.com. Well done.


View More
View Less
by: Jose10/25/2022
Great rack easy to install, light weight and well made.


View More
View Less
Bike Rack Videos
Highland Hitch Bike Racks Review - 2013 Ford Taurus
Today, on our 2013 Ford Taurus, we're going to be test fitting the Highland SportWing Two-Bike Rack for inch and a quarter or two inch hitches. Part number 5801200. We'll begin our test fit by assembling the insert and inserting the shank into the hitch. The adapter is two plates with the hole drilled through it. We're going to align those up. Now, I like to keep a hand on it as you insert it in to the hitch so the plate's hole doesn't come out of place with the hole in the shank. You need to line them up with the hitch hole. Take your anti-rattle hitch pin and throw that into place.
Yakima FrontLoader Roof Bike Rack Review - 2013 Ford Taurus
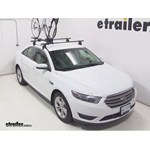
Today on our 2013 Ford Taurus, we are going to be test fitting the Yakima front loader, a wheel mount roof bike rack, part #Y02103. With our Yakima Q tower roof rack system already installed on our Taurus, we are going to begin our test fit by placing our back rack directly onto our cross bars. Here at the front, we'll bring the two portions of the clamp to the front side of our cross bar and the single portion of our clamp will go around the rear. We will then use the T-handle located in the front to tighten this down. With our front secure, we will now move to the rear. Here we're going to loosen the black T-nut, remove the T-bolt from the slot on the lower half of the clamp, bring our clamp around our bar, re-insert the T-bolt and tighten it down with the T-nut. With our rack secure, it is now time to load our bike. We'll first undo our wheel strap and move our front wheel cradle all the way to it's forward position. We'll now grab our bike, place it onto the rack, allow it to roll forward slowly, bringing up the smaller rear half of the front wheel cradle.
Yakima ForkLift Roof Mounted Bike Rack Review - 2013 Ford Taurus
Today on our 2013 Ford Taurus we'll be test-fitting the Yakima ForkLift, a fork mount, roof-mounted bike rack, part number Y02098. With the Yakima Q-Tower Roof Rack system already installed on the Taurus, we're going to begin our test fit by placing our bike rack directly onto our crossbars. The front, we'll remove the skewer. It is reverse thread. Slide back the black plastic cover. Then we can loosen the T handle to separate the lower half of our clamp.
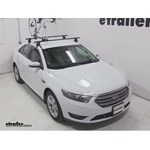
Swagman Upright Roof Mounted Bike Rack Review - 2013 Ford Taurus

Today on our 2013 Ford Taurus, we're going to be test fitting the Swagman upright roof bike rack, part number S64720. With our Yakima Q tower roof rack system already installed on the Taurus, we'll begin our test fit by placing the bike rack directly on to our crossbars. Here at the front we'll bring two of the metal U-bolts around the underside of our bar, fit them through the head of the rack, and use two wingnuts to secure each one in place. With all four of our wingnuts in the front tight, we can now move to the rear. This time we're going to place the U-bolt down through the rack, around our bar, being sure that we have threads on both sides of our crossbar. We'll then bring the metal portion of the clamp up, place the U-bolt through it, and then we'll secure this in place using two of the wingnuts. With the rear secured it's now time to load our bike.
Swagman Fork Down Roof Bike Rack Review - 2013 Ford Taurus
Today on our 2013 Ford Taurus, we're going to be test fitting the Swagman Fork Down, the fork mount roof bike rack, part number S64710. With our Yakima Q Towers roof rack system installed on our vehicle, we're going to begin the test fit by placing the bike rack directly onto our crossbars. Here at the front, we'll bring one of the metal U-bolts around the underside of our bar, fit it through the head of the carrier, and secure it in place using 2 wing nuts. We'll repeat the same process on the other side of the front of the carrier here, and then secure down all 4 of our wing nuts. With our front secure, we'll move to the rear. Here at the rear, we're going to place one of the U-bolts down through the rack. We'll be sure that it comes down on both sides of our crossbar.
SportRack Roof Mounted Bike Rack Review - 2013 Ford Taurus
Today on our 2013 Ford Taurus, we're going to be test fitting the SportRack Roof Mount Bike Rack part number SR4622. With our Yakima Q Towers Roof Rack system already installed on the Taurus, we're going to begin our test fit by placing our bike rack directly on to our cross bars. At the front we'll bring one of the black rubber coated metal U-Bolts around the underside of our bar, fit it through the head of the carrier and hold it in place with two wing nuts. On the other side of the front we'll repeat that same process, then we can tighten all four wing nuts down to secure the front of our rack to our front bar. We'll now moved to the rear bar, where we're going to place two carriage bolts through the rack, being sure that they come out on both sides of our rear crossbar, we'll then place the black plastic portion of our clamp in between our rack and our load bar being sure that these carriage bolts go through it. Then we'll bring our metal portion of our clamp around the underside of our bar. We'll fit the two bolts through it and secure it and place using two wing nuts. With these two secure, it's now time to load our bike.
SportRack 3 Bike Rack Review - 2013 Ford Taurus

Today on our 2013 Ford Taurus we're going to be test fitting the Sport Rack tilting three bike rack for inch and a quarter and two inch hitches, part number Sr2403. To begin our test fit we're going to slide the shank of the bike rack into the receiver tube of our hitch, line up our pinholes, thread in our anti-rattle bolt and tighten it down with a wrench. We'll then secure it with the provided clip. In this position we have about ten inches worth of ground clearance. The closest point of the rack to the back of our vehicle's about two inches away, and overall we've added about ten inches to the length of the car. As you can see with our mast in the upright position we do have access to our trunk. However for larger items or easier access we'll simply pull the black pin at the base of the mast. This will allow us to tilt it away from our vehicle giving full access to our trunk. With our mast back in the upright position and our pin reinserted we'll now extend our dual cradle arms.
Softride Element Hitch Mounted Bike Rack Review - 2013 Ford Taurus

Today on our 2013 Ford Taurus, we're going to be test fitting the Softride Element Parallelogram, a tilting 4-bike rack for 1 1/4 and 2-inch hitches, part number SR25248. To begin our test fit, we'll slide the shank of the bike rack into the receiver tube of our hitch. Thread in our anti-rattle bolt and tighten it down with a wrench. With our rack in this position, we'll have about 10 inches worth of ground clearance. The closest point of the rack to the back of our vehicle is about 3/4 of an inch away. Overall, we've added about 9 inches in length to the vehicle. Pulling the two silver pins at the top of the center mast will allow us to tilt our cradle arms.
Softride Dura Hitch Bike Rack Review - 2013 Ford Taurus

Today on our 2013 Ford Taurus, we're going to be test fitting the Softride Dura Parallelogram, a tilting 4 bike rack for inch and 1/4 and 2 inch hitches, part number SR26247. To begin our test fit, we'll slide the shank to the bike rack into the receiver tube of our hitch, line up our pin holes, dry 00:00:19 down our anti-rattle bolt, tighten it down with a wrench. We can then secure it with the provided lock. In this position, we'll have about 9 and 1/2 inches worth of ground clearance. The closest point of the rack to the back of our vehicle is about 3 and 1/4 inches away. Overall, we've added about 36 inches to the length of our Taurus. A great feature of the Dura Parallelogram is the ability to remove the cradle arms. To do this, we'll simply push over on the black tabs and slide them out.
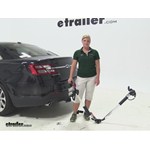
Saris Freedom Hitch Bike Racks Review - 2013 Ford Taurus

Today on our 2013 Ford Taurus, we're going to be test fitting the Saris Freedom, a platform-style tilting Ford bike rack for 2-inch hitches, part number SA4414B. To begin our test fit we'll slide the shank of the bike rack into the receiver tube of our hitch, line up our pin holes, put in our anti-rattle bolt and tighten it with a wrench. We'll then secure it with the provided clip. In this position we'll have about 11 inches worth of ground clearance. The closest point of the rack to the back of our vehicle is about a quarter inch away. Overall we've added about 14 1/2 inches to the length of the Taurus. Pulling the gray lever at the top of the rack will allow us to tilt it away from our vehicle into the platform position. In this position we've got about 16 1/2 inches worth of ground clearance here at the rear of the rack. The closest point of the rack to the back of our vehicle has moved.
Saris Axis 3 Bike Rack Review - 2013 Ford Taurus

Today, on our 2013 Ford Taurus, we're going to be test fitting the Saris Axis, a tilting 3 bike rack for 1-1/4 and 2-inch hitches with Part Number SA843B. To begin our test fit, we'll slide the shank of the bike rack into the receiver tube of our hitch, line up our pinholes, thread in our anti-rattle bolt, and tighten it with a wrench. We'll then secure it with the provided lock. In this position, we have about 10-1/4 inches worth of ground clearance. The closest corner of the rack to the back of our vehicle is about 2-1/2 inches away, and overall, we've added about 12 inches to the length of the Taurus. Pulling the yellow T-handle at the base of the rack will allow us to tilt the mast away from our vehicle. As you can see, this does give us full access to our trunk area. With our mast back in it's upright position, let's extend our dual-cradle arms.
Saris Axis Tilting 2 Bike Rack Review - 2013 Ford Taurus

Today on our 2014 Ford Taurus, were going to be test fitting the Saris Axis, a tilting 2 bike rack for 1 and 2 inch hitches part number SA832. To begin our test fit well slide the shank of the bike rack right into the receiver tube of our hitch, line up our pin holes, thread in our anti-rattle bolt then well tighten it down with a wrench and secure it with the provided pin. In this position well have about 10 inches worth of ground clearance. The closest point of the rack to the back of our Taurus is about 3 1/4 inches away. Overall weve added about 10 of inch to the length of the car. As you can see our trunk will open with our mast in its upright position.
Prorack 4 Hitch Bike Rack Review - 2013 Ford Taurus
Today on our 2013 Ford Taurus, we're going to be test fitting the Prorack Tilting 4 Bike Rack for 1-1/4" and 2" hitches, part number PR8062404. To begin our test fit, we'll slide the shank of the bike rack into the receiver tube of our hitch, line up our pin holes, thread in our anti-rattle bolt and tighten it down with a wrench. We'll then secure it with the provided clip. Our rack will offer us about 9" of ground clearance. The closest point of the rack to the back of our vehicle is about 2" away. Overall we've added about 28" to the length of the Taurus. As you can see with our mast in its upright position we do have access to the trunk.
Kuat TRIO Roof Bike Rack Review - 2013 Ford Taurus
Today on our 2013 Ford Taurus we're going to be test fitting the Kuat Trio, a Fork Mount Roof Bike Rack with part number RU01. With our Yakima Q Towers Roof Rack system already installed on the Taurus we're going to begin our test fit by placing the Trio directly onto our crossbars. At the front we'll bring the black rubber-coated metal U bolt around the underside of our bar, through the head of the carrier and we'll secure it in place using two cylinder nuts. We'll repeat this same process for the other side of the front. Then we can take our provided tool and tighten all four of our cylinder nuts down. We'll move to the rear where we're going to remove one of our wing nuts. We'll bring our clamp around our bar, being sure that one of our bolts is coming down on both sides. We'll reinsert the bolt through the lower half of our clamp, put on our wing nut and then we'll tighten down both wing nuts to secure it.
Hollywood Racks Traveler Tow n Go Bike Rack Review - 2013 Ford Taurus

Today on our 2013 Ford Taurus, we are going to be test fitting the Hollywood Racks Traveler Tow and Go, 3 Bike Rack for 2 inch ball-mounts; part number Hr135. Today we're going to be using the hidden hitch ball-mount with the 3/4 inch rise, or a 2 inch drop. It's part number is 80232. It is not included. To begin our test fit we're going to slide the shank of the ball-mount into the receiver tube of our hitch, line up our pinholes, slide through our pin and secure it with the clip. As with any ball mount fitted into a receiver tube, we've got some wiggle here.
Yakima DoubleDown Ace Hitch Bike Rack Review - 2013 Ford Taurus
Today on our 2013 Ford Taurus we'll be test fitting the Yakima Doubledown Ace Four Bike Carrier for 1-1/4 Inch and 2 Inch Hitches, part number y02451. To begin our test fit we'll slide the shank of the carrier into the receiver tube of the hitch. Line up the pin hole and install our attached pin.We'll now go over some key measurements. We have about 10 inches of ground clearance. The closest point of the carrier to the rear of our Taurus is about three inches. We've added nine inches to the overall length of the vehicle.
Pro Series Q-Slot 2 and 4 Bike Hitch Bike Rack Review - 2013 Ford Taurus

Today on our 2013 Ford Taurus we'll be test fitting the Pro Series Q-Slot Two Bike Platform-Style Bike Rack for 2 Inch Hitches, part number ps63138. This bike rack can be configured to carry two or four bikes. We will be test fitting it in the two bike configuration. To begin our test fit we'll slide the shank of the carrier into the receiver tube of the hitch.Line up the pin hole and thread in our anti-rattle bolt. Now we'll go over some key measurements. We have about ten inches of ground clearance.
Thule Helium Aero Hitch Bike Rack Review - 2013 Ford Taurus
Today, on our 2013 Ford Taurus we'll be test fitting The Thule Helium-Aero 2 Bike Carrier for 1 3/4 inch and 2 inch hitches part number th9042. To begin our test fit, we will slide the shank of the carrier into the receiver tube of the hitch. Line up the pin hole and allow our attached pin to fall in place. We'll then move to the rear of the shank and use the hand knob to secure our bike rack to our vehicle and engage our anti-rattle device. Now, we'll go over some key measurements. We have about 13 1/2 inches of ground clearance, the closest point of the carrier to the rear of the Taurus is about 1 inch. We've added 16 inches to the overall length of our vehicle.
Thule Doubletrack Hitch Bike Rack Review - 2013 Ford Taurus

Today, on our 2014 Ford Taurus well be test fitting the Thule Doubletrack Platform-Style 2 Bike Carrier for 1 inch and 2 inch hitches part number th990xt. To begin our test fit, we will slide the shank of the carrier into the receiver tube of the hitch. Line up the pin hole and thread in our anti-rattle bolt, tightening it with a wrench.Now, well go over some key measurements. We have about 9 inches of ground clearance, the closest point of the carrier to the rear of our Ford Taurus is about 1 inch. Weve added 9 inches to the overall length of our vehicle. We cannot fully access the trunk of the vehicle with the bike carrier in its stored position.
Kuat NV Hitch Bike Rack Review - 2013 Ford Taurus

Today on our 2013 Ford Taurus, we'll be test fitting the Kuat NV aluminum platform-style 2-bike rack for a 2" hitch, part number N101. To begin our test fit, we'll slide the shank of the carrier into the receiver tube of the hitch, line up the pin hole, and install our pin and lock. Now we'll move to the rear of the shank and use the hand knob to secure our bike rack to our vehicle and engage our anti-rattle device. Now we're going to go over some key measurements. We have about 10" of ground clearance. The closest point of the carrier to the rear of our vehicle is about 1".
2013 Ford Taurus Bike Rack Questions
- No, no trunk mounted bike rack is going to be able to hold a 65 lb e-bike unfortunately. Your best bet is to use a hitch mounted bike rack because that is going to give you a lot more options and capacity.
It's kind of a big undertaking, but you'd need to install a hitch first if you don't have one. I'd recommend sticking with a class III hitch because just about everything is designed to be used with a class III hitch, plus the weight capacities tend to be a bit better.
If...
view full answer... - The Thule OutWay PRO 2-Bike Rack - Trunk Mount - Adjustable Arms Item # TH45JV is going to be the best option for your lady's cruiser bike and 2013 Ford Taurus. It has arms that adjust up and down, in and out, independently of each other and the rest of the rack. What that means is that bikes with alternative frames can be loaded without the use of an adapter bar such as # 64005.
The Passage # TH910XT will hold the bike but in all likelihood you will need to use the above mentioned...
view full answer...


What our customers are saying:
"Everyone that bought before me was right! I got my rack in time for my next days off and putting it together was fast too. And I'm a grandma!! Thank you for being fast and honest! You beat anyone in my town hands down!"