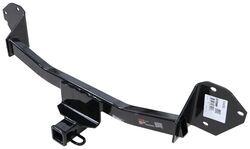
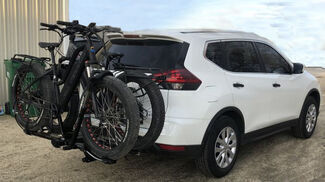
Trailer Hitch Size:
2 Inch Hitch Opening
Towing Capacity:
300 Pound Tongue Weight
2000 Pound Towing
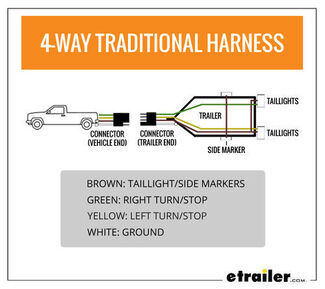
Trailer Wiring:
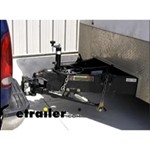
Features:
This fully welded trailer hitch receiver bolts onto your vehicle's frame with no welding required. Powder coated steel is sturdy and corrosion resistant.
Installation Notes:
No drilling through vehicle frame required for installation
Requires temporary removal of bumper/fascia during installation
Fascia trimming required for installation
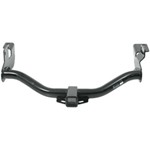
More Information >Trailer Hitch Size:
2 Inch Hitch Opening
Towing Capacity:
450 Pound Tongue Weight
3000 Pound Towing
Trailer Wiring:
Features:
This custom-fit trailer hitch with a hidden cross tube installs behind your vehicle's rear bumper, leaving only the receiver visible beneath it. Aluminum and steel alloy construction is durable and eco-friendly. Powder coat finish resists rust.
Installation Notes:
No drilling through vehicle frame required for installation
Requires temporary removal of bumper/fascia during installation
Fascia trimming required
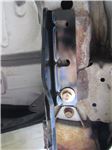
More Information >Trailer Hitch Size:
2 Inch Hitch Opening
Towing Capacity:
300 Pound Tongue Weight
2000 Pound Towing
Trailer Wiring:
Features:
Hit the road with confidence! Whether towing a camper, hauling gear, or getting the job done, this hitch is built for adventure. A fourth layer of matte black powder coating resists corrosion, ensuring strength and durability for every journey.
Installation Notes:
No drilling through vehicle frame required for installation
Requires temporary removal of bumper/fascia during installation
Fascia trimming required for installation
More Information > Filters