


To see if this custom-fit item will work for you please tell us what vehicle you'll use it with.


Thank you! Your comment has been submitted successfully. You should be able to view your question/comment here within a few days.
Error submitting comment. Please try again momentarily.


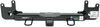
This rack receiver gives you a clean, factory look while letting you mount a bike rack or cargo carrier. The concealed cross tube sits behind the bumper so only the 2" x 2" receiver opening is visible. It’s a Class III design with a 200 lbs maximum tongue weight, perfect for carrying hitch-mounted accessories without changing your vehicle’s profile.
You don’t need to weld or modify anything to get this installed. The Curt rack receiver uses a bolt-on setup with a complete hardware kit and instructions included. The precision, robotic welding ensures a proper fit and solid structure once it’s bolted up, so you can count on strength and alignment that stays true.
A gloss black powder coat finish is layered over a protective base coat for superior rust resistance. This tough coating helps the receiver stand up to road debris and weather exposure, keeping it looking sharp through years of use. It’s designed for long-term durability so your hitch stays dependable no matter where your racks or carriers take you.
This rack receiver is made specifically for hitch-mounted racks and cargo carriers—it’s not rated for towing. That focused design means its strength and geometry are optimized for supporting your gear safely and securely every time you load up.

Videos are provided as a guide only. Refer to manufacturer installation instructions and specs for complete information.
Hi, this is John with etrailer, and today we're going to take a look at and install our CURT receiver hitch on the back of our 2026 Lexus RZ. Adding this receiver hitch to your back of your Lexus is going to give you a whole bunch of opportunities. You're going to have a whole bunch of accessories to choose from, many cargo carriers and bike racks. This is going to be a standard two-inch receiver. A couple things I do like about it is it's mainly all hidden. It's going to be a hidden cross tube design, just the opening is showing.
It does have a glossy black finish, which does match the back of the Lexus today. So I do like those features. This hitch is going to fit a standard 5/8 pin and clip. It does not come with the hitch. But if you do purchase the accessory, it does come with that most likely, or you can purchase that separately here at etrailer.
Now let's get some measurements. The first measurement we're going to take is from the ground to the opening of the receiver tube. It's going to be 13 3/4 inch. That's going to be important to know if you have a hitch-mounted accessory, or you're planning on buying one, whether or not it's going to bottom out when going up or down a steep incline. Our next measurement is going to be from the center of the pinhole to the outside edge of the bumper, and that is almost five inches.
And that's going to be important to know whether or not if you have a folding accessory, if it's going to make contact with the back of your vehicle. This hitch does have up to 200 pounds of tongue weight. That's the force going down when you have a hitch-mounted accessory. This receiver, keep in mind, it's not rated for towing, so it's only used for hitch-mounted accessories. And as far as that tongue weight capacity goes, be sure to double check that owner's manual of Lexus.
It may differ a little bit from that. If you have any questions on this, feel free to leave a comment below. But as far as the install goes, there is some trimming of the underbody panels you do have to do, and you do have to remove them and enlarge some holes. So if you're not comfortable doing that or you simply don't have the time, you can go to our Installer Locator, find someone near you that would be happy to do that install for you. But if you're looking to do it yourself, stick around and I'll show you how to do it. To begin the install, we're going to remove the push pin fasteners here on the driver's side body panel. Gonna need to have a trim panel tool. You can get one here at etrailer, if needed. We're going to lower the first pin. And then that second pin over here. And then there's going to be some more over on this side. (fastener popping) (fastener popping) Then after that, we're going to need to remove, there's a plastic nut that's way up in here. You may not be able to see this, but you're going to have to have a pretty long extension and a 10-millimeter socket to reach it. It's going to be way up here on, towards the front of the vehicle. (drill whirring) (drill whirring) Now the instructions do say to move onto these plastic retainers, one up here and one back here. In order to loosen them, it'd just be a large flathead, and you do kind of have to pull down on it a little bit. But in order to do so, I think it would be easier removing these middle pins right here to be able to get your arm up there and kind of pull down with it. So we are going to remove the rear pin right here. (fastener popping) First, just with a trim panel tool again. (fastener popping) (fastener popping) With these middle pins removed, now we can move on to these plastic retainers. Start with the one up here in this hole. We're able to now fit our arm up in here. You're going to need to pull down on it as you take a flat head, come up into here. These will want to spin on you, so be a little gentle with them because they are plastic. And you're going to pull down on it as you twist. (fastener popping) And that will lower. And then there's going to be the last one up here towards the front of the vehicle also kind of hidden up here. (fastener popping) After we removed all of our plastic fasteners, there was one more push pin. It was a little hidden up there and we didn't even know it was there until we removed the rest of the stuff. So it's going to be behind, call, I guess the rear rock guard. There's going to be a push pin fastener that's going to hold the last corner of this underbody panel on. Same thing, pry tool gets it off. Once that's removed, this panel will come down. Now we'll repeat that same process over here on the passenger's side. After removing those body panels, it's going to expose a rubber plug and two stickers on the side of the frame here. It's going to be the same on both sides. We need to remove this rubber plug just with a pry tool. And then we can come back through our finger here and remove these stickers that cover our holes. Now we need to enlarge our axis hole here on the bottom of our frame. To fit our hardware up in place, it does need to be quite a bit larger, so we're going to use a step bit on a drill to do so. (drill whirring) (drill whirring) (metal clacking) (metal clacking) Now that we have enlarged our access hole to get it to where we need to, to fit our hardware through, we'll come back through with a paint marker and cover the edge of our hole here, just prevents future corrosion. With our hole enlarged, we can start with our first hole that we need to fish wire our hardware through, come in through that hole down through our enlarged hole. And we'll take our spacer, put that on first. And then we will thread our carriage bolt on. And then put our spacer up first, carriage bolt falls in after, pull it through our first hole here. (metal clacking) Now that we got our hardware pulled through, we can repeat the same process on the passenger's side. Now we need to remove our backup alarm by disconnecting this electrical connector, pushing down on that tab right there, pulling our connector out. And then there's going to be a 10-millimeter nut here on a stud that holds this backup alarm in place. Then take a ratchet or socket, get that loosened up. (ratchet cranking) (metal clacking) And removing this is only temporary. It's to avoid damaging when damaging it when raising your hitch into place. To lift the hitch up into place, we do have to push our bolts back just a little bit there on the edge of the hole to be able to fit our hitch around. Now with an extra set of hands, we're going to raise our hitch into place. We're going to thread the fish wires through the corresponding holes from inside out. (metal clacking) (metal clacking) With our hardware pulled through, we can put on our nut just to get it held up in place. Just get one started on either side. (metal clacking) And we'll remove the last of our fish wires and hand-start all of our nuts. (metal clacking) Now we can smug down all of our hardware with a 3/4-inch socket and a ratchet. (ratchet cranking) (metal clacking) (ratchet cranking) Now we can torque all of our hardware down to the specifications listed in the instructions. (metal clacking) (torque wrench cranking) (torque wrench beeping) Gone ahead and taped off our underbody panel to trim it. We're going to need to trim this out. Listed in the instructions on how to do so. We're going to have a multi-tool to do it. (multi-tool whirring) (multi-tool whirring) Now with our cut marks made, we can grab our body panels and begin to lift them up into place. Now you may have noticed when reinstalling these panels that we did separate them. I think it's a little bit easier to separate them after cutting to get them up into place. (panel popping) And a quick little note, when putting up the passenger's side panel, make sure you put that backup sensor back into place. With all of our underbody panels back into place, that will do it for our install of our CURT receiver hitch on the back of our 2026 Lexus RZ.
Customer Satisfaction Score:
93% were satisfied with this product
7% of customers were not satisfied
Ratings & Reviews

Do you have a question about this Trailer Hitch?
Info for this part was:
At etrailer we provide the best information available about the products we sell. We take the quality of our information seriously so that you can get the right part the first time. Let us know if anything is missing or if you have any questions.























Lazer S.
5/5/2026
Sorry to hear about the install difficulties you encountered, Douglas. What year is your RZ? I can't say I have run into this issue before.