
 Product Experts Available Now!
Call 1-800-940-8924


Thank you! Your comment has been submitted successfully. You should be able to view your question/comment here within a few days.
Error submitting comment. Please try again momentarily.


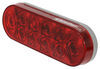
Older incandescent lights can dim over time and draw more power than they should. This Double Bullseye LED light fixes that with 10 bright red LEDs that shine clear and strong while only pulling 0.087 amps at 12.8V. Each diode is efficient, so the light stays bright without adding strain to your electrical system. The red lens over white LEDs gives off a crisp, even glow that lasts up to 50 times longer than standard bulbs.
No need to overthink wiring. The light comes with a simple 2-wire setup—white wire with ring terminal for ground, black wire for power. Ground it directly to the trailer frame and tap the hot lead into the running light circuit. It’s a clean connection that keeps current steady and prevents grounding issues that can cause dim or flickering lights.
Rough roads, vibration, and dust won’t easily bother this light. Both the housing and snap-on lens are made from durable polycarbonate that resists cracking and wear. It’s built to handle constant use without the brittle filaments or loose sockets found in older bulb designs, making it a long-term replacement you can count on.
Visibility from multiple angles makes a big difference when other drivers approach from the side or rear. This light is PC-rated, meaning it projects light 90 degrees to either side of center for a full 180-degree spread. Mounted properly, it works as both a clearance light and side marker, giving your trailer a bright outline that stands out at night and in low-light conditions.
Mounting is quick and tidy thanks to the surface-mount design. The rectangular body measures 4-1/16" long by 2-1/8" wide with mounting holes spaced 3" apart center to center. It installs flat against the trailer surface with your own hardware—no cutouts or recesses needed—so you get a solid fit that looks clean and stays put mile after mile.


Videos are provided as a guide only. Refer to manufacturer installation instructions and specs for complete information.
Speaker 1: Today we're going to take a look at and show you how to install the Optronics double bullseye LED trailer clearance and side marker light with two wires, 10 diodes and a red lens. The part number is MCL456RB. This is what the double bullseye light looks like installed and lit up. This is a very, very bright light. It has 10 diodes inside of it. A lot of times you'll three, four, six, eight.
Not too often do you see a full 10 diodes in here, so it's going to be very bright and powerful. You can see they call it a double bullseye because you've got the round bullseye shapes there on each side.This is going to be PC rated, so for those of you that need this, you can mount it on the 45 degree angle on the back corner of your trailer and it will work as the clearance and as the running light.You'll replace lights on your trailer for several different reasons. Ours have gotten old. Somebody connected using one of those quick connectors, which aren't really the best solution. The lens was broken on this one, but if the bulb goes out, your housing doesn't work anymore, whatever the problem may be, or you just want to upgrade to the new look, the clearer, cleaner look that you get out of the LED lights, it's pretty easy to get these changed out with just the two screws that are going to hold them in place, and then you'll have to wire it up with a butt connector.You have a lot of benefits to LED lights.
They're going to be a brighter, cleaner light. They also are going to use a lot less power, so you're not drawing as much power through the systems on your vehicle, and the life on them is much greater than what you'll see with a standard incandescent.As far as the dimensions of the light are concerned, from the back edge here to the leading edge you've got about 4-1/16". From the bottom edge here to the top we've got 2-1/8". Then from the surface of the trailer to the outside edge is going to be about 1-1/8". The lens is also fully removable, so if it ever gets damaged, broken, it's easily replaced.
You can leave the base in place, remove the lens, place your new one on, and you'll be ready to head right back down the road.You'll see your mounting hardware is going to be on the standard 3" center to center, so most of your lights designed in this shape and fashion, those boltholes are going to line right up during your replacement.With the two wire system like we have here on our light, we're able to use that with single wired trailers or with double wired trailers. Some trailers are going to have the power and the ground that would come out. In that case you'd connect the black to the power and the white to the ground, using butt connectors.In our situation, since we just have a single wire, you can see they've already put a ring terminal on here in anticipation of that. We'll be placing that right behind the hole where we're going to mount the light. That's going to secure it down to the trailer, giving us the ground we need to complete our circuit.
Our black wire, again like we said, we're going to be using a butt connector to make that connection. The part number is DW05744. It's a heat shrink connector. That's going to give us superior corrosion resistance and we won't have to worry about moisture getting in there and causing us issues.We'll crimp that on our light side there. We'll have to strip that one back, and the butt connector, we'll just attach that to the other side. Make sure you got a good connect there, and then you'll want to use a heat source to shrink that down. That can be a lighter, mini-torch, or of course a heat gun. You want to heat it gently. You'll notice that kind of that opaque plastic will start to turn clear. It's going to start to shrink down, and as it does the wire looks like it gets bigger and then that little bit of clear gel comes out of the end there.We'll just do that on both sides and then we'll just tuck our excess back in there. It's a good idea to have extra there so if you ever need to make any changes or anything you'll have plenty available. Like we said, we want that ring terminal to cover up that hole. Since this is a little bit of a thicker base, you'll need to use a longer screw than what typically comes in the trailer. Typically these are going to be like a 3/4" screw. You'll want to use one that's at least 1" long and matches whatever size that you've got.We'll get that threaded in. Once we've got it secure, we can put on our lens. That'll complete our look at the Optronics double bullseye LED trailer clearance and side marker light, part number MCL46RB.
Customer Satisfaction Score:
98% were satisfied with this product
2% of customers were not satisfied
Ratings & Reviews


Jon

10/2/2014
Still just as bright and working great
Do you have a question about this Trailer Light?
Info for this part was:
At etrailer we provide the best information available about the products we sell. We take the quality of our information seriously so that you can get the right part the first time. Let us know if anything is missing or if you have any questions.
























Jim
5/2/2017
Great light very reliable. I do recommend using the light with wired ground vs. ring terminal or mounting bolt ground for a lifetime of trouble free operation.