


Thank you! Your comment has been submitted successfully. You should be able to view your question/comment here within a few days.
Error submitting comment. Please try again momentarily.


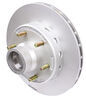
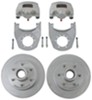
Upgrade your trailer's braking system with this integral disc brake conversion kit for one wheel end. It includes the major braking and hub components needed for installation, including bearings, hardware, lug nuts, and a threaded cap.
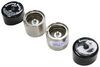
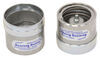
If your trailer's current brakes are no longer delivering the stopping performance you want, this kit provides the major mechanical components needed to convert one trailer wheel end to hydraulic disc brakes. It includes an integral MAXX-coated hub and rotor, stainless steel caliper, mounting bracket, bearings, grease seal, threaded cap, lug nuts, and installation hardware, giving you a matched wheel-end assembly instead of sourcing the components individually. Complete the conversion with a compatible hydraulic brake actuator, brake lines, and other required hydraulic brake components (sold separately).
Building a hydraulic disc brake system one component at a time can lead to unnecessary parts matching and compatibility questions. This kit brings together the major mechanical components for one wheel end, with the hub, rotor, caliper, bearings, seal, cap, and installation hardware already matched to work together. It's a practical approach that simplifies the mechanical side of the conversion once your trailer's specifications have been confirmed.
Brake components spend their lives exposed beneath your trailer, making corrosion a constant concern after a brake upgrade. The integral hub and rotor use MAXX coating while the caliper is constructed from stainless steel, helping protect the major brake components from weather and road exposure. Your trailer stays equipped with corrosion-resistant brake components that are ready for the next tow.
Videos are provided as a guide only. Refer to manufacturer installation instructions and specs for complete information.
Hi, everybody, Andy here with etrailer. Let's take a quick look at the zMax Max Coat Stainless Steel Disc Brake. Now this hydraulic disc brake conversion kit is gonna upgrade one wheel on your 3,500 pound trailer axle and give you stronger, more responsive braking, and all of the parts are needed for an easier installation. Now on your screen I am showing you that you can get this as a set of one as I have here. Maybe you just need to replace one wheel, one side of that trailer axle or maybe you need a set of two. So whichever one's going to work best for you, just take the appropriate part number that you see there on your screen, pop it in the search field of our website and that will take you through that quantity and you can add that to your order.
So compared to traditional drum brakes, disc brakes give you shorter stopping distances, smoother braking and better control, helping you tow with more confidence. Now this is built for long term durability, especially if your trailer is exposed to rain, road salt, or occasional salt water. The stainless steel calipers and max coated hub and rotor assembly is gonna resist corrosion far better than your standard finishes. With a 1,000 hour salt spray rating, that's more than three times the protection of Dacromet coatings. Drainage holes in the rotors also help water escape quickly so moisture doesn't sit inside and cause rust.
And then the vented one piece hub and rotor design is gonna run cooler than traditional brake setups helping to reduce heat build up for more consistent braking and longer component life. Maintenance is also going to be straightforward as well thanks to the laser etched brake bleeding instructions on each caliper. I think you can see that there. That's going to make servicing quicker and more accurate. See the brake pads here I've got an isolator in there to keep those brake pads in the caliper there.
But everything that you need to convert one wheel is included here, and you're going to get all of the bearings here and the bearing information is listed on this page, this product page, along with the seal information. Of course you're going to get the mounting bracket as well. And if you think you might need some help with installation on this product page, we have a link that's typically found underneath the photo section that will take you to our installer locator. Click that link and answer the questions that it has for you and that locator will find an installer in your area that etrailer has partnered with to help you with the install. Well again, my name's Andy.
Thank you for joining me.
Ratings & Reviews


Heather A.
4/10/2026
Thanks for sharing that, that’s a really important detail to call out. On setups like this, the included studs are typically sized for standard steel wheels, so when switching over to thicker aluminum wheels, it can definitely lead to needing longer studs like you ran into. I can see how that would be a frustrating surprise in the middle of an install. Glad you caught it and are getting it sorted out. Once everything is buttoned up, we’d be interested to hear how the full setup performs for you. What kind of trailer are you running these on?
John

6/24/2025
No problems so far. Working as expected.


Mike L.
10/21/2025
I'm glad to hear the install went well, please let us know how you like them!

Gwendolyn Y.
7/1/2025
Hey, thanks for saying that, Stanley! Maybe one day we can be as fast as light :)
Gwendolyn Y.
7/1/2025
Thanks for sharing your experience, Frank! I know Emma will be excited to hear that the brakes arrived early. Can't wait to see your picture when you're done with your project! What kind of trailer are you fixing up?
Info for this part was:
At etrailer we provide the best information available about the products we sell. We take the quality of our information seriously so that you can get the right part the first time. Let us know if anything is missing or if you have any questions.
















Andrew N.
10/21/2026
Hey Steve! Thanks for the kind words and the detailed response! Sounds like you found exactly what you needed for your boat trailer. Was that your first time installing a brake setup like this? How was the install?