
Custom Fit Roof Rack Kit With Y53TR | Y00244 | Y00421
Item # Y66GB
Our Price: $618.85
Confirmed to Fit
2020 Jeep Grand Cherokee
Will this fit?
To see if this custom-fit item will work for you please tell us what vehicle you'll use it with.
This item qualifies for Free Shipping
In Stock


- All Info
- Reviews (183)
- Q & A (0)
- Videos (16)
- Photos
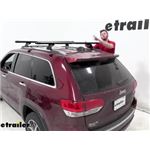
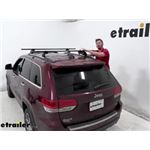
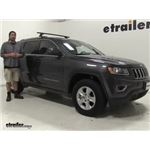
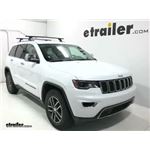
Yakima Roof Rack - Y66GB
- Crossbars
- Aero Bars
- 2 Bars
- 50 Inch Bar Space
- Yakima
- Black
These crossbars combine the strength of steel with an aerodynamic shape to create a heavy-duty yet quiet roof rack for your vehicle. Full-length bars maximize cargo carrying capacity and work with most clamp-on accessories.
Features:
Yakima 50" CoreBar SM:- Aero-style, steel crossbars let you build an aftermarket roof rack for your vehicle
- Pair with Yakima towers and a fit kit (sold separately) to create a complete roof rack
- Aerodynamic, teardrop shape helps to create a quiet roof rack system
- Controls air flow to significantly reduce wind noise and vibration
- Reduces drag to help maintain your fuel efficiency
- Full-length crossbars maximize space for clamp-on carriers and accessories
- Accommodate most universal-mount bike, water, snow, and cargo carriers
- Easy installation on Yakima towers with included brackets and hardware
- Works with BaseLine, RidgeLine, SkyLine, and TimberLine towers (sold separately)
- Roll-formed, galvanized steel bars are extremely strong and durable
- Black vinyl coating protects the bars from corrosion
- Plastic endcaps help to keep water and debris out of bars
Yakima SkyLine Towers (4-pack) (w/new covers):
- 4 Heavy-duty towers mount Yakima crossbars to your vehicle with fixed mounting points, flush side rails, or tracks
- Pair with 2 Yakima crossbars and Landing Pads (sold separately) to create a complete roof rack
- Tower pitch can be adjusted 6 degrees forward and 6 degrees backward to level your crossbars
- Versatile BarBeds are curved to accommodate the elliptical shape of Yakima CoreBar and JetStream crossbars
- Also fit RoundBar crossbars with adapter (Y03536 - sold separately)
- Easy, tool-free installation - just drop tower onto Landing Pad and close the cover
- Included torque tool clicks 3 times when crossbar is tightened to tower - eliminates fear of under- or over-tightening
- Lockable with Yakima Same Key System (SKS) lock cores (Y07204 - sold separately)
- Weather-resistant die-cast aluminum, stainless steel, glass-reinforced plastic, and elastomer construction
Yakima Landing Pad 18 (Set of 4):
- Provide mounting points for Yakima SkyLine or Control towers (sold separately)
- Pads install in the fixed mounting points inside your vehicle's flush, factory side rails
- Protect your vehicle from scratches with UV-resistant, rubber base pads
- Include snap-on covers for protection when towers are not in place
8000163 Yakima Timber Line Roof Rack Towers for CoreBar, JetStream, and RoundBar Cross Bars - Raised Side Rails - Qty 2
Replaces 8000148
8000244 Landing Pad 18 for Yakima SkyLine and Control Towers - Qty 4
8000421 Yakima Core Bar Cross Bars - Steel - Aero Profile - 50" Long - Qty 2
Video of Custom Fit Roof Rack Kit With Y53TR | Y00244 | Y00421


Videos are provided as a guide only. Refer to manufacturer installation instructions and specs for complete information.


Video Transcript for Yakima Roof Rack Review - 2021 Jeep Grand Cherokee
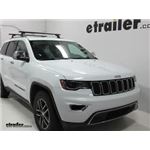
Hey, everybody, welcome to etrailer.com I'm Bobby and today we're taking a look at the Yakima JetStream Aero Bars here on our 2021 Jeep Grand Cherokee. Now, guys, this is gonna be an excellent way of giving yourself a very nice roof rack system. Yakima, of course, very known for their roof rack system. You also do have a very nice style on these guys here today. Now, in my opinion, they do sit just a little bit high because of these skyline towers that we're also utilizing. However, that is also because of our rails here today.
So we are actually working with some raised rails here with a chrome and black finish. So make sure you are getting your appropriate roof rack also put in our fit guide. You guys might just have a little bit something different. If you are working on your 2021 Jeep Grand Cherokee, make sure you do have that same rail system we're working on here today. However, of course, Yakima has a lot of different fit kits.
So these bars are still gonna work. It might be just a little bit different of getting your bars on your vehicle. But these guys are gonna be a great way of giving you a great option of getting some accessories on here. We're gonna have no trouble getting kayak carriers, roof baskets, anything that you might think you need to put up on there, we should be able to do a great job with it. You're getting a lot of great clearance as well.
So yeah, it's a little high, however, don't think we're gonna be limited by any of our accessories. Now we are on our 50 inch bars here today and we have them evened out, so you actually do have pretty good spacing here. You get about four inches. A lot of those kayaks with load assist need about four to eight inches. So if you're looking for overhang, we actually could shift it a little bit this way as well.
However, you are gonna be just a little uneven if you do that, of course. So your passenger side or your driver's side, it can be shifted too. But if you're going for that look, and you want a little bit of overhang, just go ahead, look at some of our longer bars here today. These are the 50-inchers just to give you guys an idea. They also do have that nice black of course, but they do come in silver. So if you're wanting to match your vehicle color as well, you can do so. Talking about what they're made of as well, they are an aluminum make, so they're not gonna be rusting or corroding. And with that, they also do have a black powder coat finish on them. So as long as we're treating it well, we're keeping ourselves from banging and nicking it and dinging it, it can hold up quite well. Just keep in mind that black powder coat, guys, if you aren't treating it well, you can end up kind of scraping it off. So just keep that in mind. Try to be nice with it. Try to get your things up on there in a concise manner. It'll start lasting you for the years to come, which is gonna be great. You also are gonna get 165 pounds of weight capacity on here, which should be plenty for getting most of the things we need. Of course, make sure you are checking with your vehicle's owner's manual guide to make sure that our roof can handle that. Now that is your dynamic use, so that's when it's actually in use. If you're looking to put some tents up on here and you're thinking, "Well, man, I can't get up on there." Your static is gonna be way higher than that. This is just for when you actually are moving and transporting your things while the vehicle is in motion. Well, the installation of this guy doesn't take too much time at all. I actually am a really big fan of how this system works and I think you guys will be too once you see how that gets in place. So let's go ahead, see how we got this on our roof. To go ahead and start our install, guys, we're gonna actually need to start on the top of our car here. Now you are gonna have these little bolts in place. So in the very back here, we've gone ahead and already removed that. Remember that torque bolt does come included with your pad system. To go ahead and get those removed, Of course, lefty loosey, get those guys right out of there. Then we're gonna go ahead and take our pad. Now, one thing we're gonna be looking for, these arrows need to be pointed away from our vehicle or towards the outside if we're looking at it. Then we can go ahead and take our spacer, start slotting it on top there. we're gonna take our included bolt and our washer set, swinging our flat washer towards the bottom and that locking towards the head of our bolt. And then we can simply slot that in place here and simply get it aligned right there and start tightening this down. As we get closer, make sure you use your included tool so you don't over-tighten. Once you hear that click, we know we're nice and secure. For the second part of our installation guys, we're gonna go ahead and start working on getting our system set up. So we're gonna start with our skyline towers here today. Now you guys might have to actually add this little metal element here, this little plastic spacer. It's really easy to add. What I like to do, we'll go ahead and give you guys an idea of how it's actually mounted in there. You can see where it's actually catching on that little latch right there, so it's easy to go ahead, put one of your crescents in and then put the other side, it'll clip right in place, get it set. To actually getting this guy tightened down on the other side here, we are gonna have a little exposed Allen wrench guy. All you gotta do, loosen it if you need to, of course, and then just tighten that bolt in to your metal spacer here. And this is actually what's gonna be going on our T track here, guys. So nice that we can go ahead and quickly get that installed. Really takes no time at all. Just go ahead and put that guy in. Of course, we can go ahead and replace our plastic covering here. Go ahead and get one side set, lock it down. Then we can go ahead and start getting our tower ready, guys. All we have to do, start setting this guy on there. And all we have to do is start getting this T slot set up. So it's nice to go ahead, keep it a little loose like yourself for that, and then just to start fitting in both our plastic and our metal ends right onto that T slot attachment right there, guys. So we can go ahead and start sliding it. Now at this point, we could go ahead and start measuring our spread on our vehicle. I find the best thing to do, try to get it to where you think it's gonna be. And then we can actually start seating these guys in there and then adjusting your bar while it's on there. I just, time and time again, you sit there and try to get a measurement and you're like, "I think I got it," and then you got to put it on there, just doesn't quite work out. So I think the best thing to do, get it to where you can just barely slide it. That way, when we can find that measurement, we can go ahead and take our bar off and start tightening things down. Now things might be a little different at home here too. Once we actually find that positioning, you also are gonna have this little strip here. So kind of jumping forward a little bit, but once we actually have these towers set, which we're about to do, you can go ahead and start cutting the strip to length, guys. No, we're not gonna do that here today of course, just because somebody at home might be getting this rack and they might be on a different vehicle. But all it is, just snip it, get that lined up and start filling in this hole. That's gonna do a great job of really reducing that wind noise you're gonna feel. Otherwise you're gonna have a very severe whistle as it does get on the road. It starts getting those high miles that you are- Sorry, miles per hour you'll be going, so that speed, really gonna start feeling that wind. So let's go ahead and start throwing this guy up on there, and start getting aligned. To start getting this on here, guys, all we want to do is start laying it across our roof like this. Of course, being gentle with it is gonna be nice. And really all I want to do is start fitting this in. So you guys can see as that's closed these little tabs go out, so we're just gonna be sitting that right in there. So make sure it's going down towards you. Start getting that set and locking in our patch just like so. So let's go ahead and repeat the process on the other side and make sure our bars are in the correct position. To go ahead and actually get these aligned properly, you guys can see we have a little bit of an overhang here to our left. Now of course, we can go ahead and start measuring, but I like to start eyeballing it a little bit here. So I'm gonna go ahead, shift it just a bit for myself like so. Then I can go ahead, grab my tape measure, and just from that edge of our skyline there to the very end, putting this about four and a half inches there on our passenger side right now. It looks like I'm gonna have to come back just a little bit towards our driver, but that's okay. And about four, right under four inches there. So I'm gonna come just a quarter of an inch back, like so. And double-checking myself here. Sorry guys, I know I just blocked you on that side. So about four and a half on this side. Now I might be over-correcting just a little bit. But of course, only takes me two seconds to walk across and really get them aligned. And that's gonna be right at four as well. So four inches. That way we can go ahead, give ourselves just a tad bit this way. So that's putting us at four and a half. While this guy is right at four. So again, we'll go ahead, try to go for that quarter just right there. Now we're gonna be perfectly aligned, as I did have that half inch. So we're aligned. All we got to do, tighten down with our included tool so we're nice and secure. Once we hear that clack, we know we're perfectly aligned and we can bring up our plate. I think we're a little misaligned here, guys. Let me go ahead and reseat that guy. Make sure it's pro-, there we go. Seated properly there now. You can see we are nice and secure on that bar. Now we are in our final stages here. At this point, like we talked about before, I would go ahead and add my stripping. All we have to do there, guys, pop open that latch, like so. You actually take this entire system out, which makes it really easy to add that stripping in. Then we can just walk our bar right back up, clip it in place, we'll be nice and secure again for ourselves. Of course, be sure to be adding your little caps here at the very end as well. Try not to drop them like me. But then we can go ahead and make sure that's nice and secure, That way you have it so we don't have anything getting on the inside of our bars. Well, now that our installation is complete, we can go ahead, hop up, take a closer look at the bars and how they interact with our roof. Now of course you do have that really nice aero look. So you're getting that wind spread across here in the front tailoring down to the back. Gives it that nice sleek look. Got the little Yakima on there, of course, getting that style points for itself. However, it doesn't just stop there with looks. I really do like how this system works. The big thing for me is this little T slot channel at the top here. So a lot of times, guys, this little stripping in here on a lot of the different carriers you might see out there requires you to cut it or get it out of there, and then you have to resize everything, and then you're trying to fill in those holes just like we we're talking about with that kind of whistle noise from that bottom side there. What's nice with this guy, though, we didn't do any cutting. All we had to do, take our T slot and start slotting it in right at the bottom there. So all we have to do is push it and it actually will conform to that T slot. You guys can see my fingers sliding down in there and then actually hold right there. So what's great about that, as we said, no cutting, no whistling, a lot less aggravation actually getting your accessories on there, which I do love to see. So go ahead, slap that guy back on. But a couple things we're gonna look at here. what kind of height we're adding onto our car, of course. Maybe we want to pull this in the garage or at least get through those drive-throughs wherever we might be going. So it is gonna be important to keep in mind exactly what we're working with here. And from the very top of our corrugate of our roof to the top of our bar here is gonna be putting us right at five and, right at five inches actually there, guys. So just maybe a hair over it. While our clearance for the bottom here is gonna be actually just under four inches. So you've got about an inch of a bar there, guys, so right under four and right over five for our max height. And of course, that under four is you're gonna be your clearance issue. Now that's only gonna be an issue, of course, at your corrugate and for getting your accessories on there. Now, working with a lot of rooftop accessories, I hadn't really seen anything that needs you to have this much of clearance. So I think all of us are gonna have a great time getting anything that we need up on these guys. Not to mention, with that T slot up top, should be giving us no trouble at all. Well as you guys saw, I've got a lot of good clearance there on our bars. Now, of course, like we said, they are a little tall. However, I think that fits well with our Jeep here, the Grand Cherokee already somewhat of a larger vehicle. So I don't think it's too out of place. Maybe on the sedan these will be a little tall, but I think we are in a pretty good look here for ourselves today. Now one last little great thing about Yakima. Right here, guys, you probably have noticed these little holes. So right now they're not really doing too much for us, but say we want to go ahead and keep it from anybody just doing this to our roof rack. We can go ahead and grab ourselves some locking cores from Yakima available here at etrailer.com. One great little thing about this as well, guys, say you have a Yakima rooftop bike carrier, you can go ahead and actually get that locking core keyed alike utilizing Yakima's same key system. Not only that, if we had any hitch accessories, anything that we might have a Yakima locking core for, we can go ahead and start getting them keyed alike, making ourselves just to have one little key which is great for this system, 'cause I like it if we going ahead, if we're looking at getting a bunch of accessories, can be nice to go ahead, just get them all in that Yakima field and that way you just have one key for all the things that we need to make our trip successful and fun. Well, guys, I think that that's gonna do it for our look here at the Yakima JetStream 50 inch crossbars here on our 2021 Jeep Grand Cherokee. I'm Bobby. Thank you for watching..
Customer Reviews
Custom Fit Roof Rack Kit With Y53TR | Y00244 | Y00421 - Y66GB
Average Customer Rating: 4.8 out of 5 stars (183 Customer Reviews)
These crossbars combine the strength of steel with an aerodynamic shape to create a heavy-duty yet quiet roof rack for your vehicle. Full-length bars maximize cargo carrying capacity and work with most clamp-on accessories.by: Eric 05/13/2024
Fit our Subaru Forester perfectly. Install was a breeze. For the money I wish they came with the core locks.
by: John11/16/2023
Very nice quality towers. Very heavy duty! They have a cool "snap" on / off mechanism for quick removal and installation.


by: Howard11/09/2023
2019 Hyundai Santa Fe
From start to finish, the folks at etrailer -- and I spoke to several people there, so it was a consistent corporate vibe -- were fantastic to deal with.
There were delays in getting my product that were on the supplier side and out of etrailer's control, yet etrailer folks kept me up to date and also worked on a customized solution.
My goal was to be able to carry my surfboard on the roof of our 2019 Hyundai Santa Fe to the beach more than 3 hours away. But the particular model we had had no existing racks, no recessed areas, nothing to fix racks to. Not even the dealer had a solution. I was sh*t out of luck.
But etrailer hooked me up. The racks did take me a while to put on, but most of that time was fine tuning to reduce “hum” while driving. I’m very happy with them.
Thanks to etrailer, I have gone surfing and can go surfing whenever I'd like to.


by: William02/28/2024
You guys provide great products and excellent customer service.
Thanks
by: Laura 04/01/2024
As described! Quick delivery!
by: Layne 02/11/2024
These crossbars were easy to install and adjust. Be sure to get all the pieces you need. There is no mention of the Landing Pads necessary to use these.
by: Matt 01/02/2024
Great product great service
by: Cody05/25/2023
2017 Toyota Camry
I've just recently installed this setup on my 2015 Toyota Camry.
etrailer - Shopping for this rack was fairly simple, and the shipping from etrailer was quick and reliable. I received the rack in 2 different shipments but they both arrived at the same time. etrailer made sure the all the contents were available. They also have several resourceful videos on their YouTube page, which was helpful while shopping for the rack and during a few trouble shooting items while I was installing.
Yakima Core Bar - Overall a quality product. Everything necessary was supplied, including a handy measuring tape and some very well written instructions. The fit is clean and very sturdy. The only qualm I have is that the hex hole in the large anchor bolts are a bit larger than the supplied hex driver. Toward the end of the installation, the tool was worn and ended up turning inside the bolt itself (not due to over torquing whatsoever). I ended up having to use a hex set I had in my toolbox to complete the installation because the provided tool was starting to strip out the anchor bolt. With that said, the kit is still a great kit that meets my expectations.
Wind noise is quieter than my OEM VW bars on my 2017 Volkswagen GTI. It's noticeable, but nothing extreme - I believe that's just the price you pay when adding crossbars to a vehicle.
Verdict - etrailer has definitely met my expectations, and the Yakima kit provided is a well designed kit that fits well!


by: Adam K05/14/2023
Should include extra end caps just in case they fall off.
by: Lisa04/12/2019
Honda Ridgeline
These crossbars feel like they are well made and sturdy. It took less than 30 minutes to install with the Ridgeline Towers. I love the look of the bars! Can't wait to load the Kayaks up and get out on the water.


by: Dan 11/06/2023
Great company. Fast delivery.
by: Steve30001/14/2023
Very sturdy, well made. The assembly instructions are not too good but if you call Yakima they will provide additional instructions.
by: Mike06/20/2018
2017 Ford Edge
Very happy with the Yakima roof top rack kit for my 2017 Ford Edge with glass roof. The instructions were a little confusing at first, but after reading through them a couple of times while working with the product they became much clearer. The Yakima fit site was helpful as well. After the initial cross bar mounting measurements and set up, attaching and detaching the racks from the roof is a very simple process.
by: Philip 05/29/2023
These really look so much better then the factory racks! Easy to install. Easy to order! Great product!
by: Joseph 04/17/2021
2014 JeepGrand Cherokee
I bought a 2014 Jeep Grand Cherokee. To use my Yakima Skyline Towers, I had to install these landing pads in the rack rail attached to the roof. The installation was easy, and the pads serve their purpose. But they don't seem to be engineered as secure as I would like. They have more flexibility than I think they should. The bolt head is over an inch from where it screws into the roof. I think Yakima could have engineered something more secure. In fairness to Yakima, the Jeep rack rail is different than any other rack system I've seen and is incompatible with any other system. But I am assuming that these landing pads will work OK with a full load and that the Yakima engineers have done an adequate job. This summer they will be put to the test for 3,000 miles. Note: the Yakima windshield fairing falls on the glass in the moon roof rendering the moon roof unopenable so long as the fairing is used.
by: Mark06/30/2023
Feel solid, not too tricky to install
by: Steve S.07/11/2016
Not only did etrailer have a necessary component to my new Yakima rack system that no other retailer had in stock, their price was fair and they shipped quickly. Thanks etrailer!
by: Joshua11/19/2020
antastic company and wonderful service, one of the racks was the wrong size for my car so they were able to help find the right size for my Car. Absolutely great company, with fast shipping and just the products I needed for my Car!. Very helpful, and overall smooth transaction and service. I will order from this company again very soon!. shipping came in a very strong and solid box. I highly recommend buying from them!. 10/10 all the way!.
by: Robert05/21/2021
Great design for a roof rack system.easy to put on and take off. Use it to carry 9-11 foot surf fishing rods. Takes two minutes to put on when I am ready to go fishing.
by: Axl01/02/2017
Very good product. The Yakama towers and cross bars feel very solid and appears to be high quality. Very easy install. Others have complained about the instructions, but guess I'm a visual person because the pictures all seemed very clear to me and the install was very easy. They do sit higher than I expected. After adding a Rhino Rack cargo basket, we only have about 4-5" clearance below the garage door.


by: Rafael07/03/2020
Roof rack fits and works as advertised. Over the phone customer support for sales and install directions were very helpful and thorough. Geoff is an excellent brand ambassador who goes above and beyond to fulfill customer expectations. I will definitely be shopping at etrailer for my future vehicle needs. Well done!


by: Emerson07/20/2020
All parts arrived in good order, haven't completed assembly yet as I had cross threaded one of the support brackets. Hopefully soon
by: Jeremy06/05/2018
My experience with etrailer has been excellent. There was going to be a potential delay in one of the products, but their customer service promptly informed me, half the price of some of their competitors so can't really complain. In the end they got the part ahead of schedule and was able to ship in a timely manner. I will definitely keep them in mind for future purchases.


by: DJones06/18/2018
Easy to install. Not impressed with the fit though. The biggest selling point is being able to remove the towers and leave the pad though. Overall happy with the purchase.


by: Michael01/22/2023
Yakima SkyLine Towers are well-designed and well-executed. They easily fit into the Yakima Landing Pads and form a tight fit when closed. And they also fit nicely into the Yakima JetStream Crossbars when following the Yakima instruction manual and various YouTube videos. I did run into a snag at first where I found the rubber seal on one SkyLine Tower getting caught on the JetStream Crossbar track, but after that I was careful not to let that happen with the other towers.
I find the appearance of the Yakima SkyLine Towers to match their level of quality in materials and design.
25
517
Show More Reviews
See what our Experts say about this Yakima Roof Rack
- Do Yakima Roof Racks Fit 2023 Acura RDXSo we were able to determine that the 2023 Acura RDX wasn't changed from the 2022 model and we then carried over the fits from the previous year. Sometimes one of the rack manufacturers does this first and since we know they did the correct research we know that other brands will also carry over even if they haven't had a chance to test it like with the Yakima Corebar roof rack part numbers # Y00421 # Y64AR, and # Y49AR that we have listed for your 23' RDX.
view full answer... - Can Yakima Core Bar Roof Rack Crossbars Y00421 Be Cut Down in LengthYakima's Core Bar roof rack crossbars # Y00421 can be cut to a specific length so long as you can make clean square cuts to allow re-installation of the bar end caps. You will probably also need to file the cuts to make them smooth and safe for handling. The Yakima roof racks confirmed to fit your 2018 Toyota RAV4 are shown on the page I linked for you. These racks use bar lengths of 48 or 50-inches.
view full answer... - Cross Bar Options And Kayak Carrier For A 2022 Hyundai SonataWe do have a couple of cross bar options for your 2022 Hyundai Sonata that will work great for you. -First we have the Yakima JetStream Crossbars # Y00425 with the BaseLine Towers for Yakima Crossbars # Y28TR, the fit kit # Y06180 & # Y06153. These are aerodynamic cross bars that measure 50" long, and have a maximum weight capacity of 165lbs. -Next, we have the Yakima CoreBar Crossbars # Y00421, with the same towers # Y00146, and fit kits # Y06153 & # Y06180. These cross bars share...
view full answer... - Inno Fork Mount Bike Rack Compatibility with Yakima Roof Rack Crossbar T-Slot ChannelYes, the Inno Fork Lock Roof Bike Rack - Fork Mount - Channel Mounted - Aluminum # INXA391 has t-bolts that are compatible with Yakima aero bars like the JetStream # Y00426 that have the t-slot channel on top for a clean looking install. If you have the Yakima CoreBar crossbar like # Y00421 then they are not compatible because those aero bars don't have the top channel T-Slot.
view full answer... - Recommendation on a 1 or 2 Kayak Carrier for a 2010 Subaru ForesterIf you looking for a kayak carrier that will work with factory, Aero, round, or square crossbar roof racks, then I recommend the Thule Stacker # TH830. The Stacker carrier can carry 1-2 kayaks at a time. The Stacker includes hardware and tie-down straps to help secure your kayaks to your roof rake and vehicle. It carrier can be mounted on a vehicle with a minimum crossbar spread of 24 inches. I you are looking for a carrier that will carry up to 2 kayaks and can be loaded easier form the...
view full answer... - Recommended Roof Rack Solution for 2016 Ford F-150 That Could Possibly Be Used on Different VehicleAs long as your 2016 Ford F-150 is a Super or Super Crew cab, you can certainly use a Yakima CoreBar roof rack. The rack would consist of these parts: • Yakima 60 inch CoreBar crossbars, part # Y00422 • Yakima BaseLine Towers, part # Y28TR • Yakima BaseClip fit kit, part # Y06122 You could install the crossbars on the 2015 Forester, but you'd need different roof rack towers. You'd want to use the # Y33TR Yakima TimberLine towers. This would allow you to use the crossbars with the roof...
view full answer... - 2010 Outback Roof Rack OptionsAdding feet to your 2010 Subaru Outback Wagon will not change the weight limit of the rack. The maximum weight limit will still be 165lbs. Adding the Rhino-Rack RT-Style Roof Rack Tracks - Rivet Mount - 51" Long - Qty 2, part # RRRTS551, does not change that. In fact, adding an extra feet/legs and crossbars to your roof rack will actually lower the weight you can carry on your roof. That is because your roof rack's weight actually counts toward the 165lb weight total. I would use my existing...
view full answer... - Yakima CoreBar Roof Rack System For a 2020 Hyundai Santa Fe SEL Without Factory RailsThe flush mounted rail system must be installed from the factory as there are no aftermarket kits to install them on your 2020 Hyundai Santa Fe SEL. For your Santa Fe I recommend the Yakima Roof Rack System. I have linked a video of this system installed on a similar 2019 Hyundai Santa Fe for you to reference. And you can see that they have the same rubber strips as your Hyundai. You will need the following parts. 2- Yakima CoreBar Crossbars # Y00421 4- BaseLine Towers for Yakima Crossbars...
view full answer...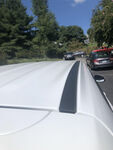
- Best Roof Rack for a 2015 Mazda 3 5-door with Fixed Mounting PointsFor the 2015 Mazda 3, you'll only have access to either Yakima or Rhino Rack roof bars. Both are great companies and there's a few differences that are important to note about the two companies. Rhino Rack doesn't produce as many accessories, but is a smaller than average bar and fits more mounting hardware in both its C-Channel and around the bar. Additionally, its locking system is two part, one for the foot pack and one for the c-channel accessories as a separate part. Finally, Rhino...
view full answer... - Solution for Roof Rack for 2017 Chrysler 300I do have a solution, but Inno has discontinued the fit kit for your 2017 Chrysler 300. Unfortunately, other fit kits will not allow you to install this roof rack on your vehicle. What I can offer instead is a Yakima roof rack like the CoreBar rack, which is similar to the # INXB108-115. You will need the following parts to complete the rack: -Yakima CoreBar Crossbars # Y00421 -BaseLine Towers # Y28TR -BaseClip Fit Kit # Y06110 The Yakima JetStream crossbars # Y00425 will work with...
view full answer... - Mounting Yakima Hully Roller and Mako Saddle on 2005 Toyota HighlanderWe have a way for you to mount your Hully Roller and Mako Saddle to your 2005 Toyota Highlander, but you will first need to determine which crossbars you have on your roof rack system. If you have factory crossbars you would use the Universal Mighty Mount # Y03590 to attach the accessories to your crossbars. If you already have the raised factory side rails, but no crossbar system I recommend going with the Yakima Roof Rack # Y00421 and # Y33TR which has the Timberline Towers and 50"...
view full answer... - Roof Rack for 2023 Chevy Bolt EUV for 2 SurfboardsThe Yakima Corebar roof rack part numbers # Y00421, # Y53TR, # Y00245 would be a great roof rack for your 2023 Chevy Bolt EUV to carry two surf boards with a carrier like the Inno Board Locker Surfboard Carrier part # INA744 which can carry up to two boards.
view full answer... - Will the Thule Motion XT Cargo Box Fit on a 2021 Hyundai Santa Fe?Yes, the Thule Motion XT Rooftop Cargo Box # TH629706 will fit your 2021 Hyundai Sante Fe with a crossbar system. The Motion X will fit on top of your vehicle and allow you to access the rear hatch. If you need a roof rack, the parts you need depend on if you have factory flush rails or a naked roof on your vehicle. If you do not already have a roof rack, you will need to purchase one. If your vehicle has flush factory rails, I recommend the following parts: - Rhino-Rack Vortex Aero...
view full answer... - Replacement Adapter and Seat for Yakima CoreBar CrossbarsIt sounds like you have the Yakima CoreBars like the # Y00421 with Skyline towers. We do have the replacement "strap" that allows you to attach the CoreBars to the Skyline towers. That is the Replacement Adapter and Seat for Yakima CoreBar Crossbars # 8880639.
view full answer... - Which Roof Rack System to install Roof Mounted Tent on 2021 Lexus RX 350The highest weight capacity offered by any of our roof rack options for your 2021 Lexus RX 350 is the Yakima Roof Rack System that includes three different parts. You need the Yakima CoreBar Crossbars - Steel - Black - 50" Long # Y00421, the RidgeLine Towers for Yakima Crossbars - Flush Side Rails # Y00145 which will fit the crossbars to your vehicle, and the RidgeClip Fit Kit for Yakima RidgeLine Roof Rack Tower # Y06027 which is the custom fit kit to attach the towers to your vehicle....
view full answer... - Recommended Upgraded Crossbar System for a 2017 Mitsubishi Outlander With a Bare RoofI spoke with Thule and they were able to confirm that there actually are not any corresponding fit kits for the Traverse Feet and your 2017 Mistubishi Outlander with a slick roof. With that being said, your only option is to upgrade your roof rack to a newer system like the Yakima CoreBar Crossbars # Y00421, with the SkyLine Towers for Yakima Crossbars # Y53TR and the Landing Pad 11 for Yakima SkyLine and Control Towers # Y00233. This system will work with your bare roof, has a maximum...
view full answer... - Roof Rack Compatibility On A 2016 Ford Edge With Naked RoofI do have a roof rack option for you, however Thule does not currently make a roof rack system for your 2016 Ford Edge with existing naked roof. In order to attach a roof rack to your vehicle you may want to consider the Yakima CoreBar Crossbars Roof Rack park # Y00421, # Y28TR, # Y06102, and # Y06139. It has an aero style crossbar setup to ensure a quiet ride. I have attached an installation video for you.
view full answer... - Will the SportRack Semi-Custom Roof Rack Fit a 2018 Elantra GT Hatchback Bare Roof?I have a great solution for you. Unfortunately, the SportRack Semi-Custom Roof Rack for Naked Roofs # SR1002 will not fit your 2018 Hyundai Elantra GT. However, for a roof rack system that does fit for your Hyundai Elantra GT, I recommend the following parts: - Yakima CoreBar Crossbars - Steel - Black - 50" Long - Qty 2 # Y00421 - BaseClip Fit Kit for Yakima BaseLine Roof Rack Towers - Qty 2 # Y06175 - BaseClip Fit Kit for Yakima BaseLine Roof Rack Towers - Qty 2 # Y06159 This setup...
view full answer... - Kayak Carrier Recommendation for Hobie Mirage Compass Fishing KayakSince your Hobie Mirage Compass fishing kayak weighs 87 lbs you're either going to have to use a post-style carrier like the Yakima BigStack # Y04041 or use 2 sets of a J-Style carrier like the etrailer J-Style Kayak Carrier # e98878. I recommend going with 2 of the J-Styles simply because it will be easier to load an individual kayak on each one, especially with your heavier kayak. If you don't already have a roof rack then I recommend using a Yakima CoreBar roof rack. The correct parts...
view full answer... - Aero Bar Roof Rack that Fits 2023 Kia Niro PHEVI have a roof rack solution that does fit your 2023 Kia Niro with flush bars but the Malone racks require a raised rail like you mentioned so it would not work. Instead you'd need a rack designed to attach to the flush rails like with the Yakima CoreBar roof rack part numbers # Y00421, # Y64AR, and # Y27AR which is a similar aero shaped crossbar to the Malone.
view full answer... - Recommendation for Carrying Kayaks and Cooler with 2004 Ford EscapeThanks for the photo! There is certainly a better way to carry your kayaks and cooler with the 2004 Ford Escape. To transport the kayaks, a roof rack will work very well for you. I like the Yakima CoreBar Roof Rack, 50 inch Crossbars # Y00421 with TimberLine Towers # Y33TR because of the aerodynamic shape, for decreased wind noise and drag. To carry your 2 kayaks on a roof rack, I recommend using 2 sets of the Rhino-Rack J-Style Kayak Carrier, Folding # S512. These J-style cradles are...
view full answer...
- Roof Rack and Kayak Load Assist Recommendation for 2011 Chevy Equinox with Raised Side RailsThere is a solution for you, but the issue with the BoatLoader EVO the crossbar spread as well as its 80 lb weight capacity, which is less than your 87 lb fishing kayak. Instead, for your 2011 Chevy Equinox with raised side rails I recommend the Rhino-Rack Roof Rack, which will give your Equinox a very functional, durable rack that will allow you to use a load assist. This roof rack uses aero bars and consists of: - Rhino-Rack Vortex Aero Crossbars # RRVA126B-2 - Rhino-Rack SX Series...
view full answer...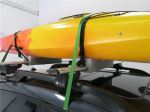
- Can Malone SeaWing Kayak Carrier Mount to the Outsides of Roof Rack Feet/TowersYes you can mount the Malone SeaWing Kayak Carrier # MPG107MD to the outside of the towers/feet of your roof rack so that you can use the max amount of bar space available on your 2007 Honda CR-V with the Core Bar roof rack # Y00421, # Y53TR, and # Y00234.
view full answer... - What Do I Need to Mount a Cargo Box on a 2020 Hyundai Palisade?In order to have a cargo box on your 2020 Hyundai Palisade, you will need a roof rack system with crossbars in order for you to mount the box and cargo. Compatible systems depend on whether your vehicle has a bare roof or flush factory side rails. If your vehicle has a bare roof, I recommend the following parts: - Yakima CoreBar Crossbars - Steel - Black - 60" Long - Qty 2 # Y00422 - BaseLine Towers for Yakima Crossbars - Naked Roofs - Qty 4 # Y28TR - BaseClip Fit Kit for Yakima BaseLine...
view full answer... - Which Yakima Landing Pads for 2021 Toyota Highlander to Mount Skyline TowersTo use the Yakima Skyline Towers # Y53TR on your 2021 Toyota Highlander the correct landing pads are the Landing Pad 28 for Skyline and Control Towers # Y66VR.
view full answer... - Roof Rack Recommendation for 2020 Honda PilotThe rack you need will depend on how the roof of your 2020 Pilot is fitted out. I really like the Yakima JetStream roof rack, because of how well they're built and designed. They may not be the least expensive option, but they work very well and are extremely durable which makes them the most popular choice for your vehicle. If you have a bare roof, you'll need the following parts: • Yakima 60 inch JetStream crossbars, part # Y00426 • Yakima BaseLine roof rack towers, part # Y28TR •...
view full answer... - Recommended Roof Rack For A 2023 Toyota RAV4 With A Thule Hullavator Hi Cathy, To ensure that you can get the extra extension to mount the Thule Hullavator # TH898 you'll want to go with a Yakima roof rack system. Yakima crossbars run their mounting track the entire length of the crossbar so you can go with ones that are longer than your typical length without worrying if the mounting feet will be able to connect. You'll want the following components: Yakima JetStream Crossbars - Black - 60" Long # Y00426 or silver # Y00429 SkyLine Towers for Yakima Crossbars...
view full answer... - How to Determine if Two Malone SeaWing Kayak Carriers Fit 2019 Subaru Outback Factory Roof RackYour kayaks will fit the Malone SeaWing Kayak Carrier with Tie-Downs # MPG107MD, but two of them will not fit your 2019 Subaru Outback's factory roof rack because the crossbars simply are not long enough for both the carriers and your 30" wide kayaks. So to use a kayak carrier you'll need an aftermarket roof rack, and the verified fit to replace the roof rack on your 2019 Outback is from Yakima, and consists of the following part numbers: - Yakima JetStream Crossbars - Silver # Y00428...
view full answer... - What Roof Rack Can I Use with the Thule Hullavator on My 2022 Toyota Highlander with Flush Rails?I have a great solution for your flush rails on your 2022 Toyota Highlander to use the Hullavator # TH898. Yakima temporarily discontinued the Y00148 because they are updating the feet to fit a wider range of vehicles. Yakima has been changing a lot of fitments lately because of this factor. The landing pads # Y66VR are separate from the Y00148. However, with that being said, Yakima does have a roof rack system that fits your flush rails with a different model of feet. For that system,...
view full answer... - Best Roof Rack for 2020 Kia Soul with Fixed Mounting PointsThe best roof rack for your 2020 Kia Soul with a naked roof (fixed mounting points) is from Yakima because it will give your Kia a roof rack that combines effectiveness and style while minimizing any wind noise that can occur with lesser roof racks. This roof rack is made up of: - Yakima JetStream Crossbars # Y00425 - SkyLine Towers for Yakima Crossbars # Y53TR - Landing Pad 22 # Y00248 - Same Key System Lock Cores (Optional) # Y07204 This roof rack will look stellar atop your 2020 Kia...
view full answer... - Yakima Roof Rack for 2022 Subaru LegacyYou are on point with Yakima being a really high-quality product so I completely understand wanting to stick with them for a roof rack on your 2022 Subaru Legacy. The Yakima roof rack that fits your Legacy consists of the following parts: - Yakima JetStream Crossbars # Y00425 - SkyLine Towers for Yakima Crossbars # Y53TR - Landing Pad 22 for Yakima Towers # Y00248 - Same Key System Lock Cores (Optional) # Y07204 I have added links to video reviews for you to check out as well.
view full answer... - Recommended Roof Rack for Mounting a Thule Hullavator Pro on a 2021 Toyota RAV4The Thule Hullavator Pro, part # TH898, does in fact need crossbars that extend 4" - 8" beyond the feet. To use the flush rails on your 2021 Toyota RAV4, you will need a roof rack that has feet that are compatible with the rails. With those two stipulations in mind, the Thule WingBar Evos don't look like they will provide enough clearance with their 47" of crossbar length. Instead, I recommend the Yakima HD Crossbars, part # Y01156. They are 55" long, so they will have the extension you...
view full answer... - Yakima Roof Rack Parts Needed for a 2017 Subaru Outback WagonYes, the recommended Yakima Landing pad for the 2017 Subaru Outback is the Landing Pad 15 part # Y00241 that you referenced. For crossbars you would want the part # Y00408, for towers part # Y53TR and adapters part # Y03536. All of these components would complete a roof rack for your vehicle.
view full answer... - 2010 Outback Roof Rack OptionsAdding feet to your 2010 Subaru Outback Wagon will not change the weight limit of the rack. The maximum weight limit will still be 165lbs. Adding the Rhino-Rack RT-Style Roof Rack Tracks - Rivet Mount - 51" Long - Qty 2, part # RRRTS551, does not change that. In fact, adding an extra feet/legs and crossbars to your roof rack will actually lower the weight you can carry on your roof. That is because your roof rack's weight actually counts toward the 165lb weight total. I would use my existing...
view full answer... - Roof Rack that Can Fit 2023 Jeep Wrangler Rubicon with Sky One Touch RoofThe Yakima Jetstream roof rack part numbers # Y00428, # Y53TR, # Y00226 is a fit for your 2023 Jeep Wrangler Rubicon that has the sky one touch roof and would do a great job to carry a tent and other cargo.
view full answer... - Roof Rack & Attachments For 2010 Toyota Tacoma TRD SR5I would get the Yakima HD Bar Roof Rack System. You'll need the HD bars # Y01156 Skyline Towers # Y53TR HD bar adapter # Y03541 and landing pad # Y74FR. You can then use the JayLow Kayak Carrier # Y04073, Off-Grid Cargo Basket # Y07139 or Skybox Cargo Box # Y95AV. These are just my suggestions for accessories but there is much much more on our website if you're wanting something different!
view full answer... - Will the Rhino-Rack # Y01-130B Fit My 2022 Hyundai Santa Cruz?Yes, you will be able to put 2 bikes on the Rhino-Rack Heavy-Duty Bar Roof Rack for Camper Shells - Track Mount # Y01-130B if the combined weight of the racks and bikes is exactly 220 pounds (or under). As far as the fitment of the # Y01-130B on your 2022 Hyundai Santa Cruz, that is a bit more complicated. The tracks will fit with the included hardware with drilling. With the 63" tracks, you can cut the tracks to the size of the bed rails. The complicated part is the crossbar fitment....
view full answer... - Can Yakima LockNLoad Platform For 2017 Toyota Highlander XLE be Used with Roof TentThe Yakima LockNLoad Platform part # Y05045, # Y53TR, # Y05042-2, and # Y00242 would work great for your tent setup. This will give you a 165 lb dynamic weight capacity which is the standard capacity needed for tents which would use a static capacity instead and would be much higher. This is a creative solution to give you the additional spread you'd need for your tent too!
view full answer... - Best Roof Rack for a 2015 Mazda 3 5-door with Fixed Mounting PointsFor the 2015 Mazda 3, you'll only have access to either Yakima or Rhino Rack roof bars. Both are great companies and there's a few differences that are important to note about the two companies. Rhino Rack doesn't produce as many accessories, but is a smaller than average bar and fits more mounting hardware in both its C-Channel and around the bar. Additionally, its locking system is two part, one for the foot pack and one for the c-channel accessories as a separate part. Finally, Rhino...
view full answer... - Parts To Use Existing Yakima Aero bars With RetraxONE For Toyota TacomaIt is possible to use your Yakima Aero bars on the RetraxONE part # RTT-60851 for the 2017 Toyota Tacoma. You need 2 sets of landing pads part # Y00221 to slide into the tracks of the Retrax system. You need one set (quantity of 4) of Yakima Skyline Towers part # Y53TR to attach to the landing pads. Then the Aero bars mount to the towers.
view full answer... - Roof Rack Recommendation for Rhino Rack Sunseeker II Awning on 2017 Ram ProMaster CitySince the Sunseeker II Awning Item # RR32105 only fits Rhino-Rack Heavy-Duty, Aero and Sportz crossbars; Thule and Inno square crossbars; Yakima round crossbars we have a solution, but it's not the Rola rack you mentioned. You'd want the Yakima Round Bar Rack part numbers # Y00408, # Y53TR, # Y03536, and # Y00233 which would fit and work well on your vehicle and with the Sunseeker. You will also need the adapter part # RR32105 too with the round bars.
view full answer... - How to Install Rhino-Rack Pioneer Platform Rack on a 2003 Hummer H2To install a platform rack on your 2003 Hummer H2 we first need a roof rack and for that I recommend the Yakima JetStream system that includes the following parts: - 60" JetStream Crossbars # Y00426 - SkyLine Towers # Y53TR - Landing Pad 4 # Y00224 This installs directly to the fixed mounting points on your Hummer which then allows you to use the Rhino-Rack Pioneer Platform Tray # RR82TB along with 2 of the Mounting Kit # RR43105 to get it installed. The Pioneer Platform # RR85ZW...
view full answer... - Recommended Roof Rack for 2024 Toyota RAV4For an extremely quiet roof rack that fits your 2024 Toyota RAV4 with flush mounted rails I recommend the Yakima JetStream roof rack. You will need the following: -Yakima JetStream Crossbars - Aluminum - Black - 50" Long # Y00425 -SkyLine Towers for Yakima Crossbars - Fixed Mounting Points, Flush Rails, and Track Systems # Y53TR -Landing Pad 23 for Yakima SkyLine and Control Towers # Y98FR The JetStream bars use an asymmetrical design along with WindRidges to reduce drag, noise, and...
view full answer... - Recommend Roof Rack for a Bike and Kayak on a 2018 Honda CR-VIn order to add a roof rack to your 2018 Honda CR-V I recommend using the Yakima Roof Rack made of parts # Y01156, # Y53TR, # Y03541 and # Y00245. This system has heavy duty yet lightweight aluminum cross bars that are durable and rustproof. This option will also be far more cost effective than an OEM roof rack as I am sure you will come to find out. If you need a kayak carrier then I recommend the Rhino-Rack Nautic Roof Kayak Carrier part # RR570. It is side-loading and it comes with...
view full answer... - Length of Yakima Crossbars Needed to Load 2 Thule Hullavators # TH898 on a 2019 Honda PilotWhile we do technically have an option for mounting 2 Hullavators # TH898 onto your 2019 Honda Pilot with the Yakima SkyLine Towers # Y53TR and Landing Pad 19 # Y00245 on your flush rails, you would need at least 72" inches of usable crossbar space for the required 4-8 inches of length past the feet. This is because one Hullavator measures 36" long. The 70" JetStream crossbars # Y00427 does not provide enough length. With that being said, the only Yakima option we carry that has that length...
view full answer... - Can Thule Hullavator Install on Yakima CrossbarsThe Thule Hullavator Pro # TH898 can fit round bars by grabbing around the crossbar and can fit aero shaped bars if the bars have a channel on top of them. Which the Yakima aero shaped bars don't have top channels so to go the Yakima route will require round bars which includes the part numbers # Y00408, # Y53TR, # Y03536, and # Y00241 and you'd be set.
view full answer... - Is There A Trailer Hitch For 2023 Kia Soul GT Line With Center ExhaustIf you need to carry cargo with your Kia Soul, I do have a few potential solutions for you. I will tell you there is not a trailer hitch available anywhere that will fit the center exhaust model at this time (August 2023). The receiver would go exactly where the exhaust sits and there is no way to work around that. If your goal was to carry a few bikes we could set you up with a trunk mount bike rack like the Malone hanger # MPG2139. This can carry 3 bikes weighing up to 33 lbs apiece...
view full answer... - Recommended Roof Rack for Hullavator and Kayak Carrier on 2019 Honda PilotThank you for all of the information! While you are able to use the Hullavator # TH898 with your setup as far as weight goes, this kayak carrier does require the crossbars to stick out 4" - 8" out past the roof rack feet. Since the Thule SquareBars have a limited amount of space under them for the feet you can only use the 53" Bars # TH712400 but this wouldn't give you the required spacing for the Hullavator. I recommend using the Yakima 60" JetStream Crossbar # Y00426 instead with the...
view full answer... - Yakima Roof Rack Fitment on a 2013 Jeep Grand Cherokee OverlandI can help you find the right Yakima roof rack for your 2013 Jeep Grand Cherokee Overland. If your Overland has the E group package you will see a metal strip in the flush mounted rails, the Yakima kit you will need is the # Y00408 in combination with # Y53TR, # Y03536, and # Y00244. This kit will include the round crossbars, the RailGrab Towers, and the Raised Side Rail adapters. If your Overland doesn't have the E group it will have a black plastic rail and the Yakima kit you will need...
view full answer... - Options For Putting A Yakima Lock N Load Platform On My 2021 Jeep Grand Cherokee TrailhawkThe lowest profile option for your 2021 Jeep Grand Cherokee Trailhawk would be to get the Landing Pad 18 # Y00244 for the Skyline Towers # Y53TR and use the SL adapters # Y05042 for this size Lock N Load Platform (55x49) # Y05044-39. This should get you about 5 inches of clearance from your panoramic roof to the bottom of the platform. This is what I recommend and will be great for hauling your lumber and gear. Just make sure you do not exceed your jeep's roof weight capacity. If for some...
view full answer...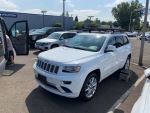
- 2021 Jeep Grand Cherokee Trailhawk Platform Style Roof RackThere may be slight differences between the 2020 and 2021 Grand Cherokee, but not much. If you're wanting to get a platform on your 2021 Jeep Grand Cherokee I do have one that is confirmed to fit. All You need is to get the Yakima LockNLoad Platform # Y05044, SkyLine Towers # Y53TR, SL Adapter # Y05042-2 and these Landing Pad 18 # Y00244. This is just like the rhino rack platform. It will install similar to the rack that I put on this 2019 Cherokee so check that out!
view full answer... - Roof Platform Rack Options for a 2014 Jeep Grand CherokeeWe have a few different options for adding a platform rack to your 2014 Jeep Grand Cherokee and it all depends on how you'd like to install it. If you'd like to install the platform rack directly to the flush rails (you'll need to remove your OEM crossbars) then we have the following: Yakima LockNLoad - Parts # Y05044, # Y53TR, # Y05042-2, and # Y00244 Rhino-Rack Pioneer - # RR74AB If you'd like to install a platform rack to your OEM crossbar system then we have the following: Yakima...
view full answer... - Yakima Roof Rack for 2015 Jeep Grand Cherokee with Flush RailsSince your 2015 Jeep Grand Cherokee Overland has the chrome rails with the slots on its roof it means you have the E Group package. So yes, the Yakima Jetstream roof rack does fit your Jeep. The parts you need are: 50 inch JetStream Crossbars # Y00425 SkyLine Towers # Y53TR Landing Pad # Y00244 Check out the attached video.
view full answer... - What Roof Rack and Cargo Box For My 2020 Jeep Grand Cherokee?For your 2020 Jeep Grand Cherokee with black/chrome flush factory rails, I recommend installing the reliable Yakima JetStream Crossbars - Aluminum - Silver - 50" Long - Qty 2 # Y00428. In order to install these, you will also need Towers # Y53TR and Landing Pads # Y00244. The weight capacity is 165lbs, but you will want to verify that your vehicle roof can handle that much weight (owner's manual). As far as the cargo box, you will be able to accommodate the largest size we offer and still...
view full answer...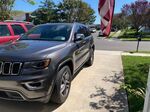
- Recommended Yakima Towers and Foot Pack for a 2014 Jeep Grand CherokeeWe have just what you're looking for, and since you already have Yakima crossbars, you'll need to use Yakima towers to use them on your 2014 Jeep Grand Cherokee. There are two types of flush side rails that come on the 2014 Jeep Grand Cherokee, black with chrome tracks and a solid matte black rail; these will determine which towers and foot pack you'll need to mount your existing Yakima bars. If your Grand Cherokee has the matte black flush mounted side rails you'll want to use the Yakima...
view full answer... - Roof Rack Recommendation for Attaching to Flush Rails of 2018 Jeep Grand CherokeeThe Rhino-Rack roof rack # RRRVP27 you mentioned is a fit for your Jeep as long as your flush rails have a chrome center section. These crossbars will give you a factory look and a quality rack that includes the locks to secure your investment. If you wanted a longer crossbar we have the Yakima roof rack part numbers # Y00425, # Y53TR, and # Y00244 which will give you a 50 inch long crossbar roof rack. I attached a picture and install video for this rack on a similar 2018 Grand Cherokee...
view full answer...
- Will the Rhino-Rack Pioneer Platform # JB0892 Fit on My 2014 Jeep Grand Cherokee with Flush Rails?I have a solution for you. As far as mounting a Pioneer platform 72" x 56" and Backbone like the # JB0892 on your black and chrome raised rails of your 2014 Jeep Grand Cherokee, I confirmed with Rhino-Rack that they do not have an engineered fit of that size of platform for your roof. Also, we do not carry a Backbone that is guaranteed to fit your roof. Regrettably, your rails will not work with the RCL Legs for Rhino-Rack Crossbars and Pioneer Platforms # RRRCL6 either. With that being...
view full answer... - Crossbar Recommendation for Yakima JayLow Kayak Carrier and 2015 Jeep Grand CherokeeThe best roof rack we carry for using long crossbars is the Yakima RoundBar system. Since the bars slide through the mounting points on the feet you can essentially use whatever length of bar you'd like. I do caution you to not get bars that extend out further than the side view mirrors though. The Yakima system that fits your 2015 Jeep Grand Cherokee with the black and chrome roof rails is the SkyLine system. You need the SkyLine towers # Y53TR, RoundBar adapter # Y03536, and Landing...
view full answer... - How Does Yakima Roof Rack Install on 2018 Grand Cherokee Trailhawk with E-Group RailsWe installed the Yakima JetStream Roof Rack part numbers # Y00425, # Y53TR, and # Y00244 on a 2018 Jeep Grand Cherokee similar to your Trailhawk and we video recorded the process. If you fast-forward to the 3:09 mark of the video I attached you'll see how we intalled the kit and how it went. The forward and rearword most screws are to be used like you mentioned. Jeep may have a Mopar rack that installs differently on the rails, but the way Yakima recommends this rack install is the only...
view full answer... - Roof Rack Needed for 2021 Jeep Grand Cherokee Limited For Thule HullavatorFor your 2021 Jeep Grand Cherokee that has the flush roof rails that have the chrome center section for a roof rack the Yakima 55 inch HD bar setup part # Y01156, # Y53TR, # Y03541, and # Y00244 would be a really great option with plenty of capacity and bar space for roof top cargo. Now you'd only be able to fit two of the Hullavators part # TH898 based on how much space they take up and how they fold down etc. This rack can easily detach for the Yakima bars as it would fit into the top...
view full answer... - Yakima Jetstream Roof Rack that Fits 2015 Jeep Grand Cherokee OverlandSince your 2015 Jeep Grand Cherokee Overland has the chrome rails with the slots on its roof it means you have the E Group package. So the Yakima Jetstream roof rack does fit your Jeep. The parts you need are: 50 inch JetStream Crossbars # Y00425 SkyLine Towers # Y53TR Landing Pad # Y00244 I attached an install video for this rack on a similar 2018 Jeep Grand Cherokee. Then you could use a roof mounted bike rack like part # Y02114.
view full answer...
- Can 2 Yakima ShowDown Carriers be Used on a 2018 Jeep Grand CherokeeTo use the Yakima ShowDown # Y04081 you would need a roof rack where the crossbars extend past the legs at least 3-1/2". From what I can tell, the Mopar roof rack for your 2018 Jeep Grand Cherokee has crossbars that end where the legs fit. I do have a solution for you to carry your kayaks but when I reached out to my contact at Yakima she said you would need to at least use their 70" crossbar and that 2 of the ShowDown carriers will be at least 80" wide when placed side by side. Because...
view full answer...
- Platform Tray/Roof Rack that Fits 2018 Jeep Grand Cherokee TrailhawkFor your 2018 Jeep Grand Cherokee we don't have a Rhino Rack Pioneer platform that fits your roof rails directly but we have the very similar Yakima LockNLoad Platform Tray setup part numbers # Y05044, # Y53TR, # Y05042-2, and # Y00244 which does fit your rail setup directly. This tray is 55 inch by 49 inch. We can't recommend opening your roof with this installed though as it might interfere but also it's going to cause quite a bit of wind noise.
view full answer... - Recommended Roof Rack and Kayak Carriers on a 2015 Jeep Grand Cherokee SummitI'm fairly sure the Summit model of the 2015 Jeep Grand Cherokee comes has the E-Group package which means you have flush rails on the Jeep's roof that have a chrome strip along them. If I'm right I recommend the Yakima roof rack system with the JetStream Crossbars, part # Y00425, the SkyLine towers, part # Y53TR, and Landing Pad # Y00244. This will give you a good rack for your Hobie kayaks. Then to carry the kayaks we have the JayLow, part # Y04073, which can carry both of them. You...
view full answer... - Recommended Roof Rack and Rooftop Cargo Carrier For 2021 Jeep Grand CherokeeAs long as the Aluminum rails on your 2021 Jeep Grand Cherokee are the Chrome/Black rails then the Yakima Roof Rack System you were looking at that uses 50" Yakima JetStream Crossbars in Black # Y00425, SkyLine Towers for Yakima Crossbars # Y53TR, and Landing Pad 18 # Y00244 would be the correct option for you. Adding the Yakima Same Key System (SKS) Lock Cores (QTY 4) # Y07204 will secure the roof rack to your Jeep to deter theft. The JetStream are have a very aerodynamic design and...
view full answer... - Recommended Roof Rack to Use Thule Hullavator # TH898 on a 2017 Jeep Grand CherokeeI'm so sorry to hear about your situation! From the looks of your previous crossbar order, you ordered the Thule AeroBlade Edge Roof Rack TH7602-TH7602. While we definitely have roof rack options for you to work with a Thule Hullavator # TH898, the AeroBlade Edge crossbars do not provide you the required 4-8 inches of crossbar overhang past the feet required for the Hullavator to function. This is because the AeroBlades do not extend past your rails. Judging that you purchased AeroBlades,...
view full answer... - Comparing Steel and Aluminium Crossbars for a 2020 Jeep Grand Cherokee with Flush TracksIn regards to choosing between steel and aluminium crossbars, I recommend aluminium because they will be lighter and offer better protection from the elements. The steel crossbars do have higher weight capacities but this would not be a factor as you will be limited by the mounting feet anyway. For a 2020 Jeep Grand Cherokee, the Yakima JetStream Crossbar System part # Y00425, part # Y53TR, and part # Y00244 is what I recommend for models with black and chrome tracks or matte black and...
view full answer... - Thule Roof Rack Recommendation for a 2012 Grand Cherokee Overland with Flush RailsI spoke to Thule about this issue and they said that they used to use the THKIT4019 to fit the Laredo Group E roof racks on the 2012 Jeep Grand Cherokee, but moving forward they are now using a different style clip system and that is why the THKIT4019 is no longer available. For your vehicle you would want the following parts to put an Thule Aeroblade roof rack like the one you referenced on your vehicle. Thule Aeroblade Load Bars # TH711520 Thule Rapid Traverse Foot Pack # TH480R Thule...
view full answer... - What is the Largest Cargo Box I Can Mount on My 2018 Jeep Grand Cherokee?The largest Thule cargo box that will fit your 2018 Jeep Grand Cherokee is the Thule Motion XT Rooftop Cargo Box - 22 cu ft - Titan Glossy # TH629907. If you want a Thule roof rack that is compatible with your 2018 Jeep Grand Cherokee that will be compatible with the Thule Motion XT, I recommend the following system: - Thule WingBar Evo Crossbars - Aluminum - Silver - 53" Long - Qty 2 # TH711400 - Rapid Podium Feet for Thule Crossbars - Fixed Point - Qty 4 # TH460R - Fit Kit for Thule...
view full answer... - Best Yakima Roof Rack for 2019 Jeep Grand Cherokee with Group E PackageYou are correct that the rails on your 2019 Jeep Grand Cherokee are the Group E package, which are black and chrome, and there is a great option from Yakima. The best roof rack for your '19 Grand Cherokee with the Group E package from Yakima will utilize the JetStream crossbars which will give your car a roof rack that is highly effective and quiet with a distinguished look. You can check out how this rack looks on a Grand Cherokee in the accompanying photo. This roof rack is made up...
view full answer...
- How Can I Use My Old Yakima Crossbars On My 2020 Jeep Grand CherokeeIf you want to use your old Yakima crossbars on your 2020 Jeep Grand Cherokee with flush rails, your options will depend on what crossbars you have and the raised rails on your vehicle. Your first option will work on Jeep Grand Cherokees with the E-Group Package. If you have the old Yakima round bars, they must be at least 50" in length. This rack will consist of the following items: Your Yakima round crossbars SkyLine Towers for Yakima Crossbars - Fixed Mounting Points, Flush Rails,...
view full answer... - Canoe Carrier Recommendation for a 2017 Jeep Grand CherokeeThanks for your kind words! For a great carrier for a 16' canoe on your 2017 Jeep Grand Cherokee Trailhawk, I recommend using the Yakima KeelOver Canoe Carrier # Y04069. The KeelOver comes with a simple, tool free installation onto your crossbars and already includes all the straps you need to secure your canoe. For your canoe length, you will be able to adjust your crossbars to the required spread of 30" apart. As far as crossbar compatibility, the KeelOver clamps around crossbars that...
view full answer...
Do you have a question about this Roof Rack?
Info for this part was:

Edited by:
Daron K

Written by:
Alex H
At etrailer.com we provide the best information available about the products we sell. We take the quality of our information seriously so that you can get the right part the first time. Let us know if anything is missing or if you have any questions.
Product Experts Available Now!
Call 1-800-940-8924
Thank you! Your comment has been submitted successfully. You should be able to view your question/comment here within a few days.
Error submitting comment. Please try again momentarily.