
Summer Starts Here - Save up to 70%
To see if this custom-fit item will work for you please tell us what vehicle you'll use it with.
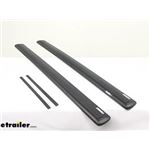
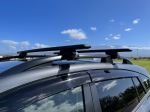
Premium, aerodynamic crossbars attach to Thule feet to create a quiet, stylish roof rack for your vehicle. Dual rubber strips in T-slots let you easily mount accessories - no trimming required. Simple to center and install with integrated scales.
Features:
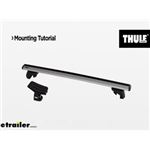
Thule WingBar Evo Crossbars 53" - Black - Aluminum - Qty 2:Videos are provided as a guide only. Refer to manufacturer installation instructions and specs for complete information.
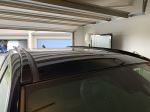
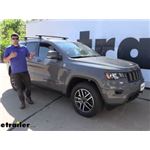
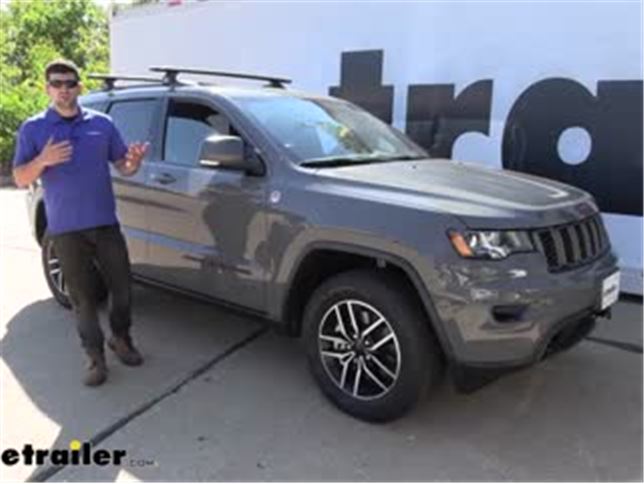
Hey everybody, how's it going Today, we're gonna be going over, and showing you how to install, the Thuli Evo Crossbars System, here on our 2021 Jeep Grand Cherokee. So, let's take a closer look at our roof rack system here. The first thing we're gonna notice, is the shape of our crossbars. So, there's a few different types of Aero crossbars on the market, Thule however, are the only ones with this airplane wing shaped crossbar. Now, what this does is, it does a couple of different things. Number one, provides the best aerodynamics, therefore we're gonna get the best, or the least amount of wind resistance.
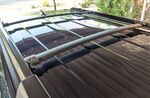
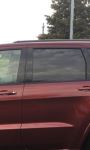
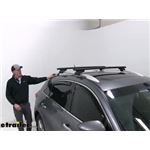
You're not gonna have to worry about as much wind noise. And number two, because of the wind resistance, we're gonna have the best miles per gallon saving. Some crossbar systems, When you add the bulky square crossbars, they're gonna catch a lot of wind, therefore creating drag and reducing your miles per gallon. So, if you have a panoramic roof on your Grand Cherokee, it's a great feature, and we don't wanna lose it with a roof rack installed. Therefore it's important that it still works with the system in place.
And, as you can see here, there are no interference issues whatsoever. So, going further into the crossbars, we're gonna have an end cap on each side, which we can flip up. And this is gonna reveal the start, or the end rather, of the integrated channels in the top of the crossbar. So, depending on what type of accessories you're using, some of them use wraparound clamps, where they attached to the bottom of the crossbar and set on top, or so of them actually use a T-bolt, and they just simply slide into the track. So, if you have those T-bolt mounted accessories, we could easily use them with this crossbar system on this vehicle.
For some vehicles, where there's not a lot of space between the top of the roof and the bottom of the crossbars, those T-bolts are a must. Therefore, it's nice to be able to utilize them here with these Thule crossbars. So, right now our system that we currently have installed, has the black crossbars, which I think looks really well here on our Grand Cherokee. However, there is still an option for silver bars as well. So either one you prefer, whichever is gonna match your vehicle better, is what I recommend.
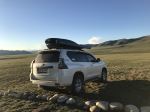
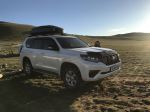
I'd also like to point out that our crossbars here are gonna be 53 inches long, which is the recommended size for this vehicle. So touching a bit more on that recommended bar size of 53 inches, this is really a great length for this vehicle here, because it provides us with the necessary overhang that certain crossbar accessories require, and it's also gonna allow us to fit as much stuff as we can on the roof here. We did fit several bikes up here, a cargo box, and a couple bikes, a couple of kayaks. Really the possibilities are endless with this bar size here. We shouldn't have any issues running out of room. So, another feature of this crossbar system that I really like, is that it can be locked with additional metal locking cores, purchased separately. We'd simply remove these black plastic plugs here, and insert our metal locking core, offer security for our roof rack and accessories. So, we talked about all the various things we can throw up on our roof here. There is one stipulation, however, we need to be aware of. And that's gonna be the weight capacity of our system here, which is 165 pounds evenly distributed across both crossbars. However, that may not seem like a lot, but I don't think you're gonna be maxing that out with the space we have available here. That's gonna be plenty for you to carry your favorite accessories. So in regards to installation, this is very simple. All the tools we need are gonna be included with our kit, and it's gonna mount into a factory fixed point on the vehicle here. And the great thing is, we actually have a couple of different to choose from, depending on what accessories we're carrying, But, as you can see, there's actually minimal contact. So, there's really no chance at all to cause any damage to the roof of our vehicle. So, a roof rack is gonna be composed of three separate components. We have the crossbar, which is what we have here. We have the mounting feet, which is what you see right here. And then finally, we have the fit kit. So both the crossbars and the mounting feet are sort of universal, if you will. The fit kit is gonna be the component that's gonna be specific to your Grand Cherokee. So, now that we have all of our components ready and laid out in front of us, we can begin assembly. First thing we're gonna do, is we're gonna flip our crossbar over. Just one little note I wanna make at this time, before we start, is that our crossbar is sort of shaped like an airplane wing. The larger round portion needs to be facing the front of the vehicle. So, keep that in mind during assembly. Where we're gonna flip the crossbar over, and on each end we have an end cap we have to remove. If we simply depressed that section there, we should be able to pull it straight out. We have one on each side. We also have a little adjuster here. You just wanna make sure that's all the way in. Next, we're gonna take one of our mounting feet here. So, that's what this part looks like. And we're gonna go ahead and slide that into the channels in our crossbar. So, we want sort of this unfinished side to be facing out, like so. We'll slide it in about halfway, and we'll do that same thing on the other side with our other mounting foot. Once we have both of our mounting feet installed, we can reinstall our end cap here, so we don't have to worry about the mounting feet sliding off the crossbar while we're working. So, next we need to grab our fit kit here. So the first thing we're gonna grab, is our little rubber pads here. So, although they may look the same, there is a difference. We're gonna have two of each in our kit. Two are labeled 46 and two are labeled 45. One is for the driver's side, the other's for the passenger's side. So, next we're gonna grab the number 46 pad here. We're gonna be working over on the passenger's side, where we're just gonna clip this in place. There's gonna be a little groove here on the bottom, that's gonna line up with the notch on the foot. So, it's kind of hard to see, but once you get your hands on it, it will definitely make a lot more sense. But, we're just gonna place that over the little channel, just like so. And then, the next thing we're gonna do is, we're gonna take our metal car clip here, that looks like this. We need to do some assembly first. So, we need to take a couple of different things. We're gonna have a socket head cap screw, a split lock washer, and then one of these little rubber spacers here. So, how this works is, we're gonna take our socket head cap screw, our split lock washer, place that over there, like so. We're gonna stick it through the top of the metal car clip, and then we're gonna hold it underneath with our rubber washer here, just like that. Once we have that done, we can go ahead and insert it into the foot pack assembly here. So, we're gonna be lining up these two holes with the two rubber ears on our pad. It's pretty simple to understand. The raised portion here on the car clip, is gonna be facing out away from the vehicle. Just like that. Next thing we're gonna do, is secure our metal car clip and our rubber pad here to the foot pack assembly, using the hardware that comes with the feet. You're gonna get these smaller socket head cap screws. There's gonna be one on each end here. So, you're gonna have to line up three different pieces of material here. That rubber pad, the metal car clip, and then there's gonna be a threaded rod inside the foot pack assembly. So, just hold everything together and begin threading to line everything up. So, our aim right now is just to get them both started. We don't wanna tighten them down all the way, because we still wanna be able to move the foot inside the crossbar, like so. So we're just gonna get them started here, without snugging them up just yet. Now, we're just gonna repeat that same process on the other side. The only thing that's gonna be different, is we need to make sure that we're using the rubber pad labeled 45 for the driver. So, next thing we're gonna do is we're gonna come up to the roof of our vehicle here, and inside the channels here, these glossy black channels, you're gonna have a few different Torx bolts. So, these Torx bolts are gonna be spaced throughout these rails here. And these are the various points we can use to mount our roof rack. We'll have a couple at the front, one in the center, and then one at the rear. So, we're gonna go ahead and show you the rear. So, we're gonna take the Torx security bit here, that comes in the fit kit pack. And we're gonna use this to remove that Torx screw there on the roof, just like so. So, we're gonna have one on each side. We need to remove them both, for both the front and rear crossbar. So now, once we have our crossbar assembly partially assembled, we can go ahead and set it up on the vehicle here, and mount it to the points that we just removed the Torx bits from. So, I will say if you have an extra set of hands, that will help you with the step, but it is possible to do by yourself. So, now what we need to do, is we're gonna take the Allen head that comes in our fit kit. We're just gonna simply tighten down that cap screw into the factory fixed mounting points. Now, I will say this part is kind of tedious, because you don't have a lot of room to move your wrench, but just be patient, take your time, make sure we don't cross thread that bolt there, and we can get it attached to the vehicle. And obviously, we have to do this on both sides. So, the next thing we're gonna do, once we have both of those bolts tight, we have the fit clip of our mounting feet securely attached to the roof, we need to center our crossbar on the roof here. There's a couple of different ways to do that. The easiest way is just to simply measure from this point of the mounting feet to the end of the crossbar, and just make sure that's the same on both sides. Once we have it centered, we can tighten these two outer Allen bolts here, using the hex wrench that comes with the mounting feet kit. So, these are gonna actually tighten the crossbars to the mounting feet, so they can't slide back and forth, side to side. And then once we get this side buttoned up, we'll just simply repeat that same process on the other side. So, now the last thing we need to do, is take one of our covers here, slide it over the mounting foot, like so, and if you have the plastic lock cord, we're just gonna take a flathead screwdriver, turn that to lock it in place. If you opted for the metal lock cores, which are sold separately, you'd install those using the keys that Thule provides. Now we'll go ahead, and install that same cover on the other side. And we'll repeat this entire process for the other crossbar system. And that's gonna do it today for our look and installation of the Thule Evo Crossbars system here on our 2021 Jeep Grand Cherokee..
Average Customer Rating: 4.8 out of 5 stars (305 Customer Reviews)
Premium, aerodynamic crossbars attach to Thule feet to create a quiet, stylish roof rack for your vehicle. Dual rubber strips in T-slots let you easily mount accessories - no trimming required. Simple to center and install with integrated scales.I'm using these Thule Evo Fixpoint Feet #710701 in conjunction with the FitKit #87003 to mount my DropRack XL to the rooftop of my 2021 Jeep Grand Cherokee. Eventually I'll get a Thule Rooftop Cargo Box to transport our RV camping supplies for which we don't have enough room in the Jeep or our Aliner RV camper. For now, I'm also using the setup to transport 4' x 8' plywood sheets for a DIY home project. This is the perfect solution for a multi-use application that'll enable us to accomplish more projects around the house as well as on the road.
Install was pretty straight forward. I did have to drill holes on the roof gutters for the fixed point bolts (2024 Mazda 3 5dr). Shipping was delayed by a month but it was not due to etrailers fault.

So far its the best roof rack you can get today! Had no issues when driving through rugged and bumpy terrains all day.
Got exactly what I needed! Perfect fit on the 2024 Q7.
I feel that the service I've received from e-trailer was superb. They made excellent suggestions and I'm looking forward to getting the new rack installed ... again, with their video help!!
Easy to install and hold crossbars very securely.
53” Thule bars fit our 2021 RAV4 Hybrid! Most people appear to be using 47” bars for the 2021 RAV4 with flush roof rails, but that’s smaller than I wanted. I sometimes carry a sheet of plywood, or a kayak plus a cargo box, and wanted a wider rack for that. I had heard that upsizing to the 53” bar was potentially not possible because the mounting slots on the bottom of the bar may not accommodate the rail locations relative to the bar length. ETrailer helped me out with some dimensions, so I bought the 53” bar knowing it would be close. There is only about a quarter inch of play on either side on the rear bar, but it fit (the front bar had more play, since the towers are a bit further apart at the front).
I’m SO happy with the result! Now I can carry what I want on the rack, and have room to spare! It looks pretty good too!
I've always trusted Thule bars. I have an old Xsporter on my truck that works really well and it has held up over time. I needed to get a Thule rack for my Jeep Grand Cherokee and found that etrailer had all the parts I needed specified for my model. That was one of my favorite things about the site. No need to search around for the different parts to attached onto the factory rails. Once I received the rack and components, it was really easy to install. I pretty much watched the etrailer videos before hand.
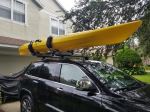
I have the older Hullavator 897XT to haul my kayak in. With the WingBar Evo, I found I needed to get a slightly longer bolt (6-1.00 x 30), which I got from the local Ace hardware store, to attached the Hullavator support bracket to the WingBar. Once I got those bolts set up, I was on the water with the kayak the next day.
Talked to the customer service a few times and they are great friendly people. And I can understand what they are saying.
Thule is an excellent product and the fit on my 2017 Chevrolet Colorado is perfect. The good people at etrailer were super helpful in getting the correct fit parts to me as quickly as possible, especially during a tough year for all. I’ve found my Thule racks to be the perfect tool to take our kayaks on our adventures!
I’ve been searching for a set of crossbars for my 2021 Crosstrek. After looking at several different companys,, I decided to go with etrailer.com and get the Thule Wingbar Evo Crossbars and Evo Raised feet. Ordering was quick and shipping was even faster! Installed them in about an hour with no issues. I love the way they look, and the construction is solid. Shout out to the staff for doing a great job and for the great communication from placing the order, confirmation, updates and shipping the order. You will not be disappointed!
Cross bars have been working very well. No issues with them
The feet are very sturdy and nice to put a strap around. The instructions didn't match the picture of what I was buying because they had a 28in gap between the front and the back feet but I actually needed more like 4 ft. so you can see I used something more like what the picture of a Leaf setup was on the etrailer website. The instructions were a little bit unclear about how the ridge on the bottom of the feet are to sit in the channels on top of the car but on the back rail I had to set the feet way outside the channels anyway. Still seems to be pretty solid
The bars are strong and fairly quiet, especially considering that I mount them on the main cab of my pickup truck and not on top of the canopy. My biggest concern is that the rubber strip that runs the length of the bar to reduce wind noise was badly damaged when I slid my canoe up on to the bars. Given the weight of the canoe, I'm accustomed to getting one end on a bar and sliding it back into position. Given the sensitivity of the rubber, is started pulling away from the bar and shredding when sliding the gunwales over the top of the bar. I'll try to be more careful, but a roof rack needs to be more utilitarian in my humble opinion.
Items arrived later than expected despite cancelling an month long order due to waiting stock on a different set up that was in stock. Once it arrived the box was all torn up and the person that delivered it just dropped it in the garage with the boxes spilling out of the bigger box. Love Thule products, etailer and the shipping supplier not so much,
Thule is a quality system
Perfect for our BMW X3. Excellent quali ty!
These bars are light weight and easy to set up. However, the measurements in the directions were not right to fit them to my vehicle, and they were really difficult to adjust once the bars were on the roof. They seem to be snug on the roof and working well, I did a test drive yesterday at varying speeds and they are secure. They don't cause any unpleasant noise - you'd forget they were on there.
I bought the Thule Evo Roof Rack to transport my kayak on my Lexus 300H. Thule will advise you on their website that his particular rack is not right for a Lexus 300H (i.e., they don't make a roof rack for a Lexus 300H); it is really for a Camry, but etrailer told me that is worked, I trusted them and they were correct. After all, a Lexus sedan is really a fancy Camry, but Thule will not acknowledge this point. It works great. Thule makes a solid product.
Product arrived quickly. Easy to install. Works as expected.
Arrived on time. The product was well packaged. These crossbars are just what I was looking for and look great on my Renegade.
Great product, but even better customer service from etrailer.com. Kaylyn went to a lot of effort to help me get what we needed in a very difficult time for availability & logistics
Good shipping. Good install. Good produ ct.
High quality! Shipped quickly, packaged well, and worked great.
Excellent product from Sweden. Well made, perfect fit, great directions, easy to install. Amazingly strong, secure installation on 2013 Honda Accord. Exceptionally strong and secure fit for a gutter-mounted roof rack! Only small unavoidable issue is that the gutter clamp pushed the Honda door rubber seal strip outward slightly, but likely not enough to cause rain to leak around top of door seal.
They installed easily and look good on my 2017 Chevy Colorado Crew Cab. Purchased so we could carry our 2 kayaks while pulling the camper. Very functional! Very happy with this purchase.

Do you have a question about this Roof Rack?
Info for this part was:
At etrailer.com we provide the best information available about the products we sell. We take the quality of our information seriously so that you can get the right part the first time. Let us know if anything is missing or if you have any questions.


Thank you! Your comment has been submitted successfully. You should be able to view your question/comment here within a few days.
Error submitting comment. Please try again momentarily.