
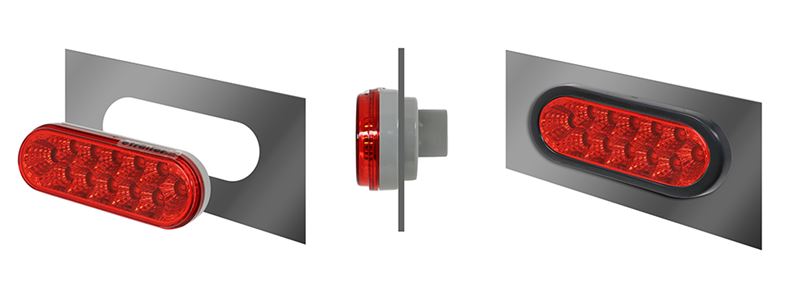
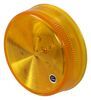
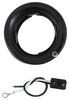
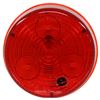
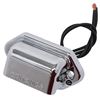
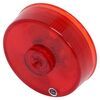
2-1/2" Diameter round. Waterproof, LED trailer light functions as a clearance or side marker light. Pirhana series combines modern design with vibrant lighting. Recessed mount with grommet (not included). Accepts standard 2-prong plug. P2 rated.
Features:
Specs:
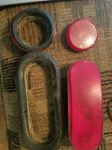
The waterproof construction of this light makes it ideal for use on trailers that may be submerged, like a boat trailer. The housing and lens are sonically sealed together to create a single unit, which means that water will not get into the light and damage the diodes or circuit board.
A P2-rated light produces a 45-degree angle of light to either side of its centerline for a total of 90 degrees of coverage. This beam pattern can be seen straight on, but it cannot be seen clearly from the side. So this type of light can be used as either a side marker light or a clearance light, but it cannot function as both. If you need both functions, then you must install 2 separate lights on your trailer - one as a front or rear clearance light and one as a side marker light.
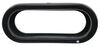
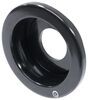
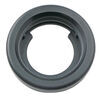
Recessed-mount trailer lights install with a grommet, which is often sold separately. These lights extend past the trailer surface and require a hole for installation. If replacing a light, you can utilize the pre-existing hole. If installing a new light, you will need to cut a hole or use a mounting bracket (sold separately) to complete the installation.
California residents: click here
Videos are provided as a guide only. Refer to manufacturer installation instructions and specs for complete information.
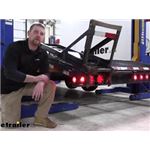
Ryan: How's it going Ryan here at etrailer.com. Today we're going to be taking a look at and showing you how to install, the Piranha LED clearance or side marker trailer light. Now this light, it's going to work great as either a direct replacement, or even an upgrade. And I say upgrade because over traditional style incandescent bulbs, this one's actually an LED. Now since it has those three LED diodes, it's going to be much brighter and last a really long time. You have no brittle filaments to worry about.
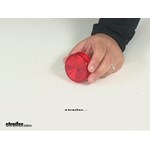
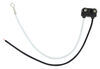
The days of having to keep spare bulbs inside of your truck's glove box are long gone. The light is going to be two and a half inches in diameter and it's going to be 15 sixteenths of an inch thick. That way you should be able to figure out which light is going to be the best option for your trailer.Now if we flip the light over, it's going to be sonically sealed, so everything will be nice and tight so it's going to be waterproof. And once you kind of get the light in your hand and feel it, you can just tell what it's really well built and should last for a really long time. Now the light is going to accept these standard two prong connector, like we have plugged in right now.
Now if your connector is damaged or anything like that and you need to get a new one, you can find them here etrailer.com. And since the LEDs are going to last a really long time, once you get the light installed, you're not going to have to worry about messing around with it. Speaking of installation, let's go ahead and put this in together now. To begin your installation, he moved back to the light that you're wanting to replace. In our particular situation, it is this missing side-marker.Now if your light is not missing, you'd simply remove it.
Now the way the lights are moved, you can kind of just push in on one side of the light and it'll kind of spin sideways and you're able to pull it out of the grommet. And to disconnect it, there's nothing special about these, you simply just pull back and that'll separate the two. Other than that, once you have it removed, you can simply plug the light in. Now, even though these terminals come with a little bit of dielectric grease on them, I like to add just a little bit more cause it can't hurt anything. And if you'd like to add some more too, find it here at etrailer.com.
Let's get those coated, plug that into the terminals and push it down to completely connected. But the light plugged in now, you simply just push it back into the grommet. Sometimes it can fit a little bit tight to the grommet, so we kind of just work around it and push back and get it to fully seat. Now it's always a good idea to test light, so you go ahead and put power to it and turn it on and make sure everything is working properly. And that'll finish up our look at and our installation of the Piranha LED clearance or side marker trailer light.

Do you have a question about this Trailer Light?
Info for this part was:
At etrailer.com we provide the best information available about the products we sell. We take the quality of our information seriously so that you can get the right part the first time. Let us know if anything is missing or if you have any questions.


Thank you! Your comment has been submitted successfully. You should be able to view your question/comment here within a few days.
Error submitting comment. Please try again momentarily.