


Velit VE49QV Roof Thickness Requirements and T@B Trailer Installation Guide
Updated 04/21/2026 | Published 04/11/2026
Question:
What range of roof/ceiling thickness is required? I’m Installing it in a T@B trailer and will be reinforcing the roof in that area.
asked by: Rick
Expert Reply:
Hi Rick,
Great question, and you’re right to want to make sure this lines up.
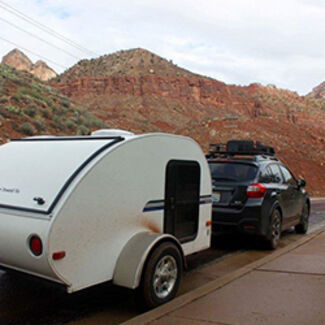
For the Velit unit part # VE49QV, the required roof thickness range is 1.99 inches to 3.54 inches, so that’s the range you’ll want to be within for proper fit and sealing. The good news is that a typical T@B trailer roof is usually built within that range. They generally have a lightweight, arched aluminum or composite outer skin that’s about 1/8 inch to 1/4 inch thick, supported by a structure that brings the total roof assembly to roughly 2 to 4 inches once you factor in insulation and the interior ceiling.
Because of that, if your roof is already within that thickness range, you likely won’t need to build it up just to meet the spec. Where you may still need to make a small adjustment is the mounting surface itself. Since the T@B roof is curved and designed to be lightweight, you’ll want to make sure the area where the unit sits is flat and well supported so the gasket can seal evenly and the unit isn’t sitting on a curve or flexing over time.
As for the opening, this unit is designed to work with a 14 x 14 standard roof cutout, so in many cases you can reuse an existing vent opening. That’s often the easiest approach.
Do you have a vent on the T@B currently?

Rick
4/18/2026
Yes, I'm removing the vent/fan now. It looks like the thickness is only about 1-1/4" but that will work fine as I'll be adding another 3/4" to help support the roof.


Product Page this Question was Asked From
Velit 2000R Mini AC for Teardrops and Truck Campers - 6.5K Btu - Non-Ducted - 12V DC - White


- RV Air Conditioners
- Complete AC System
- Cool Only
- 6500 Btu
- Standard Height
- Single Zone
- Rooftop
- Non-Ducted
- White
- Velit
more information >

Continue Researching
- Search Results: orion xs
- Search Results: velit
- Search Results: shore power cord
- Search Results: shore power
- Search Results: charger
- Search Results: battery monitor
- Search Results: orion
- Q&A: Can AC Charger Be Used With WFCO Power Center
- Q&A: Availability of Victron DC/DC Battery Charger With Lithium Compatibility and Engine On Detection
- Shop: Victron Orion-Tr Smart Isolated DC-DC Charger w/ Bluetooth - 3-Stage Charging
- Video: Review of Victron Battery Charger - Blue Smart 12V Battery Charger With Bluetooth - VN26ZR
- Shop: Victron SmartShunt Battery Monitor - 500 Amp
- Shop: Victron Blue Smart Battery Charger with Bluetooth - IP22 Protection - 12V - 30 Amp
- Shop: Victron Orion RV Converter - DC to DC - 24V/12V - 70 Amp
- Shop: Victron Orion XS RV Converter - DC to DC - 12V/12V - 50 Amp
- Shop: Velit 2000R Mini AC for Teardrops and Truck Campers - 6.5K Btu - Non-Ducted - 12V DC - White
- Shop: Camco RV or Household Extension Cord - 15 Amp - 30'
- Video: Review of Velit RV Air Conditioners - White 6500 Btu 2000R Mini RV AC System With Remote - VE49QV
- Q&A: Can Hub for 3,500 lb Axles be Used on Axles With Different Weight Rating
- Q&A: Why is Axle with Same Diameter as 3500lb Axle Rated at 2990lb
- Q&A: Why Are My Trailers Axles Under Rated For My Campers Dry Weight?
- Shop: Trailer Hitch
- Shop: Trailer Wiring
- Q&A: Can Vehicle 7-Way Charge Batteries for Trailer Winch
- Shop: Suspension Enhancement
- Shop: Brake Controller
- Shop: Base Plate for Tow Bar
- Shop: Gooseneck Hitch
- Shop: Fifth Wheel Hitch
- Q&A: What Type of Breakers Does Powermax Panel PM59VR
David
4/17/2026
I installed the Velit mini in my camper van last summer. It was a replacement so the hole in the roof was already cut. Additionally I had to work around ann existing roof rack, roof decking, furring strips and tongue and groove ceiling. It was the only DC A/C unit that fit the space. With ceiling and furring strips there was plenty of thickness. The 2 main challenges were the anchor angle brackets and fishing the large electrical connector. The anchors work well, however I had to orient differently to accommodate the existing ribs and furring strips so had to create a new way to secure the cowling. The electrical connection was in an awkward spot for my existing configuration so had to orient the anchors to leave space. I’m happy with the result. It’s solidly anchored and has survived many trips. Wonderful A/C system. Works perfect for us.