


Installation Process for Curt Powered Tail Light Converter with 4-Pole Flat Trailer Connector
Updated 02/21/2022 | Published 02/19/2022
Question:
telling me how to do it
asked by: Guilherme C
Expert Reply:
The installation process for the Curt Powered Tail Light Converter with 4-Pole Flat Trailer Connector # C59236 varies somewhat depending on what vehicle you have. You will start by locating the vehicle battery and disconnecting the negative battery terminal.
From there, you will locate your vehicle taillight wiring and identify the wiring type. Using snap locks, you will attach the input wires of the taillight converter to the corresponding vehicle harness wires you previously identified. Next, you will located a flat spot inside the vehicle near the taillights and attach the black converter box.
Locate a suitable grounding point near the connector such as an existing screw with nut in the vehicle frame or drill a 3/32" pilot hole for the provided screw. The area should be free of rust, dirt and paint. Secure the white ground wire using the ring terminal and provided screw.
Once this is completed you will need to route the 12 GA wire to the positive vehicle battery terminal and attach it using the ring terminal. You will also need to install the 15 amp fuse in the fuse holder once all other steps are complete. See the diagram below which shows how to complete this.
I have attached the written instructions as well as an installation video for your reference. You will need to refer to the wiring guides in the instructions which give additional information based on your wiring type.


(click to enlarge)

Product Page this Question was Asked From
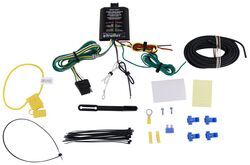
Curt Powered Tail Light Converter with 4-Pole Flat Trailer Connector

- Custom Fit Vehicle Wiring
- Trailer Hitch Wiring
- Vehicle End Connector
- Powered Converter
- Universal Fit
- 4 Flat
- Plug and Lead
- Splice-In
- CURT
more information >
Featured Help Information
Instructions
Miscellaneous Media


Continue Researching
- Shop: Trailer Hitch
- Shop: Curt Trailer Hitch Receiver - Custom Fit - Class I - 1-1/4"
- Shop: Trailer Wiring
- Shop: Brake Controller
- Search Results: curt trailer brake controller
- Shop: Vehicle Tow Bar Brake System
- Shop: Curt Discovery NEXT Trailer Brake Controller w/ Custom Harness - Up to 4 Axles - Time Delayed
- Shop: Universal Installation Kit for Trailer Brake Controller - 7-Way RV and 4-Way Flat - 10 Gauge Wires
- Shop: Demco Stay-IN-Play Duo Flat Tow Brake System for RVs w/ Hydraulic Brakes - Proportional
- Shop: Suspension Enhancement
- Search Results: installers
- Search Results: brake controller
- Search Results: etbc7 wiring kit
- Shop: Vehicle Tow Bar Wiring
- Shop: Timbren Rear Suspension Enhancement System
- Shop: Timbren Rear Suspension Enhancement System
- Shop: Timbren Front Suspension Enhancement System
- Article: Brake Controller 7- and 4-Way Installation Kit (ETBC7)
- Search Results: curt 56236
- Search Results: t~one
- Search Results: stay~in~play
- Q&A: Estimated Installation Time of Timbren Rear Suspension Enhancement System on Toyota Sienna
- Video: Set up: Tekonsha Prodigy P2 Trailer Brake Controller on a 2014 Mercedes-Benz Sprinter
- Video: Installing the Blue Ox Base Plate Kit on a 2024 Jeep Wrangler Unlimited
- Video: All About the 35 Ft 4-Way Trailer Wiring Harness
- Video: B&W Patriot 5th Wheel Trailer Hitch Head Assembly Replacement Review
- Shop: Fifth Wheel Hitch
- Article: Trailer Wiring Diagrams
- Q&A: What is the Difference Between a Class II and a Class III Hitch?
- Q&A: What is the Difference Between a 4-Way and 7-Way Trailer Connector