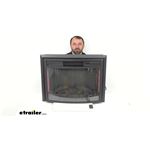
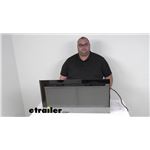
Congrats on the new camper, Steve! That's a really good question. Doe the width you want to go based off the cut out size. The new fireplace will most likely wont be the exact same size as the original one. The new fireplace will come with a…
Hey Richard welcome back! The Greystone RV Curved Electric Fireplace with Logs item #GR54FR is going to be the closest replacement option I have for your Innoflame RV26D80M-C1. The Greystone item #GR54FR fits a 26" wide x 20-7/8" tall x…
The door latches for your Furrion RV Refrigerator - 4 Door - Stainless Steel - 14 Cu Ft #FCR14ACBQASS are part #7 in the diagram below and can be activated by simply pushing the doors in until you hear a click noise.
Thanks for the information about the fire place. If you have a BLT-999A-2 then I recommend that you go with the Greystone 26 inch fireplace: Greystone 26" Electric Fireplace with Crystals - Recessed Mount - Black #324-000068. This will fit in…
We do not carry the Innoflame line of RV fireplaces. However, I do have other potential options for you depending on the size of fireplace that you have. I have also listed the wall cut-out dimensions for each fireplace, so that you can determine…
Hey Gary, while I wasn't able to find any info based on the fireplace part number you mentioned we do have the Lippert 36 inch fireplace part #LC66AF that has overall dimensions of 37-1/2" wide x 17-3/4" tall x 5-5/8" deep and…
Hey Carla! Sorry to hear about your fireplace. We're not going to have an identical replacement. Our closest option is going to be a bit smaller so you'd need to make a few modifications. It is the Greystone 40" Electric RV Fireplace…
Hey Fraser, yes the Dometic thermostat part #DMC83ZR that you referenced is correct for you to use when adding the Dometic Freshjet 3 part #DMC49ZR. This thermostat had furnace controls as well.
Hey Doug! The Firestone Ride-Rite Air Helper Springs #F35FV are the right kit for your 2026 Ford F-350 FX4 dually. However, you will need to measure to be sure it fits. The distance from the top of your rear axle to the top of the jounce bump stop…
Hi Roy, Yes, the 30 Amp Portable Power Watchdog #HU32VR will protect your RV from sustained low voltage as well as power spikes and high voltage. If the incoming voltage drops to 104 volts or below, or climbs to 132 volts or higher, the watchdog face…
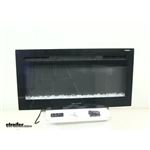
Set the mood and take the chill off in your camper. Choose curved or flat fronts and match a recessed-mount unit to your cutout so it slips in without cabinet tweaks; some installs may need minor framing. Features like multiple heat settings, adjustable flame brightness, timers, and a standard 110 volt three prong plug-in can make setup simple, and the electric heat can help reduce propane use and keep humidity down.
Most RV fireplaces are designed to be recessed mounted, not wall mounted. Verify the install type in the instructions. If it's recessed-only, plan a shelf and wooden surround instead of hanging it. Match the trim kit or bezel size to your opening, or build a surround to suit your cutout.
Measure your existing cutout and compare to the fireplace's required cutout and overall size. Check depth so the body and bezel fit. If the new unit is a bit wider or taller, minor cabinet trimming may be needed. Some installs are a perfect fit, others need small framework mods like removing a center brace or doors.
They can keep a camper warm in winter and help reduce propane use and keep humidity down. Check available heat settings and fan speed; some have two heat settings but only one fan speed. After installing, run the unit to confirm operation and inspect the glass or mirror front for damage before finalizing the fit.
Compatible replacement remotes can be available. Internal replacement parts like control circuits may not be offered, so a complete replacement can be the practical fix after a surge or failure. Confirm your exact fireplace model before ordering accessories.
They use a standard 110 volt three prong plug-in. Plug into a nearby outlet in your rig; there's no need to hardwire. Make sure the outlet is accessible in the cabinet and route the cord so it doesn't pinch when sliding the unit in.


 RV Fireplaces Parts or Accessories
 Filters