
Summer Starts Here - Save up to 70%
# 1
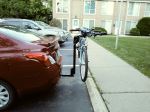
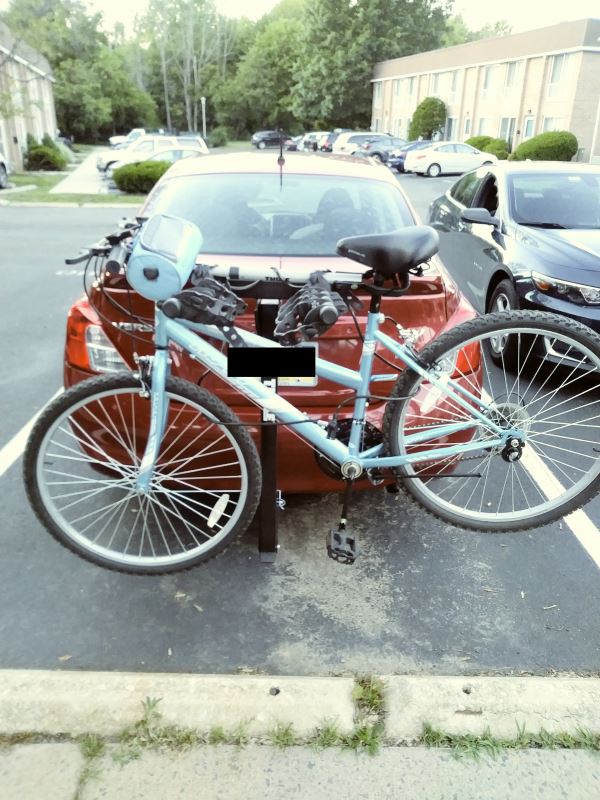
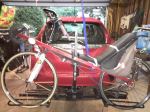
Thule Hitching Post Pro Bike Rack for 4 Bikes - 1-1/4" and 2" Hitches
The good: I like the way the bikes are held in and the ability to add the upright adapters to the bike frame holders. The straps are quality too. For a jeep with a spare tire, this is the perfect length to clear it. This rack is 5 stars from the bike holders to the base of it. The bad: the 2"receiver adapter and bolt are insufficient. I wish they made this in a solid 2" hitch. The entire setup is held into the receiver by a very short bolt. It only goes about half way into the receiver tube. So your hitch is only "secured" on one side. A hitch pin or bolt should go through the receiver tube completely imo so it can be secured on the other end with a retaining clip or nut. Because this only goes in the one side, the entire weight of the rack plus bikes are held tight to one side of the receiver by the undersized bolt and washer. A few bumps down the road and that bolt loosens. Now instead of distibuting the weight of the rack and bikes on the receiver and post, it's completely up to the bolt to keep you from losing the rack. The bolt threads get damaged too. I took this down a dirt road and nearly lost everything. I had to buy my own bolt with hd fender washers and lock washers to correct this. Thule should've provided this from the start. The current short bolt design where only one side of the receiver secures the rack is unacceptable. This rack is 1 star at best for the connection to the receiver.
I bought this bike rack back in April but wanted to make sure I used it to give the best review. First I want to say I did a lot of research on bike racks and found this one to be the best one to fit my needs. The best price I found was on etrailer.com, at the time it was When I called the customer service to place my order, I spoke to Dan. He was very pleasant on the phone and took the time and listened to what I needed and understood my concerns. I ordered the bike rack and also ordered the Thule Snug Tite Hitch Lock and Anti-Rattle Device and the Thule Cable Lock w/ One Key System Lock. Dan suggested I also get the Thule Bike Adapter Bar, which I never even thought of getting. Delivery was in about two business days, which was really fast and at the time of order they were running a special free delivery over $99. When I went to put it together I noticed I was missing the flat cap screw M6 x 16mm, part number #853-5787-02. I emailed Dan and within 24 hours received an email that the part was sent out and also in the email their was a link to track the order. After I received the part I did notice that the flat cap screw was actually in the 2 inch adaptor sleeve. The instructions were very easy to read, and it took me about 20 minutes to put together. I did have an issue when I positioned the stinger into the cradle, with the 8mm locking nut, it was not staying tight and when I took it off I noticed the threads inside were gone, so I ended up going out to Lowes and buying a new one and its holds perfectly fine. I also had a question about that part because it is not a locking part and was worried someone would try to steal the rack. I contacted etrailer.com to find if they make a locking device for this and they said no but I can contact Thule to double check, I'm still waiting for an answer back from Thule. The weather finally broke and we installed the rack onto my hitch, tightened it and it doesn't rattle. When I finally used the rack and put my bike on, it did sway a little but at 50 mph I was very happy with it. The trailer comes out just enough away from my car that I do not have to fold completely out and I can open my trunk with no issues. I am very happy with my purchase and had a great customer experience with Dan. Would highly recommend ordering from them to anyone.
# 2
Swagman Upright Bike Rack for 1 Bike - Roof Rack Crossbars - Frame Mount
I purchased this rack along with two fork-down car top bike racks. This one specifically I used to hold my daughters 18" bike. This rack works like a dream. It holds the bike very securely. I mounted this bike rack along with two of the fork-down bike racks on top of my 2004 Yukon XL and took off to go camping. Installation of this rack was a little bit of a chore (I would not want to remove it and re-install it every time I use it), but that is not a big deal as I am planning on just leaving it installed on top of the Yukon. I was towing a camper, and because the front window of the camper reflected the bike racks perfectly, I was able to look back and "check on" the bikes anytime I wanted to. I was amazed at how rock-solid all three of the bike racks that I purchased were. There was no swaying or anything. When I arrived at the campsite (about 100 miles away) the bikes were still just as secure as they were when I left them. As I mentioned, installing the bike rack was a little bit of a chore, but actually getting the bikes up and down was a breeze (I was very surprised). I would definitely recommend this bike rack, and depending on the type of bike that my other daughter gets, I will be getting another one of these (or perhaps another of the fork-down models). All in all this is a great bike rack and I have had issues with it whatsoever.
Planning on bringing bikes while camping. I mounted 2 of the Swagman bike racks to my new Sportrack on my pop-up camper. The bikes fit perfectly. The racks seem sturdy enough. Not heavy duty, but for my needs they should be fine. Assembly was relatively fast and easy.
# 3
SportRack Ridge Bike Rack for 4 Bikes - 2" Hitches - Swing Away
Solid rack for half the price of the name brands. Don’t waste your money! Thanks to the extensive reviews on etrailer and a free shipping promotion I took a chance and ordered this along with the three of their crossbars, anti rattle hitch pin and cable lock. All for well less than the name brand rack alone. Shipping was painful. Etrailer said it was in stock but then due to a delay with the manufacturer it took 35 days from order to arrival. I wasn’t in a hurry so I waited patiently, and etrailer reps emailed often to lmk they hadn’t forgotten. I thought some kind of reward for my extreme patience was in order- discount, gift card, free bag of chips- but they politely declined. Oh well. In the end it arrived when they (eventually) said it would, all in one box, in great shape. The rack was super easy to assemble. You’ll need a ratchet or two and you’ll need to crank those bolts to assemble- they don’t just “insert.” But otherwise it’s only a few steps; I had mine hanging on my truck in probably 15 minutes. Swings away and locks smoothly and requires no effort to do so. Everything feels quite sturdy and well made. No rattle on initial test drive either. This will be a once in a while rack at best for our family of four. We have two SUVs so I needed a rack that could get out of the way of the rear hatch WITH bikes on it. This will do that. And now I don’t need to stuff four dirty bikes into the back of my truck, getting them all tangled and scratched!
Unit doesn't fit a Jeep Rubicon with a spare tire. I tried 4 times and contacted etrailer.com that the unit doesn't work as sold and they offered to sell me a 7 3/4 extension and reduce the load capacity 50%. The length of the 2" hitch needs to be 3" longer for a standard Rubicon to get past the spare. You not going to want to take your spare tire off for the hitch to work. It defeats the purpose. Customer service was excellent, however the product is a flawed design. Can't recommend this hitch. Its also heavy.
# 4
Curt Bike Rack for 5 Bikes - 2" Hitches - Tilting

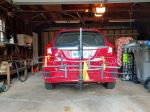
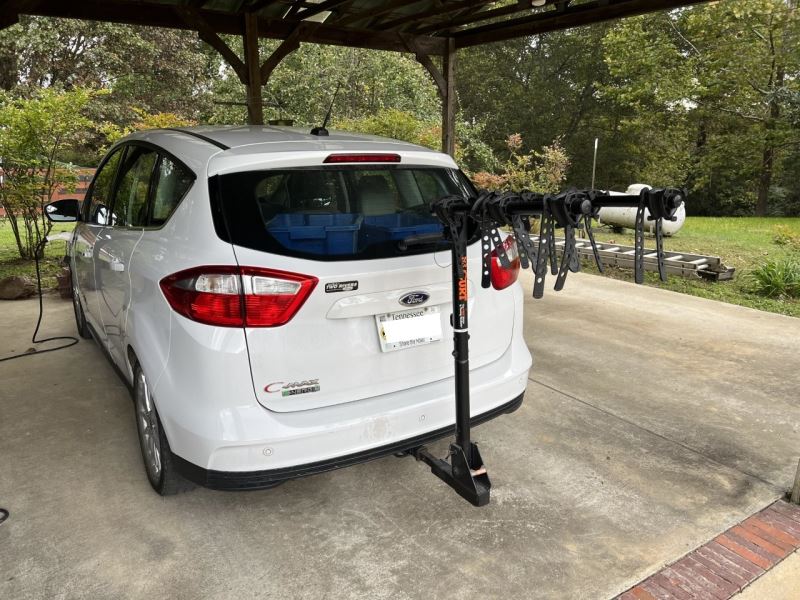
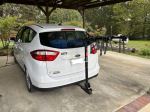
It was obvious that we received a product that was returned by someone else when the box was overly taped shut, a support collar was broken, and most of the pieces were out of their ripped plastic bags. However, it was a great price to hold 5, 26" and/or 27" Trek bikes. I used a piece of the broken collar and went ahead and assembled the rack. Due to the weight of the 5 bikes it did not wobble that much when driving, as one of the bike tires was up against my car. I can only imagine that if we received an untampered product that this review would have been 5 stars. The picture is a little hard to see, but there are 5 Trek bikes on the rack on my 2020 Toyota Seinna.
We received a damaged box, damaged items, no instructions, the nuts and bolts are completely stripped and not inside a bag. This was obviously used, returned, not checked for quality and sent out. We are extremely upset.
# 5
Yakima HoldUp Bike Rack for 4 Bikes - 2" Hitches - Wheel Mount
Great, fast service. Once I placed my order, I had the bike rack 3 days later. From Missouri to South Florida, Awesome !!!
The bike rack works extremely well and fairly easy to get two adult bikes and two kids bike. The rack can be a bit heavy if lifting all in one piece. I would recommend installing the base, then the add on. Bikes are stable and secured. The locking cable is just long enough to go throught the frame, but don't expect both tires to be locked. The only issue I had is the stablizer bold for the add on did not fit through the base rack. I called supprot and I am going to make the hole slightly larger so it will fit. Support was very knowledge and had heard of one other issue like mine so they noted my account. etrailer is great in customer support and deliver.
# 6
Hollywood Racks Traveler Bike Rack for 4 Bikes - 1-1/4" and 2" Hitches - Tilting
Prior to purchase I made sure no bike exceeded the recommended weight limit. When mounted, this rack is secure. Rubber securing straps are plenty strong. Loading and securing 4 adult size bikes was relatively easy. Although a tight fit, it was not difficult and took about 30 minutes. Traveled 4 hours on first trip with no issues! We don't use it very often so I I don't keep it mounted to the car (it only takes a few minutes to put on and take off). This will prevent the rubber securing straps and other parts from deteriorating in the weather. By doing so, this thing will outlive several cars.
So far so good! The rack shipped and arrived quickly! Never any issues at all with etrailer!! The bike rack was easy to assemble and put on my SUV. I am going to add a stabilizer to control rattle and locking hitch pin. The only complaint I have is that Hollywood trailer made the hole on the hitch smaller and neither of mine no longer fit. They were both from Hollywood racks.
# 7
Thule Passage Trunk Bike Rack for 2 Bikes - Hanging Style
Excellent and prompt customer service! When I first ordered my product it wasn’t in stock— staff were quick to let me know and offered me comparable products. I ended up waiting for my original order and shipping quick and they stayed in touch with ideas! Thule: The instructions could be a little more detailed. I ended up watching YouTube videos to help me instal. Overall it was easy, and this was the first rack I’ve ever installed and I did it by myself! I was surprised to learn the bike rack is in no way secured inside your vehicle, so.. I store it in my garage when it’s on.
Ordered online, it shipped the same day. Received it 3 days later. There is a little assembly, but, pretty simple. It took me less than 15 minutes to install and no tools were needed. It is adjustable to be used on many different auto types, but, the instructions were very clear about how to adjust it to fit my 2011 Ford Edge. I have used it twice so far to transport my bike. There are a couple of items that are inherent in the design, not a flaw, but, you need to be aware of them. First, you can't use rear window wipers. Second, the back-up alarm goes nuts because it registers a bike less than 6 inches behind you (I tolerate it for the few seconds it takes to back out of my driveway or out of a parking lot). Third, there is a little flexibility, it is held on with straps and clamps, not bolts, so, it bounces a little when you go over bumps or make sharp turns, however, it holds the bike fast to the frame and stays on the car. I use mine to transport my bike on short trips around town to bike trails. On a long trip I would suggest checking that the straps remain tight from time to time during the drive.
# 8
Rhino-Rack Bike Rack for 2 Bikes - 2" Hitches - Tilting
The unit ‘s simplicity is a real plus. It takes less than 3 minutes to put the rack on the vehicle. It is well built and very durable and has a nice feature that allows you to open the rear hatch for SUV owners without removing the rack.
I purchased this bike rack a year ago and I use it A LOT. I had to buy and install a stabilizer because without it, the unit would sway back and forth even without a bike on it (very noisy). This makes removal more cumbersome but since I keep the hitch on year round it doesn't matter to me. The tilting function is fabulous allowing easy use of my RAV4 hatchback. I can even tilt it down with a bike on it. I got the 2 bike hitch. Plenty of room for two bikes to fit without rubbing. Lastly, the hitch has a sizable through-hole on the bottom to thread a good sized cable so I can lock my bike up. Sturdy. I highly recommend.
# 9
Curt 2 Bike Platform Rack - 1-1/4" and 2" Hitches - Frame Mount - Tilting
Bike rack has been great. We've taken it on several road trips. It makes taking the bikes somewhere close to the house an option now. Before this we had one of the strap on racks that take 15 minutes to get the rack and bikes onto the car, the thought of going anywhere with the bikes was really annoying. This thing takes 2 minutes to get on or off, so taking the bikes somewhere is a breeze.
I installed this rack onto a Curt trailer hitch which is mounted onto a 2017 Honda Fit. I have been using it intermittently for several months, probably about 5 times with one bike and twice with two bikes. I give some pros and cons below and then elaborate. Pros: easy to assemble, easy to mount and dismount bikes, easy to lock and unlock, how to put the rack into different positions is intuitive Cons: inconvenient to put the rack into different positions, inconvenient to mount the rack onto the hitch, rack protrudes about 15 inches from bumper when in flipped up position (seems very vulnerable to someone backing into it in a parking lot, very inelegant looking I say the repositioning is intuitive because there is really only one way you could possibly place the pins for each position. But removing and replacing two pins is much less convenient than turning a knob or a lever, like some racks do. Also many racks fold and flip in such a way as to look very unobtrusive when in non-use mode. This one looks like kind of a monstrosity. That does not really bother me but it might bother some owners. The part that does bother me is how far it protrudes from the car. I back into parking spaces whenever possible to avoid someone bumping into the rack and damaging it (which happened to a friend). My number one suggestion for Curt is related to mounting the rack onto the hitch. Make it easier to tell when the holes are lined up so that the bolt/pin will fit and thread. As it is now, if you insert the rack as far as it can go it is way too far in. Ideally, it would be exactly lined up. Failing that, maybe some kind of click or other feedback to know at least that you are in the neighborhood. It would also be great to have an attaching device that is easier to fasten and unfasten than is the bolt/pin. Tip for mounting the rack onto the hitch: I assumed that it would be awkward to hold, what is it 46 pounds?, while trying to line up the rack probe with the receiver. If you have a garage with exposed collar ties, my solution could work well for you. I looped a cargo strap over a collar tie. Then I hooked both hooks of a bungie onto that loop. The idea is that you hook one of the bike frame holders of the rack onto the bungie, suspending the rack a few inches off the garage floor. This takes most of the weight of the rack so that you can just pull up or down and forward until you line up with the receiver. Tip for mounting bikes. Don't put the little screw into the post that prevents you from completely removing the bike frame holders. Remove both holders. Position the first bike, slide the holder into place, position the second bike, slide the holder into place. I found this makes it much easier, because you avoid parts of the bike hitting the holder as you are trying to get the wheels into place. The trick is that if you are mounting only one bike, don't forget to put the second holder back on - or maybe just stick it inside the car right away.
# 10
Curt Bike Rack for 4 Bikes - 1-1/4" and 2" Hitches - Tilting
Nice bike rack ! Saddles are well made and none of the ears that hold the straps in place have broken like they have with other brands I've owned. It came with 1 strap for each saddle and the straps seem just a tad stretchy. I looked on line and found that Home Depot has a good price for the straps so I now have 2 straps on each saddle. I've got it on a 1&1/4 hitch, but it came with an adapter for a 2 inch. It holds 3 road bikes. I used it all the time.
We are very happy with the Curt Bike Rack. It fits our 2 fat tire bikes and our tandem bike to the back of our motorhome with no problems.
# 11
Thule EasyFold XT Bike Rack for 2 Electric Bikes - 1-1/4" and 2" Hitches - Frame Mount
The BEST bike carrier by far!! We are both in our 7th decade and even I alone (5’2” 120 lbs) can manage to attach this in my hitch without any issues. It’s so easy to load both our hybrid and e-bike and they are super secure. We love that it folds up small and wheels away when not in use. This bike carrier is worth every penny!!
This rack is perfect! eTrailer had it shipped and at my home in almost no time. I drove with it on the car today, and it was solid and secure. It's super easy to get on and off the hitch. I'm 5'1 and I was able to load the bike on with the ramp without a struggle. Thanks for the thorough video and comparison information. It made this purchase easy.
# 12
Yakima HangOver Bike Rack for 6 Mountain Bikes - 2" Hitches - Tilting
I would strongly recommend NOT dealing with this company. My bike rack arrived very late and after delivery I realized it was not compatible with my bikes. I was looking for a six bike rack that could hold my family's bikes (2 adult + 4 small children's bikes) and this rack is very specific for ADULT MOUNTAIN BIKES ONLY. I did not realize this and called the customer service to initiate a return after having a hitch put onto my car. I was told I could not return. I was out over $1k and ended up giving this rack away on my local free cycle as it was NO value to me and took up space in my garage. I am not a bike expert just a mom with 4 small kiddos looking for ways to enable them to play outdoors, I would have appreciated a better product explanation up front so I understood this would not be a fit for my needs. I would have benefitted from better customer service. Suggest passing on this product/company.
Perfect rack! Easy to put together, bikes are easy to load up. I own a bike tour company and get compliments from my guests all the time about this rack. Getting ready to order another one next month.
Yakima FrontLoader Roof Bike Rack Review - 2014 GMC Yukon XL
Today on our 2014 GMC Yukon XL, we are going to be test fitting the Yakima frontloader, a wheel mount roof bike rack with part# Y02103. With the factory roof rack already on our Yukon, we will begin our test fit by placing the bike rack directly onto our crossbars. Here at the front, we will want the two outside legs to be in front of our crossbar and the single middle leg to be behind it. We can then tighten the black T-handle located on the front of the rack. This will secure our clamp. With the front secure, we can move to the rear. Here we are going to loosen the black T-handle and remove the T-bolt from the lower portion of the clamp. We will then bring the clamp around the underside of our bar, replace our T-bolt in the appropriate slot and tighten down that black T-handle to secure it.
Yakima ForkLift Roof Mounted Bike Rack Review - 2014 GMC Yukon XL

Today on our 2014 GMC Yukon XL. We're going to be test fitting the Yakima Forklift. A fork mount roof bike rack. Part number Y02098. With the factory roof rack already on our Suburban. We'll begin our test fit by placing the bike rack directly onto our crossbars.
Thule Sprint Fork Mount Bike Rack Review - 2014 GMC Yukon XL

Today on our 2014 GMC Yukon XL, we're going to be test fitting the Thule Sprint, a fork-mount roof bike rack, part number TH528. With the factory roof rack already on our Yukon XL, we'll begin our test fit by placing the bike rack directly onto our load bars. Here at the front, we'll want to bring the black rubber coated metal strap around the underside, and fit it into the head of our carrier. We'll then position our rear clamp so it sits on top of our rear crossbar, and we'll bring that strap around the underside of this one as well. We'll then tighten the black lever to secure that black strap around the underside of our bar. Complete the same tightening process that we used on the front here at the rear, using the black lever located on this clamp. With our front and rear secure, it's now time to load up our bike. We're first going to undo our rear wheel strap and make sure that our front skewer is open by loosening the black and gray knob located at the front. We'll then grab our bike, place it onto the rack.
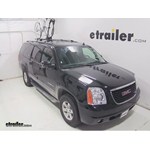
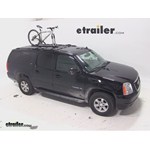
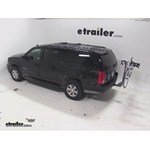
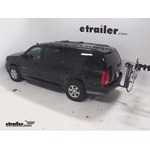
Thule Helium Aero Hitch Bike Rack Review - 2014 GMC Yukon XL

Today on our 2014 GMC Yukon XL, we're going to be test fitting the Thule Helium Aero, a tilting 2 bike rack for inch and a quarter and 2 inch hitches, part number TH9042. To begin our test fit, we'll slide the shank of the bike rack into the receiver tube of the hitch. As we do this, we're going to hold on to the black attached pin. We'll line up our pin holes, allow the attached pin to fall into the pin hole. We'll then tighten the black knob. This is going to engage our anti-rattle device and further secure the rack to our vehicle. In this position, we have about 22 1/2 inches worth of ground clearance.
Swagman Upright Roof Mounted Bike Rack Review - 2014 GMC Yukon XL

Today on our 2014 GMC Yukon XL, we're going to be test fitting the Swagman Upright Roof Bike Rack, part number S64720. With the factory roof rack already on our Suburban, we'll begin our test fit by placing our bike rack directly onto our crossbars. Here at the front, we'll bring one of the U bolts around the underside of our crossbar, fit it up through the head of the carrier, and thread two wing nuts on. We'll then take a second U bolt and repeat that same process here on the other side of the head. We'll now tighten down all four wing nuts, and that'll secure the front of the rack to our vehicle. At the rear, we're going to place the U bolt down through the rack, being sure that a threaded portion of it comes out on both sides of our crossbar. We'll then place on the black metal plate with the flat side up, and thread on two wing nuts. We'll then tighten down both wing nuts to secure our rear clamp. With the rack secure to our vehicle, it's time to load up our bike.
Swagman Fork Down Roof Bike Rack Review - 2014 GMC Yukon XL
Today on our 2014 GMC Yukon XL, we'll be test fitting the Swagman fork down roof mounted bike rack, part# S64710. With the factory roof rack on our Yukon, we'll begin our test fit by placing the bike rack up onto the vehicle's crossbars. Starting at the front, we will take the silver U-bolts and go around the underside of the front crossbar, up through the pre-drilled holes at the head of the bike rack. We will then take our black wing nuts to thread down onto the U-bolts. Once those are tight, we'll move to the rear, and this time we will take the silver U-bolt to go down through the pre-drilled holes in the tray of the bike rack. We'll then take the black plate and insert the silver bolt through the hole of the black plate. We'll then take our black wing nuts to thread down onto the U-bolt. With everything all tightened down and secure, we're ready to load up our bike.
SportRack Roof Mounted Bike Rack Review - 2014 GMC Yukon XL

Today on our 2014 GMC Yukon XL we'll be test fitting this SportRack Roof Mounted Bike Rack, part number Sr4622. With a factory roof rack system on our vehicle, we'll begin our test fit by placing the bike rack up onto the vehicle's crossbars. Starting at the front here, we'll take the rubber-coated U-bolts, go around the underside of the front bar, up through the pre-drilled holes at the head of the bike rack. We'll then take the black wingnuts and thread that onto the U-bolts. Once this is done, we'll move to rear. This time we'll take the black spacer to go on the top of the rear crossbar and rest on the bottom of the bike rack. We'll take the black bolts to go down through the holes of the tray and through the spacer. We'll then take the rubber-coated black plate and insert the bolt into the hole of the plate and install our wingnut. Once everything is all tightened down and secured, we're ready to load up our bike.
SportRack 3 Bike Rack Review - 2014 GMC Yukon XL
Today on our 2014 GMCC Yukon XL, we're going to be test fitting the Sportrack tilting 3-bike rack for 1-1/4" and 2" hitches, part number SR2403. To begin our test fit, we'll slide the shank of the bike rack into the receiver tube of our hitch, line up our pin holes, thread in our anti-rattle bolt, and tighten it down with a wrench. We'll then secure it using the provided clip. In this position, we have about 20-1/2" worth of ground clearance. The closest point of the rack to the back of our vehicle is about 5" away, and overall, we've added about 13-1/2" to the length of the Yukon. Pulling the black pin and clip at the base of the mast will allow us to tilt it away from our vehicle. As you can see, this gives us great access into our cargo area. With our mast back in it's upright position, and pin reinserted, we'll now pull the pin and clip at the top of the mast.
Softride Dura Hitch Bike Rack Review - 2014 GMC Yukon XL
Today on our 2014 GMC Yukon XL we're going to be test fitting the Softride Dura Parallelogram, a tilting 4-bike rack for 1-1/4" and 2" hitches, part number SR26247. To begin our test fit we'll slide the shank of the bike rack into the receiver tube of our hitch, line up our pin holes, thread in our anti-rattle bolt, and tighten it down with a wrench. We'll then secure it using the provided lock. In this position we have about 21-1/4" worth of ground clearance. The closest point of the rack to the back of our Yukon's about 7" away and overall we've added about 39" to the length of our SUV. A great feature of the Dura Parallelogram is the removable cradle arms. To remove the arms we'll simply push over on the small black tabs located on the front of the rack and slide them out of the rear.
Kuat TRIO Roof Bike Rack Review - 2014 GMC Yukon XL

Today on our 2014 GMC Yukon XL we'll be test fitting the Kuat Trio Roof Mounted Bike Rack, part number RU01. With a factory roof rack on our Yukon we'll begin our test fit by placing the bike rack up onto the vehicle's cross bars. I'm going to start with the rear and remove one of the black wing nuts. We'll need to position the two bolts on both the front and back side of the rear bar. I'll swing the rubber coated seal bracket around the underside of the rear bar and insert the bolt through the hole and install the wing nut. Now, I'm going to leave the back bracket loose just in case I need to make any adjustments. I'll move up to the front, take the rubber coated U-bolts to go around the underside of the front bar, up through the pre-drilled holes in the head of the bike rack. I'll then take the cylinder nuts that thread down onto the U-bolts.
Hollywood Racks Traveler Tow n Go Bike Rack Review - 2014 GMC Yukon XL

Today on our 2014 GMC Yukon XL we're going to be test fitting the Hollywood Rack's Traveler Tow-N-Go, a three bike rack for two inch ball mounts, part number HR135. For today's test fit we've mounted the Traveler on a Hidden Hitch Extra Long Shank Ball Mount, part number 80232. It is sold separately. To begin our test fit we'll slide the shank of the ball mount into the receiver tube of our hitch, line up our pinholes, slide through a pin, and secure it with a clip. As you can see this does leave a lot of play in our bike rack. We have anti-rattle devices available on our website.


What our customers are saying:
"I ordered a bike rack for my trailer hitch. It is a great product, very reasonably priced on April 10th. I installed it on my car on the 14th in time for the weekend. How can you go wrong?"