


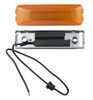
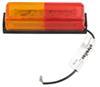
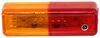
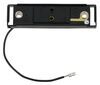
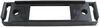
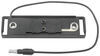
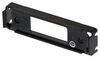
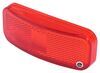
4-1/8" x 1-1/4". Waterproof, LED trailer light serves as either a clearance or side marker light. Durable polycarbonate housing and lens. Surface mount with chrome bracket. Single wire grounds through mounting hardware. P2 rated.
Features:
Specs:
The waterproof construction of this light makes it ideal for use on trailers that may be submerged, like a boat trailer. The housing and lens are sonically sealed together to create a single unit, which means that water will not get into the light and damage the diodes or circuit board.
A P2-rated light produces a 45-degree angle of light to either side of its centerline for a total of 90 degrees of coverage. This beam pattern can be seen straight on, but it cannot be seen clearly from the side. So this type of light can be used as either a side marker light or a clearance light, but it cannot function as both. If you need both functions, then you must install 2 separate lights on your trailer - one as a front or rear clearance light and one as a side marker light.
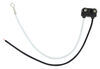
Surface-mount trailer lights install using a flange or bracket with mounting holes. These lights lay flat against the trailer surface and only require a small, often pre-existing hole, for wiring. Mounting hardware is used to secure the light to the trailer.
California residents: click here
Videos are provided as a guide only. Refer to manufacturer installation instructions and specs for complete information.
How's it going, neighbors Today, we're gonna take a look at the Optronics ThinLine side marker light. Now, this guy is in red, and it has a chrome base on it, so it'll match your layout. Now, one of the cool things about this guy is the fact that it is just your hot wire, and it's grounded by your bolts when you install it. Super easy install, especially if you're doing it as a direct replacement. So let's take a closer look at it and see what's special about it. So it's two parts to this guy right here.
You're gonna have the actual light unit itself. This is sealed, so you don't have to worry about moisture getting on the inside. And it's three diodes and you have these two pole connectors. Now, as far as your ground, this guy right here is what's gonna ground against your frame here, and you're just gonna run your wire from your wiring harness. So I already have existing holes.
I had a similar model. It just went out. It was actually incandescent, so we're gonna switch it out for an LED. I'm gonna start by just making sure my wire fits into the existing space and see how it lines up. If it doesn't, I can always use my self-tapping screws to create new holes.
And this actually has the exact same footprint, so we're good to go. So first, I'm just gonna strip the end of my wire here. All right, so we're gonna go ahead and make our connection using our butt connector, and we're also gonna use our heat gun to make sure our shrink wrap engages with the wire as well. All right, so I'm gonna go ahead and hit it with some power, and it looks like our light is working, so now we're good to go. It's just that easy for your replacement.
You have a lot of different variety as far as if you're gonna go with amber or if you're gonna go with red. And personally, I think Optronics does a great job of creating lights that can deal with real-life situations. Once you get this guy installed, please let me know what you think, 'cause I'd love to hear, you know, just your feedback. So again, this is Ed with etrailer.com taking a look at the Optronics Thin marker or clearance light. Have a great day.
Customer Satisfaction Score:
99% were satisfied with this product
1% of customers were not satisfied
Ratings & Reviews

fit as described could not ask for more
Info for this part was:
At etrailer we provide the best information available about the products we sell. We take the quality of our information seriously so that you can get the right part the first time. Let us know if anything is missing or if you have any questions.


Thank you! Your comment has been submitted successfully. You should be able to view your question/comment here within a few days.
Error submitting comment. Please try again momentarily.