
Curt Trailer Hitch Receiver - Custom Fit - Class I - 1-1/4"


To see if this custom-fit item will work for you please tell us what vehicle you'll use it with.


Thank you! Your comment has been submitted successfully. You should be able to view your question/comment here within a few days.
Error submitting comment. Please try again momentarily.


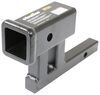
This Curt trailer hitch receiver gives you a solid connection point for light-duty towing or carrying gear. With a Class I rating, it’s built for up to 2,000 lbs gross trailer weight and 200 lbs tongue weight. It’s perfect for small campers, jet ski trailers, or utility haulers when you stay within those limits. The 1-1/4" x 1-1/4" opening also works with smaller racks and cargo carriers designed for Class I hitches.
The hitch is designed as a custom fit with holes that line up to existing points on the frame, so you can bolt it on without welding. The complete hardware kit and instructions are included, letting most folks handle the job in a driveway with standard hand tools. You won’t need to cut into body panels or guess at alignment—the precision robotic welding keeps everything square for an easy fit.
Built from fully welded steel, the hitch has a gloss black powder coat finish laid over a protective base coat for extra rust resistance. The sturdy square-tube design gives strength while keeping a clean look under the bumper. It stays solid through road grime and weather so it’s ready whenever you need to hook up your trailer or accessory rack.
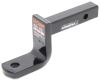
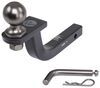
When you’re ready to tow, match this receiver with the proper drawbar or ball mount. The recommended drawbar is part?# C45521, which accepts either a 1-7/8" ball (# A-80) or a 2" ball (# A-82). Stick to the 2,000 lb trailer and 200 lb tongue limits and you’ll have a reliable setup for safe and steady hauling.

Videos are provided as a guide only. Refer to manufacturer installation instructions and specs for complete information.
Today on this 2009 Ford Focus we are going to install part number 11319 from Curt. The first step involved is to lower the exhaust. It looks like on this particular model there is two rubber hangers to remove. One here and one towards the back. Spray that down with some lubricant remove it from the pipe. We will take a pry bar and push the rubber hanger off. We are going to spray down this hanger in the back with some lubricant and pry it off. There is really not much to pry against or anything to get a hold of this rubber hanger so we used a couple of wooden blocks to give us something to pry against will work fine. First off we have got to worry about this going back and forth. Put the block right here so when we pry it over to keep it from pulling everything that way and for something to pry against we will put this block here. 00:50
We are going to work with one of the side brackets now. On the driver side we are going to use our bracket to locate our hole in the frame. We are going to line up the two holes at the end and further up there is an existing hole in the frame that is covered up by the sheet metal. Basically we are going to drill the hole out or poke a hole, anything to just get through it to run our hardware out. We have found our hole. Lets run a 1/ 2 inch drill bit through there just to make it nice and neat. 01:15
It is time to install the hardware. We are going to take our bolt leader and we are going to put it in the hole and we are going to come out at the end of the frame back by the bumper. Our hardware that goes inside is going to be a one inch by three inch long block and we will push that up on to the wire and into the frame and then we will take our carriage bolt and thread that on. Pull it on through. Next what we are going to do is put on our side bracket and we are going to bolt that on loosely to our bolt. Leave that side alone. We just got done with the driver side, now we are going to go over to the passenger side and do the same exact thing again. 01:49
The bracket is going to look a little different from the driver side but it still bolts on with the same principle. We can start putting the hitch itself up on to the vehicle. There is two holes on the end of the frame. The top bolt gets the 7/ 16 hardware and the lower bolt gets the 3/ 8. We will start with the top bolt first. The bolt is going to get a flat washer on this side. It is going to go through the hitch. On this side of the sheet metal and then go through our bracket. We are going to leave it loose and lets do the bottom bolt. Our hardware is installed now we will snug them down and then torque them down as specified in the instructions. With our bolts torqued down lets reinstall our exhaust. We have got our vehicle off the lift. Lets get a couple of measurements off the hitch. From the ground to the top of the receiver tube opening is 12 inches and from the center of the hitch pin hole to the farthest edge of the bumper is going to be six inches. With that, that will finish our install of part number 11319 from Curt on this 2009 Ford Focus.
Customer Satisfaction Score:
97% were satisfied with this product
3% of customers were not satisfied
Ratings & Reviews



Art

8/28/2024
The hitch continues to work well with no problems at all.
Andy
9/30/2024
A year later, It still works perfectly.
Do you have a question about this Trailer Hitch?
Info for this part was:
At etrailer we provide the best information available about the products we sell. We take the quality of our information seriously so that you can get the right part the first time. Let us know if anything is missing or if you have any questions.























Dan H.
8/18/2017
After one year everything is working great. Still very impressed with your company.