
Blue Ox Base Plate Kit - Removable Arms


To see if this custom-fit item will work for you please tell us what vehicle you'll use it with.


Thank you! Your comment has been submitted successfully. You should be able to view your question/comment here within a few days.
Error submitting comment. Please try again momentarily.


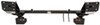
If you want your setup to stay clean and low-profile when you’re not towing, this base plate keeps everything tucked away. The hidden design leaves no bulky brackets in sight, and the removable arms pull out with a simple twist. Receiver covers plug into the openings to keep dirt and debris out so it always looks finished.
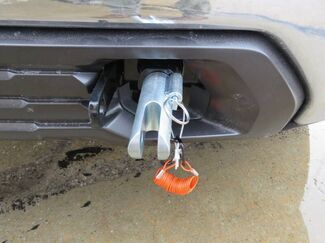

Each arm slides into the receiver, twists to lock, and secures with a pin. When you’re done towing, just pull the pin, rotate the arms, and lift them out. It’s a quick system that makes it easy to connect or disconnect whether you’re at home or on the road. Distance between brackets is 17" and bracket height is 12-1/2", so it’s easy to plan your tow bar setup around those measurements.

The base plate bolts directly to the chassis using the included hardware—no welding required. Its sturdy steel construction spreads towing force evenly across the frame to reduce stress on your suspension and hold up through countless miles of towing. A durable powder coat finish helps protect against rust and corrosion.
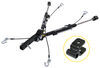
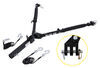
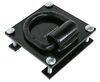
No need to start from scratch if you already have a tow bar setup you like. It pairs directly with Blue Ox tow bars for a secure connection and can be adapted for use with Roadmaster (RM-031 or RM-031-5) or Demco (DM9523041) tow bars using the correct adapter, each sold separately. Integrated mounting points make it easy to attach an electrical connector plug bracket so your wiring stays organized and accessible.

Videos are provided as a guide only. Refer to manufacturer installation instructions and specs for complete information.
Hey everybody, Ryan here at etrailer. Today, on our 2015 Ford Taurus, we're gonna be showing you how to install the Blue Ox base plate kit. But before we do that, let me check this out and make sure it's gonna be the right setup for you. Before we get too carried away talking about the base plate and what it can do and everything else, I figured it'd be useful just to kind of touch base and refresh ourselves on the main parts that we're gonna need to flat tow our vehicle down the road in the first place. And the first one is gonna be the base plate and this is going to provide us with a solid attachment point. That way, we can hook our tow bar up to it.
And the tow bar is gonna be the second component and that's gonna be the actual physical link that's connecting the front of our Ford to the back of our motor home. The third main component will be safety cables and these will connect to the front of our Ford and the back of our motor home's hitch. And that's just a safety device in case of an accidental disconnect, they're gonna keep everything paired together. The fourth main component will be tow bar wiring. And what that's gonna do is transfer the lighting functions from the back of our RV to the back of our Taurus, keeping you safe and legal.
And last but not least the fifth main part will be a supplemental breaking system. And what that's gonna do is apply the brakes in our car whenever we hit the brakes in our motor home, helping to bring us to a more predictable and complete stop. But with that out of the way, let's check this out. So in terms of appearance, I think it's probably the best looking one available. Everything's contained within the slower portion of the grill.
It has a matte black finish. So it almost matches the plastic perfectly. And compared to some of the other ones, they sit way out here, you have to do a lot more cutting and everything. So this one's a little less, or a little more inconspicuous, if you will. The safety chain tabs, I guess you could call 'em, I feel like they could shorten 'em up a little bit 'cause they do come out a little ways.
But not really a big deal, it makes 'em a lot easier to use. You know, they're in the open and easy to get to and feel like that's really important, actually, when it comes to flat tow stuff. You know, you don't want something that's complicated. You know, you want it to be easy to use, easy to set up that way. That way you can get going and not have any confusion. And because this one has removable arms it makes it really simple. So the way these work is what you would do when you're ready to hook up to your motor home, you come to your base plate and you pull out, they give you these caps. So cleans up the look of it a little bit and keeps stuff from getting in there and chewing everything up inside. But the way these are gonna work, you just slide them in and then to rotate 'em about a quarter turn and they'll lock into place. Same deal with this one over here. And now you're ready to hook your tow bar up to it. So you pull up behind your motor home and lock your tow bar into these. These are gonna work with a lot of Blue Ox tow bars, as well as other brands. A lot of times they'll have adapter ends on 'em and things like that. So one right off the top of my head I like, the Roadmaster Nighthawk. They actually have one that has Blue Ox ends on it, so it pairs right up to the base plate. So, you know, if that's something you're looking for, definitely check those out. Something I do wanna mention, they say the base plate will work with all the different types of models. Whether you have a base model, one, the SHO or S-H-O model, the ones that have adaptive cruise control and all that, the base plate is supposed to work. So you should be covered there. And at the end of the day, you know, you really can't go wrong with it. Blue Ox makes good parts. I feel like it'll track well, and last a long time. In terms of installation, it's a little more on the difficult side. I've done base plates that are harder, tensile, I've done some that are easier. But a word of advice, if I had to give one, it would be make sure you have some sharp drill bits, 'cause there's just quite a bit of drilling into the frame area. And so it's, you know, high quality steel and pretty tough. So get some sharp bits. I think the majority of 'em I used 3/8 in size. So if you're covered there, it should really help speed things up. But still set aside probably the better part of a day to get this done. If you'd like to follow along and see how it's done, feel free to. We'll go ahead and put it on together now. To begin our installation, we're gonna be here at the front of our Taurus and we need to remove our front fascia. So first things first, pop the hood. We're gonna have this radiator cover here. So whatever I do to one side of our vehicle, we're gonna do to the other side because it'll be set up the same way. So to get this off, we're gonna have four Phillips head screws along the front edge. Pull these out. And then we can switch out to a 10 millimeter socket. And we'll have two bolts. And we'll grab a flat head screwdriver. And there's a push pin right here. So you can just pry underneath the head of it and work the base out. I already removed the fasteners on this side so we should be able to get this removed. So it was attached to this clip here. It's going through this little panel or this little cut out there. So all I did, I just reached under there and kind of lifted up on it, was to pop this off and now we can set it to the side. Now we can move to our wheel well liner and along the edge we're gonna have three 5 1/2 millimeter screws we need to pull out. It does help turn your wheel in one way or the other, gives you some more space. But go ahead, grab our socket and get these out. And once these are out, and while we're right here on this area, we're gonna have another fastener we need to pull out as well. So right there in the corner, here's the fastener we need to take out. And that's a plastic one. It's a Phillip's head. You're gonna take your screwdriver and just lightly apply some pressure. and back it out. A lot of times these will get hung up and just spin, which it looks like that's our case right now. It's coming out, it looks like. If it does just spin, you can always take a flat head screwdriver and just kind of help pry it down. Once you get to a decent point there, the center of it's not wanting to come out, take a pair of needle nose pliers and just kind of pulled out on it. That was in the middle, this plastic screw. Once that is out, then you can take the base out and just pry down on it and then get it removed. Now underneath the front of our car, if you look along this edge, we're gonna have five more of these plastic fasteners. These are the same style ones that we're in our wheel well. They're kind of tricky to get out sometimes. But I'll just use that same method to get all these removed here. So ever so slightly put a little upper pressure on it while you're backing these out. Now if you look just in front of your front tire, in the corner of your wheel well liner, You're gonna have an eight millimeter head screw that we can pull out. Now with an extra set of hands, we can actually get our front fascia removed. I did put some tape here along the seams. That way we don't scratch it, 'cause we may have to take a small screw driver and kind of pry in there, which we didn't need to. 'Cause there will be little clips sometimes in there that you might have to kind of mess with to get 'em undone. But we can just work our way around, pop these off. And looks like our fog lights are gonna have an electrical connection. You just push down on the tabs to remove 'em. And once we have them disconnected, we can set our fascia off to the side. Over here on the passenger side now, we can get our washer fluid reservoir removed. And so I'm gonna kind of take off some of the wires connected to it. We can just pry these off. And we're gonna unplug the connectors. So push down on the center of the tab and pull them out. Move that out of the way. And now I'm gonna disconnect our hose here. And what I'm gonna do, ours is, of course, completely full, really don't wanna make a huge mess. So what I came up with, I just had a piece of line laying around. I plugged it. When I pull this off, I'm gonna put this on. Hopefully that'll plug it up. And then I'm just gonna take a bolt, plug it in that line. So stuff don't go everywhere. So with this, I'm just gonna kind of carefully start to work this rubber line off of the pump. Slip that on Pop that in. Now we can get our reservoir off. So we're gonna have two 11 millimeter nuts. One right here. And then another one just like it right there. And in this corner, I believe that's an eight millimeter. And that should be all of 'em. We'll see, we should be able to kind of pull this out and work it down and out from our engine compartment. And if you look at the side of our air dam here at the bottom, we have a piece of plastic that runs back and connects to this piece. There's a push pin fastener there. So we're gonna pull that out like that. And then if we follow it up on our front bumper beam, we're gonna have two more fasteners. That's an eight millimeter. And this one is connected to a bracket that holds up this ambient air temp sensor. So I think once that is off, we can kind of lift up on this and just kind of tuck it off to the side for now. On top of our air fan assembly here, we have a wire and that has a connector on it. We need to separate it. So push down on the middle. And then I'm going to pry off all the keepers here. It's just those two. And then you kinda squeeze on these, you can pull out And behind here, kind of behind the bumper beam, there's going to be a bracket that kinda wraps around the bumper beam. And we need to get that off so we're able to remove our whole assembly here. The way to get this off, if you look, we have some tabs that kind of protrude through the bracket. One up top, two just like it towards the bottom. These are kind of tricky sometimes. We need to squeeze them in and while we're squeezing it in kinda work that bracket off. And what I think I might do, we should be able to, actually, without taking those bottom ones off, we can probably just carefully, you know, pull out on this and slide the whole assembly down. And with it removed we can set it to the side. So what I went ahead and done was get our base plate into position and you definitely need an extra set of hands with this, 'cause it's really heavy. And a couple of clamps like this. But it slides up into place like how I have it here. And there's a raised portion in the side of our frame rail. This U cut out kind of goes up and around it. And hold it in place and then clamp it down. And then you wanna make sure it's level and everything. So you can clamp, you know, keep tightening until it stops, you know, it hits the bottom of the frame. And then you wanna make sure that this distance is the same on each side as well. So I just measured from the flange, the back of our bumper beam, to this corner here. Got it the same on both sides. And then just to be on the safe side, I took a marker and just kind of traced it in case it gets bumped out of position or anything, at least we have a reference. But with that said, you know, now we can start to drill out some of the holes. So there will be a couple on the bottom and then two on the sides. We're gonna start with one of them on the bottom. So with these, I usually like to start with this one back here, but my clamp's in the way. So if you can position your clamp, I'm not gonna undo it 'cause I don't wanna have to go through it again, but if you can start, with this one. It's not a big deal though. We can always use this one here. So take the drill bit, listen to the instructions and that's the proper size. It just fits right up through this opening. And we're gonna drill a hole right into the bottom of our frame. The hardware that we're gonna use to secure the base plate, what you're gonna do is take a handle nut and this handle nut is gonna go through this opening in here. And so it's gonna be tricky to see on camera, but when you look in here, you can see where the hole is that we drilled. And so you want this to end up lining up with it. And I do suggest taking the hardware, so for the bottom bolts, you're gonna use these here and put on a split lock washer. Before you get it started or anything, I do suggest is kind of running the bolt through the handle nut, because sometimes there can be some slop in there that'll make this difficult to start. So it just makes it easier. And you're also gonna take red Loctite and put that on the threads of all the hardware that we're gonna use to secure the base plate. So I'm gonna take this, put in position here and take our bolt, run it up through, and then we can get this started hand tight. So now you wanna grab a 9/16 socket and just snug these down a little bit by hand. You don't want to hit too carried away cranking down on 'em and torquing 'em just yet. We just want to kind of take that slack out and slug it down. I'm gonna move up now to the side of our frame and I'm going to drill out this hole here. And what I'll do once that's drilled, we'll get our bolts in and then we should be able to get rid of our clamps and continue on with this one and the other one on the bottom. For the bolts that go here in the side, same deal with the handle nut bend it the way you need to, where it lines up. And then you're just gonna use a split lock washer and one of the shorter bolts. And don't forget your Loctite. So we'll go ahead and get this going here. So I went ahead and did the same thing over on the other side, getting the two bolts started and snug down. So I snugged this one down too. And that'll be enough to keep our base plate, you know, in place. And at this point, I'll get our clamp out of the way. And then I'll just continue to drill this hole, the one on the bottom and use that same hardware combination and technique to get those bolts in and snug as well. So once you have those four bolts in and snug like we talked about, we're gonna have one more that we need to drill right here at the front edge of our base plate. And so I'm gonna drill up through it, through our bumper beam where it's gonna come out in the middle of it. And once I get that done, the hardware that we're gonna use is a little bit different. So I'll get this drilled out and then show you what I'm gonna use here. So I got that whole drilled out. And then you're gonna take six flat washers and I like to tape 'em together, it just makes it a lot easier to work with. And you're gonna use those to kind of fill that gap there between the base plate and the bottom of our bumper beam. And then you're gonna take the medium length bolt, Loctite split lock washer on it. And that will run up through and then just finish it off with a handle nut. With all of our hardware in place and snug, we wanna make sure to come back with a torque wrench and tighten it all down to the amount specified in the instructions. If you don't have a torque wrench, you can always go into your etrailer or a lot of times that are local auto parts store, they'll have one they're available to rent. And once everything's torqued, you can get rid of these handles here. So a lot of times, you can just work it back and forth and snap it off. Or if that one's giving you trouble, you can always come back and with a pair of snips or something and cut the rest of 'em off. So what we can do now is move back to our washer fluid reservoir. And there's a tab on it, this one here, that we're gonna trim. It looks like it'll interfere with their base plate. So I marked it out and just being thin plastic, I'm gonna use a pair of snips to cut that portion off. Probably advise against power tools in this situation 'cause if you slip, you'll probably hit the actual reservoir and probably leak. So get the snips and just get that material removed. We can put our washer fluid reservoir back on. First, you wanna take seven of the smaller washers, flat washers. And again, I taped these together. We'll pop them over that stud This will simply just get reinstalled, essentially, the opposite way that we removed it, the exception of the bolt there. So we'll put our nuts back on, tighten them down and then we can just plug all of our connectors and everything else back in. So I went ahead, got this all plugged back in and everything just like we talked about. And then on each side of your base plate, they give you a safety cable. And so I installed those, turned out pretty good actually. I just use this hole here in our sub frame, wrapped it around twice and then you can provide a D-link to wrap it around our base plate there. And then I like to just take zip ties and kind of zip tie everything uptight, that way, this isn't clanking around or rattling or anything along those lines. Now we can move to our air shutter system. And so this is the bottom, this is the top. On the bottom, you need to remove three of the louvers, that way, it'll clear the base plate. And so if you take a screwdriver, and come into the corners here, you can start to kind of pry this piece off just like that. And to get these out, you just pry up on the middle of 'em. And then we should be able to kind of bend them in. Yeah, just bend them in a little bit. And that will allow us to slide 'em out. So I'm gonna do the same thing here for two more to get these out of the way. And if you want, if you think you ever might, you know, remove the base plate for any reason, if you sell the car or anything, you can always hold on to this type of stuff too and reinstall it. It's entirely up to you though. And now, with it like this, what we can do, these pieces, we need to completely remove two. So I'm just gonna pry them off as well. Take the one off over here on the other side. And once I get that one off, we should be able to get this reinstalled. We'll go ahead and slide this back in place. Come back around and then we'll just resecure it now the opposite way that we removed it. So now we can move to the back side of our front fascia. And on each side, we're gonna have some material that we need to remove. There's a diagram and instructions. They say to cut to about here. In my experience, they usually undershoot it. So I'm just gonna go a little bit further. It's not supporting anything or really doing anything, so it's not gonna hurt to remove a little extra, that way we don't have to fight it. So I marked that out. I'm just gonna use a cutoff wheel to get all that removed. Now, what we're gonna do is take our fascia and not put it completely on, but kind of test fit it, if you will. And the reason being, you want to kinda hold it in place and look down here and see where we need to cut. So we're in pretty good shape, honestly. What I'll probably do is pull this off and just kind of cut out some slots here. That way, our base plate and everything will be able to come through and we'll be able to use it. So you got a couple of choices. You can take it off and cut it. Honestly, after looking at it, might as well just cut it while it's halfway out in the car. So just gonna go where I think we need to remove that material, take some snips and trim it out. So once I got everything how I wanted it, in terms of trimming, I just cut them little spots out like we talked about earlier. I simply just resecured the fascia the opposite way that we removed it. So nothing different there. I did forget to mention, if you're gonna be installing other flat towing components like the braking system, or wiring, or anything along those lines, usually, what I like to recommend is leave the fascia off, get all that stuff in place. It's just a lot easier to work whenever you have all the extra space. And then once those parts are on, obviously, come back and do this. But you know, definitely makes it a little bit easier. But other than that, that will finish up our look at and our installation of the Blue Ox base plate kit on our 2015 Ford Taurus..
Customer Satisfaction Score:
92% were satisfied with this product
8% of customers were not satisfied
Ratings & Reviews


Shaldaya

10/1/2024
got it repainted because my car was totalled, the thing is still holding up good and strong, though I havent used her in a while


Heather A.
5/1/2026
The install looks great Ed! Where are you planning on taking the Encore? I will let Royce know you reached out.


Mike L.
9/9/2026
Thanks Douglas, nice truck you've got there! Nice job on the install.....

Nick S.
1/5/2026
I am glad you were able to get it installed with no issues and a little help from our video! What kind of coach are you pulling the Kia Soul with?
Roger
12/12/2025
Still the same no issues...fine product
Matthew
10/12/2026
Its been two years since installation of the Blue Ox Baseplate. Since then, Ive flat towed the CRV from NJ to FL and back three separate times with many other shorter trips in between. Paired with a Blue Ox Tow Bar, the system has worked flawlessly since installation.


Kate F.
12/17/2025
Thanks for the detailed review Chris, and the pointers! This will be most helpful to others. What was your favorite stop in those 7,000 miles? Where did you go, what did you see?
Perry
10/1/2026
Follow up. Ive put about 8000 miles on the setup and its been great. A 34 ton suburban pulls nicely behind my Dutch star, and they dont have a steering lock so its nice not to have to retrieve keys when stopping for the night. I have used the safety cable attachment a few times for straight line pulls with a small shackle when working as a rally racing volunteer, its been fine but I wouldnt side pull on it.
Nick S.
12/1/2025
I am glad it worked well for you! What kind of coach are you pulling that Jeep with?

Andrew N.
10/21/2026
Hey Luis, thanks so much for the detailed response and photos. Install looks great on your Mini Cooper! I know the instructions sometimes aren't perfect, but I'm glad you got it installed correctly!
James
10/16/2025
Perfect
Do you have a question about this Tow Bar Base Plate?
Info for this part was:
At etrailer we provide the best information available about the products we sell. We take the quality of our information seriously so that you can get the right part the first time. Let us know if anything is missing or if you have any questions.



















Jenny N.
9/27/2023
We recommend keeping a can of Rustoleum on hand to touch the base plate and help to protect it.