


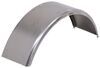
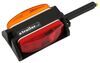
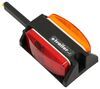
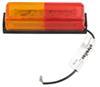
Protect your enclosed trailer from flying rocks, water, and road debris. This rounded fender mounts flush for a clean look and a close fit, keeping dirt from building up and your cargo safer on every trip.
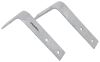
When replacing your trailer fender, do your best to match the dimensions of the new fender to your old one. If your fender was damaged in a blowout, you can use the opposite fender to get the right measurements. Before you get started, always chock your wheels for safety. If you are installing a bolt-on fender, use your existing mounting hardware if possible, but be prepared to replace any bolts or screws that are stripped or rusted. If you need to remove an old, welded-on fender, you can carefully chisel it off yourself or take your trailer to a weld shop for professional removal. Do not forget to prime and paint the new fender to prevent rust and match your trailer's finish. Before drilling any holes, position the fender exactly where you want it and center it over your wheel well, marking your spots carefully. Measure twice and drill once. Finally, wait to fully tighten down the mounting hardware until you are sure the fender is mounted just right.
Videos are provided as a guide only. Refer to manufacturer installation instructions and specs for complete information.
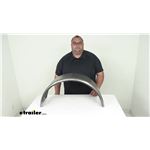
Hi, everyone. Steve here with etrailer.com. Today we're looking at a single-axle trailer fender for enclosed trailers with 15-inch wheels. So folks, starting off, you're looking from the outside of the trailer towards me. I would be the trailer side. So, you have a curved edge here.
That's the outside. And if we spin it around, (fender cover thudding) hopefully you can see the difference. This is a nice, straight, flat side. This is the side that's the mounting flange that lets you mount the trailer or the fender, rather, flush with the trailer. Now, these are gonna block road debris from hitting your trailer, your gear, and other vehicles and pedestrians on the road.
If you're going to simply weld this in place, no problem, you go ahead and do that. If you need to bolt it on and do all that, you're gonna have to drill holes through here, get some hardware sold separately and some brackets sold separately to mount that in place. Now, as far as measurements, overall, I got 32 inches wide, or our length rather, and then nine inches wide coming across the top there. And then our height, I got 15 inches from top to bottom. Now, one last thing to keep in mind.
This does come with a light film of oil on it. That's to keep it from rusting and corroding. You will need to clean that off and then either get it powder coated once you get it installed or before install or paint it, make sure you're priming that, make sure you're getting a long-lasting protection over your fender. Well, I think that's gonna wrap it up for our look together. I'm Steven, thanks for watching.
.
Customer Satisfaction Score:
86% were satisfied with this product
14% of customers were not satisfied
Ratings & Reviews

Info for this part was:
At etrailer we provide the best information available about the products we sell. We take the quality of our information seriously so that you can get the right part the first time.


Thank you! Your comment has been submitted successfully. You should be able to view your question/comment here within a few days.
Error submitting comment. Please try again momentarily.