
To see if this custom-fit item will work for you please tell us what vehicle you'll use it with.


These heavy-duty, aluminum crossbars work with Rhino-Rack legs to create a sturdy roof rack. The square bars have top channels for mounting Rhino-Rack contractor-grade accessories. Custom Backbone system installation on your vehicle's roof.
Features:
Specs:
 Alternate Instructions
Videos are provided as a guide only. Refer to manufacturer installation instructions and specs for complete information.
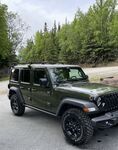
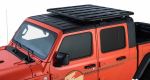
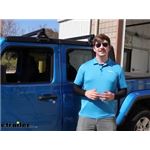
Hi everyone Aidan here with etrailer. Today we're taking a look at and showing you how to install this Rhino Rack heavy duty roof rack for your 2021 Jeep Gladiator. This is gonna mount into the hard top gutters of your Jeep and be a really quick, easy install while giving you a nice sturdy roof rack system. Let's check it out. Now you can get this kit with Rhino Rack's aero bars and that's gonna be a thinner, more aerodynamic bar. This is gonna use the HD bars, though.
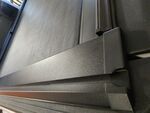
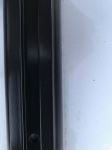
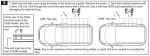
They're 59 inches long, constructed of aluminum and they've got a large channel in the top with that weather stripping in place over top. That weather stripping is gonna help with reducing wind noise while also giving a really good grip to anything mounted up top. You can remove it, cut it to length and use Rhino Rack's heavy duty accessories to slot into that channel or you can clamp around, if your clamps will fit the dimensions. Just for quick reference of those dimensions, that height on the bar from the bottom to the top of the weather strip is gonna be 1 7/8 inch and then the width here is going to be 1 5/8 inch. Now, really the heights the big one, with clamp around accessories, these bars are often a little bit thick, so just make sure if you've got accessories picked out already that those clamps are gonna be big enough.
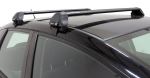
So this is gonna use the black crossbar. You can also get them in silver and they'll both function the same way. It really just comes down to the looks and whatever one matches your style or your Jeep the best. In addition to that, these are gonna have no real specified weight capacity. Rhino Rack says to go by the Jeep's roof weight capacity as that's the lowest rated component, so be sure to abide by that and you should be all good.
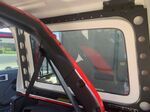
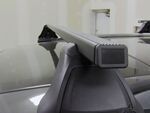
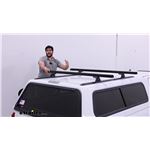
The gutter mounts are gonna slot into the gutter and clamp around the bottom right here. Now with those clamps, they don't interfere with the door at all. Some of the roof racks I have worked with like exposed racks that will mount in the gutters here. Sometimes I've noticed those have a tendency to interfere with either the weather stripping on the door or in some cases even the panel of the door, which I really don't like to see. All of the clamps here clamped around just fine and didn't have clearance issues.
So for me, that fills me with a lot of confidence. Now, personally, if I we're looking at a roof rack kit for the Jeep here, I would maybe go with Rhino Rack's Vortex aero bar system. That's gonna have one adapter piece to make it work with the gutter mount. But those bars I think are gonna be a little more versatile for most accessories and clamp around accessories. So if you've got a variety of things you're carrying like kayak carriers, cargo boxes, anything like that, you're just gonna have a better time with the aero bars having a wider range of accessories that work with it. If you need something a little more heavy duty though, these HD bars are gonna be great and strong. Either way you go though they're gonna install the exact same way with those gutter mounts and the install process is really straightforward. Let's check it out. First thing you wanna do with your install is get your parts laid out. We've got one of our crossbars installed already so we'll walk you through the process of doing the front one. You wanna take your HD bar and flip that upside down. That's where our channel is in the bottom and that's where our gutter mounts are gonna go. With the gutter mounts, you want these two screws in the bottom to be loose, so that you've got movement in the clamp here. And then on the underside, this part that actually sits in the gutter will come with a small rubber pad. That's just gonna slide over that as grip and protection. And once it's all assembled, we can drop our T-bolt into the track underneath the HD bar. Now with this, you probably want it to be a little bit loose so it can actually slide in and you'll feel the tower, actually kind of sit down in there and as you tighten that bolt a little bit. I'll kind of turn this a little bit towards you. As you tighten that, you can feel it kind of grab and it's not going to release itself. We wanna leave it somewhat loose so that we can still slide it around but tight enough that it won't come out on its own. Repeat that for the other side and then we can take this to the roof. Setting it on the roof, it might be helpful to have an extra set of hands to kind of guide things over on the other side but it's definitely doable on your own. Now I don't know that we're gonna necessarily be able to line up that other side in the gutter super perfectly but I can at least get this side set up. When you do that, make sure you feed this clamp around the bottom side of the gutter and make sure that one piece that we put the pad on is sitting in the gutter. You may have to loosen up your bolts a little bit to get that clamp to grab on properly, but right now this is good enough. I'll go to the other side and make sure everything's sitting properly over there. So the next thing you need to do is get your crossbar spread set. We left this all loose so that we can slide it along the gutter and you wanna measure from the center of one crossbar to the center of the other and make sure that that measurement is the same on both sides. That's gonna get our crossbar spread set and it's also going to ensure that they're running parallel to each other. And now I've already done the measurement on the other side, we're set right here and we can move on to the clamps. Now I already mentioned you might need to loosen these screws. The whole goal is to get this clamp to kind of grab underneath the gutter there, that way we're getting a good solid contact. So kind of push that into place. Right there's looking pretty good and once that's grabbing properly, you can tighten it down evenly on both sides. Finally, you remember those bolts we left loose underneath on the towers, gotta go and tighten those up. Before you do that, you wanna make sure that your crossbar is centered side to side. There's not a lot of overhang on this one so it's pretty easy to get it lined up by eye. And once you're happy with where it is, you can just come back with a 5/8 wrench and tighten up that screw. After everything's tightened down, we can verify that everything's nice and tight with the shake test and that's definitely not going anywhere. So I'd say our install is all done. The gutter mount definitely makes it really easy and you can adjust it to whatever crossbar spread you need for whatever accessories you plan on putting on your roof. That'll do it for our look and installation of these Rhino Rack HD crossbars with gutter mounts here on our 2021 Jeep Gladiator. Thanks for watching..

Do you have a question about this Roof Rack?
Info for this part was:
At etrailer we provide the best information available about the products we sell. We take the quality of our information seriously so that you can get the right part the first time. Let us know if anything is missing or if you have any questions.


Thank you! Your comment has been submitted successfully. You should be able to view your question/comment here within a few days.
Error submitting comment. Please try again momentarily.