
Rhino-Rack Sportz Roof Rack for Naked Roofs - Aluminum - Black - Qty 2


To see if this custom-fit item will work for you please tell us what vehicle you'll use it with.


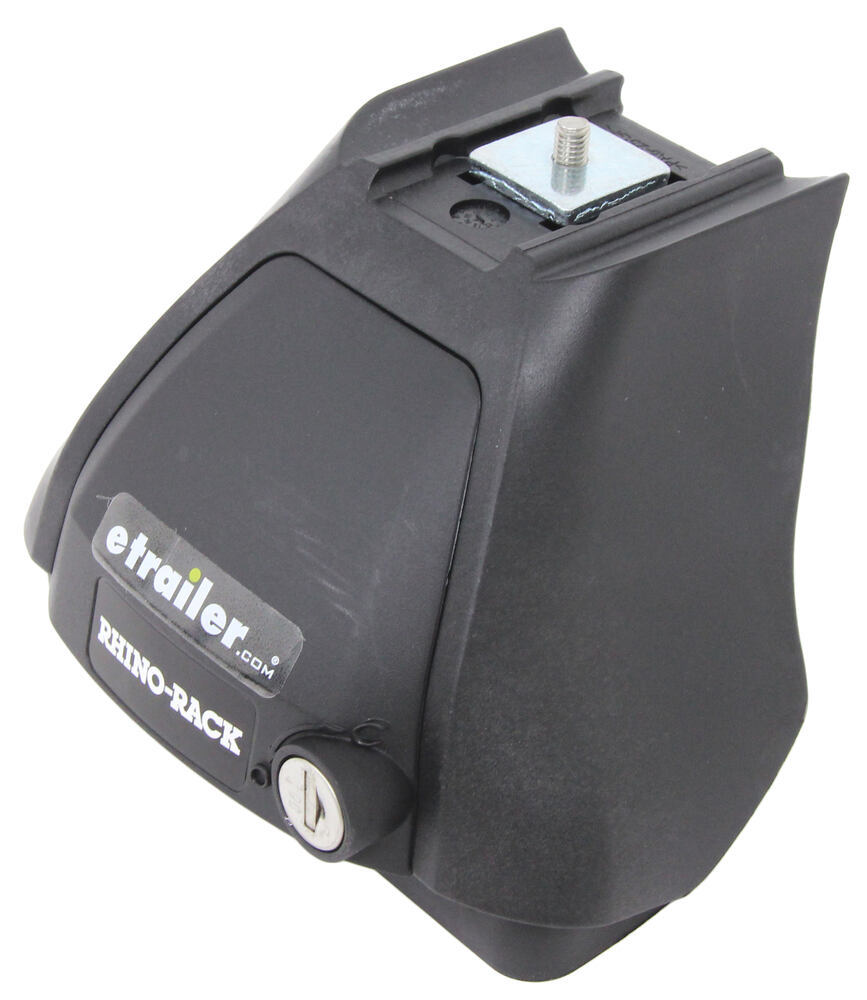
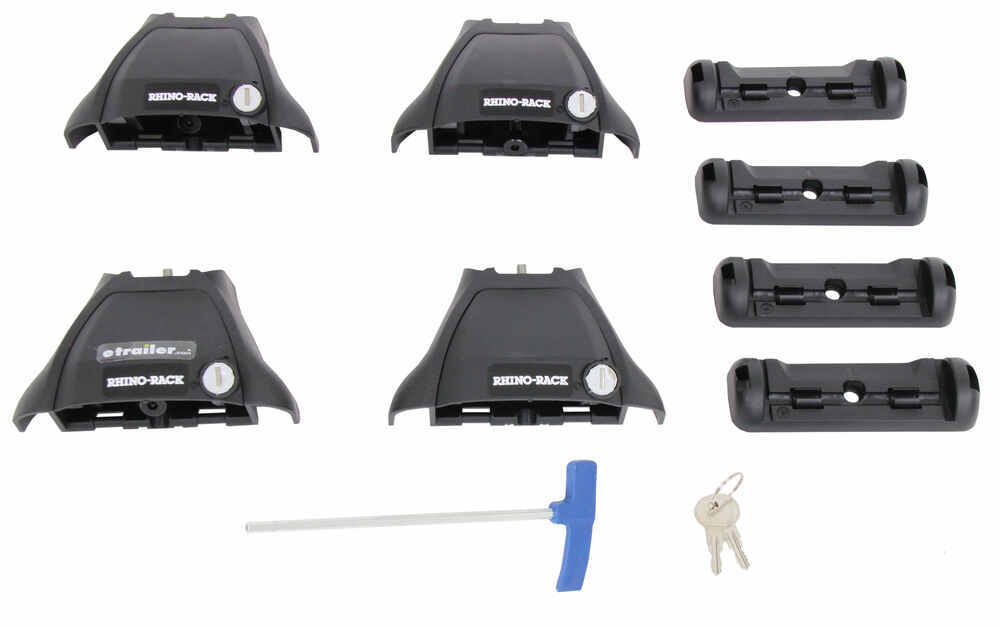


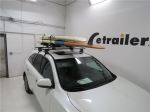
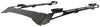
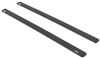
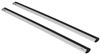
These aluminum crossbars give you plenty of room to load up your favorite gear. With 54" of bar space, there’s enough width for hauling kayaks, canoes, paddleboards, or a cargo box on longer drives. The full-length design lets you mount multiple accessories without fighting for space, so you can bring everything you want along for the ride.
No one likes a constant whistle on the highway. The aero-style shape of these Sportz crossbars helps air flow smoothly over the top, while rubberized dual strips in the top channels guide that airflow and cut down on noise. It keeps things quiet and steady when you’re cruising to your next adventure.
These bars play well with almost any attachment you already own. The top channels accept channel-mount accessories, while the bar shape also works with clamp-on mounts. You can easily use it with bike racks, kayak carriers, ski holders, or cargo boxes—anything that makes getting outdoors easier.
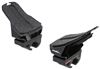
When you’re parked at the trailhead or campsite, the lockable cover plates on each leg help keep your setup in place. Once locked, they secure the rack to your roof so your gear stays where it belongs until you’re ready to hit the road again.
The all-aluminum build stands up to heavy use and changing weather without worry. With a weight capacity of 165 lbs (always following your vehicle’s roof load limit), it’s sturdy enough for serious hauling while still keeping things light on top. The black finish adds a clean look and resists wear over time—all backed by a 5-year warranty from Rhino-Rack.
 Alternate Instructions
Videos are provided as a guide only. Refer to manufacturer installation instructions and specs for complete information.
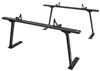
Hello neighbor, this is Curt with etrailer and today we're gonna be taking a look at the Rhino-Rack Sportz Roof Rack and we're gonna see how it fits and how it installs on our 2024 Chevy Colorado. Now a roof rack is a great way to transport items, as I'm sure you're aware. However, you may be wondering why you might need it on something like a pickup truck. You got this whole bed that you can carry cargo in. Well, if you're someone that has a ladder rack and you're carrying longer items like a canoe, lumber, whatever it might be, you might want that extra load support coming out across the roof. Of course, you may also have something back here like a camper shell or a tonneau cover or, you know, any number of accessories that, you know, or a full bed for that matter where you can't really use it for something that you could use the roof rack for.
One of those things might also be something like a kayak carrier or canoe carrier. A lot of kayaks are just gonna be sticking right out over your tailgate. If you have a kayak carrier up here on your roof rack, you'll be able to carry it safely wherever you need to go without it fumbling around and messing anything up back here in our truck bed. It would frankly make me a little bit nervous just to have one loose with a single bow tied down in your truck bed just rumbling around. I would much rather carry it up here on a roof rack.
Now this Sportz Bar Roof Rack from Rhino-Rack is a bit different than others out there. It's got this really robust and really aggressive look to it, which I think looks awesome on a lot of SUVs and trucks just like this, especially this Colorado seeing that it is a Trail Boss model. Now as I mentioned before, this is a little bit unique in some other ways to other crossbars, it's still gonna give us a 165 pound weight capacity. However, you do wanna double check the owner's manual of your Colorado and make sure that the vehicle roof capacity matches that. If it's a lower number, that will have to be your weight capacity.
But there's a lot of neat things to show you about this roof rack. So let's get in the truck bed and up over the roof and we'll show you some of those new details. So the Rhino-Rack Sportz Crossbar is a little bit unique compared to other crossbars. One of the first things you may notice is that it's got this big open channel at the top and normally you would think with an open channel like that, they vibrate a lot, they'd be very noisy as you're going down the road. But this was specifically designed in a way that that won't happen.
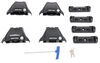
There is a dual weather strip on each side of that open cavity there, which is designed to direct air up and over the gap in the bar rather than across it like it would be normally on a standard crossbar, it is gonna be a little bit more robust of a bar as well and it gives it an overall really aggressive look. But the purpose of this open channel is that Rhino-Rack is providing us, they're coming out with new things all the time with a system called Zwifloc. Zwifloc is gonna allow you to mount T-channel accessories without sliding 'em through the end cap. You'll be able to drop them right into place and that's really big for people that use their roof rack for a variety of different accessories. Now you won't have to take something off just to slide something on in the middle, like a tie down or something like that, only to replace the original item later. So if for instance, you have a kayak carrier up here, you got two kayaks up here and you want to have a tie down in the middle, if you've got your kayak carriers already on here with a standard bar, you'd have to take 'em off to slide your tie down in the middle. This you won't have to do anything, you can just drop your tie down right into the channel and lock it in place, get everything ready for a safe ride on the road. Now while we're up here, let's take a few measurements and see exactly how it fits our Colorado. We're gonna take first a crossbar spread measurement and this is a really important measurement. We're gonna end up at about 28 and 1/4 inches worth of crossbar spread. As you'll see in the installation in a moment, you really don't have too much of an opportunity to move these bars. Rhino-Rack had us set them in very specific places on the roof of our Colorado, but your crossbar spread is gonna tell you just what kind of accessories you can put up here. Any rooftop accessory is gonna give a minimum and maximum crossbar spread and right at about 28 inches, I'm perfectly happy with. Most rooftop accessories, their minimum/maximum fall somewhere in between 25 and 35 inches. So I'm really not too displeased with this spread. This should accommodate most crossbar accessories that are out there. The other thing we're gonna double check on is how much height does it add to the vehicle It's gonna add about four and 3/4 quarter inches. So if you're worried about height clearance with the vehicle, you'll need to add that number to whatever the height of your rooftop accessory is so you know how much you can clear over your roof. The other thing we'll take a look at is our clearance under the bar, which is gonna come to about three and 1/4 inches, and that should be more than enough space under here to be able to get all those clamp mounted accessories you might have around it and secure. But I had mentioned installation a moment ago, stick around. I'm gonna show you exactly how we got these on the roof of our Colorado. So to begin our installation, we've just kind of got everything laid out here for our crossbar. We've got our towers, our feet and pads for it, our clips to go around our frame there and we've got the tower covers. So we're gonna start by assembling the tower. And to do that we're gonna take one of our foot pads here and with the arrow pointing outward to the outside of the tower, we're gonna go ahead and clip that on right there just like this. Next thing we'll do is take one of our foot pads here just like this and we're gonna go ahead and put that on with this kind of groove shape here is gonna be facing the inside of the tower like that. Now this is just gonna compress on, we wanna make sure that it goes all the way on, all the way around the lip of it as well. So real easy, just like that. And the next thing we're gonna do is add our clip. So to do that we're gonna go ahead and remove this bolt, slide this up and over just like so. And we are gonna very, very loosely just so it just barely catches that bolt back in. We wanna leave as much maneuverability to this clip as we can to make sure that it goes around the lip of our doorframe. Our second tower is gonna assemble exactly the same. Now it is important to note with these rubber pads on the bottom, on the second bar or the rear bar, both of our pads are numbered the same as M368. However, the front bar is going to be side specific. You need the M505 to go on your driver's side and M506 to go on your passenger side. So the next thing we're gonna go ahead and do is attach our tower to our crossbar and to do that, the first thing we'll do is remove our end cap here and this'll just kind of pull right off. We're gonna remove this kind of measuring strip right here as well. And what we're gonna do is take this metal block at the top of our tower and it's gonna feed through here through like a T slot. So let me get that lined up. Make sure that the outside of your tower is facing the outside of the bar before you put it on, but we're just gonna guide that on into place and slide it over. Now if you pay close attention to your instructions, it is going to give you the distance that your towers need to be apart before putting it up on the roof. The distance it gives us for our second bar is gonna be a 118 millimeters and you're gonna use this strip right here in order to measure it. So what we'll do is we'll reinsert our strip here and we're gonna put it so that the very end of it cuts off at 118 millimeters, which is going to be right there. We're gonna keep that in place, move our tower until it butts up against it, double check, make sure we keep it on that 118 millimeters. And then we're gonna use this tab here on the inside of the bar to just kind of come on over and just make a bit of a bookend here for our tower. Once that's done and it's in place, we're gonna go ahead and take our included tool and through this bolt here in the top, we're gonna go ahead and tighten it down onto our bar. This is gonna keep our tower in place so it doesn't shift in and out. We're gonna get this tightened down real good. Make sure it's flush just like that. Now this measuring strip at the end here, it's still at 118 millimeters. What we're gonna do at this point normally is we would just take a scissor or a blade and we would just cut that flush with the end of our bar. This is gonna actually help cover up what would be a gap under here and probably create a bit of noise. But since this is not a permanent install today, we're just doing a demo for it, we're just gonna leave this strip out without cutting it. So we're gonna go ahead and remove that and at this point we can replace our end cap. Now when replacing the end cap, remember we're looking at the bottom of the bar, the lip to the end cap should be toward the top of the bar. So we're gonna just put it on just like this and we're gonna repeat this process on the other side. Now as I'm over here setting the other side, remember we're on our second bar, it's 118 millimeters. The front bar actually has a different measurement. It's gonna be 123 millimeters. So pay close attention to that as you're getting these set, might be a good idea even to just take it up on the roof and double check it before you cut your strip. Could be a millimeter, give or take, that you need to make up for, but just keep note that there are gonna be different widths between your towers when it comes to the front bar and the second bar. Now if you have a measuring tape that does metric, it does end up being a lot easier to figure out where on your roof you're going to end up placing your bars. So what Rhino-Rack has in the instructions is that from the door seam right here to the center of our front bar should be 320 millimeters. So we had that measured out and we've got that right in place. The second bar is going to be based on where the front bar is. So the second bar is going to be 700 millimeters from the center of this tower to the center of the back tower. So we're gonna go ahead and grab our second bar and we're gonna get it just about in place where it should be. Get a final measurement before we lock it down. So the bar is aluminum and this is all really lightweight. This is definitely something you could do on your own. If you wanna be extra careful, grab a friend. But what I'm gonna do is just standing here in the door seam, I'm just gonna make sure that that clamp kind of goes around a little bit, the door frame and that our pad there is gonna kind of slip right into place with the lip of the rubber pad kind of going into the groove back here behind our doorframe. So we're gonna get this kind of right, about in the right spot and then we're gonna get back down on the ground and take our measurement to make sure we've got our distance right before tightening everything in place. So, you know, with my tape here, again, center to center, we're trying to get it lined up to 700 millimeters, just making sure, good there. There is a rubber padding on the inside of these clamps here, so I know you probably see it shifting around a little bit. It is rubber lined, so it's not gonna be doing anything to scratch up or paint our anything like that, but there we are right at 700 millimeters. I'm gonna go ahead and go over to the driver's side and double check that that measurement is exactly the same. That's gonna guarantee that our bars are parallel to each other. All right, now that we've got everything in line, we double checked both sides to make sure that they're even, we're gonna go ahead and take the provided tool here and we're go gonna through this bolt right here. We're gonna start tightening it down. Now what I'm gonna do or suggest that you do too, is just kind of grab onto it and press with your thumb up, get this snug up against the vehicle. That way you can kind of guarantee that it doesn't tighten up crookedly or anything like that. And the other important thing to remember too is you shouldn't over tighten one side compared to the other. I'm tightening this up here until it's snug, which it is right now, making sure my foot pad and everything is still right where I need it. And I'm gonna go over to the other side and do the same thing and I'm gonna slowly, incrementally tighten down both sides a bit at a time until it's all the way there. If you find yourself tightening one side completely while the other side's loose, I could guarantee you it's gonna shift a bit because this bolt is bringing this claw up and closer. So if you just tighten one side down completely without doing the other, the other's gonna be very difficult to get lined up and your foot pad may even come out of place too. So a little bit on each side, maybe, you know, three, four turns over here. I'm gonna go three, four turns over there, back and forth until it's completely tight. When we've got it tightened down completely, I'm gonna go ahead and kind of give it the old shake test, make sure nothing's moving. The truck is moving, but nothing on the bar is. So we've got it good and tight and in place. I'm gonna go ahead and take our tower cover right here and our key, I'm gonna make sure it's in the unlocked position. I'm gonna insert these two tabs right over here and get this into place. I'm gonna lock it down. And now we've got our roof rack installed. We're ready to load it up and head out on our next adventure. So there it is. Installation was very, very simple. This ends up being a great look here on the Colorado, as I mentioned before. We've got 53 inches of bar space with an overhang to be able to mount some of those extra accessories and whatnot. And overall, I think this would be an excellent choice for you and for the Colorado. But if you decide that this is the roof rack for you and you get it, you install it, you get to use it a few times, please share with us what you think about it in the comments below. We would love to share your experience with our other neighbors so they can make the best decision for themselves. Once again, this is Curt with etrailer. Thanks for stopping by.
Ratings & Reviews

Fairly easy to install onto my 2017 Honda CR-V. The crossbars feel very sturdy and are securely attached to the vehicle. Took me about 30 minutes to get it installed and could be done even quicker if you get help from another person. The bars themselves are a little fat so my Thule ski rack has a super tight fit. There is very minimal wind noise, so I'll probably be getting a fairing for that. The instructions felt a bit jumbled but with just the measurements alone, you can install it with a bit of common sense.
Although it a product review, I have to give it to the customer service department... YOU GUYS ROCK! As far as the product, it is very simple to install as long as you take the time to read and fully understand the steps provided. My kayaks are the pelican tandem 13' long by 3' wide and weighs about 70 pounds each. Since I received the roof racks last Friday, I've only been able to test with one kayak; however, just by the way the rack behaved, I can say that it will comfortably hold the weigh with both on.
I ordered the entire set up, as well as carriers for our kayaks. At first, it seemed I had ordered the wrong parts, as the feet were rather wobbly. I sent a photo to customer service, and got a response from Julia almost immediately (and it was a Saturday!). She included a video with her email, and my question about proper installation was solved. The ordering process was simple, shipping was fast, and Rhino Rack has an excellent brand reputation. Installation was fairly straight forward. E- trailer made everything so simple from beginning to end, and I will be buying all of my accessories from them.
Choosing a system for transporting my new (to me, they're actually used) kayaks was TOUGH. I love my little 2017 Honda Fit, and I knew I would love my new kayaks when I got them. I don't want anything bad to happen to either! Also, my car is small and the kayaks are fairly large, comparatively. I've strapped a lot of things to a lot of vehicles, but this is going to be a long term relationship, so I wanted to get it right the first time.
I've been researching and reading reviews for months, but I got confirmation that the kayaks were ready for pickup, so I needed to make a decision! I ultimately pulled the trigger on the Rhino-Rack Vortex Aero Crossbars with the 2500 Series Legs and Custom DK Fit Kit for my naked roof car and the Rhino-Rack Nautic Stack Kayak Carrier w/ Tie-Downs.
I placed my order on 09/15/21 at 6 PM. The estimated delivery date was 09/23/21, which made me a little sad. I really wanted to pick up my boats on Sunday, 09/19/21, but I figured I'd waited THIS long, I could probably handle waiting another week. I was very pleasantly surprised to receive an email at 8 PM the same evening notifying me that my order had shipped. AND, even better, the UPS tracking was showing delivery on 09/18/21 by 7PM! I was beyond excited, but didn't get my hopes up because shipping has been pretty hit or miss since well before the start of the COVID-19 pandemic. However, UPS delivered my package just before noon on Saturday, which was amazing!
I got everything unpacked and reviewed to ensure that I had all I would need to assemble the system - check. Nothing missing, which is always an auspicious start. Then I started reading the instructions - UGH. This is (so far) the ONLY thing I have to complain about. I have put together furniture that had clearer instructions. I probably should have gone to Google to find a [online] video, but I powered through with the instructions provided. Since I've never put together or used a roof rack before, I didn't really know what the final outcome should look like, so that made interpreting the instructions very difficult - the pictures were not super clear, and the accompanying text did not improve the situation. Now that I know what it looks like assembled, I get it, but at the time it was rough. I estimated it took me about 2 hours to get the rack assembled and secured to my car, and towards the end my fiancé arrived and helped me to realize that the foot pads were not properly attached to the feet, which made a huge difference! The kayak carrier was much easier to install, taking maybe 15 additional minutes.
The foot pads rest in the groove on the edge of the roof, I assume over the frame of the car. There's absolutely no flex in the roof where the feet sit. The hook part of the clamp rests against the metal of the car, under the rubber seal, so I don't foresee any potential issues with the seal as a result of the rack. The doors close as normal, and the rack has no movement whatsoever once tightened down. I've now used it as a handle to pull myself up towards the roof a few times (I'm about 190 lbs), and I feel totally confident that it's not going anywhere. I now have ideas about how to use the rack to haul around the larger stuff that won't fit INSIDE my car (which isn't much - I HIGHLY recommend this car!).
So, the big question - how'd it go with the kayaks?
In short - perfection! I was slightly concerned about the boats overhanging the front or back of my car, as they're 12.5 ft long and my car is just over 13 ft long. Eeeeek! I needn't have worried. They fit like a dream, and even without bow or stern tie downs were very secure during our trip home. We took local roads instead of the highway because we didn't tie down the bow and stern, so we probably didn't go over 40 ish MPH, but I saw absolutely no lift (I can see the ends of the boats out of the front windshield). I will be using those tie downs in the future, and anticipate no issues with highway speeds under those conditions.
Obviously, only time will tell how everything holds up/works out, but at this stage, I am extremely pleased with my decision and am looking forward to many kayaking adventures to come! I only have one picture at this point, but may take a few more and add them so anyone else considering a similar setup knows what they'll be getting.
Ordered the vortex roof rack and road warrior bike carrier, they delivered it sooner than than expected which was great. Easy to install but they only concern I had was the spec measurements need to be adjust to fit my car because following their specs left my hatch back hitting the carrier when up and even after the adjustment it still hits the rear tire of the bike but all in all I am very satisfied and am going to buy more products (wheel mount, weather tech wind deflectors). So happy saved tons than buying from bike shop or another online retailer.
Where do I start?
I've been whitewater kayaking for 22 or so years now. I've always used used either Yakima or Thule products...
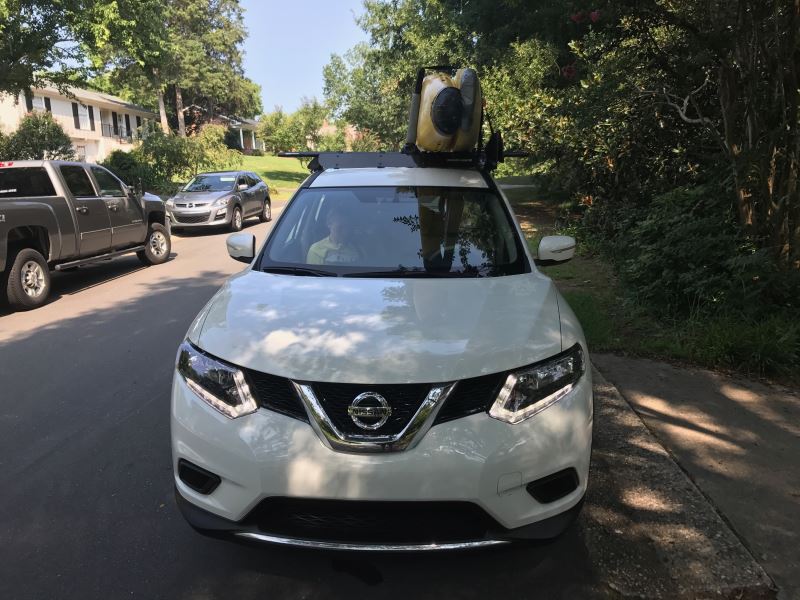
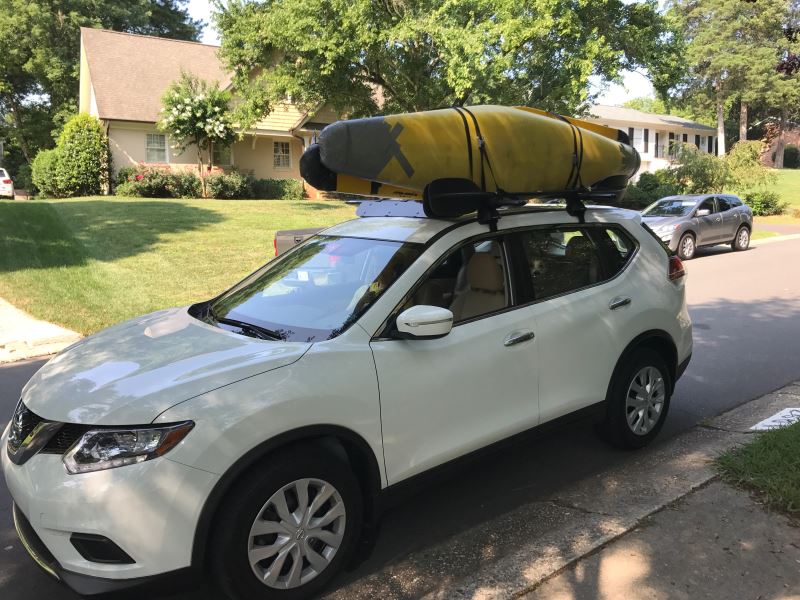
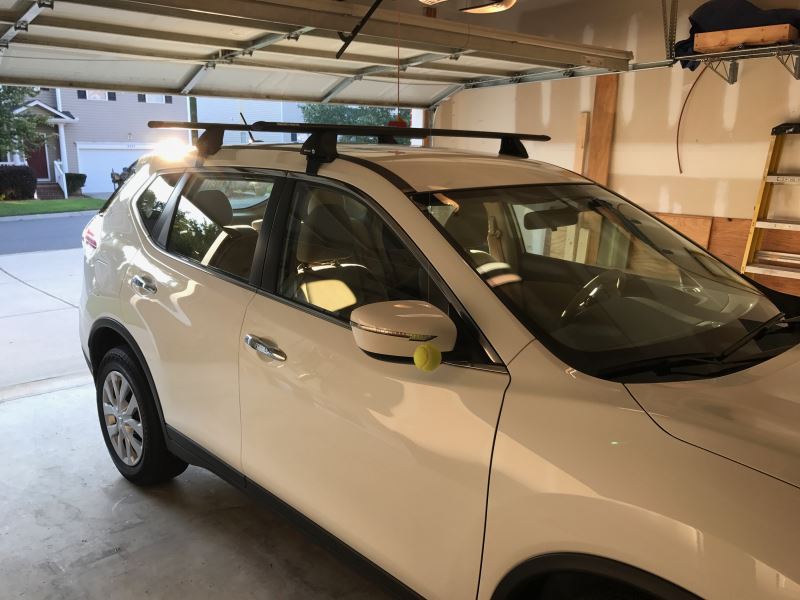
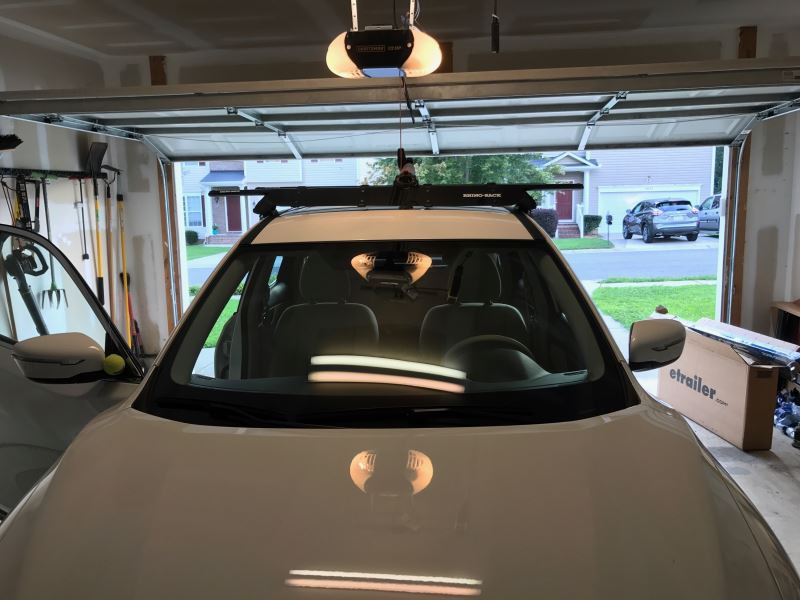
Until I bought a 2015 Nissan Rogue with a naked roof. The curvature of the roof and large door jams mean that Yakima and Thule can't make racks for them. I went to a place that does custom installs and again because of the curvature of the roof, they couldn't give me a rack. This meant no kayaking which is really bad news.
Enter the Rhino rack system. I purchased the feet, the fit kit, the cross bars and a Yakima "big stack" stacker. The first issue I had is the reccomended size for the Nissan Rogue is only 48 inches. Way too small too haul 4-5 (very light) whitewater kayaks. I called etrailer and they were SUPER helpful, told me I can buy the 65 in cross bars and they'll work fine.
I held my breath and placed my order. I was nervous leaving my trusted name brands. The order arrived super fast (they told me it would arrive by Friday but it actually arrived on Thursday) and everything was packaged rock solid. I was impressed.
I read the instructions and put the rack system on my car. It took about a hour (it was hot and I worked slowly) but the rack system is SUPER SOLID. I love it. Rhino might have a "forever" customer out of me.
-The rack system is very stable. I can't move it with my hands by pushing or pulling.
-The rubber stripping you put on the top and bottom of the bar is an awesome added feature AND it reduces wind noise.
-Adding the fairing reduced wind noise even further. With four boats on the roof you couldn't hear any extra noise.
The ONE thing I dislike is that you need to use the supplied Allen wrench to take the rack on and off the car. It's a small complaint, but other systems I've used in the past don't have them.
I paid much less for this system than I would have if I purchased one of the aforementioned systems, but I'm really really satisfied with the product. We will see how well it holds up over long-term use, but it looks awesome!
i George from etrailer,
The rack is awesome! Strong, firm hold and nice looking. When doing surveys, I put my ladders on the rack.
I highly recommend this etrailer.
Being a former dealer for Thule Racks and owning Yakima Racks, I can say that the Rhino Rack surpasses both brands in function and looks! Also the folks at etrailer provided service in the highest quality! Dennis Pistole, Eureka Springs Arkansas.
Looking for a roof rack for my Toyota Corolla IM 2017 and chose the Rhino rack-Vortex Aero bars combination. It is strong rack, good quality and nice finish (I picked the black color). Installation requires patience but not difficult, instructions could be more detailed. Happy with the solution it gave me, finding a good rack to transport my Mountain bike to the trail. Highly recommended!
I got the product a little later than expected and came in a huge box that ended up moving the product around a little. It is all metal though so it was mostly still in very good condition. (little scratches here and there) Took me a while to figure out the pads due to the instructions being different from the actual product but very simple in general. I could put one together in maybe 30 minutes now. Tons of videos are online which take time to watch but are very helpful. Overall install went well and very happy with look of product. I am buying accessories today for both kayaks and bikes to be mounted on. Rhino Rack is also a great company to call. They will spend all the time in the world to help you with what you need. Etrailer might do this as well but I went with Rhino Rack. Now just waiting for summer!
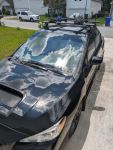
I put 3 stars because its a useful functional non-harmful roof rack solution for my WRX sedan. This review lost 2 stars because the rubber top pieces get damaged upon any accessory removal or install like(bike, snowboard rails etc). Additionally, these accessories also look to be weathering quickly because of build quality. Hopefully this helps your decision! Thanks
The selection process that etrailer uses is top-notch. This really helped narrow down the choices for my 2019 RAM Quad cab. I bought this all kitted together. The assembly process is very straightforward and well-documented. I would highly recommend etrailer as a source for vehicle accessories. I have Yakima bike racks on our Subaru and this is as good if not better.
The Rhino system works great the way it is. I'm going camping next week and took the two bars out of the closet and right onto the car. No adjustments were needed. The feet fell right into the roof line where I initially set it up. All I had to do was clamp it down. Last weekend I had the basket up there with two fully loaded RTIC coolers probably pushing 150 pounds with no problems. For this trip I have my Yakima easy load bike racks on the roof. They clamped right onto the Rhino bars and they're in a much better position for loading and unloading than my last truck.
I'm very happy with the product and not expecting anything else. Thanks for following up.
The rack was shipped within a day of order and delivered on the expected date. I got email updates with the order confirmation and shipping information. Etrailers provided excellent customer service. The web site allowed me to select the product with confidence that I was getting the right rack for my 2015 Subaru Legacy.
Assembly and installation were easy using the provided instructions. It probably took about 45-60 minutes to complete. I especially liked the measuring strips that Rhino provides. It makes setting the foot width on the bars painless.
I have not used the rack yet, but it's a solid mount and I do not expect any difficulties. It also looks good on the car.
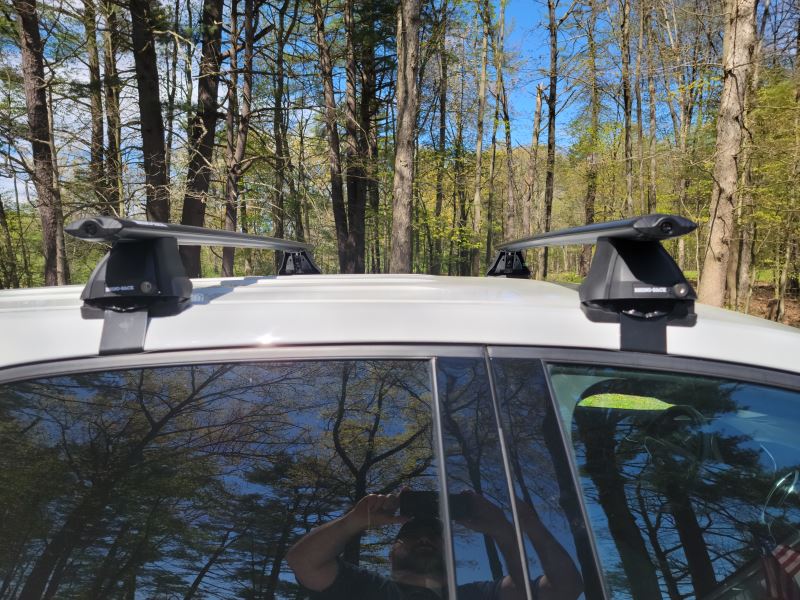
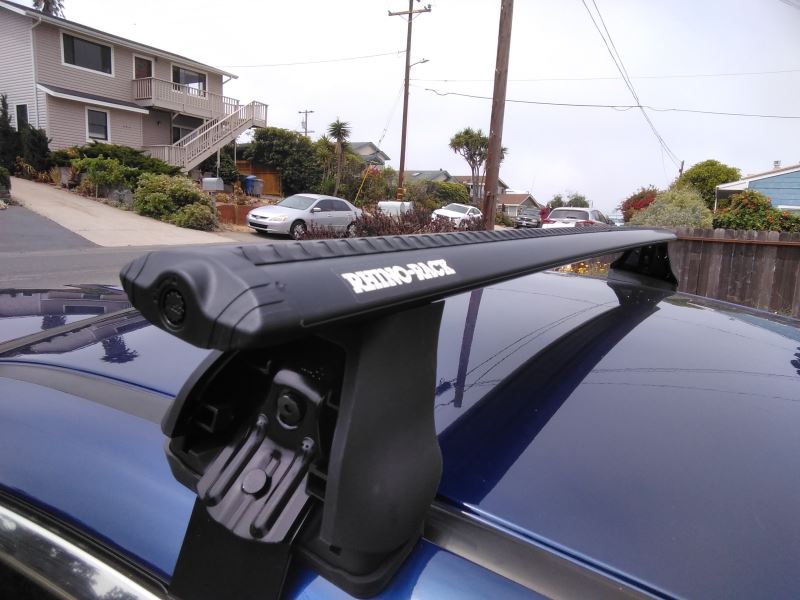
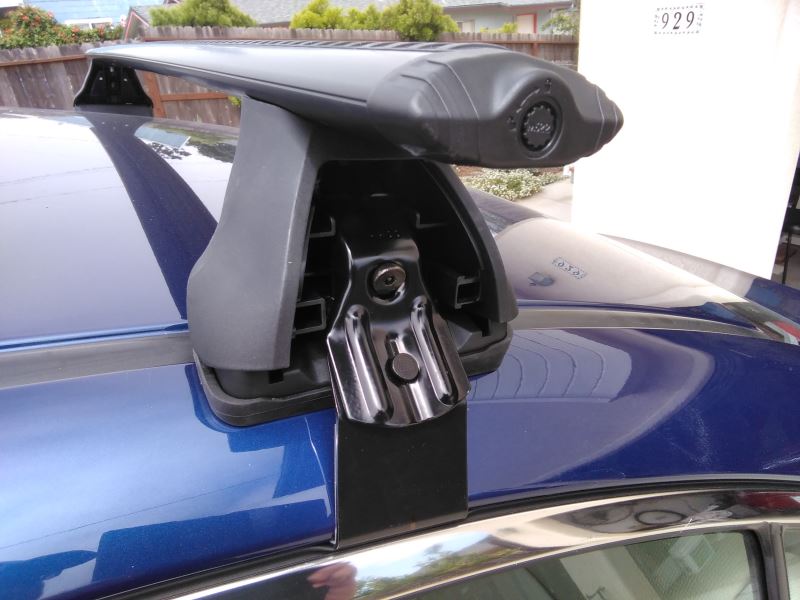
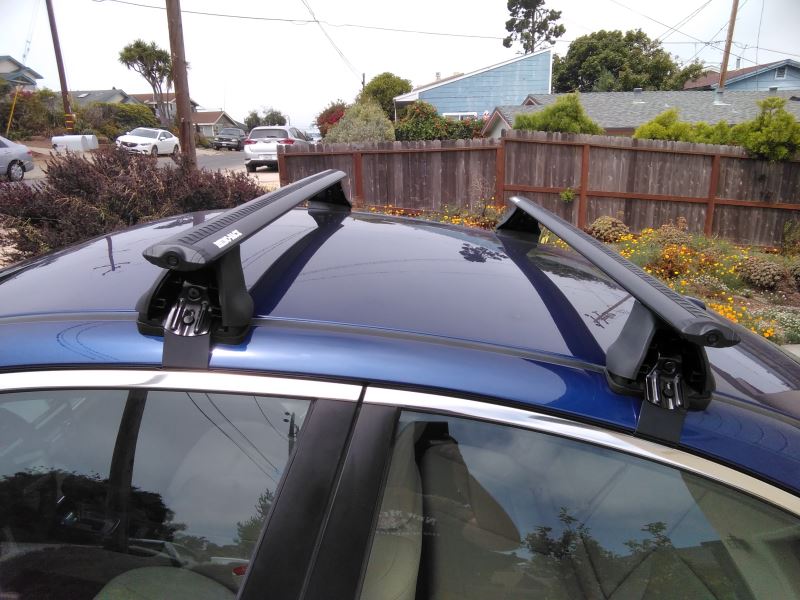
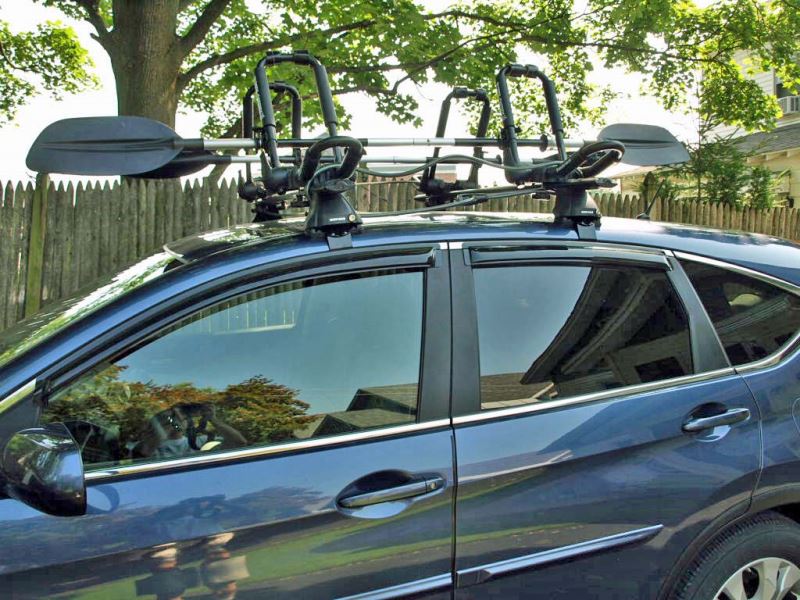
I purposely left the cover plates off in the pictures so the clamp mechanism was visible.
Been wanting to get a roof rack for my small Honda H-RV suv for some time now. Finally decided to pull the trigger on one and opted for this Rhino rack system.
Watching the etrailer install video and following the manufacturer's instruction, the front rack went on easily and perfectly. However, the rear track turned out to be a very long process. Why? Because I thought the manufacturer's measurements for the rear was an error. After the rack was assembled, it didn't seat into the roof channel at all. It appeared to be well short. So, I proceeded to use my mechanical ingenuity to get this rack to fit on my own. After a lengthy span of time and numerous adjustments, I'd come to realize that the manufacturer's measurements were correct. The footing did not sit perfectly until the unit was fully tightened against the vehicle. Live and learn.....once again.
The rack is absolutely solid, and looks very clean and sharp on top of the H-RV. I could not detect any additional noise while driving, even at highway speed.
The main purpose of this roof rack was for transporting my recreational kayak. I was not aware that these bars had a rubber strip running along the entire top of the bar. This turned out to be perfect for the kayak. Now, I didn't need to buy a specific kayak cradle. The kayak, one strapped down, is held absolutely secured to the rack.
I am very happy with this product! Once again, etrailer comes through perfectly with another of my order. Prompt service and indepth product info are the reasons why I shop here!
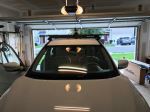
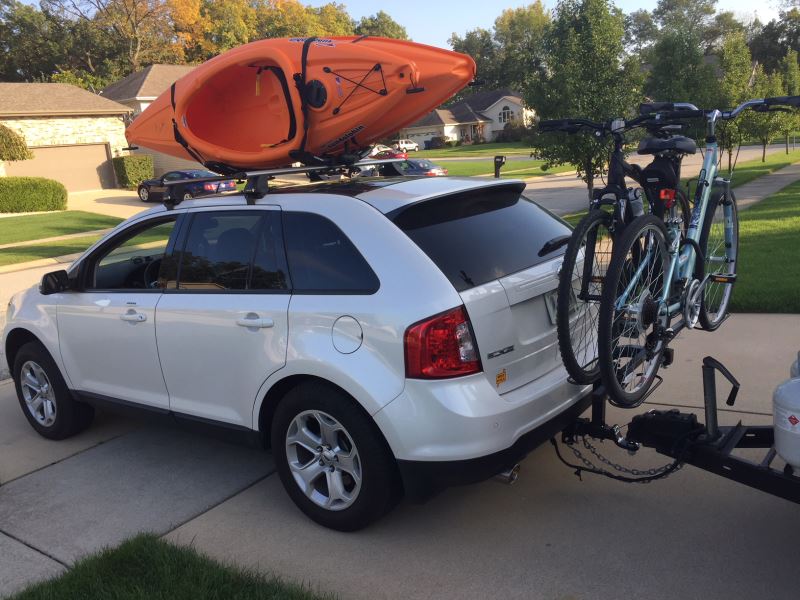
Purchased a Rhino Rack custom fit rooftop system, along with the kayak rack to hold two kayaks and the Swagman rv bike rack. Made several trips and they all work great! Included photos to share.
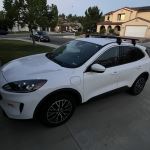
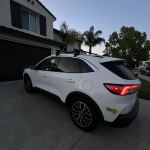
The Rhino Rack is very well made. I installed it my self on our 2016 Ford Escape, but had an assist from my wife to fine tune it at the end. There was no whistling or any other distracting wind noise on our 3,500 mile drive to visit family out West. A Sear's Cargo Box was easily mounted to the Rhino Rack and it remained centered and secured at western highway speed limits plus. The included locks on the roof mounts were the selling point for me. The Rhino Rack remained securely mounted to the roof with no additional adjustments or tightening being needed. Great Product. Donna P. @ etrailer was super with the order.
This roof rack works great! At first I was skeptical about putting a rack on my IS250, but it couldn't have turned out better. Paired with the Yakima Highroad, I can easily transport my bikes around without worrying about anything coming loose while driving. The installation instructions for the legs and bars are pretty straightforward. Takes about 30-45 minutes total to install.
Got this for a 2015 Prius. High quality works great. Use their measurements included as a guide and measure everything out yourself before cutting the spacers and when installing. I had to make minor adjustments to make it perfect.
Look how nice my crossbars look? I ordered these and paid extra for expedited shipping so that I could have them to put a luggage carrier on my roof. The legs for the crossbars never showed up and the crossbars came late as well. I ran out and got a trailer hitch basket for extra storage. Tack on an extra $[XX] in addition to the extra $$ for fast shipping and I'm $[XX] into these crossbars that I couldn't use for their intended purpose. I called early enough that the company could have overnighted the legs but they just kept blaming UPS. Very disappointed.
Excellent price and quick shipping. Excellent support for missing bar end cap. Rack was easy to put together and install and video was helpful. My only complaint is when trying to tie down kayak to cradle it is not easy to keep the loop over the top of the upright "U" shaped bar, it keeps siding down. We wrapped two pieces of foam around the bar to create a channel to hold the strap now it is easy.
The racks fit perfectly! They are a great fit to my car. They don’t interfere with the sunroof’s operation. I assembled it on my own with no difficulty. It was easy to assemble. The directions it provides to you are easy to follow. The only down side was getting the plastic pieces to lock on the ends of the bars. Other than that they are great and they look great on my car! I plan to use them to transport kayaks! They are very sturdy and very trust worthy for transporting a couple of kayaks. I recommend these racks to anyone who has a 2016 or 2017 Nissan Altima!
etrailer.com's videos and additional customer support made the purchase of a Rhino Rack system from them for our 2010 Malibu a no brainer. The rack fit the car perfectly, and with the videos and clear instructions that came with the kit, I got it installed on the car with only one misstep. The instructions came the the measurements in centimeters and inches. I didn't have a metric tape measure, and ended up messing up converting fractions to decimal.
My Daughter is going to college 500 miles away and is moving into an unfurnished apartment and needed to pick up some small furniture that wouldn't fit in her Malibu. She purchased several items from Facebook Marketplace and was able to transport a twin bed and mattress, a medium sized desk and some dining room chairs (in several trips) with no problems.
The only thing I can think of to improve the installation would be to have the Inches measurements in decimal or to include an inexpensive metric tape.
Bought this rack to carry canoe, etc. while towing our camper. Installation is easy with one person so long as you take your time to get the original setup meticulously correct. If you're planning to put it on only occasionally when you're using it, it's 10 to 15 minutes for one person to install once the original setup is done and the clamp points marked with the little unobtrusive stickers they send with the kit. Originally planned to put it on only when using because we only really need it a couple times a year (we just throw the canoe in the back for local trips). Looks good enough we might leave it on all the time. Even thought I didn't know I needed it until I was already at the store, it certainly came in handy bringing home a 10 foot long 2x8 on a rainy day when I needed to keep the bed cover closed. etrailer's service was prompt and flawless as always.
The Rhino Rack products are top notch and more reasonably priced that "T" or "Y" brands. (I think some accessories may be interchangeable.) I've had both "T" and "Y" racks but I'm now totally sold on the Rhino brand.
Photo attached of four Rhino,Aero bars, towers and ARB awning mounted on my '18 Colorado and Alu-Cab canopy.
My ARB awning fits fine. And the crossbars come in real handy for our canoes and some pairs panel fencing we transported last summer.
As for the staff at etrailer? Well, I'd say they take fantastic care of their customers. Knowledgeable, helpful and they followup, as well.
Etrailer also has amazing HELP videos as well. I bent the crank handle on my trailer tongue jack, which messed up the "internals". I thought Ikd be shelling out for a new Jack, for sure.
Nope. etrailer had a repair kit available (apparently, I'm not the only destroyer of tongue jacks) at a very affordable price and they have an online video to instruct one in the replacement of the innards.
I don't bother with the other accessory or parts sources anymore. I just call these guys and ask what they have. Never have been disappointed, and they enjoy helping.
Do you have a question about this Roof Rack?
Info for this part was:
At etrailer we provide the best information available about the products we sell. We take the quality of our information seriously so that you can get the right part the first time. Let us know if anything is missing or if you have any questions.



































Thank you! Your comment has been submitted successfully. You should be able to view your question/comment here within a few days.
Error submitting comment. Please try again momentarily.