
To see if this custom-fit item will work for you please tell us what vehicle you'll use it with.


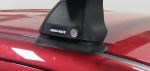
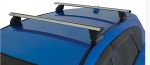
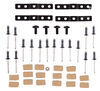
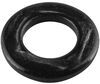
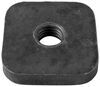
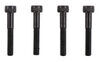
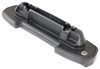
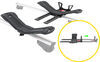
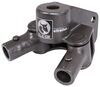
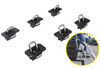
This custom fit kit lets you mount 4 Rhino-Rack 2500 legs to your vehicle with fixed mounting points. Legs mount to vehicle with attachment studs. Includes 4 pads and 4 attachment studs.
Features:
Specs:

California residents: click here
Videos are provided as a guide only. Refer to manufacturer installation instructions and specs for complete information.
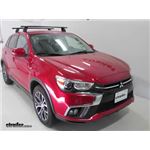
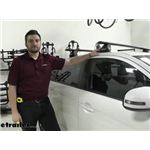
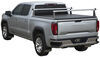
Hey everyone, Charles here at etrailer. And today we're taking a look at the Rhino-Rack Vortex Aero series crossbars with the custom DK fit kit and a 2500 series roof rack legs on our 2015 Mazda CX-5. These cross bars are gonna be a great way of carrying extra gear to and from your destinations and freeing up space in your vehicle. You can carry up to 165 pounds, just make sure you don't exceed that of the crossbars or the weight of your roof. So we have this aerodynamic shape that's gonna improve your drag as well as the vortex Aero strips. They are also gonna reduce drag and wind noise as well.
And with those straps or the strips on the bottom as well where you slide in your legs, it comes included with a plastic lock core on each tower. And these plastic end caps with a lock. All the end caps will be keyed alike, and then all these will be keyed alike as well. So it'll just be two keys and you can also get metal locking cores here at etrailer, just for a better peace of mind. So mounting these at the two closest points where we could, we are going to have a spread of about 42 and a half inches.
The overhang for the rear is gonna be about two and a half inches from the end of the crossbar and not the end cap and in the front, about an inch overhang and the distance from the roof to the bottom of the crossbars in the front's gonna be a little under three and a half and to the top, about four and a half inches. And for the rear crossbars to the bottom of the crossbar, it's about three inches. And then to the top, about four and a quarter inches. And let's go ahead and show you how to install it. Beginning of the installation, I unpackaged everything and set them in their separate groups.
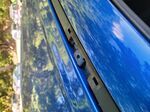
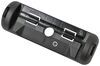
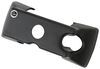
One thing to note for the fit kit here is that they're all gonna be the same number, the M 473 but you're gonna have two twos and two ones. The twos are gonna be for the rear crossbar and the ones are gonna be for the front but you're just gonna take that and snap them into place and make sure you keep the twos together and the ones together, separate from each other. From there, we're gonna go ahead and open the tower like that. And then for our fit kit and our vehicle here, we don't need these two middle parts that it comes with. We're gonna replace those.
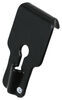
So after you wanna unscrew it, little technique I found to make it easier at popping this guy out 'cause it's a little stuck is just use that bolt and push it up and you can just throw these away. Or if you want to keep 'em, you can keep 'em. So over here, these we're in separate bags and so you just want to take one of the screws, this lock washer and then this washer, set that off to the side for now. And then this piece with the curve at top and facing out, we're gonna place it in the back of the tower. Just like that. I'm gonna hold it with my finger so it doesn't fall out. And then taking this piece, I'm gonna insert it into the slot, above the piece that we're holding with our finger from there. Now I'm gonna hold this piece, flip it over and then I can screw in this bolt right here. Set this off to the side and do this for all three towers. That's how it should look. Once all four towers are completed, we can go ahead and just pry our trim pieces off at both sides. What we did is we just took the whole thing off and there are two placements where we can add these screws in. We chose the two closest points and we're just gonna screw the screws in there. And then once we have that, we placed the trim piece on top of that, gave it a little smack and it made an indent so that we drilled right in there, placed it right over the top and just clicked it back in place. Once you removed all the strips from the inside of your crossbars, go ahead and pre-install this. For me, it just makes it easier to just kind of massage them in there. And then for the numbered strips, we are gonna take a look at the instructions I found for our Mazda CX-5. For the front crossbars, I trimmed it to 191 millimeters because we have the Vortex Aero crossbars. For the rear, we trimmed them down to 163 millimeters. And that's what we did right here. Just chopped it right at 163 and slid this in there. And that is going to give us the space we need. So now we can just slide the tower on it. And we know that this is the distance we need to hit those two points on our vehicle. With the leftover insert here, you can go ahead and fill up that gap to reduce any wind noise or drag as well. And then we can cut off the excess right there. Once you have your strips and everything in place, we can go ahead and tighten these down with the included tool. And don't forget to attach your feet. You want the arrow pointing out and these two parts attached to these two bars right here, snaps into place. Now we can go ahead and throw these on our roof. And so whenever we're all lined up, we can go ahead and hand tighten this to reduce any slack and then we'll use the included tool to finish tightening it down. And we're just gonna do the same thing on other side. After you've tightened them down, give it the old shake test. And if the whole vehicle's moving, then you know you're secure. Once everything's secure, we can go ahead and put our caps on and lock them. There we go. And that'll do it for the installation. So overall, Rhino-Rack makes a great product. I like the aerodynamic shape and the Vortex Aero strip bars. If you want, you can get a little bit bigger crossbars or longer I mean, just so that you can have a little bit more overhang so that you can clamp more accessories on the end and still use the rest of your rack as well. But other than that, these are great. And that's gonna do it for our look on the Rhino-Rack Vortex Aero series crossbars on our 2015 Mazda CX-5..


the best rack i see
great service. thank you
Great! Works with my 2010 E350!
Ordering was easy. And was delivered quickly. I’m very pleased.
bought as part of a package - worked well with the other rhino products
Easy to install on my Mazda 5 and hauling a 15 foot canoe.
The directions for assembling is slightly difficult to understand with pictures and little wording. However, the second set of directions with the product was more helpful.
best investment I ever made. Easy to install and they work great. Thanks
Fit the 2010 Subaru Impreza.
Fantastic service. Very happy with this company! Highly recommend it
Great fit, super fast shipping.
Do you have a question about this Roof Rack?
Info for this part was:
At etrailer.com we provide the best information available about the products we sell. We take the quality of our information seriously so that you can get the right part the first time. Let us know if anything is missing or if you have any questions.


Thank you! Your comment has been submitted successfully. You should be able to view your question/comment here within a few days.
Error submitting comment. Please try again momentarily.