
Yakima BaseLine Roof Rack for Naked Roofs - JetStream Crossbars - Aluminum - Silver - Qty 2
Item # Y53KB
Our Price: $688.80
Confirmed to Fit
2019 Nissan Altima
Will this fit?
To see if this custom-fit item will work for you please tell us what vehicle you'll use it with.


- All Info
- Reviews (152)
- Q & A (0)
- Videos (5)
- Photos
Yakima Roof Rack - Y53KB
- Aero Bars
- Crossbars
- 50 Inch Bar Space
- Yakima
- Silver
- Overhang
- 2 Bars
Extremely quiet, aerodynamic crossbars attach to Yakima towers to create a stylish roof rack for your vehicle. Rubber strips in T-slots push down to load carriers or accessories - no need to trim. Full-length aluminum bars maximize carrying capacity.
Features:
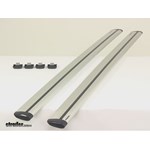
Yakima JetStream Crossbars - 50" Long - Silver - Qty 2:- Quiet, low-profile crossbars let you build an aftermarket roof rack for your vehicle
- Pair with Yakima towers and a fit kit to create a complete roof rack
- Asymmetrical JetFlow shape creates an extremely aerodynamic roof rack system
- Built-in WindRidges help control air flow over bars to dramatically reduce wind noise and vibration
- Aero-style bars reduce drag to help maintain fuel efficiency
- Full-length design maximizes space for carriers and accessories
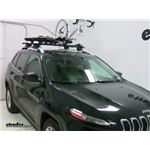
- Versatile crossbars accommodate accessories that mount in the T-slots or clamp around the bars
- Works with most universal-mount bike, water, snow, and cargo carriers
- Rubber SmartFill strips in T-slots allow for easy installation of channel-mounted accessories
- Simply push down on the SmartFill strips to slide in accessories - no trimming required
- Bottom channels allow for easy installation on Yakima towers
- Fit BaseLine, RidgeLine, SkyLine, and TimberLine towers
- Etched measurements on bottoms of bars help center rack on your roof
- Lightweight aluminum bars are durable and rustproof
- Internal JetTruss extrusions provide exceptional bar strength
- Clear anodized alloy finish is corrosion resistant
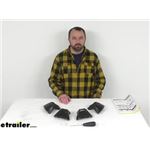
Yakima BaseClip 102:
- Custom-fit mounting clips and pads allow you to mount BaseLine towers on your vehicle with a naked roof
- Padded, stainless steel clips provide secure grip on your door jambs
- Snap onto DropHooks inside towers
- Protect door jambs from scratches and abrasions
- Powder coated for durability and rust resistance
- Molded rubber pads fit the contours of your roof
- Clip onto bottoms of towers
- Protect roof from scratches and abrasions
Yakima BaseClip 185:
- Custom-fit mounting clips and pads allow you to mount BaseLine towers on your vehicle with a naked roof
- Padded, stainless steel clips provide secure grip on your door jambs
- Snap onto DropHooks inside towers
- Protect door jambs from scratches and abrasions
- Powder coated for durability and rust resistance
- Molded rubber pads fit the contours of your roof
- Clip onto bottoms of towers
- Protect roof from scratches and abrasions
Yakima BaseLine Towers - Qty 4:
- 4 Heavy-duty towers mount Yakima crossbars to your vehicle with a naked roof
- Pair with 2 Yakima crossbars and BaseClips to create a complete roof rack
- Tower pitch can be adjusted 6 degrees forward and 6 degrees backward to level your crossbars
- Pivoting bases can be adjusted during installation to ensure towers are seated correctly
- Versatile BarBeds are curved to accommodate the elliptical shape of Yakima CoreBar and JetStream crossbars
- Also fit RoundBar crossbars with adapter
- Safe and easy installation with DropHook system and included torque tool
- DropHook clip holder adjusts on 3 axes for perfect fit on your naked roof
- BaseClips attach to hooks in tower assemblies and tighten for a secure grip
- Torque tool clicks 3 times when clips are secure - eliminates fear of under- or over-tightening
- Lockable with Yakima Same Key System (SKS) lock cores (Y07204 - sold separately)
- Weather-resistant stainless steel, glass-reinforced plastic, and elastomer construction with matte finish
8000428 Yakima Jet Stream CrossBbars - Aluminum - 50" Long - Qty 2 - Silver
8006102 Custom Base Clips and Pads for Yakima Base Line Towers
8006185 Custom Base Clips and Pads for Yakima Base Line Towers
8000162 Yakima Base Line Towers for CoreBar, JetStream, and RoundBar Cross Bars - Bare Roofs - Qty 4
Replaces 8000146
Video of Yakima BaseLine Roof Rack for Naked Roofs - JetStream Crossbars - Aluminum - Silver - Qty 2

Videos are provided as a guide only. Refer to manufacturer installation instructions and specs for complete information.


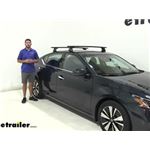
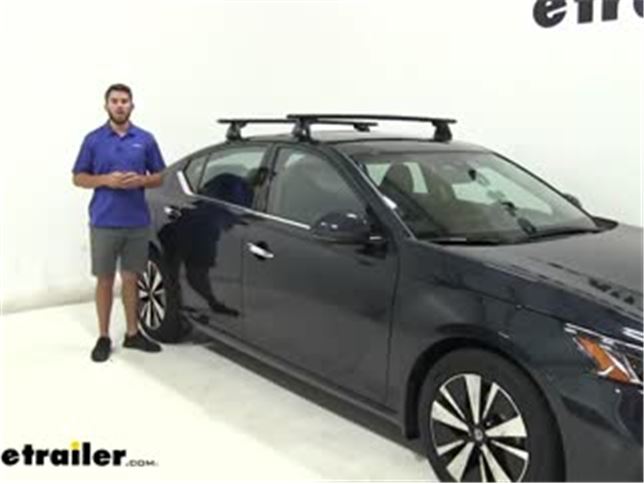
Video Transcript for Yakima JetStream Roof Rack Installation - 2019 Nissan Altima
Colin: Hey, everyone. It's Colin here at etrailer. Today, we have a 2019 Nissan Altima. Now, we're going to be test fitting the Yakima JetStream Roof Rack System.This roof rack system mounts to the naked roof of your Altima. It allows you to get all of your favorite accessories on top of your roof, whether you've got a bike rack, a kayak carrier, or even a cargo box.Now we have a couple of different components in our roof rack. Up top, we're going to have our 50" long JetStream crossbars.
Now these are in black, but they're also available in silver, just see etrailer. They're going to have a nice aerodynamic shape to them. It's going to help cut down on wind noise and drag, especially when compared to your standard square or round bar roof rack system.We have a rubber strip up top letting us know we can utilize the T track accessories. How we access that track, we have to pull the end cap off and instead of having to pull the rubber strip out and then cut it to length, all we have to do is push down on it, insert our accessory and then slide it to wherever is most convenient for us on our roof rack.Now in the middle is going to be our baseline towers. These are what's connecting our roof rack to our crossbars, excuse me, to our fit kit.
When I pull it off you can see the components on the inside. We're going to have our tightening bolt right here, which is securing our fit kitted hook and our rubber pad from our fit kit onto the roof.The fit kit is going to include a rubber pad right here, which is going to help prevent any type of scratches or abrasions occurring on your roof. It's also going to have rubber padding on the inside of the hook to do the same thing. It is going to be custom fit for your Altima, so it is going to match the contours making sure it gives it a nice sleek look.On our towers, we are going to have these pop locks right here, which we can replace with Yakima lock cores. That'll give you more security for your roof rack.Now I want to go over a few measurements for you guys.
First I'm going to go from the top of our roof to the bottom of our JetStream bar. It's going to be about three and a quarter inches, so that's plenty of space to be able to get any clamp on accessories under our crossbar without risking damaging the roof of our Altima.Now I'm going to go from the top of the roof to the top of the crossbar. That's going to be 4 1/2", so that's just something to keep in mind that you have added that height to your roof. With an Altima, you probably don't have to worry about any low clearance situations, but it is something to be mindful of.We're also going to have a weight capacity of 165 pounds for our JetStream system, which is more than enough weight to get your favorite accessories on top, but be sure to double check with your vehicle's Owner's Manual to make sure your roof can handle that weight.Now that we've gone over the features, let's show you guys how to get it installed. We'll show you how to get the rear crossbar assembled and installed.
It's going to be the exact same process as our front one. The only difference being how you position it. And how we got the front bar position, we measured from the center of the door jam to the center of our crossbar.Now the back is going to assemble the same way. We're just going to flip it over. Remove the end cap on the other side. These push up on the cap right there and just pull. It's supposed to be pretty tight like that, so don't get worried if it takes a little bit to get it off.Now we're going to come down to our baseline towers. First thing we're gonna do is grab it. We're going to grab the pad from our kit. You're going to see that there is an arrow right above the number. You want to make sure that, that arrow is facing to the outside of the vehicle, so because the tower is going to sit like this, you want to make sure the arrow is facing that way, so we'll do it like that. It just clips right in there like so.Now we're going to come up here and take our black plastic piece, it's going to clip in right here. You want to make sure you pull this gray tab right there. That's going to make sure that this bolt inside is visible. You need that bolt to be visible because it's actually that one right there. We're going to take our silver piece right here. Make sure the flat side is up, and try to thread it on there instead of right on top, and hold it. With my finger, I'm going to flipped it over, and take my roof rack tool that's included in my kit and just begin to tighten it down. Now if I come from the angle, you'll see it start to go down towards the baseline tower. Just make sure it's tight.From there, we're going to come over to this side of our crossbar. We need to feed it into the channel right here, so using the tabs that's right there, we're just going to go like so. Let's get it in the channel. There we go.Now on our cross bar, we are going to have engravings of numbers. There is a measurement in your instructions to let you know where to position it. Wherever the instruction says to mount it, you want to make sure you get the edge of the tower right here right up against there, so we'll adjust it to where our instructions tell us to. There we go.Now the next thing we need to do is adjust our pitch and our tow. Our pitch is going to be which way the towers angle. You can see I move it back and forth like that. Once we tighten it down at a certain formation that's going to be our pitch. How we tighten that down, we adjust it to the pitch that we need, so I need to tilt it back like that per the instructions. Tighten down that bolt that we used for the silver piece. Just keep pulling it back. Now with the tool, it's going to let you know when it's tight enough by giving you those clicks right there.We've adjusted our pitch, now we're going to adjust our tow, which is going to be the way that our pad is. You can see I've shifted it around right there. You adjust it, which is right there. You can see that knob moving back and forth. It's going to be numbered by one, two, and three from the front to the back. Two is just right in the middle. That's where we need to go. Tighten down this bolt. Now we'll just throw our end cap back on and now we're ready to get it on our roof.Now with both doors open, we'll go ahead and set this on top of our roof. It doesn't have to be in an exact spot. We'll go ahead and measure our crossbar spread. That's going to be center on center from our crossbars. You can find this measurement in your instructions. Just make sure it's the same on both sides.Now when getting the hooks installed, we're going to loosen up this bolt right here. That's going to adjust the angle of the hook. We're going to flip that cap back. Take our the hook. We might need to loosen that a little bit more to get our hook installed, just like that.Now we'll need to loosen it a little bit, so the hook can reach the doorframe. There we go. Now what we're going to do is tighten this down. That's going to bring the angle down to where it's exactly the angle we need for the hook to be at. There we go. We don't need to over tighten. It just needs to be like that. Now we'll go to the other side and repeat this.Now the next thing you need to do is make your way back and forth tightening down the hook, which is going to pull up on the door frame. I've already gone back and forth a couple of times. We're on the finishing touches. All I'm gonna do is tighten it up until I hear those clicks right there. Now I can close that cap, and put on my end cap to my tower, shut my door, and now I'm ready to load up my favorite Yakima Roof Rack accessories and then hit the road.Thank you all for watching. That's going to do it for our test fit of the Yakima JetStream Roof Rack System on our 2019 Nissan Altima.
Customer Reviews
Yakima BaseLine Roof Rack for Naked Roofs - JetStream Crossbars - Aluminum - Silver - Qty 2 - Y53KB
Average Customer Rating: 4.8 out of 5 stars (152 Customer Reviews)
Extremely quiet, aerodynamic crossbars attach to Yakima towers to create a stylish roof rack for your vehicle. Rubber strips in T-slots push down to load carriers or accessories - no need to trim. Full-length aluminum bars maximize carrying capacity.by: TimN03/19/2024
Chevrolet Silverado
Excellent solution for my 2023 Chevy Silverado. In the past, I have had rails installed on the roof of my pickup trucks, but I find the BaseLine towers to be a better solution, since they don't permanently change the truck. Plus, they are much more solid than SkyLine system on the rails.
by: 04/01/2024
Follow the instructions, and you can't go wrong on the self installation
by: Paul06/01/2023
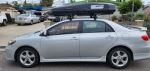
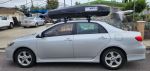
2018 Toyota Corolla
Yakima Baseline with Yakima CBX 18 Cargo Box fitted on my 2012 Toyota Corolla S Sedan 2012.
Instructions were clear and roof rack was easily installed.


by: Todd06/24/2023
Really easy to install & work as specified. So happy with the customer support/service at etrailer.


by: John 09/06/2023
Your notice of schemes was a lot better than the yakima site provided. They did not suggest the scheme you did.
But when the products arrived, the instructions were by yakima. Generally worked as instructed except the tower to tower transverse mounting dimensions needed to be tweaked for a perfect fit.
by: Dave02/11/2024
Love my Yakima roof rack!! It exceeds my expectations.great product. Also thank etrailer for the tec support! great staff always there to help thanks again!!
by: William02/28/2024
You guys provide great products and excellent customer service.
Thanks
by: Paul08/16/2023
Ackage came 2 days early the install was somewhat easy (did it by myself)
Did not get to mount anything to it but seems really sturdy. One thing I can say is mark out your mounting points with provided stickers then put up and make adjustments to the roof rack.
by: MB07/12/2021
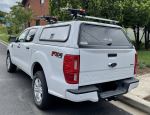
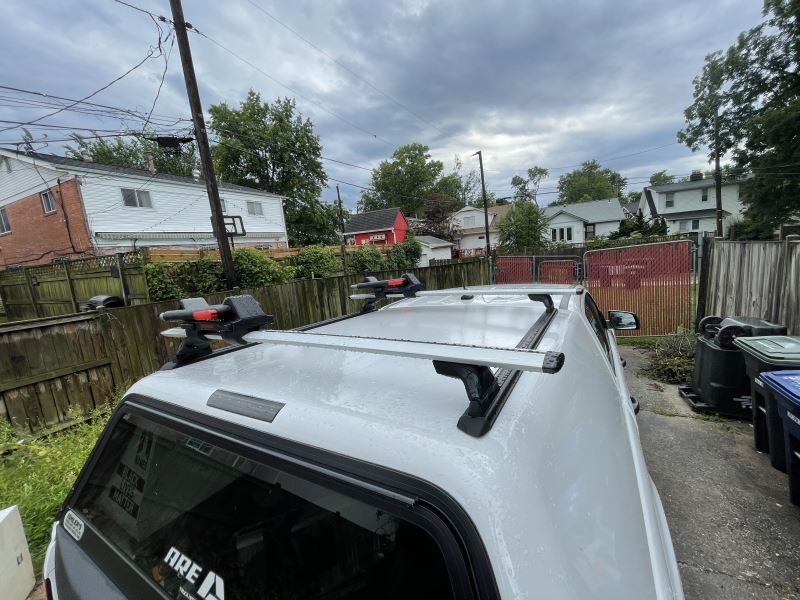
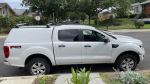
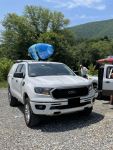
2019 Ford Ranger
The 50” jetstream cross bars were perfect for my 2019 Ford Ranger with my ARE cap. They are paired with the Yakima Skyline towers and appropriate landing pads (protip: call etrailer when you order to ensure you have the correct setup;)
These cross bars are SILENT on my cap. Zero wind noise. My daughter and I installed them on a Friday (I do recommend watching etrailer’s installation video in addition to the paper instructions) and left for a 700 mile weekend road trip the next day to pick up a kayak, paddle with friends downstate then drop her off at summer camp.
Even with empty Yakima Jaylows on top, no wind noise. Even with a boat in the Jaylows, no wind noise.
These are the sweetest rack’s I’ve had. With the Skyline towers and landing pads, they are also easy to take off and put on. Click click done.
They look good, too;)
etrailer customer service for the win, too. When I originally ordered, I did not order all the items I needed for installation. When I realized this, I called and they got me squared away.


by: James08/10/2019
2019 Subaru Forester
I’m using these towers in conjunction with the JetStream cross bars. Assembly and setup was easy, all the tools you need are provided, except perhaps a tape measure for mounting. Looks and feels solid and well made. This is my second set of Yakima towers and cross bars. I plan to use this setup for an old roof top hard shell case and for my mountain bike to get to the trail head.
After completing the installation I took it out for a spin to check for wind noise at highway speeds. No discernible noise, I’m very happy about that as I really don’t want to remove these when not needed. For reference these are mounted on a 2019 Subaru Forester Touring with factory raised rails. Plenty of clearance for attaching equipment and gear.
Side note: the gentleman that assisted me on the phone while ordering was very pleasant and helpful, got me the right products very quickly as I was in a time crunch. Two thumbs up!


by: Ian 07/02/2023
Mazda
Solid build quality and easy installation on my '21 Mazda CX-5.
by: Richard R02/20/2023
GMC Canyon
So far so good. Purchased these towers to use on a 2022 GMC Canyon with HD bars that I already had, primarily to carry my canoe. Yakima's fitting instructions worked perfectly and the whole system seems really solid.
by: Jason04/10/2023
They do the job but have loosened up and needed readjusting a couple times over the almost 20,000 miles we’ve put on them since installing. Overall, good, just check periodically for loosening.
by: Roland01/08/2024
Well packaged and on time
by: Duane05/17/2023
Perfect fit for our car, much better than any OEM rack I've ever seen.
by: Ginger05/22/2019
Great product - very good quality. I liked the fact that I could keep the risers mounted on my car, but could remove the cross bars. It took me awhile to install - but I'm not very mechanically inclined.


by: Earl07/28/2022
Volvo Cross Country
Yakima towers and crossbars were solid and easy to install with the very well written instructions. We used them on 2 cross country trips with any loosening. They were easy to remove. We plan to use them again as the need arises.
by: Richard06/28/2017
Honda
etrailer installation videos were very helpful in selecting the product and first installation, although in practice, minor adjustments to method were required. Now after more than a dozen set ups, mounting the crossbars takes 15 minutes, and taking them off, 10. The system is well made, and when mounted, precise, strong, and reliable. Expensive perhaps compared to alternatives, but well worth the money. Used to carry a 50# sailboard 40 miles to the beach on weekends. ('11 Honda Fit)
One minor shortcoming: rubber sheet glued to base clips where they touch the car body have torn and moved sideways 1/16", but expect will be easily replaced with readily available 1/16" sheet rubber (e.g., shower pan liner) when the time comes.
Used in rain at least once, (sustained 60mph), with no leaks.
by: Leslie 02/10/2023
Roof rack parts were ordered correctly and shipped quickly.
by: Beyhan A.02/21/2019
2018 Honda Ridgeline
I needed crossbars for my new 2018 Mazda CX5, which came with flush side rails. The Yakima crossbars, along with the RidgeLine Towers and the the vehicle specific kit worked great. The installation (10-15 min) is super easy. They look cool, and performed great (I strapped 160-lbs rooftop tent on them!). Removing them is also super easy (10 min tops). Highly recommend.
by: Mike06/20/2018
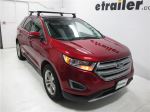
2017 Ford Edge
Very happy with the Yakima roof top rack kit for my 2017 Ford Edge with glass roof. The instructions were a little confusing at first, but after reading through them a couple of times while working with the product they became much clearer. The Yakima fit site was helpful as well. After the initial cross bar mounting measurements and set up, attaching and detaching the racks from the roof is a very simple process.
by: Phillip09/29/2021
Because of the 'rona-induced supply chain interruptions, I was unable to purchase all of my Yakima components from etrailer, but I did get these, and they are typically excellent Yakima components. Well-made, easy to install, good directions, no problems.
by: Todd 06/24/2023
Look great & perform outstanding. Would recommend this product to anyone where applicable.
by: Bruce06/12/2019
I chose the Yakima roof rack, because It spanned 50 inches, rather than the leading competitor's 47 inches, making it better for tying down 4 ft x 8 ft sheets of building material. It also seemed to be about half the price. It took me about 2 hours to put it all together and mount it on my car. The instructions were all visual and there was one little pic I didn't understand, but the equipment seemed to go together correctly anyway. Now that it's adjusted, it should be fairly easy to remove and replace next time. I did need to put on super tacky gloves to get the covers off. Although it seemed unnecessarily complicated, I would still choose this product again.
by: Ivars07/04/2020
Yakima Jetstream cross bars.. nice bars worth the extra money. can be adjusted for pitch/angle of attack to "tune" the air profile.. mine have absolutely no high speed wind noise or whistling.. rubber weather strip underneath further smoothes the bar profile.. quietest roof rack system I have ever owned..
25
785
Show More Reviews
See what our Experts say about this Yakima Roof Rack
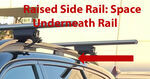
- How to Determine Correct Roof Rack For 2024 Kia TellurideI'm going to go ahead and respectfully disagree that we're idiots, Paul. I'm confident we can figure out the combination for a roof rack on your 2024 Kia Telluride, and there are three possible options Kia has for your roof - flush-mounted rails, raised side rails, and a bare roof. I made some diagrams below showing test fits on a Kia Telluride with photos from the nice folks at Yakima so you can see the difference (please note these are just test fit photos, and not exactly how the rack...
view full answer...
- Yakima Roof Rack Fit For 2024 Subaru Outback WildernessSure can; I checked with Yakima and the correct parts for a Yakima roof rack on your 2024 Subaru Outback Wilderness are the following: - Yakima JetStream Crossbars - Silver # Y00428 or Black # Y00425 - TimberLine Towers for Yakima Crossbars # Y33TR I also recommend protecting your investment by adding locks to secure the rack; you can do this with the Yakima Same Key System (SKS) Lock Cores # Y07204.
view full answer... - Best Roof Rack For 2025 Toyota Corolla Cross WIth Bare RoofThe best roof rack for your 2024 Toyota Corolla Cross with a bare roof is from Yakima, and consists of the following part numbers: - Yakima JetStream Crossbars - Silver # Y00428 or Black # Y00425 - BaseLine Towers # Y28TR - BaseClip Fit Kit # Y06153 - BaseClip Fit Kit # Y06154 I really like the Yakima brand due to how quiet the bars are; they have what are called "WindRidges" on top that control the flow of the air both over and under the bar, which minimizes both vibration of the...
view full answer... - Can I Put 70" Yakima JetStream Bars On A 2024 Kia Niro PHEVYou absolutely can put your Yakima JetsStream bars on your 2024 Kia Niro PHEV with factory flush rails. To do so you will need the following parts: SightLine Towers for Yakima Crossbars # Y64AR SightClip Fit Kit for Yakima SightLin3 Towers # Y27AR Since the mounting channel on the Yakima crossbar runs the full length of the bar, you can mount virtually any size crossbar on your roof. That said, we recommend a 50" bar # Y00428 for the Kia Niro. So while your 70" bars will still fit, there...
view full answer... - What Roof Rack and Cargo Box For My 2020 Jeep Grand Cherokee?For your 2020 Jeep Grand Cherokee with black/chrome flush factory rails, I recommend installing the reliable Yakima JetStream Crossbars - Aluminum - Silver - 50" Long - Qty 2 # Y00428. In order to install these, you will also need Towers # Y53TR and Landing Pads # Y00244. The weight capacity is 165lbs, but you will want to verify that your vehicle roof can handle that much weight (owner's manual). As far as the cargo box, you will be able to accommodate the largest size we offer and still...
view full answer...
- Recommended Roof Rack for a 2020 Toyota Yaris HatchbackI am sorry we do not have a hitch that will fit the 2020 Toyota Yaris Hatchback. We do have options to add a roof rack to your car so long as you do not have any roof rails. I recommend the roof rack by Yakima which includes the following parts: Yakima JetStream Crossbars - Aluminum 50" Long - Qty 2 item # Y00425 in Black or item # Y00428 in Silver BaseLine Towers for Yakima Crossbars - Naked Roofs - Qty 4 item # Y28TR BaseClip Fit Kit for Yakima BaseLine Roof Rack Towers - Qty 2 item...
view full answer... - Recommended Roof Rack for a 2024 Mazda CX-50 w/ Flush Rails To add a roof rack to a 2024 Mazda CX-50 with flush rails, I recommend the roof rack by Yakima which includes the following parts: Yakima JetStream Crossbars - Aluminum - 50" Long - Qty 2 item # Y00425 in Black or item # Y00428 in Silver SightLine Towers for Yakima Crossbars - Flush Side Rails - Qty 4 item # Y64AR SightClip Fit Kit for Yakima SightLine and RidgeLine Roof Rack Towers item # Y27AR This aero bar roof rack system has a 165 lbs capacity. I recommend adding the Yakima Same...
view full answer... - Recommended Yakima Roof Rack For A 2023 Acura MDX Yes, we do have a roof rack available that will fit your 2023 Acura MDX. This roof rack consists of the following parts: Crossbars - Yakima Jetstream 50' # Y00428 Towers - Yakima SightLine # Y64AR Fit Kit - # Y49AR It is also recommended (but not required) to get locks for the roof rack for added security. If you are interested you will want part # Y07204. This will be everything you need to be able to mount your Yakima Skybox 12 # Y07334 to your roof. Please keep in mind that for the...
view full answer... - Is The Malone FoldAway Carrier Compatible With Subaru Outback Factory Crossbars From what I can find in the online owner's manual Subaru just doesn't want you exceeding 150lbs with the factory crossbars, which is same capacity for the Malone FoldAway-5 Kayak, Canoe, and SUP Roof Rack # MAL38FR that you were looking at. They aren't really descriptive with the shape or dimensions of the factory crossbars so you'll want to ensure that they fall within the requirements of the # MAL38FR, which I have pictured below. If your crossbars fall outside of these requirements...
view full answer...
- Does Yakima Roof Rack For 2013 Toyota Prius Require Professional InstallI would tell them they could do it and not to bother with spending money to go to a mechanic or the dealer. Do you have a measuring tape of some sort? If so, that's it regarding the needed tools to install the Yakima rack on your 2013 Toyota Prius. So no tools are needed, it's light as a feather, and all you have to do is some measuring to get it installed. I am 1000% confident this is something you can do on on your own in about 30 minutes without any assistance. The correct fit for the...
view full answer... - Recommended Crossbars and Towers for a 2016 Ford Expedition The SportRack Vista XL Cargo Box - Roof Mount - 18 cu ft # SR7018 is not a vehicle specific fit, but rather crossbar dependent. As long as you have round, square, aero, elliptical, or factory crossbars on your Expedition, this'll fit. If not, you can add a set of Yakima JetStream Crossbars # Y00428 with the TimberLine Towers for Yakima Crossbars # Y33TR to your vehicle so the SportRack Vista can be attached.
view full answer... - Roof Rack Recommendation for 2024 Kia Niro EVHey William, for your 2024 Kia Niro EV I would recommend the flush bar roof rack from Yakima that consists of part numbers # Y53UV and # Y27AR. This will give you a really well made roof rack that is very quiet and looks OEM. If you prefer a roof rack that has more crossbar space the Jetstream rack part numbers # Y00428 # Y64AR and # Y27AR would be a great option as well. The bars of this rack attach to the top of the feet of the roof rack instead of in between them like on the flush...
view full answer... - Recommended Roof Basket and Crossbars for a 2013 Volkswagen GLIFirst for a set of crossbars on your 2013 Volkswagen GLI, I recommend going with the Yakima JetStream Crossbars # Y00428 with the BaseLine Towers for Yakima Crossbars # Y28TR, and the BaseClip Fit Kit for Yakima BaseLine Roof Rack Towers # Y06137 & # Y06126. These crossbars are going to work with your Volkswagen's naked roof, measure 50" long x 2-3/4" wide x 1-1/8" tall, and has a dynamic weight capacity of 165 lbs. For a roof basket, I recommend going with the popular Thule Canyon XT...
view full answer... - Roof Rack Recommendation for Bike Rack and Cargo Box on 2022 Toyota Corolla Cross with Naked RoofThanks for reaching out! For your application we'll need to stick with the Yakima JetStream system since Thule doesn't have a fit for your 2022 Toyota Corolla Cross naked roof at this time (January 2023). The 50" JetStream crossbars will be a great size for fitting both the Thule FastRide Roof Bike Rack # TH95JV and Thule Force XT Sport Rooftop Cargo Box # TH6356B. Here are the parts you'll need for the complete roof rack system: 50" JetStream Crossbars - Black # Y00425 or Silver # Y00428 BaseLine...
view full answer... - What Length Yakima Jetstream Crossbars for 2021 Mazda CX-5Yes you can use 60 inch Jetstream bars # Y00426 on your vehicle. Normally the 50 inch part numbers # Y00428, # Y64AR, # Y39AR are recommended for your 2021 Mazda CX-5 but since the mounting channels on the bottom of the Jetstream bars run the full length you can go with a longer bar.
view full answer... - Yakima Aero Roof Rack for 2022 Mazda CX-5 with Flush RailsYakima has their JetStream roof rack part numbers # Y00428, # Y64AR, # Y39AR that fit the flush rails of your 2022 Mazda CX-5. This does connect to your roof using the door mounts though but there isn't a different style of rack available.
view full answer... - What Crossbars Fit My 2022 Hyundai Palisade with Flush Rails?For your 2022 Hyundai Palisade with flush roof rails, I recommend the reliable and attractive Yakima Jetstream crossbars. You will need the following parts: Yakima crossbars: # Y00428 Yakima towers: # Y64AR Yakima fit kit: # Y79AR The weight capacity is 165lbs, but you'll want to verify the weight rating of your vehicle's roof by checking the owner's manual.
view full answer... - Does Thule Force XT XL Rooftop Cargo Box Fit Yakima Roof Rack on 2023 Acura MDXYes, the Thule Force XT XL # TH6358B will fit very easily on the Yakima roof rack for your 2023 Acura MDX. There won't be any issues with the fit of your cargo box on this rack it will fit perfectly so you can continue to use it. The only thing you need to do is pick the right Yakima rack for your '23 MDX, depending on if it has a bare roof or flush-mounted rails. Bare Roof - Yakima JetStream Crossbars - Silver # Y00429 or Black # Y00426 - BaseLine Towers # Y28TR - BaseClip Fit Kit # Y06163...
view full answer... - Best Roof Rack For 2024 Subaru Impreza HatchbackThe best roof rack for your 2024 Subaru Impreza hatchback with a naked roof is from Yakima due to how quiet it is as well as its durability. The roof rack that fits your Impreza is made up of the following parts: - Yakima JetStream Crossbars - Silver # Y00428 or Black # Y00425 - SightLine Towers for Yakima Crossbars # Y64AR - Landing Pad 22 for Yakima Towers # Y00248 The JetStream bars are quiet because have what are called "WindRidges" on top that control the flow of the air both over...
view full answer... - What Crossbar System Do I Need to Mount a Thule Motion XT # TH629706 to MY 2019 Subaru Outback?For a compatible roof rack system that will work with Thule cargo boxes like the Thule Motion XT Rooftop Cargo Box - 16 cu ft - Black Glossy # TH629706 on your 2019 Subaru Outback Wagon with raised factory rails, I recommend the following parts: - Yakima JetStream Crossbars - Aluminum - Silver - 50" Long - Qty 2 # Y00428 - SkyLine Towers for Yakima Crossbars - Fixed Mounting Points, Flush Rails, and Track Systems - Qty 4 # Y53TR Landing Pad 15 for Yakima SkyLine and Control Towers - Qty...
view full answer... - Which Yakima BaseClip is Front and Which is Back for the 2014 Chevy ImpalaThe Yakima JetStream roof rack that fits your 2014 Chevy Impala includes the following parts: 50" Yakima JetStream Crossbars - # Y00428 BaseLine Towers - # Y28TR Front BaseClip - # Y06124 Rear BaseClip - # Y06126 Lock Cores - # Y07204 (optional) I listed which clip should be in which position above but if I hadn't told you this, you can find these fitments in the instructions or on the Yakima website. Attached are some videos for you to check out!
view full answer... - Roof Rack For 2018 Toyota Highlander w/ Flush Mount Rails For Rooftop TentWe have a roof rack and rooftop tent for your 2018 Toyota Highlander with flush mount rails, though the crossbar spread on your Highlander is set at 27-1/2 inches. The reason for that is roof racks install at fixed mounting points on the rails, which means a tent requiring a larger spread won't work. That said, there is still a really nice option for a rack and tent for your '18 Highlander, and let's go ahead and start with the rack you'll need, which is from Yakima: - Yakima JetStream...
view full answer... - Parts Needed To Install Roof Rack On a 2023 Toyota Corolla CrossHere is a list of the parts needed to install a Yakima JetStream roof rack on your 2023 Toyota Corolla Cross. Yakima JetStream Crossbars - Aluminum - Silver - 50" Long # Y00428 BaseLine Towers for Yakima Crossbars - Naked Roofs # Y28TR BaseClip Fit Kit for Yakima BaseLine Roof Rack Towers # Y06154 BaseClip Fit Kit for Yakima BaseLine Roof Rack Towers # Y06153 You can add the Yakima Same Key System # Y07208 to lock your roof rack to your Toyota. This kit included 8 lock cores, four of...
view full answer... - Roof Rack Recommendation for 2007 Honda AccordWhile we don't have a Thule roof rack available for your 2007 Honda Accord we have the very similar quality Yakima JetStream roof rack part numbers # Y00428, # Y28TR, # Y06159, # Y06143 that is a fit. Yakima and Thule are both widely considered to be the nicest roof racks out there so this rack would be a really great option.
view full answer... - Bike Rack Recommendation for 2020 Genesis G70 with 2 Carbon Fiber BikesThe trunk mount bike rack options for a 2020 Genesis G70 are all hanging style racks and while these will technically get the job done, since you have carbon fiber bikes you want to avoid using a bike rack that will be in contact with your bike frames. Normally I would say go with a trailer hitch and a hitch mount bike rack because they are more cost-effective and easier to use, but there are no trailer hitches that fit your 2020 Genesis G70 so you'll want to go with a roof rack and a...
view full answer... - Roof Rack and Kayak Carrier for a 2017 Ford F-150 with Panoramic RoofYakima has a roof rack option that will fit models of the 2017 Ford F-150 that have the panoramic roof. Keep in mind though they state not to open a sunroof or panoramic roof because they may interfere with some accessories. If you have a Super Crew Cab or SuperCab you can use bars # Y00426, BaseLine towers # Y28TR, and 2 sets of clips # Y06122. There isn't an option for the regular cab (if the panoramic roof was even an option for the regular cab models). A popular kayak carrier that...
view full answer... - Roof Rack with 60-Inch Crossbars for 2013 Hyundai Santa Fe SportThe Rhino-Rack 54-inch roof rack setup you referred to, parts # RRVA137B-2 and # RRSX032, is what Rhino-Rack recommends for your vehicle. My contact there said the 60-inch Vortex bars will not work on your car, but we do have other Aero style racks from Yakima with 60-inch bars that do fit well on the car. All such roof racks appear on the linked page. For a silver 60-inch crossbar rack for the Santa Fe Sport with flush mounted rails that run front to back use parts # Y00426, # Y64AR and...
view full answer... - Recommended Trailer Hitch Receiver for 2015 Lexus IS 250 for a Bike Rack and Light TrailerI recommend the Draw-Tite trailer hitch receiver, part # 24923, for your 2015 Lexus IS 250. It's confirmed to fit both the sedan or convertible models. The hitch is a Class I, 1-1/4 inch receiver so you need to make sure the bike rack you use fits the Class I. The bike rack I recommend is the very popular Thule T2 Pro XTR, part # TH23JV. The T2 is a platfrom rack that carries up to 2 bikes at 50 pounds each. it can be folded up out of the way when you're not using it as well as tilted...
view full answer... - Recommended Roof Rack to Fit 2 Sets of the Thule Hullavator on a 2013 GMC TerrainSince the Thule Hullavator Pro Kayak Carrier # TH898 requires about 31" of crossbar space, the 53" WingBar Evo bars # TH711400 that you referenced are not long enough to accommodate it. The Thule aero bars also have limited mounting space on the underside so you wouldn't be able to go with larger crossbars but we do have an alternative solution for longer crossbars. Yakima has their JetStream bars which are comparable to the WingBar Evo bars and they have a strip that runs the full length...
view full answer... - Do Yakima JetStream Crossbars Fit a 2015 Lincoln MKX with Panoramic RoofActually, the Yakima JetStream roof rack has been confirmed to fit your 2015 Lincoln MKX with the panoramic roof. You may not be able to open the roof depending on how much clearance there is between it and the bottom of the crossbars or the mounting hardware of anything on the crossbars. So use caution once you have the rack on our Lincoln. You need the 50 inch JetSreams # Y00425 in black. Along with the BaseLine towers, part # Y28TR, and BaseClips, part # Y06180.
view full answer... - Roof Rack and Surfboard Carrier Recommendation for 2016 Jeep Grand CherokeeFirst you'll need a roof rack installed on your 2016 Jeep Grand Cherokee if your vehicle does not have one already from the factory. You need crossbars that run from left to right on the roof for a surf board rack to install. So you'll need to look at the rails on the roof of your vehicle that run front to back. If there is a chrome center section on the rail then you have the E Group style rails and you'd want the Yakima roof rack part numbers # Y00421, # Y53TR, and #Y00244 which is an...
view full answer... - Roof Rack Recommendation for 2015 Hyundai Sonata with Panoramic RoofYakima has roof racks for your 2015 Hyundai Sonata Limted that include the panoramic roofs like what you have. So for that you could use the Jetstream Crossbar kit # Y00426, # Y28TR, # Y06137, and # Y06127 and you'd be set.
view full answer... - What Roof Rack do You Recommend for a 2020 Hyundai Palisade with a Bare Roof?Fortunately, we do carry roof rack systems that are compatible with your bare roof on your 2020 Hyundai Palisade. For this system, I recommend the following parts: - Yakima CoreBar Crossbars - Steel - Black - 60" Long - Qty 2 # Y00422 - BaseLine Towers for Yakima Crossbars - Naked Roofs - Qty 4 # Y28TR - BaseClip Fit Kit for Yakima BaseLine Roof Rack Towers - Qty 2 # Y06145 - BaseClip Fit Kit for Yakima BaseLine Roof Rack Towers - Qty 2 # Y06138 - (Optional for extra security) Yakima...
view full answer... - HD Yakima Roof Rack that Fits 2021 Kia TellurideThe Yakima HD Roof Rack that fits your 2021 Kia Tulluride part numbers # Y01157, # Y28TR, # Y03541, # Y06125, # Y06165 gives you a 60 inch crossbar roof rack which would be enough to fit all of the roof top accessories you mentioned because of the length and the top channel. Some of that depends on the width of the cargo box but I don't believe it would be an issue. The Yakima SkyBox 16 part # Y07335 would work great and is 36 inches wide. The bars are a heavier duty option but are still...
view full answer... - Picking Between 50 and 60 inch Yakima Jetstream Roof Racks for 2021 Kia TellurideGoing with a longer crossbar does give you more space to mount roof accessories and carriers but the longer bars do tend to get in the way a little more and create a little more wind noise. So really it comes down to considering how many things you plan to carry on the roof rack and how wide they might be. Now that said the 60 inch Jetstream rack Yakima offers part numbers # Y00426, # Y28TR, # Y06125, and # Y06165 is the correct rack for if you have a naked roof and the 50 inch rack part...
view full answer... - What Do I Need to Mount a Cargo Box on a 2020 Hyundai Palisade?In order to have a cargo box on your 2020 Hyundai Palisade, you will need a roof rack system with crossbars in order for you to mount the box and cargo. Compatible systems depend on whether your vehicle has a bare roof or flush factory side rails. If your vehicle has a bare roof, I recommend the following parts: - Yakima CoreBar Crossbars - Steel - Black - 60" Long - Qty 2 # Y00422 - BaseLine Towers for Yakima Crossbars - Naked Roofs - Qty 4 # Y28TR - BaseClip Fit Kit for Yakima BaseLine...
view full answer... - Does Same Yakima CoreBar Roof Rack Fit 2017 and 2020 Ford F-350Yes the Yakima CoreBar Roof Rack part numbers # Y00422, # Y28TR, and # Y06185 is a confirmed fit for both a 2017 and a 2020 Ford F-350 crew cab.
view full answer... - Roof Rack Recommendation for 2016 Honda Pilot With Bare RoofWe don't offer any aftermarket side rails for your 2016 Honda Pilot, but you can still install a roof rack. Since your Pilot doesn't have the roof rails, you'll need a Yakima roof rack system for a bare roof that clamps to the inside top of the door jambs. This is a very effective mounting system that will work perfectly for your Pilot. The most cost-effective rack uses round crossbars, you'd use the following parts: Yakima Round 58 inch crossbars, part # Y00409 Yakima BaseLine towers,...
view full answer... - Recommended Roof Rack for a 2024 Acura MDX w/ No RailsI would be happy to help you! To add a roof rack to your 2024 Acura MDX, I recommend the roof rack by Yakima which includes the following parts: Yakima JetStream Crossbars - Aluminum - Black - 60" Long - Qty 2 item # Y00426 BaseLine Towers for Yakima Crossbars - Naked Roofs - Qty 4 item # Y28TR BaseClip Fit Kit for Yakima BaseLine Roof Rack Towers - Qty 2 item # Y06163 BaseClip Fit Kit for Yakima BaseLine Roof Rack Towers - Qty 2 item # Y06178
view full answer... - Can I Use Shorter Bars With 2020 Kia Telluride LX Yakima Roof RackYes, you can use the 50" Yakima JetStream bars part # Y00425 on the 2020 Kia Telluride LX with a naked roof. The 60" bars part # Y00426 are recommended by Yakima but it is possible to use the 50" bars if you would like to. I do agree that the 70" bars look too long for the Telluride. You can use the 50" JetStream bars part # Y00425 with BaseLine Towers for Yakima Crossbars part # Y00146, fit kit part # Y06125 with part # Y28TR. You could also use the 60" bars part # Y00426 with the same...
view full answer... - Roof Rack that Fits 2019 Kia Forte with Naked RoofYakima has a roof rack that fits your 2019 Kia Forte with the Jetstream rack part # Y00426, # Y28TR and # Y06175 but the Rola rack you mentioned would not fit.
view full answer... - Roof Rack for 2016 Jeep Grand Cherokee to Carry Ladder RackFor carrying ladders the Yakima HD bars are a really great option as they have a higher weight capacity and a more rugged design while still being aerodynamic. For that there are a few options based on the roof style of your vehicle. If you have a totally naked roof or have black matte flush rails you'd need the part numbers # Y01157, # Y28TR, # Y03541, and # Y06121. Or if you have black and chrome rails you'd want # Y01156, # Y53TR, # Y03541, and # Y00244.
view full answer... - Which Yakima Roof Rack Components are Needed for 2011 Honda FitSince you have a Q tower roof rack the fit kit you would need is the now discontinued Q99 clips. The fit kit you found on our site # Y06143 is correct but it's for the current style of Yakima roof rack that is still supported. The complete parts list needed for the 2011 Honda Fit now is # Y00408, # Y28TR, # Y03536, and # Y06143.
view full answer... - Best Roof Rack for 2020 Toyota Highlander with Naked RoofIf this were my 2020 Toyota Highlander the roof rack I would put on it would be Yakima because it will give you a larger amount of crossbar space than most racks so you can hold the most gear, it is extremely quiet, highly durable and looks fantastic. The rack that fits your 2020 Toyota Highlander with a naked roof is made up of the following parts: - Yakima JetStream Crossbars # Y00426 - BaseLine Towers for Yakima Crossbars # Y28TR - BaseClip Fit Kit # Y06153 and # Y06132 - Same Key System...
view full answer... - Does Yakima Jetstream Roof Rack Fit 2018 Ford Fiesta HatchbackYes, we have confirmed with Yakima that the Jetstream roof rack part numbers # Y00425, # Y28TR, and # Y06148 is a confirmed fit for your 2018 Ford Fiesta Hatchback. I attached a picture of the rack installed on a similar Fiesta as yours for you to check out as well.
view full answer...
- Recommended Roof Rack for 2020 Jeep Grand Cherokee High Altitude with Flush Mounted RailsThe Yakima Roof Rack Kit for a 2020 Jeep Grand Cherokee that uses parts # Y00426, # Y28TR and # Y06121 is a great choice and I don't think you can ever go wrong with Yakima products; they're durable and easy to install. The Baseline Towers # Y28TR and landing pads # Y06121 will clamp onto your flush mounted rails easily, like the dealer mentioned. This rack has 60" Jetstream bars that are aerodynamic and will provide you with a ton of useable bar space, so it's just a great all around roof...
view full answer... - Roof Rack For 2021 Nissan Murano With Naked Roof For Thule HullavatorWe can get your 2021 Nissan Murano with a naked roof set up with a roof rack so you can use the Thule Hullavator Pro Kayak Carrier # TH898. What you will need is a roof rack from Yakima, and I verified the exact parts that will fit your '21 Murano, which are the following: - Yakima JetStream Crossbars # Y00425 - BaseLine Towers for Yakima Crossbars # Y28TR - BaseClip Fit Kit # Y06138 - BaseClip Fit Kit # Y06126 This will allow you to carry and use the Hullavator with ease, and gives...
view full answer... - How to Determine Correct Roof Rack For 2024 Kia TellurideI'm going to go ahead and respectfully disagree that we're idiots, Paul. I'm confident we can figure out the combination for a roof rack on your 2024 Kia Telluride, and there are three possible options Kia has for your roof - flush-mounted rails, raised side rails, and a bare roof. I made some diagrams below showing test fits on a Kia Telluride with photos from the nice folks at Yakima so you can see the difference (please note these are just test fit photos, and not exactly how the rack...
view full answer... - Recommended Roof Rack For 2016 Ford Edge With Glass RoofWe do have a roof rack that will fit your 2016 Edge with the glass roof. I recommend the Yakima JetStream roof rack. This roof rack has Black aluminum aerodynamic crossbars that have WindRidges to help reduce wind noise and vibration. The weight capacity for this roof rack but you do not want to exceed the roof weight capacity of your vehicle roof. I have attached a photo that shows how the roof rack looks when installed on the roof of a Ford Edge. To order this roof rack you will need...
view full answer...
- Roof Rack Recommendation for 2017 Ford Edge with Panoramic SunroofWe have a variety of roof rack options that fit your 2017 Ford Edge with the glass roof but I really like the Yakima JetStream system because it's fine-tuned to fit your vehicle like a glove and keep the crossbars level with each other. The correct parts will depend on if you have the flush rails or a naked roof. Flush Rails 50" JetStream Crossbars - # Y00425 SightLine Towers - # Y64AR SightClip Fit Kit - # Y79AR Naked Roof 60" JetStream Crossbars - # Y00426 BaseLine Towers - # Y28TR BaseClip...
view full answer...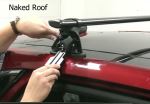
- Roof Rack Recommendation for a 2016 Ford Edge SportI attached a link to a page that has all of the roof rack fits we offer for the 2016 Ford Edge Sport with a naked roof. I really like the Yakima Corebar roof rack that consists of part numbers # Y00422, # Y28TR, # Y06102, and # Y06139. The aero shape of these bars will give you a quiet roof rack that will have a minimal affect on fuel mileage when compared to other racks.
view full answer... - Best Roof Rack for a 2018 Ford Edge with a Naked Roof and Panoramic Vista GlassSince your 2018 Ford Edge has a naked roof the type of roof racks we have available use a clamp style that fits into the door jambs. I recommend the Yakima JetStream system. The aero bars do a great job at reducing drag and wind noise. What sets these apart from other aero bars is the SmartFill strips in the t-slots. You don't need to cut the strips to get them to fit around channel mounted accessories. All you do is push down on the strips and slide the accessoy in. The JetStream...
view full answer...
- Recommended Roof Rack for 2016 Ford Edge Sport withI am happy to tell you that we do ship to APO addresses! If you let me know what rack you are interested in or what vehicle you are trying to outfit I'd be happy to help you out.
view full answer...
- Can the Yakima BaseLine Towers be Used to Carry a Thule Evolution 1600 Box on a 2015 Ford EdgeThe Thule Evolution 1600 cargo box that you referenced has been discontinued, but I spoke with my contact at Thule who was able to confirm some fits for me. The Evolution 1600 is compatible with Yakima round bars so the system that you will want to use includes the 48" CrossBars # Y00408, BaseLine Towers # Y28TR, RoundBar SL Adapter # Y03536, and BaseClip Fit Kit # Y06102. This roof rack doesn't come with locks but they can easily be added with part # Y07204 . If you already have the...
view full answer... - Yakima Roof Rack Recommendation for a 2016 Ford Edge with Panoramic Glass RoofThe Yakima roof rack you looked at, consisting of the JetStream # Y00426 60 inch crossbars, # Y28TR BaseLine Towers, # Y06102 and # Y06139 clip kits is compatible with your 2016 Ford Edge with the glass roof, according to Yakima. The feet will sit on the painted portion of the roof, not the glass. The Baseline rack part numbers # Y00421, # Y28TR, # Y06102, and # Y06139 are also a confirmed fit for the 2016 Ford Edge with a Panoramic Vista Roof. I attached an install picture for...
view full answer... - Roof Rack for a 2017 Ford Edge Titanium With Glass RoofYou can actually obtain a roof rack for a 2017 Ford Edge Titanium. According to my resarch the only real issues you may have are reduced capacity of 100 pounds and not being able to operate the opening or closing mechanism of the roof while the rack is installed. Your 100 pound capacity will include the weight of the rack, the weight of any accessories and any cargo loaded onto the vehicle. I would still exercise caution when loading accessories onto the roof rack, as there still is...
view full answer... - Yakima Roof Rack for 2016 Ford Edge w/ Panoramic Vista RoofI checked with Yakima and the Baseline rack part numbers # Y00421, # Y28TR, # Y06102, and # Y06139 that you referenced is a confirmed fit for the 2016 Ford Edge with a Panoramic Vista Roof. I attached a couple pictures that I got from their fit guide that shows that the smaller feet fit perfectly on the top of the metal of the roof and that is how they are able to fit the rack.
view full answer...
- Roof Rack Recommendation for a 2016 Ford Edge with Vista RoofI checked with Yakima and the Baseline rack part numbers # Y00421, # Y28TR, # Y06102, and # Y06139 that you referenced is a confirmed fit for the 2016 Ford Edge with a Panoramic Vista Roof. I attached a couple pictures that I got from their fit guide that shows that the smaller feet fit perfectly on the top of the metal of the roof and that is how they are able to fit the rack.
view full answer...
- What Roof Rack/Carrier Do You Recommend for Surfboards/Paddleboards on a 2021 Ford Edge?The great thing about having a naked roof on your 2021 Ford Edge is that you have the ability to mount an extremely secure roof rack system even without side rails. You will not need to install factory side rails in order to get the security you need. With that being said, I recommend the following roof rack system for your bare roof (with or without panoramic glass): - Yakima CoreBar Crossbars - Steel - Black - 60" Long - Qty 2 # Y00422 - BaseLine Towers for Yakima Crossbars - Naked...
view full answer... - Best Roof Rack and Kayak Carriers to Transport 2 Kayaks on a 2019 Ford Edge with a Glass RoofI have a great roof rack recommendation for you! It's the Yakima HD Crossbars, part # Y01157. These aero-style crossbars are 60" in length, so they will extend past the feet by about 5" on each side. Combine these with the BaseLine Towers, part # Y28TR, and the two BaseClips, part # Y06102 and # Y06139, to complete the roof rack setup. I've linked to a video review of the HD bars for you to look at. As for the kayaks carriers, there may not be enough room to lay two of them down flat...
view full answer... - Best Roof Rack Options for a 2015 Ford Edge with Glass Panoramic RoofYes, we have a few different roof rack systems that will fit your 2015 Ford Edge w/ the glass panoramic roof. For the popular roof rack I recommend the Rhino-Rack Vortex Aero Rack System, # RRVA137B-2 Vortex bars, # RRRLKVA 2500 Series Legs, and the # DK435 fit kit. This Rhino-Rack system has a 165 lbs capacity and aero bar design make the bars aerodynamic to help reduce wind drag and noise. The Vortex system also has a sleeker low-profile design that is aesthetically pleasing to the...
view full answer... - 2016 Ford EDGE Titanium Panoramic Sunroof Roof Rack RecommendationWe checked with Yakima and their Jetstream roof rack part numbers # Y00425, # Y28TR, # Y06102, and # Y06139 is a confirmed fit for your 2016 Ford Edge with the panoramic roof. This would be a great option that would fit perfectly so we highly recommend it.
view full answer...
- Compatibility of Yakima JetStream Roof Rack for 2016 Ford Edge w/ Panoramic Vista RoofThe Yakima roof rack you looked at, consisting of the JetStream # Y00426 60 inch crossbars, # Y28TR BaseLine Towers, # Y06102 and # Y06139 clip kits is compatible with your 2016 Ford Edge with the glass roof, according to Yakima. The feet will sit on the painted portion of the roof, not the glass so this is perfectly safe to use. If you let me know what you're needing to use the roof rack for I can make some recommendations for you!
view full answer... - Availability of Roof Racks to Fit 2016 Ford Edge with Panoramic Glass RoofWe actually do have a selection of roof racks that fit your 2016 Ford Edge with the panoramic roof. I have attached a link to our selection for you to filter through, but I'm pretty sure you have the naked roof (no flush mounted rails) so I recommend using the Yakima JetStream roof rack which consists of the following: 60" JetStream Crossbars - Black # Y00426 BaseLine Towers - # Y28TR Fit Kit - # Y06102 Fit Kit - # Y06139 Yakima actually has pictures showing this installed and the panoramic...
view full answer...
- Roof Rack Kit for a 2016 Ford Edge SELThere are roof racks available for 2016 Ford Edges without rails, and they can be installed at home without any special tools. I recommend Yakima's JetStream bars, which come as a kit that consists of: Yakima JetStream Crossbars, 50 Inches part # Y00425 Yakima BaseLine Towers, part # Y28TR Yakima BaseClip #102, part # Y06102 Yakima BaseClip #139, part # Y06139 Make sure to order both BaseClip #102 and BaseClip #139 as they are two separate kits, one for the front and one for the rear....
view full answer... - Yakima Jet Stream Bars for 2015 Ford Edge with Vista Roof Compatibility with Thule Kayak CarrierThe Thule kayak carriers like the Hull-A-Port # TH834 are compatible with the Yakima JetStream Crossbars like part # Y00425. These carriers can also utilize the crossbar channels if you use the Watersports Adapter # THXADAPT11. If you don't already have the Yakima roof rack system for your 2015 Edge with Vista Roof, I recommend the confirmed fit of: Yakima JetStream Crossbars 50" Long # Y00425 BaseLine Towers # Y28TR BaseClip Fit Kit # Y06102 and # Y06139 Lock Cores # Y07204
view full answer... - Parts Needed to Install Yakima Round Bar Roof Rack on 2021 Ford EdgeYes we have the parts needed to install a round bar Yakima roof rack on your 2021 Ford Edge that does not have rails or a glass roof. You'd need the following # Y28TR, # Y03536, # Y06102, and # Y06139 since you already have the # Y00409.
view full answer... - Parts Needed for Yakima Roof Rack on 2016 Ford Edge with Panoramic SunroofWe do have all the parts needed to install a Yakima roof rack on yoru 2016 Ford Edge with a panoramic sunroof, and the parts are all sold individually, the crossbars, towers, clips and locks (if you want to lock the rack to your car). Here is a list of the parts you will need: - Yakima JetStream Crossbars # Y00426 (Black) - BaseLine Towers for Yakima Crossbars # Y28TR - BaseClip Fit Kit # Y06139 - BaseClip Fit Kit # Y06102 - Same Key System Lock Cores (Optional) # Y07204 I have added...
view full answer... - Roof Rack Compatibility On A 2016 Ford Edge With Naked RoofI do have a roof rack option for you, however Thule does not currently make a roof rack system for your 2016 Ford Edge with existing naked roof. In order to attach a roof rack to your vehicle you may want to consider the Yakima CoreBar Crossbars Roof Rack park # Y00421, # Y28TR, # Y06102, and # Y06139. It has an aero style crossbar setup to ensure a quiet ride. I have attached an installation video for you.
view full answer... - Recommended Roof Rack For 2017 Ford Edge With Panorama Vista RoofThe BaseLine Towers for Yakima Crossbars - Naked Roofs - Qty 4, # Y28TR, the BaseClip Fit Kit for Yakima BaseLine Roof Rack Towers - Qty 2, # Y06102, and the Yakima JetStream Crossbars - Aluminum - Black - 50" Long - Qty 2, # Y00425, make up the roof rack system I recommend for your 2017 Ford Edge with no existing rails or crossbars. According to the Ford owners manual for this vehicle, this rack is limited to the factory specs for load capacity of 45 kg or 99.2 lbs. I've attached...
view full answer... - Recommended Roof Rack for 2018 Ford Edge with Moonroof and without Factory Side RailsFor your 2018 Ford Edge without the factory side rails and a moonroof I recommend taking a look at the Yakima JetStream roof rack system. This consists of # Y00425 for the two 50 inch long JetStream Crossbars, # Y28TR for the BaseLine Towers, # Y06102 for the Front Fit Kit, and # Y06139 for the Rear Fit Kit. This is confirmed to fit the naked roof of your vehicle and will work just fine with the moonroof. It has a 165 pound weight capacity. I have attached the written installation instructions...
view full answer... - Does the SportRack Horizon Rooftop Cargo Box Fit on the 2019 Ford Edge without a MoonroofThe SportRack Horizon Rooftop Cargo Box, part # SR7011, is designed to fit a variety of crossbars (including factory bars), so it will not be a problem fitting on your 2019 Ford Edge. If you do not have a roof rack and have no rails, I recommend the Yakima JetStream Crossbars, part # Y00426. They are aero-style bars that reduce wind drag and noise. To mount them, you will need the BaseLine Towers, part # Y28TR. You will also need the two fit kits, # Y06102 and # Y06139. I've linked to...
view full answer... - Does Same Yakima CoreBar Roof Rack Fit 2017 and 2020 Ford F-350Yes the Yakima CoreBar Roof Rack part numbers # Y00422, # Y28TR, and # Y06185 is a confirmed fit for both a 2017 and a 2020 Ford F-350 crew cab.
view full answer... - Recommended Roof Rack for a 2018 Ford F-350 Super Duty With a Naked RoofFor your 2018 Ford F-350 super duty with a naked roof, I recommend going with the Yakima BaseLine FX Roof Rack for Naked Roofs - JetStream Aero Crossbars # Y56UV with the fit kit # Y06185. This roof rack system will work great with your naked roof, has a maximum weight capacity of 165-lbs, and has integrated t-slots so you can use roof mounted accessories as well.
view full answer... - Are Yakima Jetstream Roof Rack Instructions for 2023 Ford F-350 Same as 2024 ModelsThe Yakima JetStream roof rack part numbers # Y00426, # Y28TR, # Y06185 that fits the 2024 Ford F-350 crew cab is the same as the 2023 models so the instructions are the exact same. So Jack, what that means is that the instructions were printed when the 23' model was the newest but it's definitely the same as the 24' models.
view full answer... - How To Transfer Crossbars From a 2019 Ford F-350 to a Leer 100RC TopperThe track systems are all pretty much universal so you can use Yakima accessories in Thule tracks or vice versa. In regards to weight, you will be limited to 165 lbs per set of crossbars no matter which system you choose as that is all the mounting feet can handle, even with the Yakima HD Crossbars System. The vehicle's roof would likely not be able to handle much more than this either. However, you can carry up to 330 lbs total but you would need to distribute the weight so that 165 lbs...
view full answer... - Half Roof Rack and Ladder Rack that Fits 2023 Ford F-350To do a half roof rack for the roof of your 2023 Ford F-350 you'd need the following: Yakima JetStream Crossbar part # 8880650 BaseLine Towers for Yakima Crossbars part # Y62TR BaseClip Fit Kit for Yakima BaseLine Roof Rack Towers part # Y06185 There isn't a way to do a half ladder rack so best option would be an adjustable height rack like the Yakima Overhaul # Y01151-5855 so that you can have it match the height of your roof rack and if needed you could leave off the rear (or front)...
view full answer... - What Roof Rack do You Recommend for a 2017 Lexus LS 460?I have an answer about your Rhino-Rack crossbar system. Unfortunately, I confirmed that Rhino-Rack does not make a crossbar system that is compatible to fit your 2017 Lexus LS 460. Since they do not have any roof racks for your vehicle, they do not manufacture compatible fit kits for the crossbars. Fit kits from other manufacturers do not work with Rhino-Rack crossbars because each company produces specific fitments for their feet/towers. Here at etrailer, we have never seen anyone custom...
view full answer... - Correct Yakima Roof Rack For 2018 Ford F-250 Crew CabOkay, we can get your 2018 Ford F-250 Crew Cab set up with the right Yakima roof rack, and let's start with your first question about the correct length bars. That is determined by the manufacturer when they test fit roof racks, which is how we know the correct length of crossbar for your truck are the 70 inch long bars. In regards to a disadvantage with the clips/clamp-on versus drilled on racks, there is no disadvantage at all. Really, the only reason someone might use a rack that that...
view full answer... - Can I Reuse Yakima Q Towers for 2021 Ford F-250In 2016, Yakima phased out their Q-Towers and upgraded to their new BaseLine system. That means for vehicles that are model year 2016 or newer, there are no confirmed Q-clip fits for them so we need to get you a new roof rack for your 2021 Ford F-250. If you want to reuse your round bars to make a roof rack on your F-250 Crew Cab, you can do so with a new BaseLine system. That consists of BaseLine Towers # Y28TR, a RoundBar Adapter # Y03536, and BaseClip Fit Kit # Y06185.
view full answer... - Can Two Thule Hullavator Kayak Carriers Be Used On A Thule TracRac SR Ladder Rack Yes, you can use two of the Thule Hullavator Pro Kayak Roof Rack and Lift Assist # TH898 on the Thule TracRac SR. It has plenty of capacity and space for both to fit, you'll just need to place the towers so that the crossbars are spaced 24" apart. For your 2022 Ford F-250 with a 6-3/4' bed you'll need part # TH43003XT-785 for the TracRac. The Thule Hullavator requires that the roof of the vehicle can hold at least 130lbs, but you'll be splitting this with the ladder rack. I'd just check...
view full answer... - Correct BaseClip Fit Kit for Yakima JetStream Crossbars on a 2024 Ford F-350 Crew CabFor your 2024 Ford F-350 Crew Cab using the Yakima JetStream Crossbars # Y00426 you're going to need the BaseClip Fit Kit for Yakima BaseLine Roof Rack Towers # Y06185 with the towers # Y28TR.
view full answer... - Recommended Set Up for 2017 Ford F-250 to Haul 4 White Water Kayaks.I have a set up that will work great for your 2017 Ford F-250 to haul 4 white water kayaks. For a roof rack for your truck I recommend the following components: -Yakima HD Crossbars # Y01158 -BaseLine Towers for Yakima Crossbars # Y28TR -HD Bar SL Adapter for Yakima BaseLine, SkyLine, TimberLine, and RidgeLine Towers # Y03541 -BaseClip Fit Kit for Yakima BaseLine Roof Rack # Y06185 To get your 4 kayaks strapped down safe and sound, I recommend the Rhino-Rack Nautic Stack Kayak Carrier...
view full answer... - Is There a Solution for a Roof Rack on My 2021 Ford F-250 that Doesnt Require Drilling?I have a great no-drilling solution for you. While the Rhino-Rack Heavy-Duty Bar Roof Rack for Camper Shells - Track Mount - Black - 59" Long # Y01-130B requires drilling, there are options for your 2021 Ford F-250 Super Duty crew cab that do not require any drilling. To go this route, you will need the following parts: - Round 66" CrossBars for Yakima Roof Rack System (QTY 2) # Y00410 - BaseLine Towers for Yakima Crossbars - Naked Roofs - Qty 4 # Y28TR - RoundBar SL Adapter for Yakima...
view full answer... - Parts Needed To Install Single Roof Rack Crossbar With Aero Fairing On a 2019 Ford F-250 As long as you have a crew cab or super cab the following parts will allow you to mount a AirScreen XT # TH22WV on the roof of your 2019 Ford F-250. Yakima JetStream Crossbar # 8880650 Qty 1 BaseLine Tower # 8880618 Qty 2 Fit Kit # Y06185 Qty 1
view full answer... - Adding A Roof Rack To A 2020 Ford F-350 Crew Cab For Additional Cargo Carrying CapacityYakima OverHaul HD Adjustable Truck Bed Ladder Rack - Aluminum - 500lbs - 68" Crossbars # Y01151-58 has an on-road capacity of 500lbs, off-road capacity of 300lbs, and static capacity of 800lbs. The correct roof rack for your 2020 Ford F-350 Super Duty Roof Rack by Yakima would be the following parts: Yakima HD Crossbars - Aluminum - Black - 60" Long - Qty 2 # Y01157. BaseLine Towers for Yakima Crossbars - Naked Roofs - Qty 4 # Y28TR. HD Bar SL Adapter for Yakima BaseLine, SkyLine, TimberLine,...
view full answer... - Is It Possible To Add One Crossbar To The Roof Of A 2019 Ford F-350 Super DutyAbsolutely! As long as your 2019 Ford F-350 Super Duty is a Crew Cab or Super Cab you can use the following parts to add just one crossbar to your truck: 60" Yakima JetStream Crossbar # 8880649 2 of the Replacement BaseLine Tower for Yakima Crossbars # 8880618 BaseClip Fit Kit # Y06185 I also recommend adding the Yakima Same Key System (SKS) Lock Cores # Y07202 which will lock the roof rack to your roof to deter theft. At this time there is not a roof rack system to fit the regular...
view full answer... - Roof Rack for 2020 Ford F-350 Super Duty to Carry Bike RacksFor a roof rack for your 2020 Ford F-350 Super Duty that would allow you to carry a lot of bikes you'd want to go with a rack that has a longer crossbar like our Yakima Jetstream Rack # Y00426, # Y28TR, and # Y06185 which is 60 inches long. Then you could use a roof bike rack like the Yakima HighRoad part # Y02114 which allows you to keep the front wheel installed on the bike. Space-wise you wouldn't be limited on how many bikes you could carry as most likely you'd run out of roof capacity...
view full answer... - Buying a Single Yakima HD Crossbar for a 2020 Ford F-250While we do not have a full kit for just one crossbar for your 2020 Ford F-250, I have compiled a list of the individual part numbers that make up the Yakima HD crossbars that are compatible with the SuperCab and CrewCab. For the crossbar itself, use part # Y95FR. It's the single bar, 60" long like the full kit. For the BaseLine Towers, use part # Y62TR. There are 2 in this kit. For the HD Bar SL Adapter, use part # Y03541. This, unfortunately, does not come in a quantity of 2, so you'll...
view full answer... - Roof Rack Fit for 2016 Hyundai Elantra GT With Panoramic SunroofI checked for you and there is a fit for a roof rack for your 2016 Hyundai Elantra GT with the panoramic glass roof (moonroof), which is from Yakima. I verified the fit with the manufacturer and roof rack consists of the following parts: - Yakima JetStream Crossbars # Y00425 Black - BaseLine Towers for Yakima Crossbars # Y28TR - BaseClip Fit Kit # Y06151 - BaseClip Fit Kit # Y06185 - Same Key System Lock Cores (Optional) # Y07204 This is going to give your '16 Elantra GT an easy to use,...
view full answer... - Can I Purchase a Half System of the 66 Yakima Round Crossbars?Yes, we do carry a option for a single Yakima Round Crossbar - 66" # Y8810025 for your 2020 Ford F-250 Super Duty (Super Cab). In addition to the crossbar, you will need two of the Replacement BaseLine Tower for Yakima Crossbars # 8880618, the BaseClip Fit Kit for Yakima BaseLine Roof Rack Towers - Qty 2 # Y06185, and two of the Replacement RoundBar SL Adapter for Yakima StreamLine Towers - Qty 1 # 8880641. With that being said, in order to transport a kayak or a canoe on the top of your...
view full answer... - Can 70 Inch Yakima JetStream Crossbars be Cut on 2021 Ford F-350 Crew CabWe have a similar option for you, but you do not want to cut or trim down the Yakima JetStream Crossbars # Y00427. Instead, there are different Yakima bars that are designed to be cut down if needed, called CoreBars. The 70 inch CoreBars, and rest of the parts needed for a Yakima roof rack on your 2021 Ford F-350 Crew Cab are the following: - Yakima CoreBar Crossbars # Y00423 - BaseLine Towers for Yakima Crossbars # Y28TR - BaseClip Fit Kit # Y06185 I do recommend considering locks...
view full answer... - Roof Rack for Roof Tent on a 2019 Ford F-450 Super Duty Crew CabWhile there are no roof racks that have a weight capacity of 400 lbs, I still believe we have a solution for your 2019 Ford F-450 Super Duty Crew Cab with the Yakima HD roof rack. This consists of the HD Crossbars # Y01157, BaseLine Towers # Y28TR, HD Bar SL Adapter # Y03541, and Fit Kit # Y06185. If you are looking to use a tent that has a 400 lb weight capacity like the Yakima SkyRise HD # Y07436 then you actually just need to make sure that the roof rack is rated for 165 lbs like the...
view full answer... - Yakima BaseClips Y06185 NeededYou need the BaseClip Fit Kit for Yakima BaseLine Roof Rack Towers - Qty 2, part # Y06185.
view full answer... - Roof Rack Recommendatio nfor 2018 Ford F-250 Crew Cab that is LeasedFor your 2018 Ford F-250 Crew Cab the Yakima Roof Rack part numbers # Y00422, # Y28TR, and # Y06185 would be a great solution as it is a confirmed fit and the fact that it does not permanently modify the roof of the vehicle it is installed on. So you'd be able to take the roof off when it's time to return the lease and no one would know the difference. The aero shape of these bars also helps cut down on wind noise which is a nice feature as well. I attached an install video for thist...
view full answer...
- Parts Needed to Install Yakima JetStream Crossbars on 2021 Ford F-250To install 60 inch Yakima JetStream # Y00427 aero-style crossbars on your Ford F-250, you'll need the # Y28TR BaseLine towers and the # Y06185 vehicle-specific fit kit.
view full answer...
Do you have a question about this Roof Rack?
Info for this part was:

Edited by:
Daron K

Written by:
Alex H
At etrailer.com we provide the best information available about the products we sell. We take the quality of our information seriously so that you can get the right part the first time. Let us know if anything is missing or if you have any questions.
Product Experts Available Now!
Call 1-800-940-8924
Thank you! Your comment has been submitted successfully. You should be able to view your question/comment here within a few days.
Error submitting comment. Please try again momentarily.