
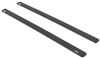
Thule WingBar Edge Roof Rack for Fixed Mounting Points - Aluminum - Silver - Qty 2


To see if this custom-fit item will work for you please tell us what vehicle you'll use it with.


Ever wish your roof rack could have that clean, seamless appearance of factory-installed options? The Thule WingBar Edge Roof Rack does just that. With its flush design, the crossbars align perfectly with the roof of your vehicle, providing an elegant, streamlined look that blends with your car's overall aesthetics. It’s all about sophistication without sacrificing function.
Driving with a roof rack doesn't have to mean enduring constant wind noise. The aerodynamic design of the Thule WingBar Edge features crossbars that include split rubber strips in the top channels, significantly reducing wind noise and vibration. Enjoy the quiet, peaceful drive you deserve with a roof rack that prioritizes comfort.
Whether you need to transport cargo boxes, baskets, kayaks, or bikes, the Thule WingBar Edge has you covered. These crossbars offer hassle-free compatibility with both channel mount and clamp-on attachments, making it easy to customize your setup to match your adventure needs.
Concerned about the security of your roof attachments? The Thule WingBar Edge can be equipped with the Thule One-Key System, sold separately, that safely locks the rack and its channel-mount accessories in place (part number required). Sleep soundly knowing your gear is securely attached to your vehicle, wherever you park.
 Alternate Instructions
Videos are provided as a guide only. Refer to manufacturer installation instructions and specs for complete information.
Hey everyone, I'm Evangeline right here at Etrailer and today we get to take a look at our Thule WingBar Edge Roof Rack and how it fits, and also to show you how to install on a 2026 Toyota Grand Highlander. This is going to be a very sleek roof rack of all the different types of roof racks available for your vehicle. So if you're looking for something that looks really good but carries a lot of stuff, let's go take a look. The WingBar Edge secures to your fixed mounting points and creates a very low profile, good looking roof rack. So if you like the Thule brand, just because of all their different functionality and different roof accessories and since they've been making roof racks for a very long time, this is going to be one of their more sleek options. So this will be ideal if you are looking to carry accessories every now and then, like maybe kayaks or roof boxes for extra cargo space or even a rooftop tent.
But if you are planning on maximizing your roof rack space, maybe you're carrying a lot of things or even looking into kayak lift assist carriers, you might be interested in Thule's other WingBar options. So some of Thule's other crossbars come out and give you what's called an overhang. That's great if you wanna carry those other accessories. But these are gonna be the edge versions where you don't get that overhang, you get this curve in. So what then happens is you actually get slightly less usable crossbar space compared to your other options.
How much crossbar space, well let's go measure. If we measure from that one end to this end, inside these towers, I have a measurement of about 39", which is a good amount of space actually. This will be good to carry one large roof box, maybe two kayaks or if you want to carry bike racks, you can do that too. Opening up our sunroof here, you can see that there's plenty of space underneath in order to still have access to our sunroof and have things mounted on top. Looking at that roof rack clearance, now you'll have a little different from the front bar to the back bar.
So let's go take a measurement here in the back. So from underneath the back bar to the top of the roof, we have it at around 4-1/4". If we take into account the distance or I guess the height of the open sunroof, we will then have almost 2" of clearance. My recommendation here is that since you'll actually still have even more clearance in that for your front bar, you'll still be able to carry around items that clamp around the bar, no problem. If your accessory is maybe the more old school which uses U bolts and wing nuts, I'd be a little bit more conscious about opening up this sun roof when those are installed, but in most scenarios, you'll be good.
Another measurement I like to talk about is how much height is now added to the top of the roof. In our case here, about five and a half inches. So something worth considering is since you have a tall vehicle, you wanna be very careful if you have a small garage about when you put items on top. The amount of times I've had neighbors that forget about the roof box and then hit their garage door on the way back out is a little too often. So be very careful when you add things on top of your roof. You now have a new clearance, add 5-1/2" to that that you need to count for, for your garages, for your low bridges and even your drive throughs. This is designed for these fixed mounting points of your flush rail. What that means is this actually bolts into your flush rail rack, which a lot of people actually like. That's how I have it on my car. I like the extra security and stability that bolting into the roof does. It is a little bit more involved though, so we'll talk about that later during the install. Where it mounts to is gonna be a very specific spot, which means you get a very specific crossbar spread. Crossbar spread is measured center to center. We have that 27 inches, which is really good. That is versatile for most accessories. But if you are not sure, you can always double check your product accessory, see if it requires a crossbar spread, cross reference it with a 27 inches you get on the Grand Highlander. And a fun thing you may not have thought about is that this front bar sits right where the sunroof window opens. So you still have full clearance in your open sunroof or whatever you want. There's a lot of things you could do with different roof racks and it's all about what type of accessories are you carrying, how often are you using it, and what's the look that you are going for. If you want something that looks good, looks sleek, you're keeping your roof rack on your vehicle all the time, but you're not always using it, the WingBar edge is definitely the way to go If you are carrying more cargo, more accessories. You do also have to consider that your Grand Highlander is a pretty tall vehicle and it may be a little tricky to get up there and load things up. That's why I recommend getting the longer bar options when possible because then they are easier to reach and I can load things up further out. But it's totally up to you. Hopefully this video was helpful for seeing how this looks, how this works. If you're curious about how this installs, stick around. Getting your roof rack installed may seem very daunting at first because there's a lot of different parts, even more than some other flush roof rail vehicles. So we're gonna go through that process together. Now I already installed the rear bar, so we get to install the front crossbar and the very first thing we're going to do is set up the bar. You're gonna start with these rubber strips. So these rubber strips actually come together like this. You split them apart and then you flip them around. So the way to figure out which strip goes where is I like to look at the Thule logo. So the flat strip pushes into the side where your logo is, you just push down with your thumb and then the arrows, those face the front of the bar, so the taller portion, that's actually the front of your crossbar. Next up you have your towers. So when you remove the end cap out of your towers, you're gonna see it looking like this. There's going to be a right side and there's going to be a left side. And the way you know is when you push your tower up to your crossbar, do you have it where it fits around the whole crossbar. So right here, this looks good. Now as you push in, you are gonna be stopped by this button over here. So what I actually like to do is I just set this down and I use the tool included with our kit to just push that button in and underneath the bar. From there, I can just slide the whole system in. Now time to get up to the roof. So on your roof, this is gonna be your flush rail and you're gonna have these little covers on them. These are actually held in with two little tabs. Sometimes you may use a little flat screwdriver, but I'm actually able to just kind of lift it off with my own fingernails. And here's what it looks like taken off. With this large open space, we now will cover it with this plastic piece that was included with our kit. So this just fits right over that hole. Now if it doesn't fit flush the first time, no worries. You are gonna make it fit flush when you put all the other things on there. We're gonna start with this bolt. This bolt fits into the threaded hole that was already on your flush rail. So this fits right in there. And this will tighten down using the little wrench included also with your kit. That's why it's important to have this side facing up so that you can continue to tighten it down. Now tightening this down very tightly, there is gonna be a torque measurement in your instructions that you can follow. And now put together, each corner will have their own set of a rubber pad, a metal plate, and then this little spring that goes on top. So underneath the rubber pads are going to be numbered. So again, referring to instructions, each corner will have a different number. For our front passenger side, it's gonna be 418. Now putting the metal plate on top, this lines up where the tall part of the metal plate is on the same side as the opening on the pad. See how that looks. And then on the inside, you're gonna fit that little spring piece. So this pops into place and we'll look like this. This whole thing will fit right on top of the bolt and fit around your flush rail. So the groove should match the grooves of your rail and then you're going to secure it with this nut on top. And then you'll use your torque tool to tighten down on that nut 'cause it has a open hex head. Now this tool is actually a torque tool that prevents over tightening and it will click like that once you've reached tension. Once you have the other side set up, now you can put your crossbars on there with the towers already attached. So very carefully bring your crossbars over to the kit that you just put up. Now your towers can adjust a little bit inwards and outwards. So you wanna get it lined up with your kit where it drops right in, and then that front end clips into that metal plate. And once you have that lined up on both sides, you can then tighten down with that tool. Once these are all tightened down, then you can put the end caps on. So the kit comes with a plastic block and this is actually what I use with my own kit. This just pops right in. And then you use a flat head screwdriver or the little wrench included and that's what you'll use to lock. So first insert in the unlocked position, this will just slide onto your tower and kind of click into place once you have it all lined up. There we go. And then you just use that wrench to turn to the locked position and then give it good little shake and do this on all four sides. What I then do is I keep the caps of the rails as well as the tool as well as the wrench in the little bag. And I keep that in the trunk or in the center console. And that way if we ever need to take this roof rack off, you have all the things to set back to normal. But that's gonna be it for your installation process. You're now ready to load up your roof rack with all the cool cargo and hit the road. This was a look at the Thule flush roof rack system here on our 2026 Toyota Grand Highlander.
Ratings & Reviews

The sales person was very helpful. The website worked very well. I called & everything went as anticipated. The company was located 2000 miles away and despite all of this my order from last Sunday weekend was just delivered yesterday Wednesday the the 17th. I received my package with free delivery for a $420 purchase without a hitch. I will definitely use etrailer again. Business is business &this company delivers.
Great experience, fast shipping, great selection. Would buy here again.
all good. thanks for your advice
Fit and performance perfect
So far so good, I am still putting it on the car.
fit great, looks good, no problems at a ll!
Fit perfectly on my 2020 Highlander and was an easy install.
This "fit kit" from THULE does not impress me much. It does not sit flush with the roof rails of my 2021 Toyota highlander, doesn't really line up with the openings on the flush mount rails, and only attaches to the vehicle via one bolt at each of the 4 mounting locations. In that sense it's inferior to even the OEM toyota roof rack mount.
Niiiiiice! Is what we say when we see the car now. The roof rack is well built. Instructions were easy- the letter specification to tighten the rack were a bit much. We had to adjust based on how things looked and jived with the car. Some soft cushion edging would not flush over the roof indentation edge, so we had to re-loosen and tighten the rack few times until all settled well. Bottom line, we wanted a solid rack that did not have overhang, did what it is suppose to, was low profile, and make the car look hot- check!!!! We are very happy! Best part about the entire experience however is etrailer. I swear, one might never need customer service or any help with their purchase, until they do. And what a customer service it is. Wow. It’s worth returning to etrailer for more business, purely because you want this business to do well and to remain in business and to show them how much we appreciate their excellent customer service.
Excellent service. I called etrailer and they were able to match the key for my old Thule box to the new key cylinders for this rack. They gave no guarantees, but they somehow made it happen quickly!
Just what I needed. Toyota was not to clear on exactly what type of roof I had. Toyata specified to Thule The Highlander will come with a few different roof types: Normal/Naked, Fixed Point, and Flush Rail.
Your vehicle technically is equipped with both a flush rail and a fixed point. However, it will be categorized under a flush rail fitment. Thanks to rhiannon p and photos going back and forth I finally received this kit, which was the proper kit.
Kate was so easy and awesome to work with! Will order through your team again.
The Product was delivered in a very timely manner and was in flawless condition.
Excellent product. Doesn’t bring locks. It doesn’t say it anywhere
Great products with superior customer s ervice!
Delivered the order correctly the first time!
And fit the car perfectly. Excellent design and manufacturing! Rock Solid.
Excellent customer service, quick delivery, nice packaging, and perfect fit! Very satisfied. E-trailer is a great company.
One year in and it’s been great. Looks awesome, very functional, but I would recommend getting the windscreen as well. I didn’t want one, but if you have a sunroof and plan on using it, you’ll need the screen to avoid the noise. I haven’t maxed out the weight, but have put bikes, kayaks, and a roof box on with no issues. Would recommend 100%.
Do you have a question about this Roof Rack?
Info for this part was:
At etrailer we provide the best information available about the products we sell. We take the quality of our information seriously so that you can get the right part the first time. Let us know if anything is missing or if you have any questions.

















Thank you! Your comment has been submitted successfully. You should be able to view your question/comment here within a few days.
Error submitting comment. Please try again momentarily.