


To see if this custom-fit item will work for you please tell us what vehicle you'll use it with.


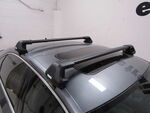
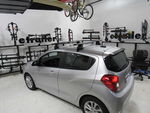
The Thule WingBar Edge keeps things sleek and clean. Its flush design means the bars don’t stick out past the feet, giving a smooth, factory-installed look that blends right in. You get a solid roof rack setup that looks like it came built-in rather than bolted on.
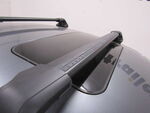
No one wants that whistling sound on the highway. These aero-style aluminum crossbars are shaped to reduce wind drag, and the split rubber strips in the top channels help quiet vibrations while you drive. The strips also seal up around accessories when installed, keeping air from getting trapped and cutting down on the hum that can come from open tracks.
This rack is ready for just about anything you want to bring. The top channels let you slide in channel-mount accessories, while the bar shape also fits clamp-on gear. Whether it’s kayaks, bikes, skis, or cargo boxes, you can use what you already have or add new gear later—no fuss or special adapters needed.
Some racks make you cut rubber strips to fit your mounts. Not this one. The split-strip design means you can simply slide your accessory into the top channel without trimming anything down. Once in place, the strip closes around the mount for a clean fit that helps block wind and weather from getting in.
You can add Thule’s One-Key System (sold separately) to lock both the rack and any channel-mounted gear. It’s an easy upgrade that helps keep your roof rack and accessories secure when parked overnight or at a trailhead.
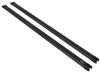
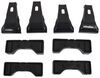
Includes two WingBar Edge crossbars (41" long x 3-1/8" wide x 1" tall), four Edge Clamp feet, and a custom fit kit; aluminum construction; color: black; weight capacity: 165 lbs; top channel dimensions: 3/4" wide x 1/8" tall with 3/8" opening; limited lifetime warranty.
 Alternate Instructions
Videos are provided as a guide only. Refer to manufacturer installation instructions and specs for complete information.
Hello neighbor, this is Curt with etrailer, and today we're gonna be taking a look at the Thule WingBar Edge roof rack, and we're gonna see how it works with our 2024 Chevy Colorado. Now, normally you'd see a roof rack on a car or an SUV just simply to create that extra storage space that you may not get inside the vehicle, or you've got things that are just too large to go in the vehicle. In the case of a truck like this, you may be wondering, well, why a roof rack if I've got all the bed space to use Well, the truth is, a lot of times, you might be keeping a lot of things in that truck bed, and you may need to carry some bulkier items that either won't fit in the truck bed, or you just don't want rumbling around with the rest of the stuff that's back there. Or you may actually have a ladder rack on your truck, and you want to put some extra support over the cab if you have some longer items going up on that ladder rack. Both of those are excellent reasons to get a roof rack for your truck. So this is a flush roof rack system, and by that, I mean that the crossbar dead ends into the tower.
It doesn't extend past it at all. Now while that does kind of force you to move any items you have up here to the center of the roof, it does end up being a bit of a cleaner look in a lot of people's eyes, and it has a little bit more of an OEM or factory look, only because it just looks a little more custom to the vehicle than some of the overhang options you may come across. The other thing about this roof rack is that the bars are an aero style bar, which means they have a bit more of an ovular shape. What that's gonna give you is a lot less vibration and road noise. There's a lot less wind resistance on these, so they're gonna be a lot quieter and more comfortable of a ride for you than your traditional round or square bars.
So these crossbars, you're gonna be able to mount your clamp style accessories around the bar, and you can access your T-track by removing your tower cover and accessing it right here. So any of your T-track, T-slot accessories can go right here in between this rubber strip, which add, you know, the rubber strip up here is actually gonna be one of the things that's gonna help reduce some of that noise, because it's covering up any gaps that you'll find in the top of the crossbar. So let's talk a little bit about how it fits on our Colorado. For one, we want to see exactly how much bar space we do have to work with, because it does dead end into the towers here. And this is gonna offer about 36 and three-quarters inches of bar space going across.
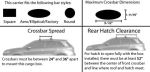
The other thing that we want to double check on is our crossbar spread. And the crossbar spread is gonna be really important, because every rooftop accessory has a minimum and a maximum crossbar spread that you can fit it onto. So I'm gonna measure from the middle of one T-track to the middle of another, and we're gonna end up with 27 and three-quarter inches. And that's actually a pretty good spot to be. A lot of those minimums and maximums, they're gonna fall in between the 25-inch and 35-inch mark, so I'm not really too concerned about rooftop accessories not fitting up here.
Another thing that we are gonna check on is how much space we have under our crossbar, and how much height this is adding to the vehicle above the crossbar. So underneath we've got a little more than two and a half inches of space. That's actually a pretty decent thing, because that is gonna allow those clamp mounted accessories to have plenty of gap under here in order to be able to fasten those onto your crossbars. It's going to add about four inches of height to your vehicle. So if you are concerned with roof clearance, if you know your vehicle height and you know the height of your accessory, just add that four inches to it, and you'll end up with your overall vehicle height. In reference specifically to the Colorado, we do have this antenna back here, and as I mentioned before, a flush mounted roof rack isn't really gonna give you much opportunity because of the limited bar space to be able to mount something side by side on it. There's just really not enough room. So pretty much everything you put up here is gonna have a central mount to it. This antenna will interfere with anything going beyond 15, 14 and a half inches, rather, past the end of this last crossbar, but it can be unscrewed and removed. And there are aftermarket antennas available out there that are more low profile. So if you wanted to switch out for that, or if you just simply wanted to remove this anytime you had something up here on your roof, feel free to do so. Install on these are not all that difficult. There are a few details that you want to pay attention to. For one thing, it is a naked roof. There's no fixed mounting points or existing rails up here, so Thule is very specific in their instructions about where these bars get placed. So follow along right now, and I'll show you exactly how we got these on the roof of our Colorado. So the first thing that we're gonna do with our installation is we're going to get our crossbar, we're gonna get our tower. And remember these towers are side specific, so kind of the wider end of the molding on it here is gonna go to the rear of the bar or the blade end of the bar, not the wider end. So once you kind of lay it out a little bit, make sure you get your towers in the appropriate positions. You're gonna grab your rubber foot pad. Now these are stamped with numbers. This one says 547. 547, when you look in your instructions, is where Thule wants you to put on the passenger rear bar. So we are gonna be installing our rear bar here, and I'm just gonna turn my tower over, and as you can see, the shape matches up, and I'm just gonna fit this onto there, and make sure it's pressed on firmly. Now it is really important that you correctly identify which of these pads goes on which tower. The pad for our driver's side on the rear bar is number 546. And the reason for that is these are contoured specifically to fit the area of the roof that the rear bar is going to go on. So that way, you get an even bar between the front two, or between the two bars, rather, and you don't have one that's gonna end up higher up than the other because they're in different roof locations. Once we get that foot pad on there securely, we're gonna take our bar and we're gonna go ahead and insert just like that. Now you can see this metal tab here is kind of stopping us. We need to depress that, and it's gonna pop up right out of this little hole right over here, (device clicks) just like so. Now once you get the tower onto the bar, you're gonna see this kind of scale, it's alphabetical. Starts with A up here in the front, goes all the way to U back here in the back. In your instructions, it'll tell you where you need to tighten this bolt here down to in order to get your bar length correct for the width of the vehicle. So on our front bar, it asked us to take it down to O. Our rear bar, it asks to take it down to Q, It's gonna be a little bit narrower, and that's only because the roof kind of slopes, I guess. It gets a little narrower as it goes back than it is up in the front. So what we're gonna do is we're gonna take the included Thule tool here. We're gonna go through this bolt right here, and we're just gonna continue to tighten this down until the edge of our crossbar is on the line where Q is at. And now that we've got that lined up to the Q there, it's time to go ahead and add our weather strip. So you're gonna have to take this and separate it. And you'll see on the back here there's a narrow channel for this to go into. It's a good little design here. It does help you out knowing which side goes which. One of these sides is gonna have some arrows on it. You wanna make sure that those are facing forward on your bar. The other one is going to be just a plain strip, as you can see. And we're gonna go ahead and pop that one in first. So I'm just gonna line it up. There is gonna be a little bit of overhang to it, but that's okay. It's not gonna interfere with anything. You just wanna make sure you don't come up short on one side. So getting down here, I'm just gonna depress that in. Make sure it's all fitting smoothly, and then I'm gonna grab the front end. And remember with the arrows pointing forward, I'm gonna put that in the exact same way. And after that, once everything is connected, we're gonna go ahead up here on the roof, and we're gonna try to set it down so that that little lip on our rubber pad kind of fits the inside contour here. We're gonna get it kinda lined up on both sides. Okay, so in your instructions, it is gonna give you a bar placement. Your front bar, the very front of your tower, should measure 11 and a quarter inches from the top of your windshield glass. Your second bar placement, you're gonna measure from the front of your first bar to the front of your second bar, and that measurement should come out to 27 and a half inches. So what I'm gonna do is I'm gonna get my driver's side over here in position, and then I'm gonna come over and match up that measurement to the passenger side. And I'm gonna double check that again, because you really wanna make sure that these bars are gonna be perfectly parallel to each other, so you wanna make sure that that measurement matches on both sides of your front and both sides of your second bar. Now before we put our clamps on, you're gonna see in your kit these kinda little hollow rubber tube strips. There's a specific place on the vehicle that you want to put this, and it has an adhesive backing, but we're not doing a permanent install today. We're really just doing a test fit. So I just got a little bit of painter's tape to keep it in place, but where it's gonna end up going is right here on this bottom ridge on the inside of the door, and you just wanna make sure it's gonna go in a spot. It's gonna cover the entire space of where the clamp is gonna go. So if you get it centered to where the tower is, you should be in really good shape. Now before you get your clamps, what you probably should do is go ahead and take your Thule tool. There's a bolt located right in here, and it's a good idea to go ahead, and at this point, just loosen that up as loose as it'll go. Reason being is that out of the box, once you install your clamp, the angle of this doesn't really reach around here, so we just want to get it in a position, so that we can put in our clamp easily. So we've got our clamp here, and as you can see, there's kind of a J hook down here underneath it. That's 'cause it's going to wrap around the inside of the vehicle frame right here. So what you're going to need to do first is just kind of get this seal off of the door frame, and expose that lip underneath there. What I'm gonna do now is get my clamp, I'm gonna make sure that it hooks around the frame portion, and then I'm gonna get my tower, and I'm gonna clamp it down into place. Now what we're gonna hear is a snapping sound that's gonna indicate that our clamp indeed went in place. And it may be that you still have a little bit trouble reaching where it actually clips in. So I'm gonna go ahead and unhook it, make sure that I get this seated all the way, (device clicks) just like that. Now at this point, I'm just gonna kind of gently bring it around. As you can see, it's kind of fit to contour across here. Place that seal real quick, and then I'm gonna get it down and around that portion. (device clicks) So once I make sure that my clamp is seated on both sides, and I've double checked the measurements to make sure we're still at 27 and a half, 'cause this could shift a little bit on you as you're maneuvering that clamp. At this point, I'm gonna take that included Thule tool, and through this bolt right here that we had loosened up initially, we're gonna start getting it tightened down, and as I'm doing it, I'm just double checking to make sure that that hook portion remains going around there. And I'm gonna incrementally tighten a little bit down on the passenger side, do the same on the driver, and I'm kind of gonna go back and forth. I don't wanna overtighten one side and shift the other side out of position. And this, by the way, is a torquing tool. So it is gonna indicate for you when you've got it tightened down enough, you're gonna hear a loud pop, (device clicks) just like that. Now it's on and it's in good position. We're gonna get up here and we're gonna give it a bit of a shake test. My bar isn't shifting back and forth. My towers aren't shifting at all. Looks like we got a pretty solid installation up here. At this point, what we're gonna do is we're gonna take that seal that we had kind of partially removed, and we're gonna tuck that back up into position, just like that, and at this point, all we need to do is grab our tower covers. Now when it comes to your tower covers, there is an open cavity right here where your lock core would go. Now what it'll come with are these plastic lock cores, little plastic tab on the back, slot in the front for a flathead screwdriver or a coin or something like that. And this is what you get initially from Thule out of the box. Very easy to just pop in and install. My recommendation, however, would be to go ahead and get a set of Thule lock cores with the matching keys. They are part of Thule's one-key system, so if you do have some Thule accessories, you do have the opportunity to get your towers keyed alike to those accessories, and therefore, just cut down on the amount of keys and things you have, and just keep organization really easy. We're gonna go ahead and pop this on without our lock core though. And to do that, we just wanna make sure that that wider end is toward the back, and it's gonna slide in and pop into place. And once you do that, your installation is complete. You're gonna be ready to load up and head out on your next adventure. So that's a look at the Thule WingBar Edge roof rack on our 2024 Chevy Colorado, and if after watching this video, you decide that this is gonna be the roof rack for you, after you get it and install it and use it a little bit, please share with us what you think about it in the comments below. Sharing your experience with other neighbors just like you can help them make the best decision for themselves. Once again, this is Curt with etrailer. Thanks for stopping by.
Ratings & Reviews

Great quality products! Easy installation with properly guided instructions. One of the best tracking information, from ordering to delivery. Would strongly recommend etrailer to anyone looking for roof or hitch bike racks.
My THULE roof racks arrived as expected according to the delivery schedule. The box of the cross bars kit was open upon arrival and the one bar had a slight blemish and a little dint almost in the middle of the bar. The other box which contains the two pair of the J-Bars were closed and everything in it were fine. All the parts came altogether and nothing was missing. I purchased this product to install onto our KIA Sportage for loading our new Vanhunks Orca 13’-footer fishing Kayak. The THULE cross bar roof rack system is an excellent engineering design and very sturdy. I loaded and transported our new 81 pounder Kayak and the THULE roof racks maintained our cargo solidly and securely on top of the SUV. Drove to the Lake for almost two hours and two hours back and everything stayed intact until we got home and to the storage area.
I’ll let you know after I get new crossbars to put them on.
Easy to install, strong product. I only wish I had known it didn't include locks.
Very pleased with this item (as always I trust Thule on my roof and have across multiple vehicles!) and with the entire transaction. Knowing that we have the right fit kit for our vehicle’s Thule was very important and e-trailer made this easy to accomplish.
A combination of well-reviewed products with quality customer service, fast shipping, and an endless array of educational content makes buying from e-trailer a no-brainer!
While I secured a firm fit on the car, the rubber pads that contacted the car roof did not track the roof line as they should have. In addition, the instruction manual looked like it was written by someone who has never installed this roof rack. The parts were not labeled and the instructions were visual images that lacked a lot of detail and very little written instructions. I have owned several other Thule products in the past and found the instructions and fit to be much more accommodating. The only bright spot was the service I received from Adam S at Etrailer, who went above and beyond in helping me select the proper rack for the car I own. While I am somewhat disappointed in Thule, I would highly recommend using Adam and Etrailer.
These themselves seem great and solid - I just don't love the way they look hovering above the fit-kit.
Is perfect fit but would have liked it better if I could have just ordered and paid for the one item I needed instead of whole set of 4 feet for the repair when I only needed one.
Been a month haven’t received them yet they are in stock but guess we are waiting for one item which it’s in stock date gets pushed back every day. And the company doesn’t let the customer know the date changes or when they will send it.
Great solution for the naked roof on my 2011 Porsche Cayenne S
Love e trailer! So fast! Wish I could order Thule locks by number on their site.
One year in, this fit kit and the whole system have worked very well on my Kia EV6.
I miss the simplicity, in terms of cost as well as installation and removal, of the old Thule rectangular-bar racks, but this system looks better, is quiet, won't sag, and seems more robust.
Great seller, fast shipping, good selec tion.
Niiiiiice! Is what we say when we see the car now. The roof rack is well built. Instructions were easy- the letter specification to tighten the rack were a bit much. We had to adjust based on how things looked and jived with the car. Some soft cushion edging would not flush over the roof indentation edge, so we had to re-loosen and tighten the rack few times until all settled well. Bottom line, we wanted a solid rack that did not have overhang, did what it is suppose to, was low profile, and make the car look hot- check!!!! We are very happy! Best part about the entire experience however is etrailer. I swear, one might never need customer service or any help with their purchase, until they do. And what a customer service it is. Wow. It’s worth returning to etrailer for more business, purely because you want this business to do well and to remain in business and to show them how much we appreciate their excellent customer service.
Do you have a question about this Roof Rack?
Info for this part was:
At etrailer we provide the best information available about the products we sell. We take the quality of our information seriously so that you can get the right part the first time. Let us know if anything is missing or if you have any questions.















Thank you! Your comment has been submitted successfully. You should be able to view your question/comment here within a few days.
Error submitting comment. Please try again momentarily.