


Thank you! Your comment has been submitted successfully. You should be able to view your question/comment here within a few days.
Error submitting comment. Please try again momentarily.


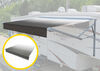
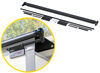
This awning rail lets you anchor your awning fabric to your RV. The rail is 8' long and mounts on the outside wall of your RV.
Features:
How to Order a Solera Awning Rail
To determine the rail size that you need, first measure the distance between the support arms on your awning. Be sure to measure from the center of one arm to the center of the other. Then add 12" to this measurement to get the rail length needed for your specific application.
This rail is sold in 8' sections, so if you need 15' for your RV, you will need to purchase 2 sections and cut 1 piece down. The sections can then be butted together in the center of your awning.
Videos are provided as a guide only. Refer to manufacturer installation instructions and specs for complete information.
Speaker 1: Today we'll be having a look at the Solara Rail Extrusion in black, 8 feet long, Part Number LC715217. Now the reason we're going to need and want to have the extrusion on our trailer here is so we can actually have an awning installed on our trailer as well. This extrusion will allow us to slide an awning into it and serve as the fixed attachment point on our trailer or motor home or RV in order for the awning to roll down and provide us with shade.Now this extrusion has a channel in it for the top of your awning fabric will slide into and allow it to be secured to the top of your trailer, motor home or RV. Now every 6" on our extrusion you can see we have several mounting holes to secure to the side of our trailer plus the channel for awning to slide into.Now in our case we're installing a 20' awning so we're going to need 21 feet of this extrusion material, and since it's sold as 8' sections we'll need two complete 8' sections plus 5 feet of one of the other sections.This is our 45' roll of butyl tape. Now we're going to need this butyl tape because this will help keep any of the elements outside of any of the screw holes from where we secure this extrusion onto the side of our trailer.Now since this extrusion will be secured to the side of the trailer using screws, there's going to be holes made inside the trailer. We're going to have to have something to seal it.
That's what we're going to use this butyl tape for.We have our extrusion flipped over right now, and on the back side this this is where we're going to apply our butyl tape. We're just going to apply it down the entire length of it so we'll roll out a small section, and we'll just roll it down the back of it.All right. Once we have our butyl tape cut down to size we'll just press it down firmly against the back to hold it in place.Now in our particular case we're going to be installing this awning and extrusion as far forward as we possibly can in our trailer. That's going to be right in this general area, and that's where we're going to start at. We're going to line it up touching this weld right here, and the bottom of it is going to go follow this top line here on the roof of our trailer.
And it's going to follow this line all the way to the back.Right now we have an extra set of hands to help hold the extrusion in place. I'm going to peel back our butyl tape here a little bit, just enough to get our front hole exposed. I'm going to line up and get it in the right position. Then we'll secure it using a self tapping screw. With the secure of our self tapping screw I'd like to point out the channel faces the top and our screw holes are on the bottom.Now I'm going to go to the other side, put a screw hole in place at the end.
With our extrusion in place we can grab the other side of the butyl tape and pull it off. We'll just keep doing that all the way down the end of it.Now we'll just use the rest of our screws to secure every other hole that we have in the extrusion.Now that we have our extrusion secured in all the way across our excess butyl tape here, you can kind of just rub it, make a nice little ball, and work it off, try to help clean up our look a little bit. This will also give us a nice seal. You want to do this down the entire length. As you see, we get enough of it built up and you just pull it off.
Make yourselves a nice little ball of it. Do this on the top and bottom of the extrusion, all the way down it.Now that we have our front extrusion in place we'll do the same for our middle and rear sections with the middle section being the one that's cut down to size.All right. Now with a couple of extra set of hands, we're going to grab our awning assembly as one giant piece and we'll slide into the extrusion at the rear of our trailer, and then walk it forward until we have it all the way through to the front.Okay. We went ahead and put one screw on each one of our arms on the very top to help support some of the weight. Now we've ensured that our arm is squared to the rear of the trailer and the back, and we'll put another screw into the top to hold it in place and this will keep it centered. Speaker 1: And that will complete our look at the Solara Rail Extrusion in black, 8 feet long, Part Number LC715217.
Customer Satisfaction Score:
91% were satisfied with this product
9% of customers were not satisfied
Ratings & Reviews


Ralph

10/20/2025
I purchased 4 retractable window awnings. They have worked as expected, great, no problems or issues.


Do you have a question about this Accessories and Part?
Info for this part was:
At etrailer we provide the best information available about the products we sell. We take the quality of our information seriously so that you can get the right part the first time. Let us know if anything is missing or if you have any questions.





















Jenny N.
5/2/2024
That is definitely not how you should receive it and I will let our shipping department know. We will also be in contact with you about a replacement.