
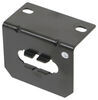
Blue Ox Trailer Hitch Receiver - Custom Fit - Class III - 2"


To see if this custom-fit item will work for you please tell us what vehicle you'll use it with.
Thank you! Your comment has been submitted successfully. You should be able to view your question/comment here within a few days.
Error submitting comment. Please try again momentarily.


This fully welded trailer hitch receiver bolts onto your vehicle's frame with no welding required. Textured black powder coat over e-coat shields against rust and corrosion. Mounting bracket for wiring is welded on for a clean look.
Features:
Specs:
At etrailer.com we're committed to the products we sell, and to our customers. Our experienced and knowledgeable staff are available via both phone and email to address your questions and concerns for the lifetime of your hitch. The technicians at etrailer perform hitch installations on a daily basis, making them a valuable resource for do-it-yourselfers. The one-on-one, personal service you'll receive comes straight from an expert in the towing and automotive field. We've installed it, we've wired it and we've towed with it, so whatever your question, we can answer it.
California residents: click here
Videos are provided as a guide only. Refer to manufacturer installation instructions and specs for complete information.
Hi, Jesse with etrailer. Today, we'll be taking a look at and I'll show you how to install the Blue Ox Custom Fit Class III hitch on our 2019 Toyota RAV4. Adding a hitch to a car like the RAV4 makes a ton of sense. It's a great vehicle for road trips, and you might run out of storage space on the inside, so it's gonna give you the ability to add a cargo carrier, or a bike rack, or something like that, and it even gives you the ability to do some light-duty towing with your Toyota. Now, for our closer look at our hitch here, we'll see it has a nice textured black powder coat and they actually put an e-coating underneath that. So this is really gonna hold up to the test of time, any rocks that kick up won't really scratch it up or damage the paint at all.
So, it looks really good there. And you have a mostly hidden cross tube. It does come with this mounting bracket for wiring, so it's a good thing if you're looking into towing with the vehicle, you will need to add on trailer wiring. And this hitch here comes with a bracket, we're ready to mount everything up right there. The receiver opening is going to be a standard two inch by two inch opening, and behind that will be a standard 5/8-inch pin hole for your pin and clip.
The pin and clip itself does not come with the hitch, however, we have many options available here at etrailer or any accessory that you add on will most likely come with one included. Then behind that, we have our safety cable loops, nice sturdy design. It's also gonna be super easy to get any clip that you might want to add on there, whether it be a quick link like that or a club style like this. Now, for some measurements, from the ground to the top of the inside of the car is about 11 1/2 inches. That's on the low side.
If you're looking to add a ball onto here, I would definitely get something with a rise to it. From the center of the pin hole to the edge of the bumper, looks like it's about 4 1/2 inches. So keep that in mind for any folding accessories that you might add on here, just to ensure that they don't make contact with the vehicle. Now, for the weight capacities on the hitch, the gross trailer weight will be 4,500 pounds. That's the amount of weight that you can pull behind the vehicle.
The maximum tongue weight is 675 pounds. That's the amount of weight pushing down on the hitch. You do have the ability to add weight distribution with this hitch. However, both those numbers will stay the same. Anytime we're talking weight capacities, you'll always wanna double-check your Toyota's owner's manual just to ensure that your RAV4 can handle that weight safely. All in all, if you're looking for a good-looking hitch for your RAV4 that's also made by a reputable brand that has on the higher-end tow rating numbers, I think this is definitely a good choice for you. As far as the install goes, it's really simple, it's just a matter of possibly having an extra set of hands to lift the weight of the hitch up into place and then getting four bolts on. So if that's not something that you think you can do, maybe you don't have the time or space, feel free to check out our Dealer Locator. If you are looking to do this yourself, then follow along and I'll show you how we got ours set up today. To begin our installation, we're going to need to drop the exhaust. So, I recommend having something supporting the exhaust. I'm just using a cam strap that's hooked onto both sides and tighten it down under it. If you're on the ground, you can just use a jack stand or something like that. We have two 12-millimeter bolts with this hanger here and there will be another one on the other side. We'll get those removed. (drill whirring) We do have one more hanger to remove here in the center. I just sprayed some white lithium grease on it to help lubricate it. You could also use something like soapy water. I'll just take a pry bar and just kinda try to get in there and pry that hanger loose. (hanger clattering) (metal clanging) At this point, we can loosen our strap a bit. Now, on both sides, we have some stickers covering up some weld nuts that we'll need to remove to gain access to. The easiest way I've found is just to take a razor blade (sticker ripping) and kind of dig in under it. And once you have enough up, you should be able to get under there with your fingernail and pop it off. Once we have all the stickers removed, I like to run a wire brush in and clean up the threads. (wire brush clattering) And after doing that for a little bit, I also will run our hardware that we're gonna use. (wire brush clattering) Just thread it in and out, make sure they're threading in easily. 'Cause the last thing you want is to have the hitch held up above your head and then not be able to thread the hardware in. So let's go through all of our weld nuts and make sure they're nice and smooth, and then we're ready to move on. So, on some models, like the one that we're working with today, we have a tie down that's going to interfere with our hitch here. So it should just be two 17-millimeter bolts we'll need to remove. (drill whirring) And we will bring that down and set it aside. (drill whirring) Before we lift the hitch up into place, I just wanted to show you how the hardware will be installed. You'll have a bolt for each hole here and a conical tooth washer. Make sure that the washer will face towards the hitch, the teeth on the washer release, and they're just gonna slide in like this and we'll be threading onto those weld nuts that we just cleaned up. It's a good idea for this step to have an extra set of hands. I have my friend Aiden here helping me out. So I have the hitch in one hand and the hardware in the other. We'll lift it up over the exhaust there (hitch clanging) and just get everything lined up. (hitch clanging) And the one bolt finger-tight for now. That way, the hitch will hang and we can install the rest of the hardware. So, it might be a little bit of a hassle trying to get the bolts started on this side. What I'd recommend is just getting someone over here holding the hitch, get both the bolts started on the other side, on the driver's side, and then have somebody hold it up, and it makes it a little easier, but it is kind of a fight, just 'cause there's a really tight space up on the passenger side. So, if we're tightening the bolts down, I definitely recommend using a ratcheting wrench because you won't be able to get a ratchet and a socket in there. (bolt scratching) You could also use a regular wrench, but having that ratcheting wrench, it's just gonna make it a lot easier. So, I'm just gonna go through, get all four of our bolts snug down, and then we can torque them all down. (bolt scratching) Now, we'll need to go through and torque all of our bolts. If you don't have your own torque wrench, we do have some available here at etrailer or you can always rent one from your local auto parts store. Now, on this side, once again, it is very narrow, so what I have is a little offset wrench adapter for the torque wrench, and that's gonna allow me to gain access to it. That's a 3/4-inch socket opening. (torque wrench beeping) Now, with the exhaust up and with the hangers reinstalled, just remove your strap. Otherwise, that's gonna do it for our look at and installation of the Blue Ox Class III Hitch on our 2019 Toyota RAV4.

Installed on a 2021 RAV4 Prime with no issues, and unlike the factory Toyota hitch, it did not require cutting the bumper. However, if you plan to use a rise/drop hitch, be aware that clearance is tight. I have approximately 3 cm of space between the bumper and the Aero Weigh Safe hitch.
To maximize clearance, make sure the hitch is positioned as far rearward as possible before final tightening. The mounting holes are oval-shaped and allow a small amount of adjustment, so pull the hitch rearward before torquing the bolts.
This hitch is very good. So far I am happy with the purchase. The only thing keeping it from 5 stars was the installation on the passenger side of our ‘23 RAV4 Prime XSE, and to be honest Toyota shares some of the blame because I believe all hitches would have the same problem with the bolt closest to the rear of the vehicle on that passenger side. The way the car is molded in that spot makes it difficult to get the metal spacer between the frame and the hitch while trying to slide the bolt (with washer) through both the hitch and the spacer into the threaded hole in the frame. There is very little space for your hand to accomplish that task. That one bolt took longer than the other three combined. If there was a spacer/washer combo that was u-shaped and slide over the hitch, I think it would help a great deal. Other than that the installation went very well. I didn’t even need to lower my exhaust, just slide my exhaust tips off while I raised hitch into place with my floor jack. If you’re doing this alone without a car lift, a floor jack will be your best friend. The fit and finish of the hitch is great. It should be great to use for as long as we own this car.
My review for etrailer is five stars! They are always great at communicating as their customer service is top notch. Shipping was fast and free, I received the hitch in under a week. I got personalized emails from them after ordering and again a week later to see if I had any needs with my purchase.
Thank you etrailer!
It’s a tow hitch. It comes with spacers to allow for additional figments. Mine didn’t appear to need them. A jack and an extra hand is helpful. I did it by myself with 3 jack stands and a floor jack. Made in the USA. Hardest part is scrapping off stickers on the vehicle frame for installation with short finger nails.
Tip, get yourself some gloss black spray paint as I have always had bare metal showing due to shipping damaged from being shipped in cardboard.
Hitch was so wide I could only get one thread started on each bolt before I could tighten it down. It would’ve been easier if it came with two longer bolts for the left side where there’s plenty of room.

Very happy with this hitch. Thank you for asking.
The item shipped with all hardware including shims. The figure showed the shims being installed but it didn't include details in the instructions. Also, requiring the installation of shims greatly adds to the difficulty of installation. It seems like for popular car models, the width of the hitch where it is mounted to the tub should not require shims.
I took a break from working for exactly one hour to get a bolt in. The tolerances in this rack are not good. I wish i had not purchased it had been too much aggrevation.
Do you have a question about this Trailer Hitch?
Info for this part was:
At etrailer we provide the best information available about the products we sell. We take the quality of our information seriously so that you can get the right part the first time. Let us know if anything is missing or if you have any questions.


Lazer S.
5/5/2026
Sorry to hear about the difficulties you are having, Kelsey. Do you have the other bolts installed already? And are they tightened down or are they just loose with a couple threads in the weld nut to hold it in place?