
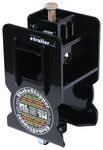
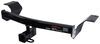
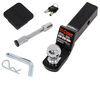
B&W Trailer Hitch Receiver - Custom Fit - Class III - 2"


To see if this custom-fit item will work for you please tell us what vehicle you'll use it with.


B&W is known for building hitches people trust. Made in the USA and made to last. This one bolts right on, with the receiver just below the bumper for easy access. Powder-coated steel holds up against rust, grime, and plenty of road trips.
With a 750-lb tongue weight, this hitch is ready for your multi-bike rack or a fully loaded cargo carrier. Whether you're hauling electric bikes or extra gear for a weekend trip, it handles the weight with ease.
The 5,000-lb towing capacity makes it ideal for hauling small travel trailers, utility trailers, or lightweight boat trailers, giving you the flexibility to take your adventure wherever you want.
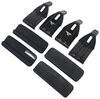
This custom-fit hitch lines up with factory holes, and the 3-piece bolt-on setup makes installation quick and drill-free with no special tools or welding needed.
California residents: click here
Videos are provided as a guide only. Refer to manufacturer installation instructions and specs for complete information.
Hi, I'm Daniel with etrailer, and today we're gonna take a look at, I'm gonna try to install the B&W trailer hitch on our 2020 Toyota Highlander. Adding a hitch to your Toyota Highlander is gonna be a great idea 'cause it's gonna allow you to tow some trailers, maybe a camper to the campsite, or a boat to the lake, or if you just need some extra space back here when you're going on that trip with the family, you can add a cargo carrier, and stack it up with your luggage, or you could even have a bike rack. Now let's get into how this is gonna look on your Highlander. As you can see, the cross tubes are completely hidden, and you have a nice shiny black finish. Now this one does stick out a little bit further than some of the other ones we have on the market. And as you can see, the tow loops are actually pretty well behind here, so they're pretty well hidden.
So I would probably use this mostly for accessories like cargo carriers and bike racks, because it does stick out a little further, so you do have that extra clearance for folding accessories like those bike racks. Now this hitch would be really good with accessories, but you can definitely still tow with it. It's got a total towing capacity of 5,000 pounds. That's gonna be your trailer plus what's packed inside of it. Now something to keep in mind is if you're towing with this hitch, you definitely wanna check your owner's manual, and make sure you're towing at your lowest rated component.
Now you will need a 5/8-inch pin and clip to secure your accessory in the hitch. Now as you can see, it's pretty far forward, so it's easy to get to. Now I would recommend getting a locking pin just so you have that extra sense of security when you have an accessory in here, no one can come and take that. Now like I said, the safety chain loops are on a welded plate on the back here, so if you're towing quite regularly, it might be kind of annoying to reach back here, but it still can easily accept a clevis-style or an S-hook safety chain. Now I'll go ahead and get you a couple measurements.
So from the ground to the top of the inside of the hitch receiver is gonna be about 15 1/2, and that's a good measurement to know if you have any longer accessories, like maybe a cargo carrier that sticks out here, and you'll make sure that doesn't bottom out when you're going up a steep hill. Now the next measurement is gonna be from the center of the hitch pin hole to the furthest point of the bumper, and that's gonna be about an inch and a half. And like I said, that's really far out, so you're not gonna have any problem with most of your standard folding accessories like bike racks. Now if you have any further questions, please feel free to reach out to us at etrailer, and we love to help you out, and figure out which hitch is gonna be best for you and your Highlander. Now as far as install goes, the B&W is actually really easy to install.
It comes in three separate parts, so you can actually install it yourself without an extra set of hands. But if you don't have the time or tools to do it yourself, you can check out our dealer locator. We can find a professional in your area to get this installed for you. But if you want to install it yourself, follow along, and I'll walk you through it. First off, we want to remove that spare tire, so we can have more room to work under there. And you just wanna open your hatch, and there's gonna be on the passenger side, just a circular cap. Let's get that removed, and you should have a five-point socket back here and some tools to get this removed. Now we need to remove this underbody panel so we can get up to the frame. I got a 10-millimeter socket, and there's gonna be various fasteners here. I'm just gonna start with the mud flap, (power tool buzzing) and get these removed. (power tool buzzing) There's gonna be one more closer to the bumper, (power tool buzzing) and there's gonna be a couple of push-pin style fasteners. I'm just gonna get a flathead, stick it in one of those grooves, twist it down, just be careful. If there's a lot of gunk in there, this could be difficult to get out. Once that intersection is pulled out, we should be able to pull these out. Now if they're proving to be difficult, you can pick up a trim panel tool. It makes it a little easier to get these out. And there was three of these push-pin style fasteners, and there's gonna be two more, now these are gonna be a 12-millimeter socket, and you're gonna want to pull down, (power tool buzzing) as you loose these up, it won't detach, (power tool buzzing) and once you get those removed, you should be able to just pull this down. (car panel clattering) So there's a clip in the corner that you can just get your thumb on. And once you've done that, we can set this to the side. Now there's gonna be five caps on the frame, and we'll just get those all removed. I'm just gonna use a flathead. It's gonna be a bumper support bracket, and it's gonna be secured with a push-pin fastener. And we'll just take these out on either side, and just get those bent down. Now to remove the passenger side, it is a little bit different. There's gonna be a plate back here, that we're gonna have to remove. So I got a 19-millimeter socket, (car part snapping) (power tool buzzing) let me get that bigger bolt removed. Then I'll use a 10-millimeter socket to get this smaller bolt removed. (power tool buzzing) And then that tire plate will come down, we'll just set this to the side. The rest of the fasteners are a series of push-pin fasteners and screws just like the other side. Once you get those out, you can take this out, again, that one side's clipped in. And I'll just set this to the side for now and we can put our side brackets in place. And do make sure you get the correct side. One's for driver, one's for passenger. I'll start with the driver, and that's gonna have the notch facing out towards the tire, and you're gonna have this bent bracket, that's gonna be facing in towards the center of the vehicle. So now I'll take our hardware, it's gonna be a bolt and a conical tooth washer. Just make sure those teeth are facing the metal. I'll just hold this up, I'll align those with our threaded holes here, and we'll just get our hardware threaded in. (bolt clattering) And on the passenger side, this bent piece of the bracket is going to be facing out towards the tire. So I'll get this held up and our hardware started. that plate that we took off earlier, we can now reinstall with the hardware that comes in our kit, (bolt clinking) and we'll just get everything hand-tied at this time. And we can lift the hitch into position, and you definitely wanna make sure that these are loose, so you can have some movement to 'em. But first, I'm gonna set it on the lip of the driver's side bracket, and that'll hold it in place for us. And then on passenger side, I just have to get it past the exhaust. I'm just gonna push down on that. And once you've done that, you can get one of your smaller bolts, put it through, get the holes lined up, get it fully put through. And on the other side, I'll take a flange nut, and just get that loosely tightened for now. And on the driver's side, I'll do the same thing, I'll lift it up, put our hardware, push through, and our nut tightened down. And now we'll do that for the remainder of our holes. Now with everything hand-tight, you wanna make sure that your hitch receiver is centered on the vehicle. So there's a little bit of play to this, and you can see notches on the bumper, and you can really just center it between that. And once you've done that, you can tighten the bolts that are going up into the frame. We're just gonna use a 19-millimeter socket and get these tightened down. (power tool buzzing) And now I'll come back through with a 9/16 socket and wrench, and get these tightened down. If you don't have a swivel adapter like I do, you can just use a regular wrench to get these tightened down. (power tool buzzing) Now we can torque everything down to the specs in the instructions. Now, if you don't have a torque wrench at home, you can usually rent one from your local auto parts store, or you can pick one up from us at etrailer. (torque wrench clicking) (torque wrench beeping) Now you can trim your lower panel so you can reinstall it or you don't have to reinstall it, it is optional. We're gonna go ahead and trim it. Now on the side here, you just wanna follow this straight edge down, and you wanna measure 1/2 inch from this beveled edge. And that's what we're gonna cut out right here. And then where this oval is, you just wanna follow those straight lines all the way down, and get this cut out. And I'll just take a utility knife and I'll clean up some of these edges as it did melt some of the plastic just a bit. It's always a good idea to hold this up before you cut, just to make sure that it's gonna fit properly. I'll go ahead and test-fit this. we may need to cut it more. Well, I'll get this back in place. (panel clattering) Once you get this panel back in place, you can put all the fasteners back in the same way we took 'em out, and then you can put the passenger side back on, and you won't have to turn that one. Now we can put our rear bumper supports back in place. Now, the last thing to do, is to put your spare tire back in place. And once you've done that, you can start using your B&W trailer hitch on your 2020 Toyota Highlander.

This hitch is extremely solid, and, now that it's on, I'm happy to have it. I did the install myself, and it took a little more than double the 50 minute time noted. This is the third hitch I've installed, and I expected it to take longer, so that's not such a surprise. I didn't appreciate how hard and time-consuming it would be to assemble the hitch and torque all the bolts to spec while lying under my car. If I were doing it again, I'd order a solid-weld one-piece hitch rather than one that requires the hitch bar be bolted to the side panels in order to save some time and hassle.
The hitch was just as described. It took around 2 hours to install. I appreciated the three pieces instead of one so the weight of the pieces was less and easier to install.
Very happy with the looks and install of this trailer hitch.
Easy install great product with perfect fit. Thank you!
Works as advertised. Installation photos are misleading.
Do you have a question about this Trailer Hitch?
Info for this part was:
At etrailer we provide the best information available about the products we sell. We take the quality of our information seriously so that you can get the right part the first time. Let us know if anything is missing or if you have any questions.


Thank you! Your comment has been submitted successfully. You should be able to view your question/comment here within a few days.
Error submitting comment. Please try again momentarily.