
Best 2014 Volkswagen Jetta Bike Racks
change vehicle# 1
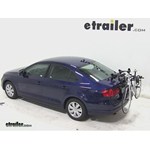
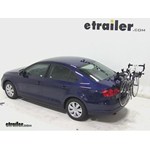
Thule Passage Trunk Bike Rack for 2 Bikes - Hanging Style

- view all Trunk Bike Racks
- Frame Mount - Anti-Sway
- 2 Bikes
- Non-Retractable
- Locks Not Included
- 6 Straps
- Adjustable Arms
- Hanging Rack
- Thule
More Information >

by: David j kentucky12/20/20132003 Volkswagen Jetta
Really fast and information about shipping was right on!! Would not hasitate to use again!!
View More
View Less
by: Jennifer06/14/2020
Excellent and prompt customer service! When I first ordered my product it wasn’t in stock— staff were quick to let me know and offered me comparable products. I ended up waiting for my original order and shipping quick and they stayed in touch with ideas! Thule: The instructions could be a little more detailed. I ended up watching YouTube videos to help me instal. Overall it was easy, and this was the first rack I’ve ever installed and I did it by myself! I was surprised to learn the bike rack is in no way secured inside your vehicle, so.. I store it in my garage when it’s on.

View More
View Less
# 2
Swagman XTC2 Bike Rack for 2 Bikes - 1-1/4" and 2" Hitches - Frame Mount

- view all Hitch Bike Racks
- Platform Rack
- Folding Rack
- Frame Mount
- Locks Not Included
- 2 Bikes
- Class 2
- Fits 1-1/4 Inch Hitch
- Fits 2 Inch Hitch
- Fits 1-1/4 and 2 Inch Hitch
- Swagman
More Information >
by: Kerry in Florida08/12/2020
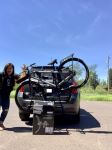
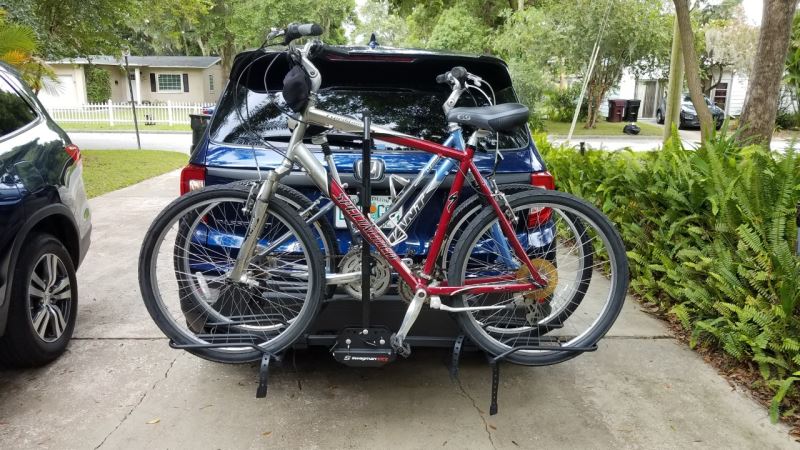
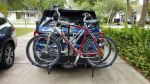
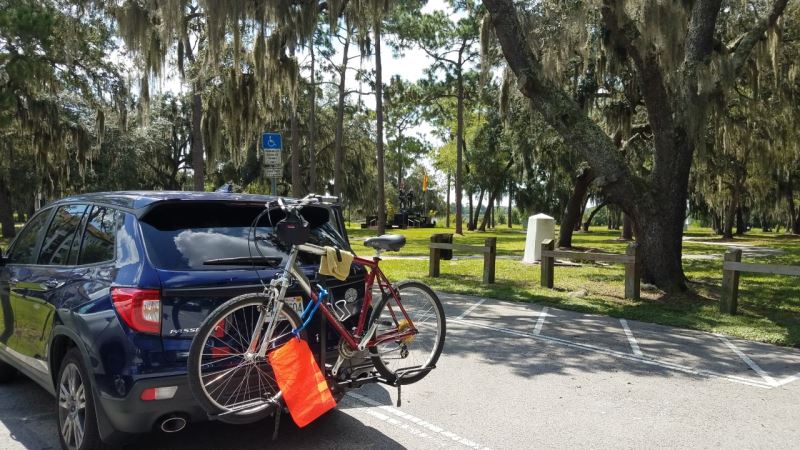
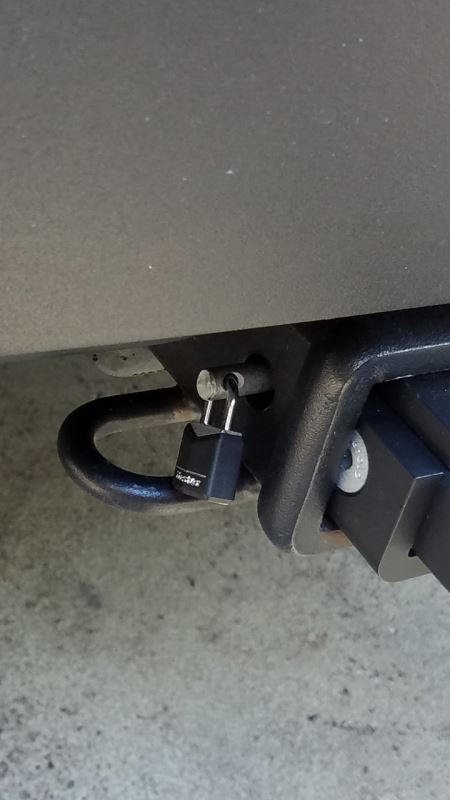
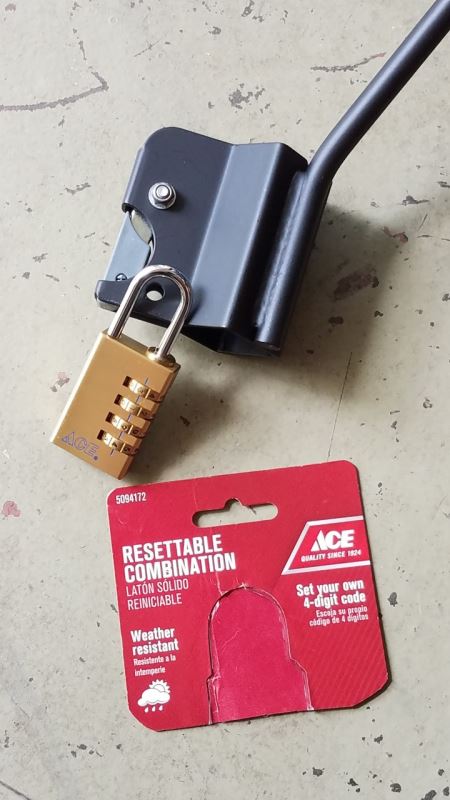
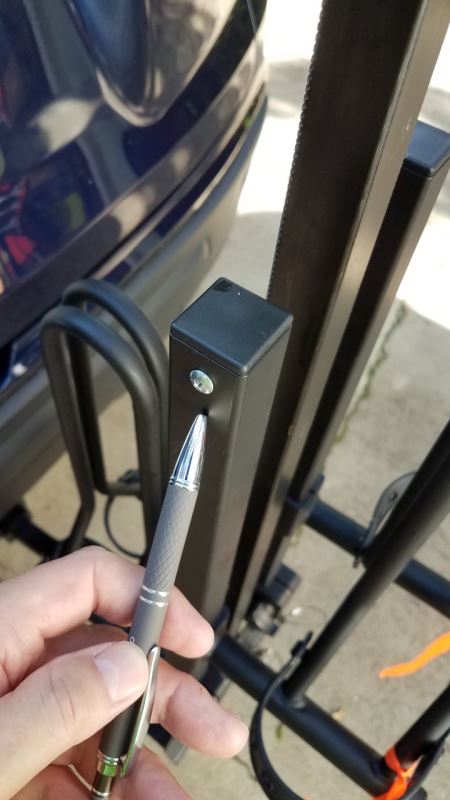
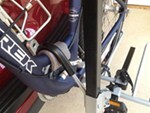
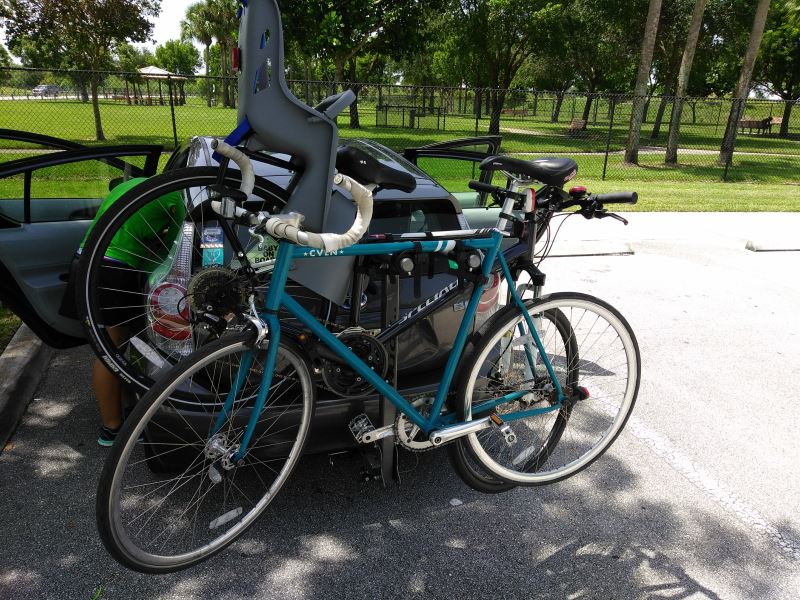
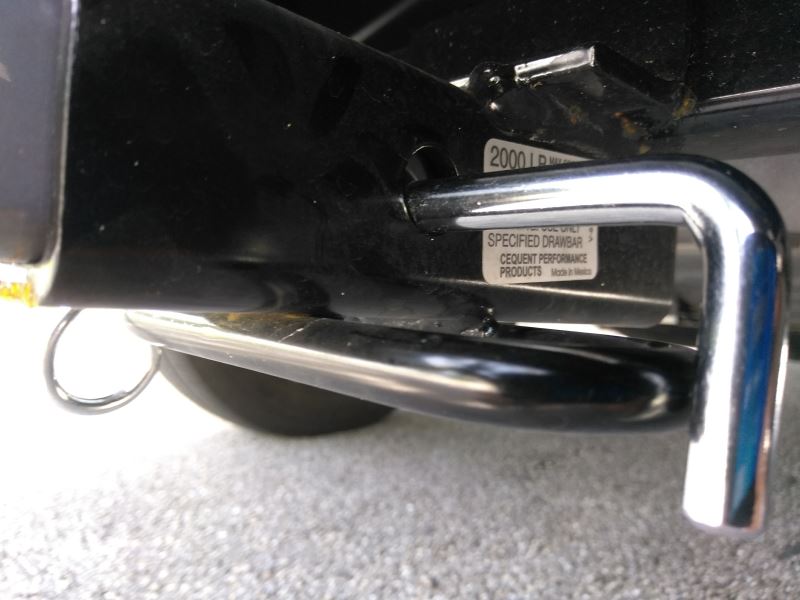
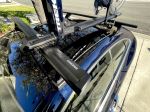
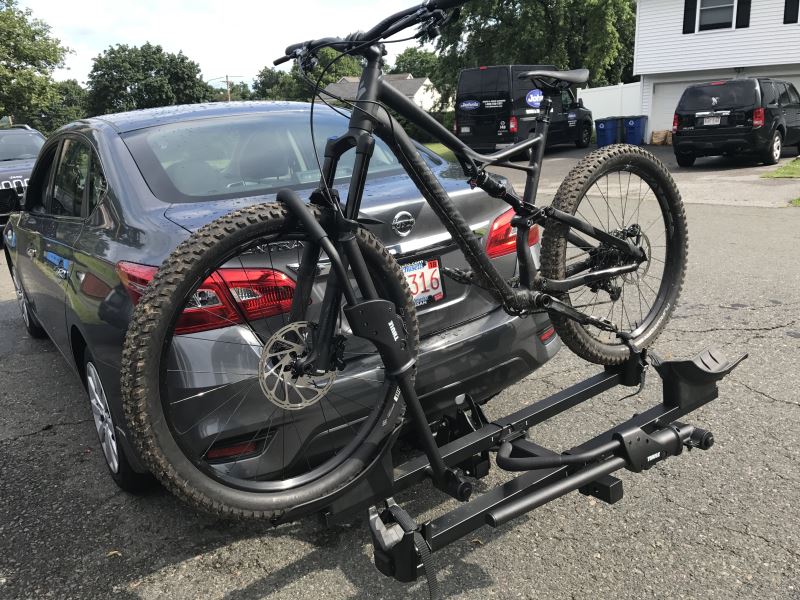
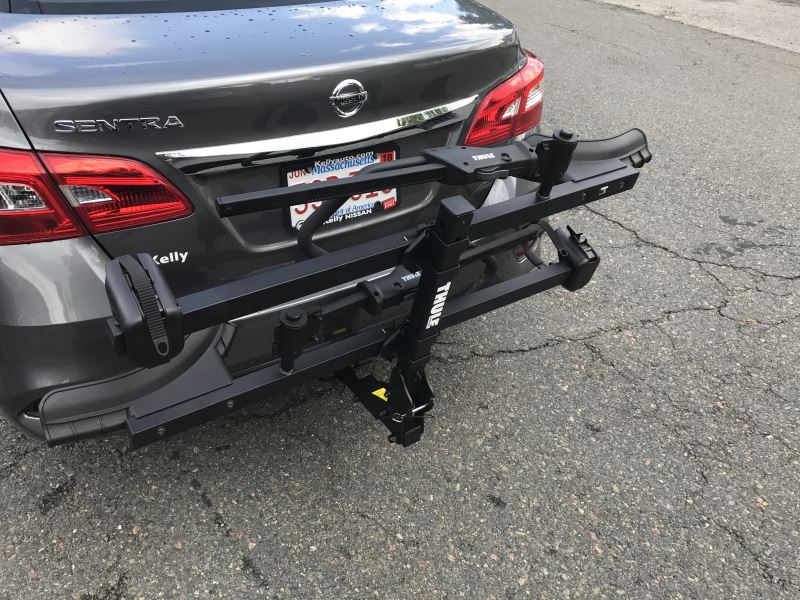
First-time rack buyer / owner / installer. The rack arrived in a timely fashion, maybe a day or 2 ahead of schedule. It was well packaged. I’m LOVING this bike rack. It was easy to put together and to mount on my new Honda Passport. Thus far, no squeaks in my 2” receiver. Hardest part of initial set-up is figuring out the best way to position two bikes. Trial & error and some patience. The directions weren’t clear as to where the 2 left-over screws went. I found the answer in another review and have posted a pic in case others have the same problem (photo with pen pointing at screw). These screws go in the underneath side of both of the folding arms. They appear to keep the wheel wells from sliding off in case in you drive with an empty, un-folded rack, and forgot to tighten down the wheel wells. The folding arm push / pull pins can be difficult at times. I coated the tips with some lube. That and a little jiggling seems to solve that issue. I guess it’s better for the pins to be snug vs popping right out. I added a small Master lock to the hitch pin (in lieu of the provided cotter pin) as a theft deterrent. I read that a 3/16 shackle lock will fit into the bike clamp down arms to also act as a deterrent. I had an old 3/16 lock that did snugly fit and appeared to be locked. HOWEVER, I yanked on the lock and it came open as there isn’t quite enough clearance for the shackle to lock. I discovered that longer 3/16 shackle locks are hard to find. Have attached a photo of the lock that actually fits and works (Ace Hardware). One lock on the upper clamp down arm will secure both arms as the lower arm can’t be removed without removing the upper arm. The clamp down arms appear to be coated to prevent damage to your bike. I’ve tried a simple rag and ultimately settled on pool noodle pieces as a precautionary measure. I CAN NOT open my tailgate (regardless of whether or not the rack is fold up and in the bike carry position). If that’s a concern for you, then spring for the more costly titling version. My back-up camera still functions.


View More
View Less
by: Kevin K06/27/2014
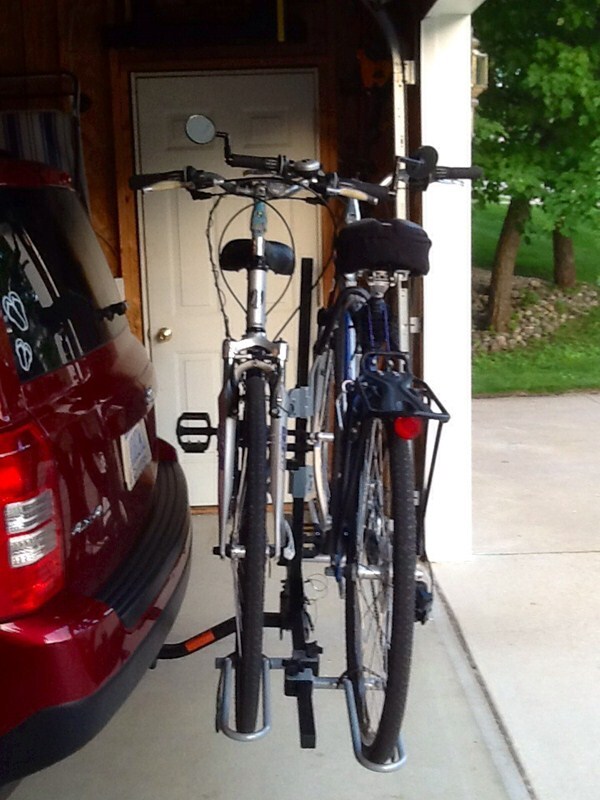
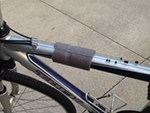
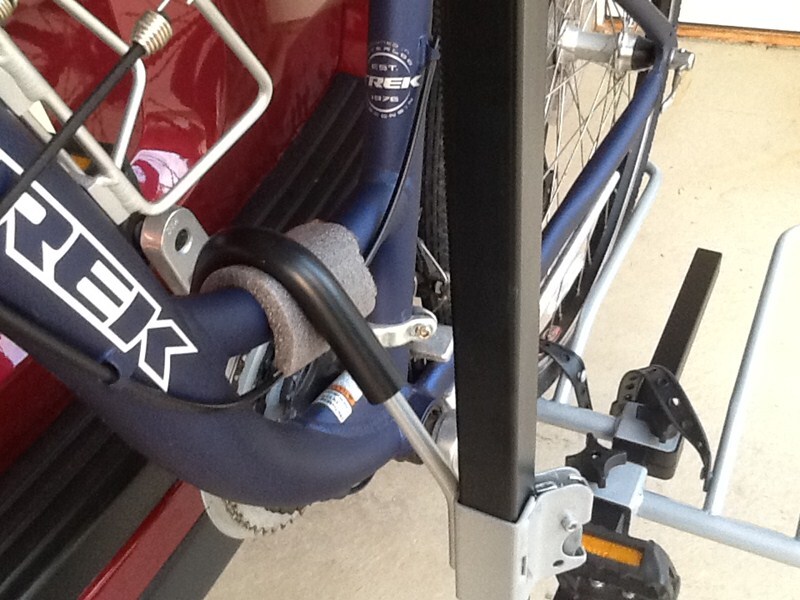
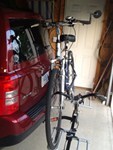
The Swagman XTC-2 platform bike carrier arrived very quickly from etrailer and in good shape, the actual carrier box is inside another shipper box, which I'm sure helped with its condition. Assembly was relatively quick and painless, even though the instructions could be a little more thorough. Installing the carrier on the back of our Jeep Patriot also was quick, it helps to have an extra ratchet & 3/4" socket laying around for just this purpose. Installing the bikes takes a little patience and trial and error the first time you try and put them on the carrier. It's easy enough to adjust the wheel holders to fit the wheelbase of your bikes, but for us at least, the challenge was trying to swing the vertical support bar up into position after putting on the first bike (closest to the Jeep). We couldn't angle the bike enough toward the Jeep to have the bar clear the bike. We learned that the easiest way to secure the first bike was to remove the ratcheting frame hooks altogether, put the bike in the carrier, swing up the vertical support bar, put in the pin, and then slide one of the frame hooks down on the bar. The outside bike is much easier because you can set the bike in the carrier at whatever angle you need, not being limited by the back of the vehicle. One thing we did to protect the bike frames was to use some foam pipe insulation as cushion between the frame hook and the frame (see pictures). Once you get a system for installing the bikes, it is very quick to load/unload them. The rack seems to be well made and doesn't wiggle excessively when traveling. All in all a good product for a good price, would definitely recommend it for anyone looking for a platform bike carrier.


View More
View Less
# 3
Thule Hitching Post Pro Bike Rack for 4 Bikes - 1-1/4" and 2" Hitches

- view all Hitch Bike Racks
- Hanging Rack
- Folding Rack
- Tilt-Away Rack
- Frame Mount
- Locks Not Included
- 4 Bikes
- Class 1
- Class 2
- Class 3
- Fits 1-1/4 and 2 Inch Hitch
- Fits 1-1/4 Inch Hitch
- Fits 2 Inch Hitch
- Thule
More Information >
by: Fabio Joly07/27/2017
Excellent product Its been a year that I bought and still working well using everyday... Im very happy I recommend it

View More
View Less
by: Nano07/11/2013
I love the anti-sway feature of this bike rack.
View More
View Less
# 4
Hollywood Racks Express 3 Bike Carrier - Fixed Arms - Trunk Mount

- view all Trunk Bike Racks
- Frame Mount - Standard
- 3 Bikes
- Non-Retractable
- Locks Not Included
- Does Not Fit Spoilers
- 6 Straps
- Non-Adjustable
- Hanging Rack
- Hollywood Racks
More Information >
by: Perry07/13/2016
I recently installed my HRE2 on my vehicle. The setup was easy and took about ten minutes. My daughter and I took it out for a test drive. We drove it over rough streets to see if it would fall off and it did not. I checked for scratches and found none. The rubber straps provide a secure grip for my bike.I feel safe knowing that i can tow my bike anywhere to ride.Thanks.
View More
View Less
by: aaron02/17/2017
Nice product, works great for my 2010 VW Jetta SE. Once you figure out how it works it's pretty simple. Only problem is getting the trunk to close after attaching the hooks on the bottom, I have to slam it hard 3-4 times to get it to latch.
View More
View Less
# 5
Thule Passage 3 Bike Carrier - Trunk Mount

- view all Trunk Bike Racks
- Frame Mount - Anti-Sway
- 3 Bikes
- Non-Retractable
- Locks Not Included
- Fits Most Factory Spoilers
- 6 Straps
- Adjustable Arms
- Hanging Rack
- Thule
More Information >
by: David j kentucky12/20/20132003 Volkswagen Jetta
Really fast and information about shipping was right on!! Would not hasitate to use again!!
View More
View Less
by: Kelly11/20/2017Ford Edge
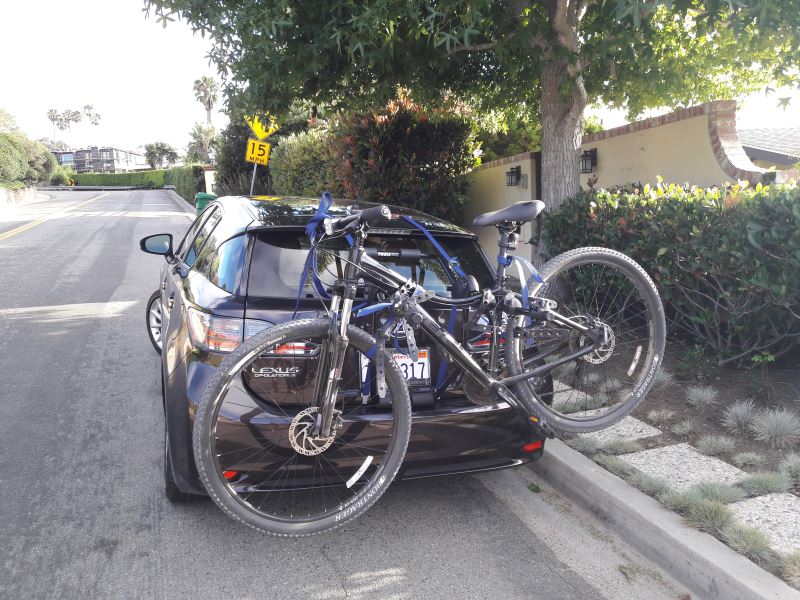
Ford EdgeFits perfectly on our Lexus CT200h. Only on the old LS400, the side straps have to be fastened to the wheel arch edge, since the upper trunklid gap is to narrow for inserting the strap hooks. Mounting of two bikes is (with some routine) quickly done, and they stay safe even for longer and faster routes. For transporting three (mountain) bikes, though, the design doesn't seem big and robust enough. Nevertheless, the price-benefit-fun ratios are way better than reasonable.

View More
View Less
# 6
Swagman Trailhead Bike Rack for 2 Bikes - 1-1/4" and 2" Hitches - Tilting

- view all Hitch Bike Racks
- Hanging Rack
- Folding Rack
- Tilt-Away Rack
- Frame Mount
- Locks Not Included
- 2 Bikes
- Class 1
- Class 2
- Class 3
- Fits 1-1/4 and 2 Inch Hitch
- Fits 1-1/4 Inch Hitch
- Fits 2 Inch Hitch
- Swagman
More Information >
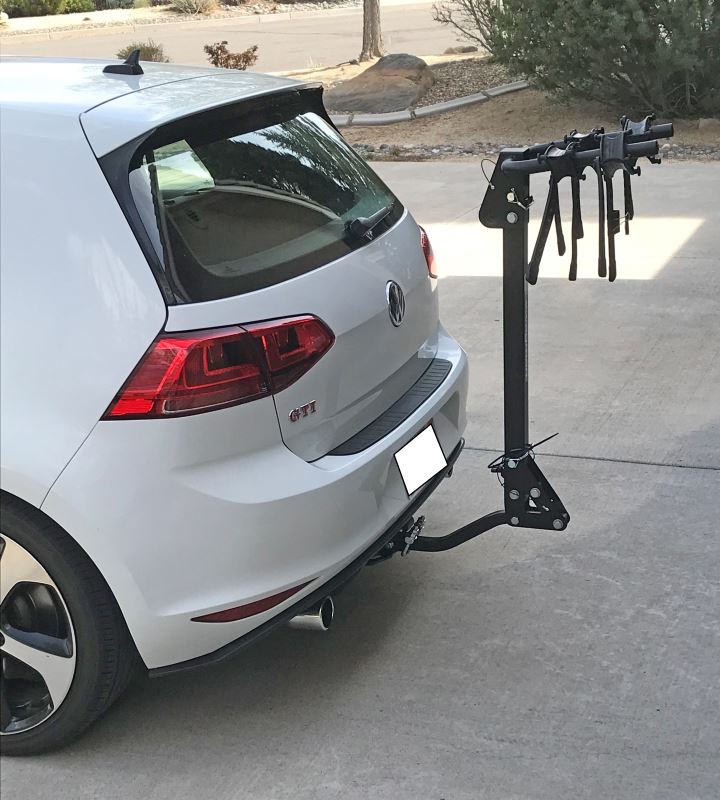
by: Mark04/23/2021
etrailer has the best pre- and post-sales customer service I've ever seen! I started out not knowing anything about hitch-mounted racks. So I wrote to etrailer telling them about my car and type of hitch I was about to have installed. Samuel wrote back with lots of great information tailored specifically to my car. He even included a photo that looked just like my 2017 white VW GTI with a hitch and rack installed. Okay something of a coincidence. But the rest of the assistance I got from the crew at etrailer was just as prophetic. I went into this a novice and came out knowing lots more about hitches and racks and finding the rack best suited to my situation. I have a small car, a class 1 hitch and a heavy mountain bike. I got exactly what I needed. As to the Swagman rack itself, it works fine. If I had a different situation I would probably buy a platform rack as they are easier to load. There's no reason to buy a bike rack anywhere else.

View More
View Less
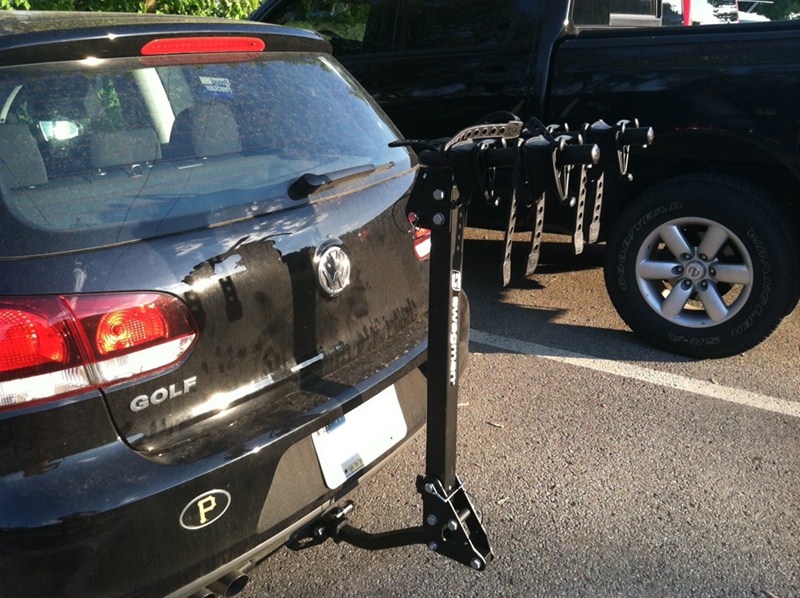
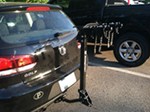
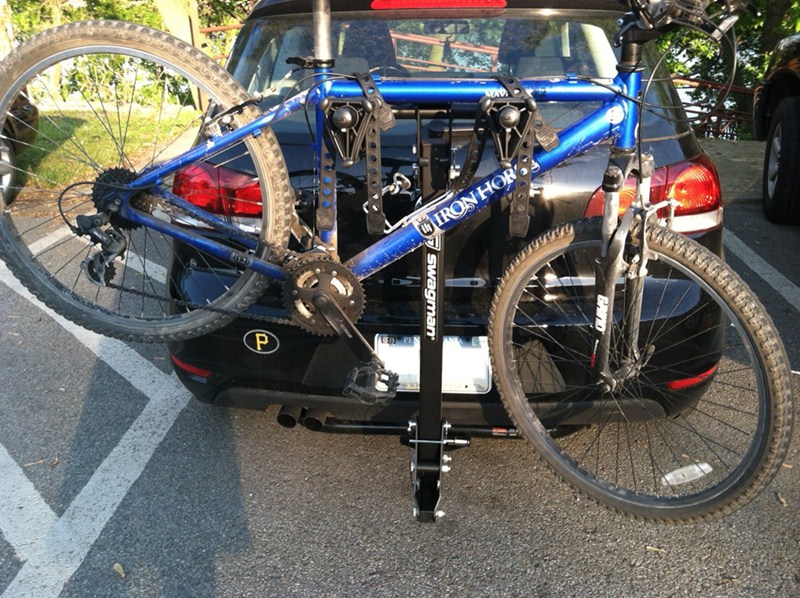
by: AlleyCat05/17/2013
First off, thanks to Jason T. or "Troop". The exemplary customer service he provided is rare these days. Troop made several calls to the various manufacturers to ascertain which bike rack would afford me the most ground clearance as my new VW Golf sits low to the ground and my old bike rack frequently scraped the ground when I went up even a slight up hill grade. His efforts paid off as he found me the best bike rack for my car, the Swagman Trailhead 2 Bike Carrier. It sits up off the ground just high enough that it doesn't scrape on my driveway. It is also sturdy and holds my bikes securely. And, the delivery was amazingly fast. I had my rack in about 2 days! Note to Troop, see my Pittsburgh Pirates Logo on my bumper in the attached pictures? Pirate Fans persevere! The Bucco's will be coming after your Cardinals this year! Thanks again Troop!


View More
View Less
# 7
Rhino-Rack MountainTrail Rooftop Bike Carrier - Fork Mount

- view all Roof Bike Racks
- Fork Mount
- 9mm Fork
- Bike and Rack Lock
- Aero Bars
- Factory Bars
- Round Bars
- Square Bars
- Disc Brake Compatible
- Clamp On - Quick
- Black
- Rhino Rack
More Information >
by: Rodrigo10/02/2020
it looks great and really held up my bike secure. Easy to install.
View More
View Less
by: Jordan09/05/2016
Love this bike rack! It fits perfectly with my Rhino Rack Cross Bars. I'm very impressed by the lack of wind noise. With the bike mounted on the rack, you can barely hear the wind noise at 60mph. With the sunroof open you can hear wind noise, but as long as the window is closed, you can only slightly hear anything if the radio is off and you are trying to hear it. Amazing! Can't wait to get more use out of it in the future!


View More
View Less
# 8
Kuat Beta Bike Rack for 2 Bikes - 1-1/4" Trailer Hitches - Tilting

- view all Hitch Bike Racks
- Hanging Rack
- Folding Rack
- Tilt-Away Rack
- Frame Mount
- Locks Not Included
- 2 Bikes
- Class 1
- Class 2
- Fits 1-1/4 Inch Hitch
- Kuat
More Information >
by: Daniel F07/06/2019
I was looking for a light weight bike rack for my 2015 Honda Accord. Your videos stated that the Kuat Beta was light and easy to install. You were right. I opened the box, read the instructions, and had it installed in about 10 minutes. I don't use a rack lock. It is so easy to pop on and off the hitch that I keep the rack in my car trunk.

View More
View Less
by: Larry08/10/2017
We've been using this bike rack with a 1.25" Draw-Tite receiver hitch (also purchased from etrailer) on a 2012 Prius C for a month with no problems. As shown on the pictures, it fits two bikes very well, even one with a baby carrier. I chose this model based on recommendations from etrailer that it can be easily detached from the car without tools. True to their word, it is very easily detachable from the hitch and folds up nicely to fit in your garage/closet/storage area. Basically, it uses a hand tightened ball bearing mechanism to secure itself into the hitch receiver, and then uses a 3/8" hand locked pin as a safety device. You can install and de-install this rack in just a few minutes. During driving, there is little noticeable vibration from this rack, even on rougher roads or speed bumps. The only downside is that the holes on the receiver hitch do not align perfectly with the holes on the bike rack (see picture). I believe a few other reviewers also noted this issue. There is enough room to fit the safety pin, but not quite enough to fit a 1/2" hitch lock. I called Kuat to ask them about this and the rep told me that not all hitches will line up with this rack. Kuat, coincidentally(?), sells a hitch lock that is also 3/8" (same size as the safety pin) and still fits.


View More
View Less
# 9
Yakima FrontLoader Wheel Mount Bike Carrier - Roof Mount

- view all Roof Bike Racks
- Wheel Mount
- 15mm Fork
- 15mm Thru-Axle
- 20mm Thru-Axle
- 5mm Fork
- 9mm Fork
- 9mm Thru-Axle
- Bike Lock
- Aero Bars
- Factory Bars
- Round Bars
- Square Bars
- Disc Brake Compatible
- Clamp On - Quick
- Black
- Yakima
More Information >
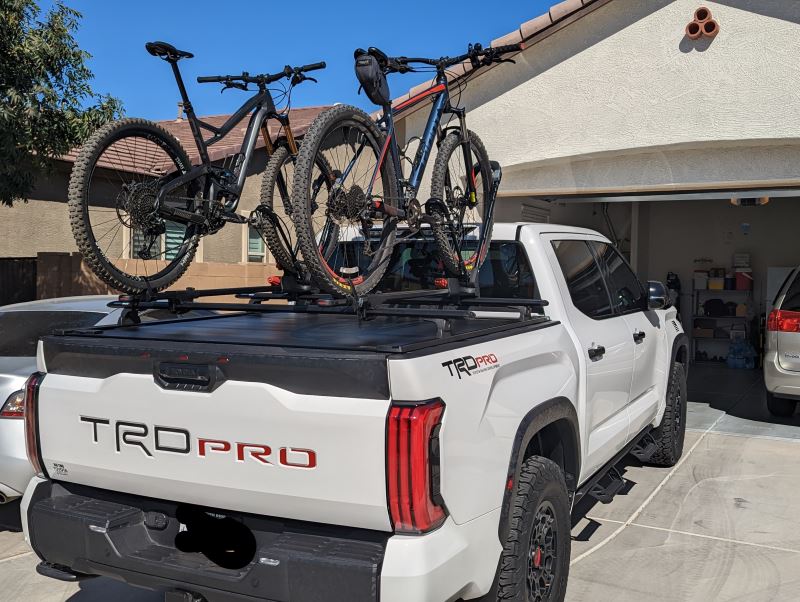
by: Rodney10/11/2023
Overall I am happy with these bike carriers. They mount to the racks over the bed of my Tundra TRD Pro. Installation is simple. I think they could be just a bit sturdier because there is just a bit of wobbling when driving on bumpy roads but I'm not too worried about them coming dislodged. Take note that although they come with a cable lock to attach the bike to the carrier, the key is sold separately.


View More
View Less
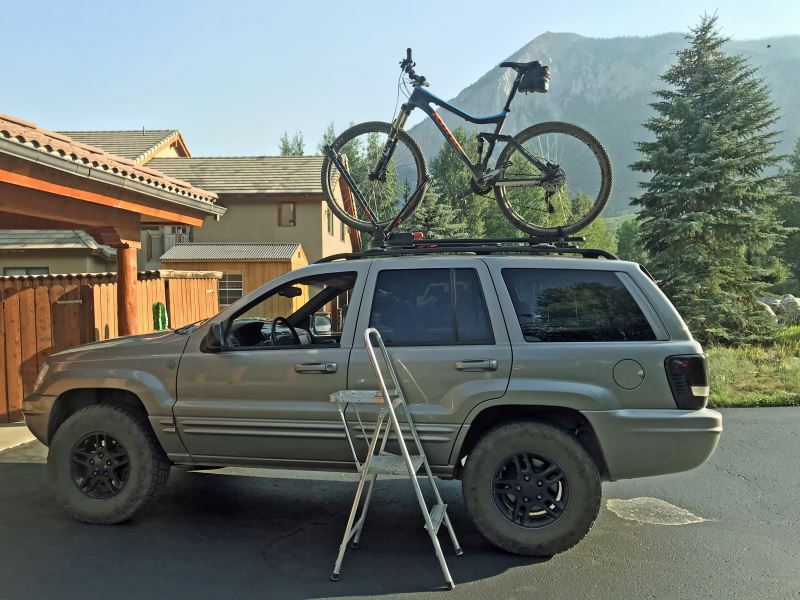
by: Karey08/08/2018
Very good product. It holds the bike securely on the roof without contacting the frame. It is easy to adjust from my road bike to my 29er mountain bike. Our drives are all relatively short, so I like that I do not need to remove the front wheel to lock in the bike. It's also nice that the SKS locking system allows me to use the same key for this rack that I use for my Yakima roof box and hitch rack. This is my first roof rack and I chose this route for a couple reasons. Some of the roads we travel to get to our trail heads are a bit rough and with a roof rack I don't have to worry about bottoming out a hitch rack hanging off the back of the vehicle. Also, it takes up less room in the garage. Our vehicle is a 2000 Jeep Grand Cherokee with an additional 4 inches of ground clearance. That makes it a bit of a reach for my 5'4" wife, so we take our two-step along to help her. This is my third time purchasing from etrailer, and each experience has been very good. They are a very customer service oriented company. I really appreciate all the additional information they provide on their products, especially all the videos they produce to aid in reviews, assembly, and use.
View More
View Less
# 10
Rhino-Rack Road Warrior Rooftop Bike Carrier - Fork Mount

- view all Roof Bike Racks
- Fork Mount
- 9mm Fork
- Bike and Rack Lock
- Aero Bars
- Disc Brake Compatible
- Clamp On - Standard
- Black
- Rhino Rack
More Information >
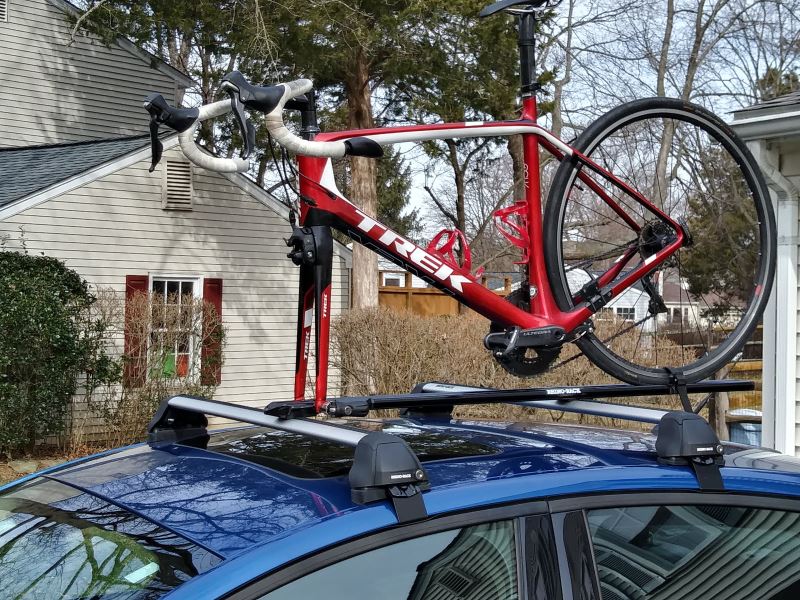
by: Scott02/06/2020
This bike carrier has a clean design and it assembled and attached to the roof rack easily. A locking front cover prevents it from being detached from the roof rack and the tray has a cut out in the front for a disc brake if my next bike has one. Once everything is snug, the bike feels solid and there's no slop.

View More
View Less
by: KevinV06/08/2022
I'm not too sure how to rate this but I'm not happy with it. Everything that happened is no fault of etrailer. I've made many purchases from etrailer, they're a great distributor. The bike rack appears to be great. The problem seems to be that they changed the design. To start, UPS damaged the box in shipping and then tried to tape the package they sent me. After walking through the parts in the box with an etrailer rep on the phone, it seemed that no parts were missing. So I proceeded to connect everything up based on the instructions. As I put it together I noticed the mounting bracket in the rear doesn't have anything to remove the slop. The rear is literally resting on a slider, which means that it would rattle when driving around. Just for kicks I took it for a drive with my bike on top. It rattled like crazy! So I looked at the installation videos on etrailer and then youtube. Every one of them showed an extra rear mounting bracket with knobs to tighten. These were not listed in the install manual so I suspect Rhino thought they could cut cost by eliminating them. I contacted etrailer to see if they had any. They didn't. So I returned it. Sadly, I still had to pay a $25 restocking fee. I'm not sure why etrailer charged me. It's not like I bought the wrong thing and didn't want it. It's actually a really nice bike carrier. Just a flaw in the design that etrailer should catch when they test it out in their videos. If anything, I've helped them out with this. Hopefully etrailer will test out what I sent them, then reach out to Rhino about this new design flaw. Again, I like etrailer as a service but I wish they had caught this before selling to me (and others). I strongly suggest that you don't buy this until the bracket issue gets resolved. Also, take a look at the last pic of the Inno XA391 on the etrailer site. They resolve the rear bracket rattle by putting in a thumb screw.
View More
View Less
# 11
Kuat Trio Roof Bike Rack - Fork Mount - Clamp On - Aluminum - Black and Polished Chrome

- view all Roof Bike Racks
- Fork Mount
- 15mm Thru-Axle
- 20mm Thru-Axle
- 9mm Fork
- Bike Lock
- Aero Bars
- Factory Bars
- Round Bars
- Square Bars
- Disc Brake Compatible
- Clamp On - Standard
- Black
- Kuat
More Information >
by: Michael P.01/22/2023
Installed all products after having watched videos and read through pdf instructions. The Yakima JetStream roof rack system is outstanding (with one exception) - instructions and videos facilitated the installation. The Yakima system is the only one I could find for my car (Mercedes E450 Coupe), as the car's panorama roof glass extends to the edges near the fixed mounts. The Yakima system is quiet, thanks to the ability to modify the crossbar pitch angles, and has a high-quality appearance that complements my car. And it is rock solid. The Kuat Trio bike tray is an outstanding low-cost, simple solution - well-designed and well-executed and installs to the Yakima JetStream bars flawlessly. I would recommend that Kuat include a 12mm x 100mm thru-axle in the Trio kit, as I had to purchase that part separately. Only disappointment is in the Yakima Landing Pad Covers that ship with the Landing Pad 22 (LP 22) kit. The covers do not snap tightly into place, and appear as if they were designed for a different Landing Pad. In summary, my Yakima/Kuat bicycle roof rack system exceeds expectations (except for the LP 22 Covers), operates flawlessly, looks great, and stores easily. It has given me high confidence in Yakima, in Kuat and in etrailer.com. Well done.


View More
View Less
by: Jose10/25/2022
Great rack easy to install, light weight and well made.


View More
View Less
# 12
Thule T2 Classic Bike Rack for 2 Bikes - 1-1/4" Hitches - Wheel Mount

- view all Hitch Bike Racks
- Platform Rack
- Folding Rack
- Tilt-Away Rack
- Wheel Mount
- Hitch Lock
- 2 Bikes
- Class 1
- Class 2
- Fits 1-1/4 Inch Hitch
- Carbon Fiber Bikes
Electric Bikes
Fat Bikes
Heavy Bikes - Thule
More Information >
by: Mike P07/10/2017
I have to get a trailer hitch extension in order for the bike rack to fold up when not in use. Definitely will go through etrailer for this item.


View More
View Less
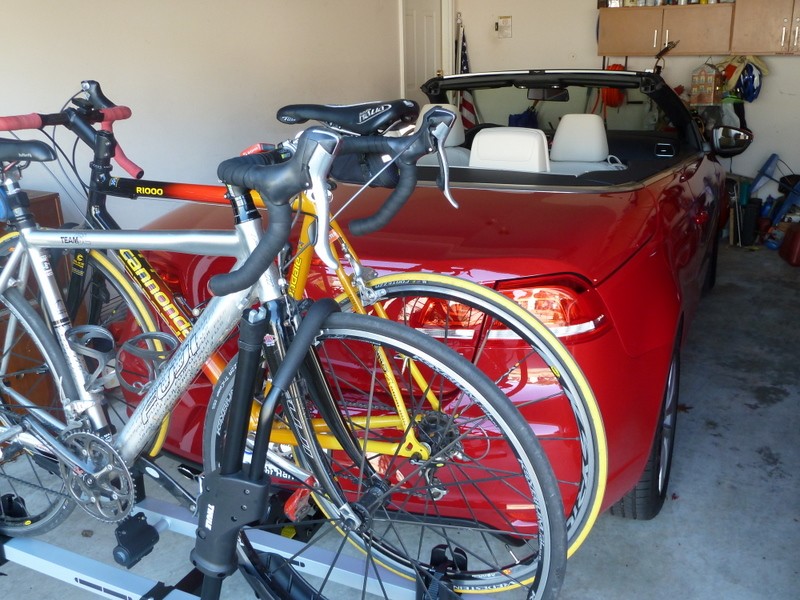
by: John Anschutz12/04/2011
Great product. We just got a new convertible and I could not use the roof mount or trunk mount. Using the bikes was important. Taking care of the bikes is important too. This bike rack is really the best I have ever had. It is extremely easy to use. I like that it has built in locks. I can use the hard top convertible on the VW Eos if I only have one bike positioned outward. It also works with no bikes installed. I could not be happier with this product and the incredible price, fast shipping and overall value from etrailer.com.

View More
View Less
# 13
Swagman Upright Bike Rack for 1 Bike - Roof Rack Crossbars - Frame Mount

- view all Roof Bike Racks
- Frame Mount
- 15mm Fork
- 15mm Thru-Axle
- 20mm Thru-Axle
- 5mm Fork
- 9mm Fork
- 9mm Thru-Axle
- Bike Lock
- Factory Bars
- Round Bars
- Square Bars
- Disc Brake Compatible
- Clamp On - Standard
- Black
- Swagman
More Information >
by: Nick S.05/01/2012
I bought a couple of these for my new OEM VW roof rack with elliptical bars for my 01 Jetta. They fit nice, are made better than expected, and were easy to install, requiring only a 10mm and 12mm ratchet. I will be retrofitting thule lock cores into the the locking knobs on these bike carriers so that i can match the key to my roof rack. I haven't had a chance to put a bike on them yet, but will definitely be taking a bike ride this weekend.
View More
View Less
by: Jamey06/28/2023
Planning on bringing bikes while camping. I mounted 2 of the Swagman bike racks to my new Sportrack on my pop-up camper. The bikes fit perfectly. The racks seem sturdy enough. Not heavy duty, but for my needs they should be fine. Assembly was relatively fast and easy.


View More
View Less
# 14
Yakima RidgeBack Bike Rack for 4 Bikes - 1-1/4" and 2" Hitches - Tilting

- view all Hitch Bike Racks
- Hanging Rack
- Folding Rack
- Tilt-Away Rack
- Frame Mount
- Hitch Lock
- 4 Bikes
- Class 2
- Class 3
- Fits 1-1/4 and 2 Inch Hitch
- Fits 1-1/4 Inch Hitch
- Fits 2 Inch Hitch
- Yakima
More Information >
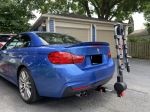
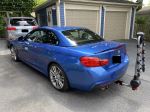
by: Ryan06/12/2022
Check out my other review on the hidden hitch for a 2015 BMW 4 Series for the majority of the review, but this thing is great. Easy setup and install, does all the things it's supposed to do. Mounting and removing bikes is a snap with the included clips (big difference from some of the cheaper variants with nylon ratchet straps). Fits very snugly in my 2" receiver, and pretty solid on the highway and over bumpy roads.


View More
View Less
by: Luis 07/20/2023
The rack itself is fantastic. Not too heavy, easy to attach to hitch, and very easy setup. The only real downside is if your bicycles don't have a standard frame, you'll need to buy the Yakima Tube Top Bike Adapter Bars (~$50 each) in order to be able to mount them on the rack. I will say that smaller bikes (for my 9 year old) can be a challenge to mount with larger bikes as you'll need to finagle the handle bars and such to get them to line up but once you do it a few times you figure it out.
View More
View Less
Bike Rack Videos
Thule Passage Trunk Mounted Bike Rack Review - 2014 Volkswagen Jetta
Today on our 2014 Volkswagen Jetta, we'll be test fitting the Thule Passage trunk mounted 2-bike rack, part #TH910XT. With the fit dial to #7 according to the included instructions we'll begin our test fit by placing the bike rack up onto the vehicle's trunk. The bottom part of the bike rack should rest on the upper tier of the rear bumper. We'll now take the top clips and hook them to the top part of the trunk, the side clips to side part of the trunk and the bottom clips to the bottom part of the trunk. We'll then loosely tighten them down to get them in place. Once the straps are in place and the bike rack can support itself, we'll fully tighten them down securing the bike rack to the trunk. After the securing the excess slack, we're ready to load up our bike. With the cradle straps already undone we'll simply place our bike into the frame cradles, bring the rubber coated straps around the frame and secure them. And with our bike all loaded up that will complete today's test fit for the Thule Passage, part #TH910XT, on our 2014 Volkswagen Jetta.
Thule Gateway Trunk Mount Bike Rack Review - 2014 Volkswagen Jetta
Today, on our 2014 Volkswagen Jetta, we'll be test-fitting the Thule Gateway trunk mounted 2 bike rack, part number TH9006XT. With the fit dial set to number seven, according to the included instructions, we'll begin our test fit by placing the bike rack up onto the vehicle's trunk. The bottom portion will rest on the upper tier of the bumper. We'll then take the top clips and hook them to the top part of the trunk, the side clips to the side part of the trunk, and the bottom clips to the bottom part of the trunk. We'll then tighten down the blue straps to secure the clips to the vehicle. Once everything is all tightened down and secure, we'll go ahead and secure the excess strap with the included hook-and-loop fasteners. With this done and our bike rack secure, we're ready to load up our bike.
Thule Archway Trunk Mount Bike Rack Review - 2014 Volkswagen Jetta

Today, on our 2014 Volkswagen Jetta, we'll be test fitting a Thule Archway trunk mounted 2 bike rake, part number TH9009XT.With the fit dial set to number 7, according to the included instructions, we'll begin our test fit by placing the bottom part of the bike rack on the upper tier of the rear bumper. This will allow the top portion of the bike rack to rest on the top part of the trunk.We'll now take the top clips and hook them on the top part of the trunk, the side clips to the side part of the trunk, and the bottom clips to the bottom part of the trunk. We'll then tighten down the straps to secure the bike rack to the vehicle.With the bike rack secured, we'll go ahead and secure the excess strap with the included hook and loop fasteners. Now with this done, we're ready to load up our bike. We'll flip out the gray levers on the left and right hand side of the bike rack to swing out our cradle arms.Keep in mind, the cradle arms do need to be level or slightly angled up. With the cradle arms in position, we'll simply snap down the gray levers.
Thule Big Mouth Roof Bike Rack Review - 2014 Volkswagen Jetta
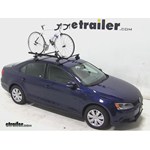
Today on our 2014 Volkswagen Jetta, we'll be test fitting the Thule Big Mouth Roof-Mounted Bike Rack, part number TH599XTR. With a Thule traverse track system on our vehicle, we'll begin our test fit by first placing the bike rack up onto the vehicle's load bars. Starting at the front, we'll position the L-brackets to go around the underside of the front bar. We'll then insert the T-bolt into the slot of the L-bracket. We'll then loosely tighten the black wing nuts. We'll now move to the rear, where we will remove a wing nut to position the bracket around the underside of the rear bar. We'll then re-install our black wing nut, making sure it is loose.
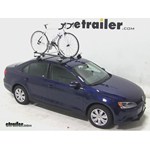
Swagman Upright Roof Mounted Bike Rack Review - 2014 Volkswagen Jetta

Today on our 2014 Volkswagen Jetta, we'll be test fitting the Swagman upright roof mounted bike rack, part number S64720. With our thule rapid traversed roof rack system on our vehicle, we'll begin our test fit by placing the bike rack up onto the vehicles load bars. Starting at the front, we'll take the silver U bolts to go in the underside of the front bar and up through the predrilled holes to the front of the bike rack. We'll then take our black wing knots to thread down onto the silver U bolts. We'll then repeat the same process for the other side. Now moving through the rear of the bike rack, this time we'll take the silver U bolt and slide it down through the predrileld holes of the bike rack. We'll take the black plate to go on the underside of the rear bar and use our black wing knots to tighten it down.
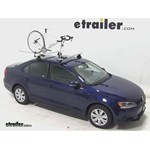
Swagman Fork Down Roof Bike Rack Review - 2014 Volkswagen Jetta

Today on our 2014 Volkswagen Jetta, we'll be test fitting the Swagman fork down roof mounted bike rack, part number S64710. With the thule rapid traversed roof rack system on our vehicle, we'll begin our test fit by placing the bike rack up onto the vehicles load bars. Starting at the front, we'll take the silver U bolts to go on the underside of the front bar up to the predrilled holes to the front of the bike rack. We'll then take our black wing knots to thread down onto the silver U bolts. We'll repeat the same process for the other side. Now moving to the rear, we'll take the silver U bolts to go on top of the bike rack through the predrilled holes. We'll take the black plate to go on the underside of the rear bar and we'll use the black wing knots to tighten it down.
SportRack Roof Mounted Bike Rack Review - 2014 Volkswagen Jetta

Today on our 2014 Volkswagen Jetta we'll be test fitting the Sportrack Roof Mounted Bike Rack, Part #SR4622. With a Thule rapid reverse roof rack system on our vehicle, we'll begin our test fit by placing the bike rack up onto to the vehicles load bars. Here at the front of the bike rack, we'll take the rubber coated U-bolts to go around the underside of the front bar, up through the pre-drilled holes at the head of the bike rack. We'll then take our black wing nuts to thread down onto the U-bolt. We'll then repeat the same process for the other side. Here at the rear of the bike rack, we'll take the black bracket which will go in between the top of the rear load bar and the bottom of the bike rack. We'll then insert our black bolts through the pre-drilled holes of the bike rack and the bracket. We'll take the rubber coated steel bracket around the underside of the rear bar, making sure the bolts go through the pre-drilled holes. We'll then use the black wing nuts to thread onto the bolts and tighten it down. Now we're ready to load our bike.
SportRack Frame Mount Roof Mounted Bike Rack Review - 2014 Volkswagen Jetta
Today our 2014 Volkswagen Jetta, we'll be test fitting the sport rack roof mounted bike rack part number Sr4611. With the Thule rapids reverse roof rack system on our vehicle, we'll begin our test fit by placing the bike rack up onto the vehicle's load bars. Starting there at the front, we'll take the rubber coated U-bolts around the underside of the front bar, up through the pre-drilled holes of the bike rack. We'll then take our black ring nuts to threat down onto our U-bolts. Now moving to the rear, we'll take the thick black bracket to go in between the bottom of the bike rack and the top of the load bar. We'll then take our black bolts to go down through the pre-drilled holes of both the bike rack and the bracket. We'll then take the rubber coated steel plate to go on the underside of the rear load bar and use the wing nuts to tighten it down. Once everything is all tightened down and secured, we're ready to load up our bike.
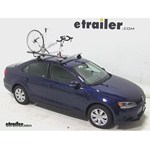
RockyMounts TieRod Roof Bike Rack Review - 2014 Volkswagen Jetta

Today on our 2014 Volkswagen Jetta, we'll be test fitting the Rockymounts TieRod roof mounted bike rack, part number RKY1014. With the Thule Rapid Traverse roof rack system on our vehicle, we'll begin our test fit by placing the bike rack up onto our vehicle's load bars. We'll start off by removing the black plastic cover at the front of the bike rack and bring the rubber coated straps around the underside of the front bar. We'll then hook them into the connection points, and move to the rear of the bike rack. We'll use the included Allen wrench to remove one of the Allen bolts to position the rear bracket around the underside of the rear bar. We'll then reinstall our Allen bolt and tighten down using an Allen wrench. Moving back up to the front, we'll use the included Allen wrench to tighten down the silver bolt to tighten down the straps up against the front bar.
RockyMounts TieRod Stretch Roof Bike Rack Review - 2014 Volkswagen Jetta
Today on our 2014 Volkswagen Jetta, we'll be test-fitting the Rockymounts Tierod Stretch roof-mounted bike rack, part number RKY1011. With a truly rapid traverse roof rack system on our vehicle, we'll begin our test-fit by placing the bike rack up onto the vehicle's load bars. Starting at the front, we'll remove the black plastic cover to position the rubber-coated steel straps around the underside of the front bar. We'll then hook them into the connection points and move to the rear of the bike rack. We'll use the included allen wrench to remove one of the allen bolts to position the rear bracket around the underside of the rear bar. We'll reinstall our allen bolt and tighten it down with the allen wrench. Moving back up to the front, we'll use the included allen wrench to tighten down the silver bolt to tighten down the straps up against the front bar. Once everything is all tightened down and secured, we're ready to load up our bike.
Kuat TRIO Roof Bike Rack Review - 2014 Volkswagen Jetta
Today on our 2014 Volkswagen Jetta, we'll be test fitting the Kuat Trio Roof Mounted Bike Rack, Part #RU01. With a Thule Rapic Traverse roof rack system on our vehicle, we'll begin our test fit by placing the bike rack up onto the vehicles load bars. Starting at the front, we'll take the rubber coated u-bolts to go on the underside of the front bar. They'll go up through the pre-drilled holes at the head of the bike rack. We'll then use the cylindrical black nuts to thread down onto the black u-bolts. We'll then repeat the same process for the other side. We'll then go ahead and use the included tightening tool to tighten down the nuts to secure the front part of the bike rack to the front bar. Now, moving to the rear we'll remove one of the black wing nuts and position the rear bracket on the underside of the rear bar. We'll reinstall the wing nut and tighten it down. Once everything is all tightened down and secured, we're ready to load up our bike.
Hollywood Racks Expedition Trunk Bike Rack Review - 2014 Volkswagen Jetta
Today on our 2014 Volkswagen Jetta we will be test fitting the Hollywood Racks Expedition trunk-mounted 2-bike rack, part #HRS6-2. We will begin our test fit by placing the bottom part of the bike rack onto the upper tier of the rear bumper. Next, we'll flip out the black levers on the left and right hand corner of the bike rack. This will allow us to position the top portion of the bike rack onto the top portion of the trunk. With it in position, we'll clamp down the levers and we're ready to go. We'll take the top clips to the top part of the trunk, the side clips to the side part of the trunk, and the bottom clips to the bottom of the trunk. We'll then tighten down the straps to secure the bike rack to the vehicle's trunk.
Hollywood Racks Baja 2 Trunk Bike Rack Review - 2014 Volkswagen Jetta
Today on our 2014 Volkswagen Jetta, we'll be test fitting the Hollywood Racks Baja trunk mounted 2 bike rack, part number HRB2. We'll begin our test fit by placing the bottom part of the bike rack onto the upper tier of the rear bumper. We'll then flip out the levers on the upper left and right hand corner of the bike rack to swing out our dual arms and position the top part of the bike rack on the top part of the trunk. Keep in mind, the cradle arms do need to be level or slightly angled up. Once we've established this position, we can clamp down the black plastic levers. We'll now take the top clips and hook them to the top part of the trunk, the side clips to the side part of the trunk, and the bottom clips to the bottom part of the trunk. We'll then tighten down the straps to secure the bike rack to the vehicle. Once everything is all tightened down and secured, we'll go ahead and secure the excess strap. With this done, we're ready to load up our bike.
2014 Volkswagen Jetta Bike Rack Questions
- The only trunk-mounted bike rack that will allow you to open the trunk of your 2014 VW Jetta is the SeaSucker Komodo Trunk Bike Rack # 298-BK1910-SV because it mounts with four vacuum cups instead of straps. The reason a trunk cannot open with a trunk-mounted rack is because opening the trunk will cause the straps to loosen and the rack to fall off.
The vast majority of trunk-mounted bike racks use straps to secure to vehicles so they need to be removed before opening your...
view full answer... - The Rhino Rack Dual Trekker part # RRRBC048 weighs 56 lbs. The weight capacity per bike for this rack is 45 lbs.
I attached a review video for this rack for you to check out as well.
view full answer... - To lock your bikes to this roof basket you'll need to use a cable lock like the etrailer # e98891 since the Rhino-Rack XTray Pro Cargo Basket and 2 Bike Carrier - Steel - 58-1/4" x 41" - 165 lbs # RRRMCB03 does not come with the skewers. There are adapters for different size skewers but none of them fit with a locking solution.
view full answer...


What our customers are saying:
"great experience!!! I've been looking for a hitch. With the experience I just had with the bike rack, I;kk definitely come back and order the hitch when I have a little more $$$. delivery was quick! the product was awesome!!! Frank"