


To see if this custom-fit item will work for you please tell us what vehicle you'll use it with.


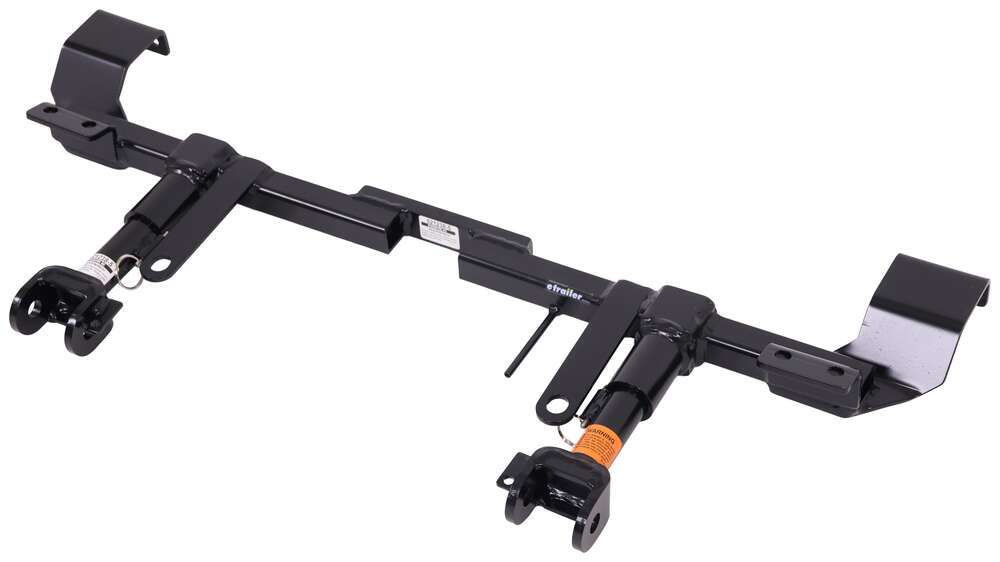
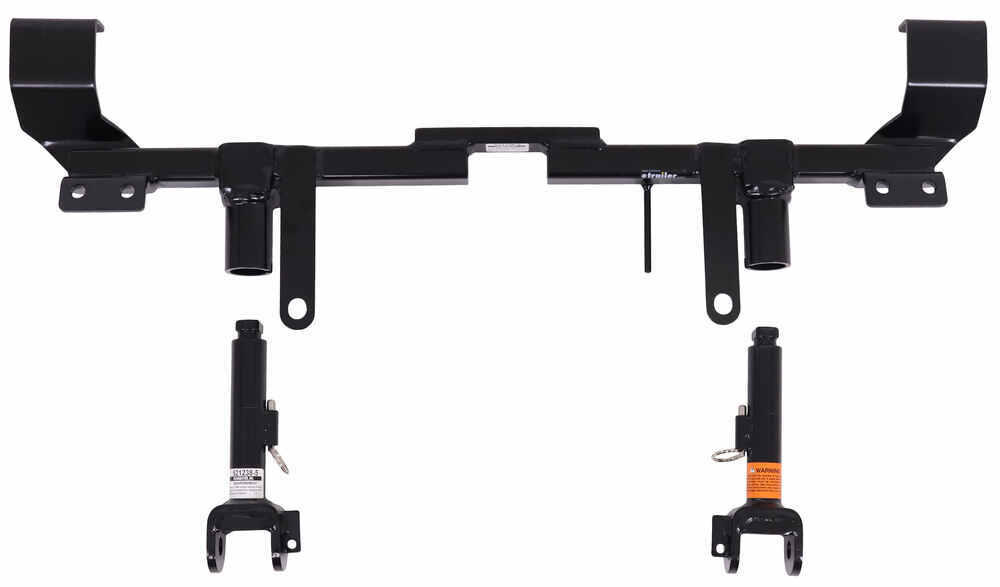


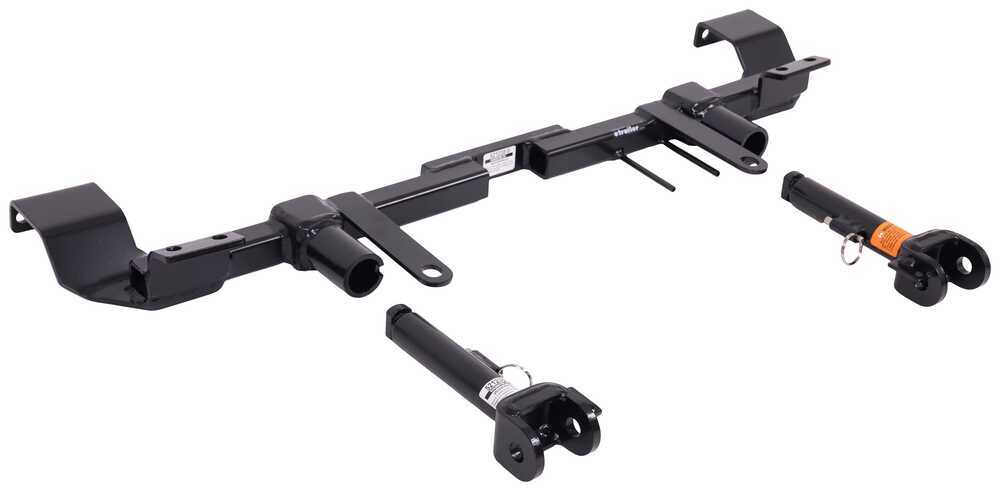

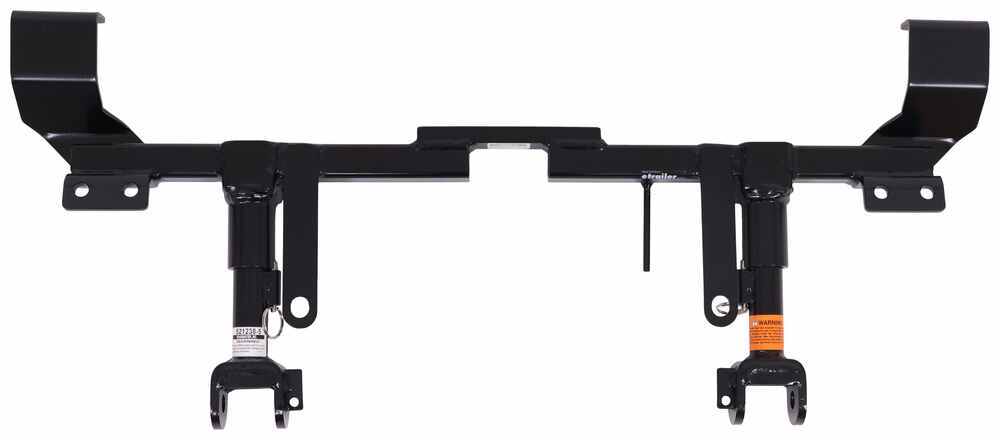

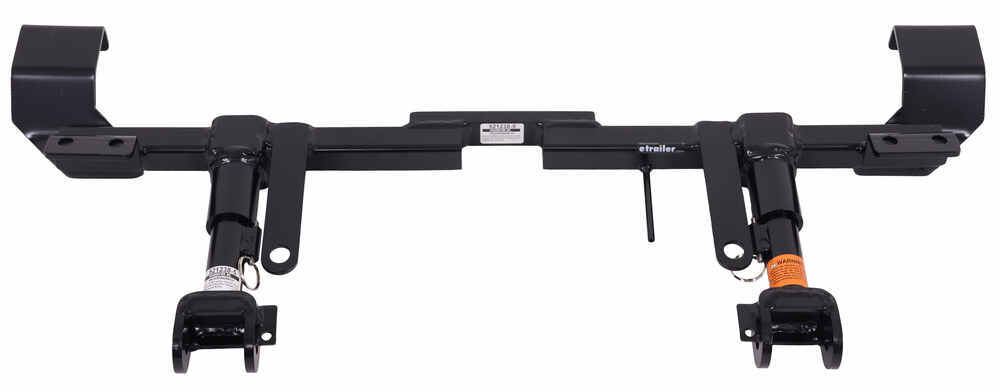

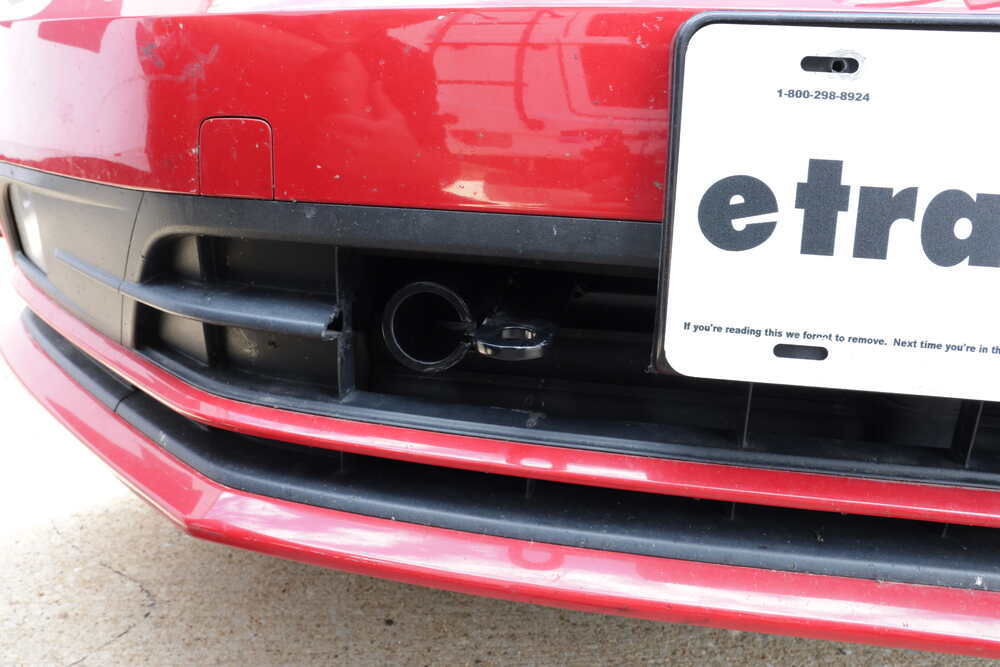
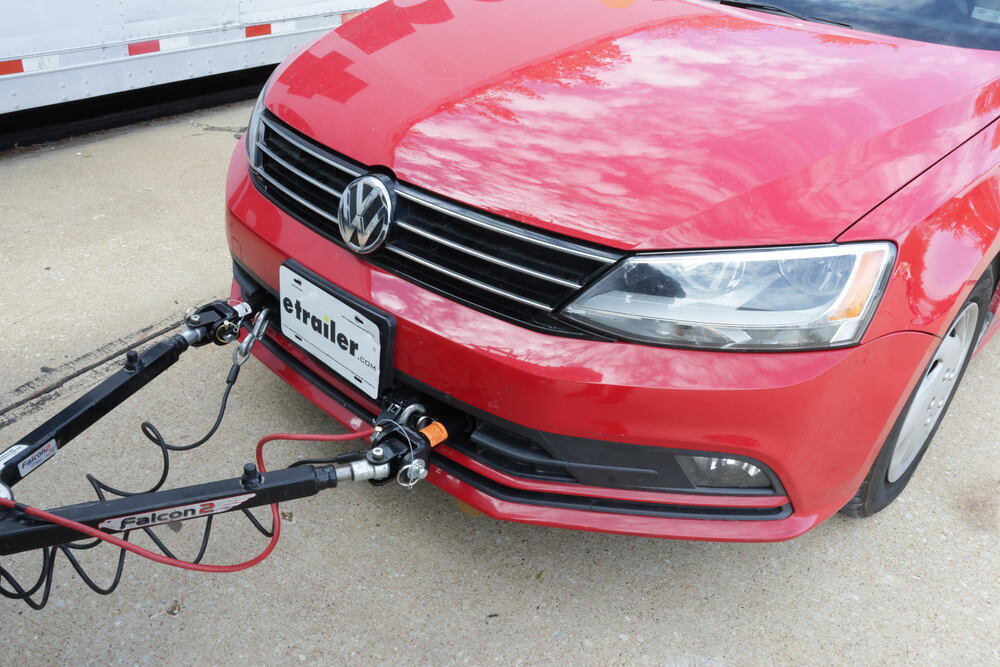

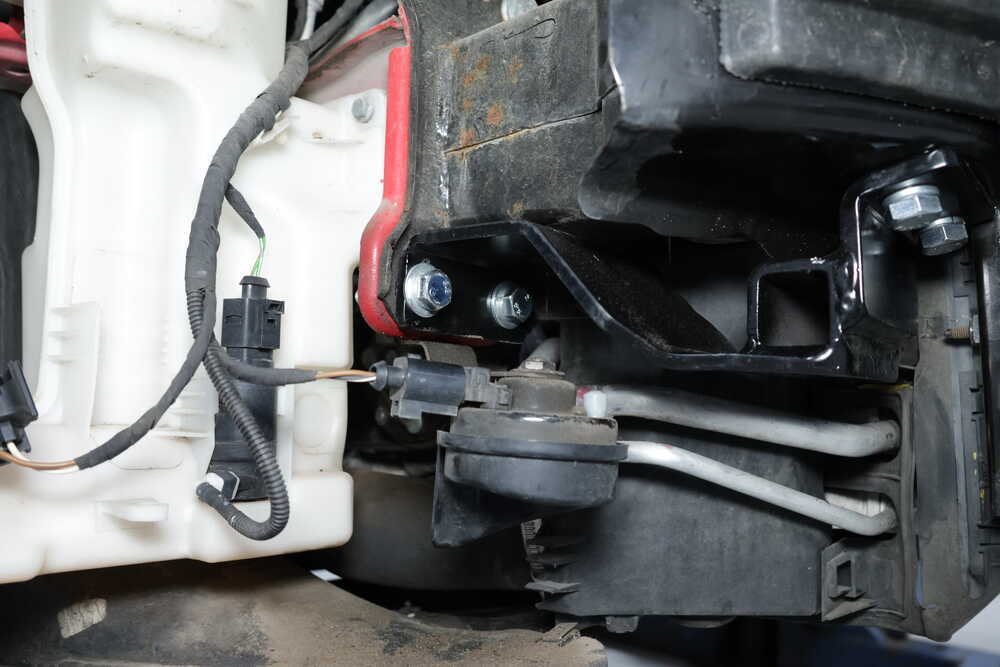

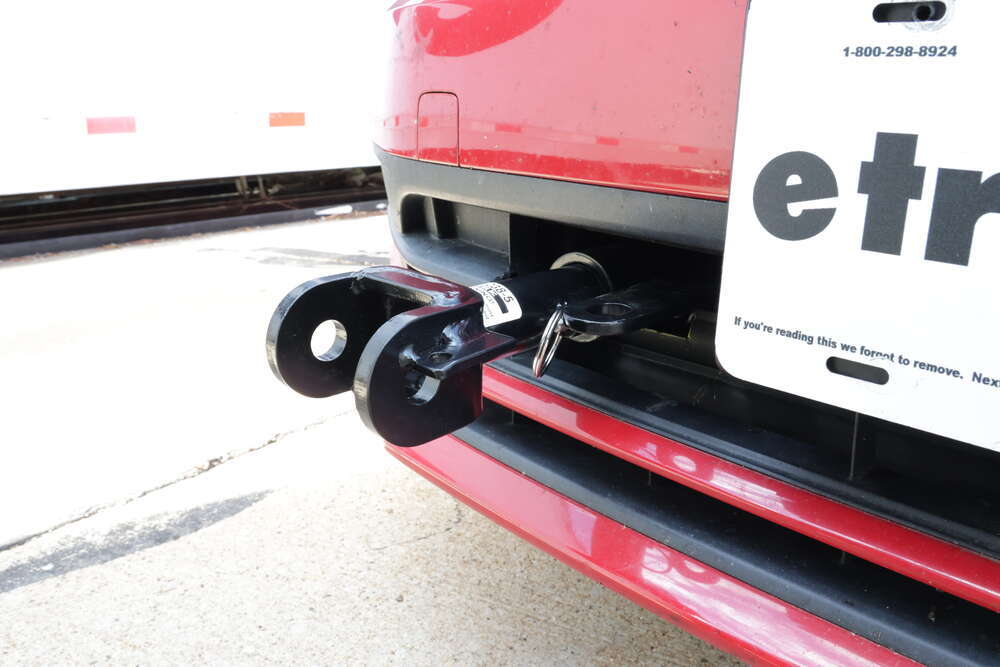

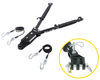
This setup keeps things looking tidy when your tow bar isn’t attached. The direct-connect brackets sit farther back than standard ones, so when the removable drawbars are out, they’re virtually invisible. There’s no bulky quick-disconnect crossbar hanging out front, giving your vehicle a clean, factory-style look with solid protection from scrapes and scuffs.
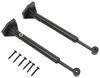
Getting ready to tow is simple thanks to the twist-lock attachment system. Just slide each arm into the bracket, twist to lock, and you’re set. When it’s time to disconnect, pull the built-in ring to release the lock, twist back, and remove the arm. The design makes it easy to handle alone and keeps setup fast and consistent on every trip.
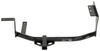
The base plate is computer-cut from all steel for precise strength where you need it most. The black powder coat finish resists corrosion and road wear mile after mile. Bolting directly to the frame spreads load forces evenly and eliminates the need for any welding during installation. It’s a sturdy, confidence-inspiring setup built to handle real towing duty.
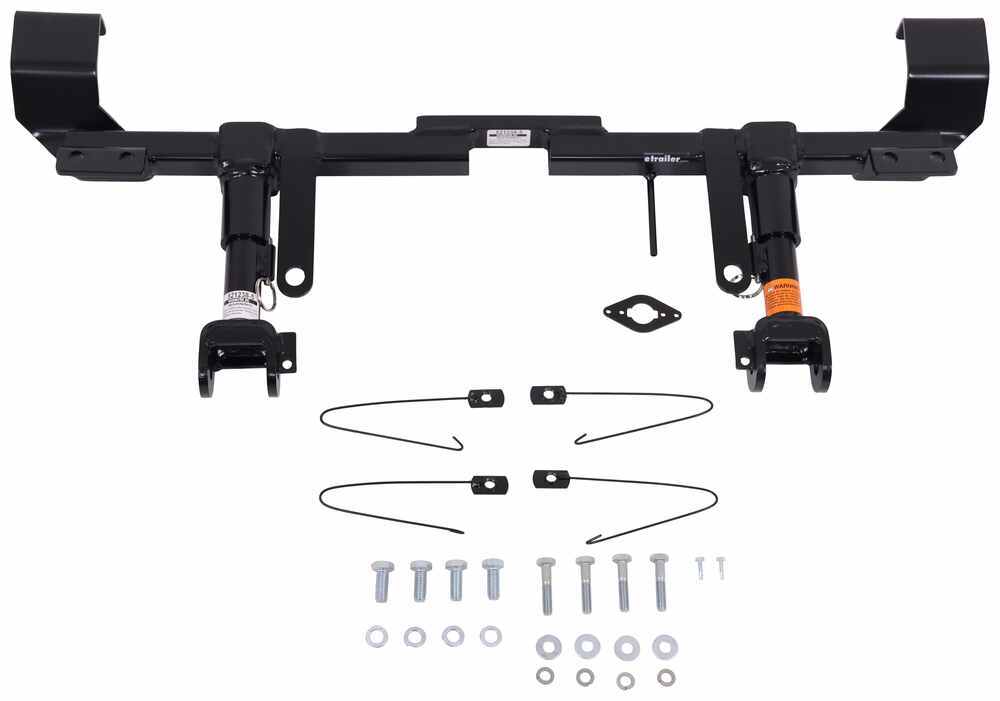
Everything needed for mounting comes in the box, including hardware and clear instructions. The custom design ensures a direct fit to your vehicle’s frame without extra fabrication. It’s a straightforward job that results in a secure mount ready for serious travel.
This base plate kit works exclusively with Roadmaster motor-home-mounted tow bars that slide into a trailer hitch—like the Nighthawk, Sterling, Blackhawk, Blackhawk 2, Falcon, or Falcon 2—and skips any setup requiring a hitch ball. That direct connection makes for a cleaner front end and fewer parts between you and the open road.

Videos are provided as a guide only. Refer to manufacturer installation instructions and specs for complete information.
Hi, John with etrailer. If you're ready to flat tow your Volkswagen, well, then take a look at this. This is Roadmaster's Direct-Connect baseplate kit, and we've installed it on a 2016 Volkswagen Jetta. Now real quick, if you are interested in flat towing your Jetta and you haven't done it before, there are five major components that you need. One being the base plate, and that's what we're gonna be talking about in this video here. You also are gonna need safety cables, a tow bar.
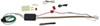
Depending on what state you live in or travel through, you may need a supplemental braking system. And then you're also gonna need some diode wiring. That's just gonna be some of the essentials that you would need to flat tow your Volkswagen Jetta. Now, about the Roadmaster baseplate here, this is a great base plate. This kit doesn't require any welding.
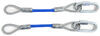
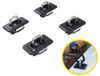
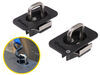
The arms are removable here. This is all powder coated, a black finish on here. And these arms are removable. We'll take the safety cables off here off the tabs. These tabs are a part of the base plate that runs behind the bumper here.
So what we're looking at, you just pull a pin, rotate it, and these arms will come right out. So your Jetta will retain a near factory look with the base plate installed. You don't have one of those big crossmember style type that fit across the front and fold up. This is a really super clean base plate that you can install in just a few hours. The Roadmaster baseplate is made in the USA, and it accepts Roadmaster style links on your tow bar.
So that is something else you need to consider. If you have Blue Ox ends or a Blue Ox tow bar, it's not the end of the world. You can get the Roadmaster style ends to fit up with the Jetta and the Roadmaster baseplate. Now something else to keep in mind when you're flat towing a Jetta is how low it sits versus if you've got a motorhome or whatever you're towing it with. So something to consider also, it's gonna be an adjustable style hitch such as this Gen-Y here. That's gonna bring the tow bar in line with the Jetta. When you're flat towing, you want this plane right here between the RV and the car as level as possible. You never wanna see any more than 3 inches in either direction. As far as installation of the base plate on the Jetta, it gets pretty involved, mostly due to Volkswagen. There's a lot of things when you have to take the fascia, the front fascia off of this car, that even the directions are, they're good, but sometimes a car doesn't want to cooperate. And then in this instance, it was the same thing with some problems that we had with trying to remove the grill. So we we're able to work around that. Other than that, the base plate, it fits the Jetta great. There is some drilling that you have to do, but I like the way that it mounts up. I like the quality of Roadmaster. And this is just something that if you're interested in flat towing, I just consider it an investment because this is something that's gonna last for you. If you wanna see what it takes to install this base plate on the Jetta, or if you wanna see what a shop has to go through to install it, stick around and we'll show you. Now to begin our installation, you're gonna wanna pop the hood and there's four T25 screws that are holding our front grill on. Now hang onto your T25. We can come over to the wheel wells. I'm gonna remove the T25 screws that are holding our inner liner. If you're having trouble getting your tool in here, you can turn the wheel and that'll make it a little bit easier. Now if you pull back the inner liner, you're gonna have another T25 screw right here, and it's facing up in this direction. It's gonna be a little bit tough to get to, so I've got an extension and a wobble. Now keep your same T25 Torx bit and work your way around the front. There's gonna be a number of fasteners that are gonna be holding the front fascia to the car. Ours is missing a few fasteners and yours might be as well. That's so I don't really have a count for you here. Just kind of pull at the fascia here and work your way around. Now if you have fog lights, there's gonna be a panel on the inside of the wheel well here you can remove to disconnect the fog lights. The cover, you can just pop 'em off from the bottom and then reach your hand in to disconnect the fog light. Now at this point, your fascia is almost ready to come off. The only thing that's holding it on right now is gonna be three T30 Torx screws: one, two, and three. Now they're behind the grill here. In the direction, they'd say that in order to remove the grill, once you've got the top loose, it tell you to grab it and pull straight back. And I'm just not comfortable doing that on this car. So as an alternative method, if you're having the same problems at home, I'm gonna use a low profile ratchet and a T30 Torx, and I'm just gonna work my way back behind here and remove these fasteners without removing the grill. I was able to reach the outer two with the low profile wrench. As far as the middle one, you can take a pick and you could pop out the Volkswagen symbol and that's going to just give you free access for this center T30 screw that needs to come out. Now we should have all of the bolts removed that's holding the fascia on. So we can come over to the wheel wells on both sides and you're gonna pull out on this outer fascia and it's gonna pop out. These came out pretty easy, but yours might come out a little bit harder than that. So this is loose. I'll come around to the other side and do the same thing. And just gently pull back on the fascia. And since we already disconnected our fog lights, there's nothing else holding this on, so we can just set this off to the side. Now if we come over to the driver's side, we're gonna have two connectors that we need to disconnect here. One is gonna be the power for the louvers, and I'm just pinching this tab right here, and then we can separate. The other one is gonna be the ambient air temperature sensor. Now to remove the connectors from their little clips here, there's gonna be a tab on the backside. Just push that down like this, bend, and then push up on it. So that's the tab I was pushing down on, and then slide these up. They need to be disconnected from the car because now we're gonna remove the louvers with a T30 Torx bit. We have one on each side. (Torx bit whirring) It may want to come down on you. Ours had some damage to 'em. (Torx bit whirring) We can remove these. Yeah, so they normally just slide straight down and we'll set these off on the workbench. On both sides of your louver, this is the backside of the louver, you're gonna see a mounting tab out here and then a shelf. And then in your directions, you're gonna have a little diagram that shows you what you need to cut. Basically what you're doing is you're gonna trim this flush and then cut this off as well. So we're just gonna have this height all the way across. You wanna do that on both sides. This plastic will cut pretty easy, but today I'm gonna be using a cordless oscillating tool to trim this. (oscillating tool whirring) And you're gonna have a diagram in your directions outlining how you need to mark off the inside of your louvers We're gonna trim these on both sides, again, using the oscillating tool. (oscillating tool whirring) We need to come to the center of the linkage on the louvers. We're gonna pull up on this and disconnect this. Just kind of. Now we need to take the top set of louvers out on each side. You can take a flathead screwdriver and pry right on the middle here and it'll slide the latch over. I can slide it out. And once again, your directions are gonna have a diagram to let you know how you need to trim each side. Just to let you know, I did flip these louvers over, and your sizes are gonna be different on the driver's side and passenger side. (oscillating tool whirring) Okay, stand our louvers up on the top, we're gonna have our air temperature sensor up here. We can just pry up on that and we're gonna relocate it. We need to drill a new half-inch hole. And again, in your directions, they're gonna tell you how to find this spot right here. (drill bit whirring) And then remount the air temperature sensor. Now we need to come back to the front of the Jetta here. And if you look for your air conditioning lines right here, you're gonna see this rubber air dam. And I've already marked off where we need to cut. We'll have to trim this air dam on both sides of the car, and again, your instructions will have a diagram showing you how you need to mark it off. (oscillating tool whirring) Now on both sides of the car, we're gonna have two bolts on the bottom of the bumper that we need to remove. Now the directions called for 15 millimeter. On our car today, they're 16 millimeter just so you know. Now, before we bolt our base plate up, we're gonna take the styrofoam cover off of the bumper beam. You're gonna have two little clips right here, and more than likely it's gonna have some sort of adhesive on the sides holding that on. Now this is gonna get replaced back up here, so just set it off to the side for now. Now in your kit you're gonna get some bolts and we need four of these. You're gonna have a lock washer and a flat washer as well. Just a side note, all of these bolts that we're gonna be using are gonna need red Loctite. This does not come in your kit, and they require this. So we can pick some up either here at etrailer, we have this for sale or any auto parts store or home store is gonna sell this stuff as well. Now, I'm not gonna put the red Loctite on the bolts just yet because we wanna make sure everything's gonna fit. So we can take our base plate and the tabs for your safety chains are gonna be up on top. So this is the top side, and we need to roll this into position. So this is the mounting tabs here and here for the louvers. The base plate's gonna go behind that, and it's gonna bolt up where we took those bumper bolts off. So you may have to bend the horn out of the way just a little bit for now. We will get this up here. So I have the base plate temporarily supported now with just one of our bolts on each side, and I didn't use red Loctite yet. We want to just keep everything until the very end, then we'll torque everything up, but it's on here tight enough now. We have to drill some holes. Up here on the front brackets here, we're gonna be drilling up into the bumper with a half-inch drill bit. So we're gonna drill two holes per side. And then we're also gonna have to drill an access hole on the passenger side to be able to get our handle nuts in through the frame of the bumper here. So we're gonna begin by drilling our holes in the bottom here. (drill bit whirring) I am just using a half-inch bit right now. Kind of mark our center point, and I'm gonna start these holes with a smaller drill bit size. (drill bit whirring) Now with all of our holes drilled in the bumper on both sides and making sure everything fits right, we can begin applying the red Loctite to the bolts and getting all these bolts finger tight. And we can come back, you'll have torque specs in your installation manual. And you may have to bend these to make it a little bit easier for you. But I'd like to start with the one furthest away. And once we have all of the bolts finger tight, now we can torque into the specs in our installation manual. Now once you have everything torqued, you can just cut or break this wire off of these handle nuts. Now bend the horn back into position if you had bent it down like I did, and then we can reinstall the styrofoam cover on our bumper. Now from here, the base plate is essentially installed. The only remaining steps would be to trim the fascia and reinstall the fascia. But if you are doing diode wiring or a braking system like we are, it's best to get that stuff on there right now. We have lots of room to work on the front. We don't have to worry about trying to work our way around the fascia. So what we're gonna do right now is install our diode wiring and we'll come back, and we'll trim the fascia and reinstall it. Now we can reassemble our louvers by snapping the piece back on here. You'll see those little grooves right here and they're gonna fit over the louver controls here. Okay, make sure they're locked. Now we can replace the louvers here. The reason we we're cutting the louvers out is to fit over the base plate. Now our louvers we're previously broken on this side, so you just need a nice fit right here. Make sure your bolt holes line up. And the other thing you need to make sure is that you have them trimmed enough that they're gonna move freely, and they'll open and close as they should. So if everything looks okay, then you can just bolt 'em up. Then we can hook up the two connectors on the side and get them reattached. Now we need to trim the fascia to allow the base plate to come through. Now in order to do that, we're gonna rehang it on the car. There's diagrams in the instructions that'll help you, but I highly recommend placing it on the car. So with it centered on the car, you can kind of see we're gonna end up having to just cut this block out right here. This plastic is gonna cut best with an oscillating tool like this. You can also use a razor knife or snips. (oscillating tool whirring) Now once you have your fascia trimmed, you wanna make sure that you have enough room for your safety cables and for the removable arms to come in and out. But on the Volkswagen here, it's pretty easy. We just made a rectangle, so there's gonna be plenty of room also for the diode wiring and if you're doing a charge line or anything else. So once that's done, just reinstall your fascia in the reverse order that you took it off. Make sure you get all the fasteners, get fog lights hooked up, and that'll complete your installation of Roadmaster's Direct-Connect baseplate on the 2016 Volkswagen Jetta.
Ratings & Reviews

2017 f150
Customer service was very helpful. Easy to install. No bumper or grill cutting however, you do loose your front hooks. Nice low profile.
I watched YouTube videos on how to install. I have used this a year now. It is well made and not some cheap junk. Heavy steel and I am pleased with it. As with all etrailer products I have purchased, I highly recommend. Their customer service is outstanding.
Bolted right up to my 2021 Ford Expedition Max Platinum. No issues and is a snap to hook up and unhook the tow bars. The units poke right out the factory openings and are hardly noticeable when the draw bars are removed. About the only complaint I have is that the draw bars fit sloppy in the base plate adapters. They wobble a LOT but are made of very thick steel. After about 3000 miles towing so far, the draw bars are pretty heavily worn where they contact the base plate adapters.
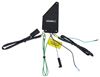
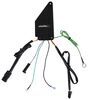
Quality product for my new 2024 Ford Escape Hybrid AWD ST Line. Came with decent instructions that got me through installation without issue. Installation required drilling only two holes through the plastic lower grille opening for the insertion of the tow arms. Everything else was completely "bolt-on". The breakaway switch, safety cable tabs, and the wiring receptacle all fit through existing openings in the lower grille providing a "clean" finished look.
I originally purchased a Blue Ox baseplate to install since I already had a tow bar. Upon removing the front grill, I was surprised to find the used Element I had purchased already had the front bumper caps removed and 2 braces installed. Thanks to the photos on etrailer reviews and product info, I was able to determine that the vehicle had previously had a roadmaster baseplate installed! I purchased this unit and it fit perfectly onto the already installed braces. Seems very solid and high-quality so far.
A clean look on my 2025 Ford Maverick Hybrid after following e-trailer's detailed installation instructions.
Installation was fairly straightforward, kudos to e-trailer for the videos, looks great, everyone says it looks factory installed, love the low profile base plate without the bar, also love that the hook ups are detachable and can be removed when not towing, gives it an overall cleaner look. Installed it right at the campground without issues, took about 3 hours to install, with our rubicon only had to widen the top holes as the second set of holes were already the size of the bolts needed. This is the 3rd base blare we have installed and they get easier each time.
Put this on a 2014 Honda CR-V. This is a very well made base plate setup! The overall design, welds and powder coating are outstanding! Shipping was super fast too! The install video by etrailer was close to perfect and really helped to take the "scary" out of doing the job. The only change I would like to see in the video is during the grill removal. He says to just yank it forward to get the clips to release. Unfortunately, most of the specialized clips broke doing it this way. Had I known, I would have slipped a thin tool just below the grill to get the clips to unlock/release. Also, on the wrap around, bumper cover, some of the tabs on the bumper cover ripped out and I had to do some creative plastic welding or fiberglass resin/cloth to repair. These clips have a release tab also. I suggest finding specific videos on youtube to remove the plastic body parts and grill. I got it all done and it works perfectly! I really love the almost invisible tow receivers on the car (when the arms are removed). Our last toad was a 1997 Nissan Hardbody pickup that has permanent knee busting/shin smashing protrusions. I am super happy with everything we have bought from etrailer over the past 18 years!
The folks at etrailer are fantastic. I didn't know everything I needed to tow my car behind our RV... but they did! Everything I needed was in the boxes and the videos made it all come together. Thank you to everyone at etrailer!
It mounted up just as the instructions said it would. From previous research I was not surprised when some of the mounting did not align perfectly. Had to use a dremel tool to make it work. The product looks very sturdy from its design. I’m happy with it and look forward to RV traveling.
Good product. If you are reasonably handy and have some tools, you can install this yourself in a few hours. I'm a mechanic, it took me a little over 2 hours to install on my own toad. The fit is good, there are 4 holes you have to drill, otherwise it is plug and play. When you insert and twist lock the tow bar mounts into their sockets they feel a little sloppy but they are secure, and i never noticed any rattle when towing. Overall i give it a 4 out of 5 for easy install and clean look after install. Pic included of installed base plate.
This was a bit of a challenge to install on a 2026 Chevrolet Colorado Z71. One item to be aware of, as you take off the front Facia of the truck for the install, there are two Facia "brakets" that attach to the front fenders that seem like they are use once plastic snaps. Three of the 4 snaps broke off on both sides when I removed the facia. These are about $35 a piece from Chevy and prevent you from making this a 1 day job. Additionally, there are 2 7mm screws/bolts that connect one of the coolers to the back of the bumper support and these are a real problem to get back in - over an hour of time and every 1/4" tool in my arsenal was needed to find a way to get these started. Finally, one of the Connecting Plates (Passenger side) needed to holes to be elongated to enable all the bolts to be started. Finally - you need to put the Brakaway bracket on the driver side, to have enough cable to reach you brake system. Probably have 4 hours in the disassembly and installation of the Direct-Connect Plate. Now waiting a couple days for the plastic brackets from Chevy to complete the install. Good Luck!!
Excellent base plate, just as my wife requested, she didn’t want too much metal visible in front of the bumper. Installation instructions were a bit confusing for me, but I’ll clarify, for me.
Very fast shipping, and the install was easy. Great product
2002 Honda CR-V. Easy to install. Two and a half hours, and stopped to eat a sandwich. To install the spacers inside the roll frame on the car I used an extension magnet to reach in there and position them. As you can see NO cutting was needed on the bumper cover!
Now I have to figure out the easiest way to run the wiring for the lights.
Thanks Lauren A for your help!
Awesome instructions! Install was fairly easy. Product is very high quality and solid construction. Thank you E Trailer!
I installed this base plate on a 2018 Miata RF. I think I recall something about it taking 3.5 hours and my initial estimate was 3.5 days. It actually took a bit longer than that, but I was not pushing myself and did not have the luxury of having the vehicle on a lift but had it up on two ramps for the front wheels.
The order came pretty quickly, probably about 4 or 5 days between the time I placed it and UPS delivered it. The parts were well packaged and it came with a printed set of instructions. I had watched the video install on another Miata and if it weren't for that I'm not sure I would have tried it. I'm not a pro mechanic by any means but have worked on my own vehicles now for over 40 years. And I'm not a spring chicken either, so all the up and down working on the car can tire me fairly quickly. But if you are not in a rush and go carefully it can be done.
It took a day to do most of the disassembly. I removed both headlights and the intake tube on the passenger side. That tube came out much easier then it went back in.
The next day I got the baseplate mounted which helped to start visualizing how it all would work. All of the holes for the 6mm bolts did not quite line up with the holes in the frame. I had to file one sides worth for a bit of extra clearance. From my experience on this install you really want to leave all the bolt on the loose side till you get everything situated.
A couple of days off for rain and the then I got to work on the bracing. Initially I though I didnt need to cut the top lip of the frame but I decided to go ahead and do it anyway since that part didnt seem to sit flat when bolted from the back end. I'm still not sure its really necessary as the hump clears the metal lip without cutting it.
I also ordered a 14" long 1/2" drill bit to cut the holes in the frame. It was a Bosch bit, wasnt very expensive and it went through the metal like the proverbial hot knife. I managed to get all the big bolts installed in a day with a great sense of satisfaction.
The next day I torqued down all the bolts and the mount felt very solid. They stress that you need to install all the bolts, but honestly I can't see the 6mm bolts doing much compared to the half inch bolts that do most or all of the work. But I put them in and tightened them all the same.
A couple of days spent to install the tail light wiring and then I got back on to putting the front clip back on. My car must have had an aftermarket grill since it did not match the pictures or the video. I tried to position it carefully to see where the parts that were going to stick out would be so I didnt cut out more than I needed to. So there was a good amount of back and forth, cut and fit. In the end I had to make some extra cuts for clearance for the safety cable tabs as well as the mount for the 6 wire connector. Until I made the extra cuts the lower part of the front clip would not seat correctly. Getting the clip in the right position so it fits under the lights also takes some finagling.
Figuring out where all the bolts go back in can be interesting. Take pictures where you can. Dont be too aggressive when working with plastic parts. Overall I'm satisfied with the install, but I have yet to try and hook it up to tow.
Easy to install needed to replace some fasteners as they broke removing front grill was able to get them from Amazon cheap
Easy installation! Etrailer videos are very informative and helpful! Always great to have a helper too!
This Road Master Direct connect base plate works perfectly for a 2020 ford transit cargo 250! Awesome service from etrailer as usual! The finished product can barely be seen through the front fascia!
It was shipped promply. I installed it myself using the included step by step instructions and videos from etrailer. It all went well (though I had to come back and reconnect the sensor plug- my bad).
I tow a Jeep Grand Cherokee Trailhawk and this base plate is nearly invisible when not towing. Works well.
I bought and installed this tow plate one year ago on my 2013 Jeep Wrangler. I bought this particular plate due to the jeep having a Barricade off-road bumper. This plate attaches a bit lower than other plates and prevented having to modify the bumper. Installation was easy involving only hand tools. The plate comes with all needed bolts and attachments. I have towed this Jeep several thousand miles behind my RV with absolutely no issues. As an aside, I use a Roadmaster Night Hawk tow bar which is also an excellent product. Both are expensive, but I believe cheaping-out on safety is no a good idea. I highly recommend this product.
This works perfect with my Roadmaster tow bar. It was a little difficult to install since I had to remove the front end of the Trailblazer, but with the good directions that came with it and some you tube videos made the installation easier.
Had these installed at Lester’s Automotive in Boerne,Texas…First class service all the way. Paul and his crew worked through lunch for over 4 hours to install these on our 2026 Ford Ranger. Also ran the wire and hooked up my auxiliary tow lights. The price for this was very reasonable and would highly recommend them for all r.v. needs even if not real close to the Boerne area. R.V park within reasonable distance if needed.
Etrailer comes through again! This was a great savings as a used kit, but it was even better than the description online. I have installed (4) baseplates on and etrailer.com has given me great videos to watch and good instructions to follow. Couldn't be more pleased with the quality, service and delivery times.
Info for this part was:
At etrailer we provide the best information available about the products we sell. We take the quality of our information seriously so that you can get the right part the first time. Let us know if anything is missing or if you have any questions.

















Thank you! Your comment has been submitted successfully. You should be able to view your question/comment here within a few days.
Error submitting comment. Please try again momentarily.