

Recommended Replacement for a Lippert 289252 Control Module
Updated 09/12/2025 | Published 08/10/2024
Question:
Will the LC53ED work as a replacement for the 289252E? See attached pic of the 289252E
asked by: Tom B
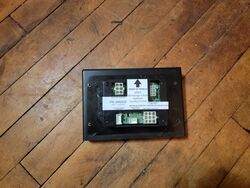
(click to enlarge)
Expert Reply:
Tom, unfortunately the controller 2020003067 is not going to work in place of the 289252, so It would need to be replaced with the 289252. I have also confirmed this with Lippert to make sure.


Andrew D.
12/7/2024
Hi, I ordered the recommended replacement ‘brain’ but there are two additional harnesses needed. The old part had a single connector for the ‘Remote Sensor Connector’ and the new brain has 2 plugs in this same location. Do you have a the part numbers for those harness replacements?

Andrew D.
12/7/2024
My factory touch pad connector will fit the new brain (although I bought the recommended adapter harness) but the wire colors do not match. With the tab down the factory is yellow, red, black, green. The adapter is green, yellow, black red. Does this matter???

Mrbrbrtd
9/12/2025
Yes this is a direct replacement for the 289252 I spoke with an electrical engineer who has tested this item so I just installed on on our 2014 itasca suncruiser 38q. This is a Plug and play installation. The only difference is you don’t use the rear sensor any longer as it’s built into this unit. Leave the 3 wire plug off as there’s no where to plug it in. When installed and power up controller to level it’s automatically in Zero Calibration mode” you must find a level pad to level it first. The customer needs a long 4’ level and use the manual jack controls to get the level you need and are happy with. Adjust front jacks then back jacks then side to side if needed. When you are finished hit enter and it will calibrate to that level you created. The system shuts off and your good to go.

Product Page this Question was Asked From
Replacement Lippert Leveling Control Brain for 4-Point Leveling System

- Accessories and Parts
- Camper Jacks
- Controllers
- Control Panel
- Lippert
more information >

Continue Researching
- Video: Review of MAXXAIR RV Vents and Fans - Rooftop Vent with Pivoting Fan - MA36WV
- Search Results: compartment door latch
- Search Results: 90885
- Search Results: tekonsha 90195 p3
- Search Results: goal zero
- Search Results: brake buddy
- Search Results: amp step
- Search Results: awning
- Shop: Lippert Road Armor Shock-Absorbing Equalizer Kit - Tandem Axle - 3,500-8,000 lbs
- Shop: Replacement Lippert Leveling Control Brain for 4-Point Leveling System
- Video: Review of Utopia RV Sinks - Gunmetal Double Bowl RV Kitchen Sink - UT72RR
- Shop: MaxxAir MaxxFan Rooftop Vent w/ Pivoting Fan - 4 Speed - Manual Lift - Smoke Lid
- Shop: Utopia RV Kitchen Sink - Double Bowl - 33" Wide x 22" Long - Gunmetal
- Shop: Base Plate for Tow Bar
- Shop: Blue Ox Avail Non-Binding Tow Bar - RV Mount - 2" Hitch - 10,000 lbs
- Shop: Vehicle Tow Bar Brake System
- Shop: Valterra EZ Valve Electric Waste Valve for RV Black Water Tank - 3" Hub to 3" Hub
- Shop: etrailer Invisible Base Plate Kit - Removable Arms
- Video: Review of Global Link RV Door Locks - Entry Door RV Lock with Bluetooth - GL62VR
- Video: Review of Lippert RV Slide Out Parts - Replacement Hydraulic Actuator - LC45BX
- Video: Checking Out the Replacement Hydraulic Actuator for Through-Frame RV Slide-Outs
- Q&A: Replacement Controller for Lippert Components 6-Point Ground Control 2.0 Electric Leveling System
- Article: Trailer Wiring Diagrams
- Shop: Brake Controller
- Video: Review of the Valterra EZ Valve Electric Waste Valve for RV Black Water Tank
- Q&A: Replacement Lid Options For A Dometic 1450 RV Roof Vent
- Q&A: Replacement Part for Kwikee Step Controller # 909506000 Varies by Mfg. Date
- Video: B&W Turnoverball Underbed Gooseneck Trailer Hitch Installation Guide - 2022 Ram 2500
- Q&A: Replacement Motor for Dexter Group VT 00206
- Q&A: Troubleshooting External Sensor Error on Lippert Level Up
Steve
9/9/2024
I bought controller PN 2020003067 for a replacement for PN 289252. The difference in the two controllers is the connectors for the external sensor. My controller (289252) is a single 3 pin connector (black, yellow, red wires). The new controller has 2 two pin connectors and the suggested additional wiring harness (178278) will not work. All other connectors look correct. What is the fix?