bing tracking image

RV Winterization Guide article.

RV Winterization Guide: Step-By-Step Process from the Pros

Written by: Sam C.
Last updated: 10/09/2025
Every spring, I see the same sad story: a shiny RV that looks fine from the outside—but inside? Split fittings, cracked tanks, and busted pumps. All because someone said, “Eh, it’ll be fine till spring.” Spoiler alert — it wasn’t. At etrailer, our technicians have seen what happens when winter wins. This step-by-step RV winterization guide from the pros walks you through the same trusted process we use in our shop — no guesswork, no gimmicks, and definitely no “I saw it on YouTube” shortcuts. Whether it’s your first camper or your tenth, here’s how to make sure your RV plumbing system survives the winter, the professional way.

GETTING STARTED: THE BASICS

Why does the exact process matter?Ask five RV owners how they winterize, and you’ll get five different answers — and at least three of them are wrong. Following the proper process — the same one used by etrailer’s in-house pros — guarantees every line, valve, and fitting is protected. Even in warmer states, a cold snap can cause serious damage. The professional method doesn’t cut corners — it’s consistent, safe, and proven in every climate.

What do I need to winterize my RV?

You don’t need a full workshop — just the essentials our techs use every season:The must-haves:
  • Basic Tools: Screwdriver, pliers, maybe a flashlight. You’ll probably be contorting under a cabinet or two.
  • Air Compressor with Regulator: Keeps your RV plumbing lines safe by maintaining the correct air pressure. It’s the small gauge between your hose and the compressor outlet — set it before connecting to your RV so that first blast doesn’t hit full pressure.
  • Blowout Plug: Threads into your city water inlet so you can push air through the lines. Trust me — skip the plastic ones. They strip, they leak, they make you swear.
  • RV & Marine Antifreeze: Pink, non-toxic propylene glycol. Never use automotive antifreeze. It’s toxic and will wreck your plumbing. Our shop techs have seen the damage it causes to RV plumbing fittings and seals. The pink stuff’s cheap. Stock up.

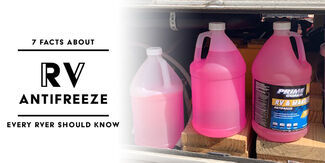
How do I pick the right antifreeze?

RV antifreeze is rated by burst protection, not “when it looks frozen.” It’ll start to slush up before that number — but it won’t expand and break pipes until it hits its rated burst temp.
Rating
Protection Zone
Notes
-50°FMidwest & Southern U.S.Standard choice
-100°FNorthern U.S. & CanadaSafe bet if unsure
-200°FArctic expeditionsNot your problem
If you’re wondering whether to buy -50 or -100, just grab -100 and call it a day. It won’t hurt anything except your wallet (by about two bucks).
etrailer Pro-Tip
Our technicians use -100°F in most regions — it adds an extra layer of protection for just a couple of bucks more.

PHASE ONE: DRAIN & BLOW OUT THE LINES

You can’t protect what’s still full of water. Get every drop out of your RV plumbing system before adding antifreeze.
Step 1: Drain the freshwater tank Start here. It’s the slowest part of the job. The valve’s small, the tank’s huge, and gravity doesn’t hurry. Open it first, let it drain while you move on.
AJ draining the fresh water tank.
Start by draining your fresh water tank.
Step 2: Open the low point drainsThey’re the plumbing’s basement windows — way in the back, lowest part of the RV. Our techs never skip this step — it’s one of the most common causes of cracked plumbing lines come spring. Look for two short hoses poking out of the underbelly — usually one red (hot) and one blue (cold), with little screw-on caps. That’s them.
Low Point Drains Under RV.
Low point drains are located at the lowest point of the RV's water system
Step 3: Set the right air pressure60–80 PSI. That’s your sweet spot. That’s what manufacturers use when testing for leaks at the factory. Go higher, and you’re not cleaning — you’re stress-testing. Always use a regulator. “Unregulated shop compressor” is code for “how to buy a new faucet.”
Air Compressor on pavement.
By staying in the 60-80 PSI range, you are well within the system's tested limits.
Step 4: Use the blowout plug
  • Screw in your brass blowout plug.Hand-tighten it into the city water connection. It should sit snug, not cranked down with tools.
  • Hook up the compressor. Clip your air hose to the plug’s valve stem, just like filling a tire. Double-check that your regulator is set between 60–80 PSI before turning it on.
  • Open all faucets. Start inside and work your way out — kitchen sink, bathroom sink, shower, outside shower, and toilet. Open every fixture all the way.
  • Cycle hot and cold lines. If your faucet has separate knobs, open both; if it’s a single lever, move it back and forth to flush both sides.
  • Run air until it sputters dry. You’ll see a few bursts of water and mist, then it’ll start blowing only air. Let it run 20–30 seconds longer just to make sure the line is fully clear.
  • Check each fixture. Close one faucet before moving to the next so you’re pushing air through the whole system, not venting everywhere at once. Make sure each line clears fully, the professional way to winterize your RV plumbing system.
Blow out lines on RV.
Attach your air hose to the valve stem on the plug, just as you would when inflating a tire
etrailer Pro-Tip
You can’t overdo this step. Air costs nothing and saves pipes. If you’re unsure, run air longer — there’s no harm in it.
PHASE TWO: SPECIAL COMPONENTS THAT NEED EXTRA ATTENTION
Now it’s time to handle the parts our technicians pay special attention to — the components that turn small oversights into big repair bills.

What about the refrigerator ice maker?

Do not blow air through it. You’ll blow the valve apart — guaranteed. Ice makers have tiny solenoids inside that don’t like pressure.Here’s what to do instead:
  • Shut off its water line (usually under the kitchen sink or behind a lower cabinet near the fridge).
  • Disconnect the line from the shut-off valve and let it drain into a towel or small bucket.
  • Leave it open for winter so any trapped moisture can evaporate.
If your fridge also has a built-in water dispenser, shut that line off and drain it the same way. Both feed from the same valve, so skipping one leaves water in the line.

How do I handle the water heater?

Tanked Water Heater
  • Never pump antifreeze into it. It’ll eat the liner and ruin the tank.
  • Flip the bypass valves to “bypass.” Most setups have three valves on the back of the tank — one on the cold line in, one on the hot line out, and one small line connecting the two. In bypass mode, the top and bottom valves are closed and the middle one’s open. That lets water flow around the tank instead of through it.
  • Pull the drain plug or anode rod and let it drain completely. The plug may be tight — use a wrench and expect a quick splash when it breaks loose.
  • Leave the plug out all winter. That prevents moisture buildup and gives leftover drips a place to go. (And no, squirrels aren’t moving in — they’re not that motivated.)
If your anode rod looks pitted or corroded, go ahead and plan to replace it in spring. That rod protects the tank from rust, and it’s a cheap fix compared to a new heater.
Tankless Water Heater on RV.
Standard Water Heater
Tanked Water Heater
  • Opposite rules apply. Tankless heaters need antifreeze in the internal coils or they’ll crack.
  • Use the winterize ports (if equipped) or follow the manufacturer’s directions for your model.
  • Always check the manual. Every brand is a little different — some require a special flush or valve setting. Guessing here can turn a $1,000 appliance into scrap.
If you’re not sure which type you have, check the exterior access panel. A tanked heater has a large round plug or anode; a tankless unit looks flat with multiple small fittings and no obvious drain.
Tankless Water Heater on RV.
Tankless Water Heater

What if my RV has an accumulator tank?

If you’ve got one of those small pressure tanks near the pump — usually a black or blue cylinder the size of a football — take it out before blowing out your lines. It traps water like a sponge.
  • Disconnect the fittings (usually quick-connect or threaded).
  • Drain the tank fully.
  • Install a short bypass line or a simple union fitting until spring.
If you’re not sure whether you have one, look near the water pump. If you see a small tank on the outlet side of the pump with flexible hoses attached, that’s it.
PHASE THREE: PUMPING ANTIFREEZE Here’s where the pro-grade protection really starts — circulating antifreeze through every line in your RV plumbing system.
Step 1: Set up the water pump
  • Find it: Turn the pump on and listen — it’s always hiding behind the loudest cabinet in your camper.
  • Flip to winterizing mode: The valve on the intake side lets it suck from your hose, not the fresh tank. If your RV doesn’t have a built-in winterizing valve, no big deal — just disconnect the line from the freshwater tank, stick it straight into the antifreeze jug, and run the pump. Same idea, just done manually.
  • Drop the hose: Straight into a jug or bucket of antifreeze.
  • Power up: Make sure your 12V system’s on. No power, no pump.
  • Check the bypass: Confirm the water heater is still in bypass mode before you turn the pump on. (Pros never skip this step.) Otherwise, you’ll fill the whole tank with antifreeze and waste a few gallons fast.
Antifreeze jugs.
Drop the hose straight into a jug of antifreeze.
Step 2: Run antifreeze through the systemStart at the lowest point and work your way up.
  • Open low point drains until you see a steady pink stream, then close them. That ensures the lowest part of your plumbing is filled first.
  • Move to the farthest faucet from the pump. Open the cold side first and run it until the water turns from clear to a solid, bubble-free pink. Then do the hot side the same way.
  • Work fixture by fixture. Go through every faucet, shower (inside and out), and the toilet. Don’t forget any washer hookups, spray ports, or outdoor kitchens — those lines freeze too.
  • Watch for air pockets. When switching between fixtures, you may hear sputtering. Let it run until the flow evens out to a smooth, solid stream of pink.
  • Flush the toilet pedal until you get pink in the bowl. That protects the valve and the line leading to it.
Turn on the Faucet for Antifreeze to Drain.
Open the taps and let them run until the stream is solid pink.
etrailer Pro-Tip
Use a short piece of PVC pipe to hold the toilet pedal open while the antifreeze runs. Glue a larger fitting or coupler on the top end of that pipe so it can’t fall down into the toilet opening — because if it does, it’s headed straight for the black tank, and getting it out isn’t fun for anyone.
Step 3: How much antifreeze do I need?
  • Bumper Pull Trailer = 2–4 gallons
  • Fifth Wheel = 4–5 gallons
  • Toy Hauler = 5–7 gallons
A smaller trailer might only use two gallons if you’re efficient, but it’s smart to have one or two extra jugs ready. You’ll use more if you have multiple bathrooms or an outdoor kitchen. Antifreeze is cheap — about two bucks a jug — and replacing frozen plumbing costs hundreds. Don’t gamble.

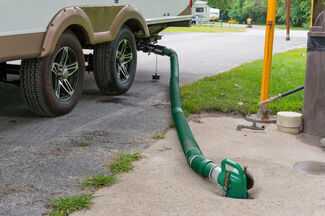
FINAL STEP: DRAINS & TANKS

You’re almost there. Don’t stop before the finish line — frozen P-traps can wreck your day just as fast as a busted pipe.

Why pour antifreeze in the drains?

Every sink and shower has a P-trap — that U-shaped bend under the drain that holds a small amount of water to block sewer gas from creeping up. But that water doesn’t drain out when you winterize. When it freezes, it expands, and that’s how you end up with cracked elbows and leaks under the sink. Pour ½ to 1 cup of RV antifreeze into every drain — kitchen, bathroom, shower, and even the washing machine drain if you have one. The goal is to fill that trap with antifreeze so the water sitting there can’t freeze solid. Don’t forget the shower or tub drain. They’re the easiest to overlook because they’re not eye level — but they’re also the biggest lines and hold the most water.

What about the black and gray tanks?

Once the freshwater system’s protected, you’ve still got to think about your waste tanks. Even a small amount of water around the dump valves can freeze, expand, and crack them. Option 1: Drain and leave open You can empty both tanks and leave the termination valves open, but it’s not ideal if your RV has tank sensors. When the tanks dry out completely, leftover residue can harden on the sensor probes, making them read “full” forever. Option 2: Add antifreeze directly (recommended) Pour a few cups of pure RV antifreeze down the toilet for the black tank and through a sink or shower drain for the gray tank. Then drive the RV a short distance or rock it a few times so the antifreeze sloshes around and coats the valves. If your RV has a macerator or dump pump, make sure to run a little antifreeze through that line too. Those seals can crack just as easily as a valve.

BONUS: QUICK CHECKLIST

  • Drain freshwater tank
  • Open low point drains
  • Blow out all lines at 60–80 PSI
  • Bypass or fill water heater (depending on type)
  • Pump antifreeze through every fixture
  • Add antifreeze to drains and tanks
  • Pressure test in spring before adding water
  • Sanitize system before first trip

THE BOTTOM LINE

Winterizing isn’t optional. It’s a couple of gallons of antifreeze and an afternoon of work that can save you a spring full of regret. These are the same steps our etrailer technicians use every day — tested, proven, and built to last.Take your time, double-check your valves, and remember: it’s easier to pour in pink now than to replace cracked plumbing later. When it’s time to wake your RV back up, check out our Winterize and De-Winterization Guide for a smooth spring start-up.
Sam C fishing.
About Sam C.Here at etrailer I spend my day working on trailers, fixing RV's, and building training aids/displays to keep all of employees up to speed on how things in an RV work! I'm also responsible for training all of our Customer Service/Content teams, so it's important I'm out doing things keeping up with changes in the RV industry. In my personal time I stay in my camper up at a large fishing lake here in Missouri with my wife, and am always doing something to it. It's a 2005, and I'm cheap, so I will keep it for as long as possible!
Related Articles
Related Products