Hey David, the Derale transmission cooler part #D15200 that you referenced does not come with a thermostat or any install kit components but if you wanted a similar option that does have all of that you would want the part #D15500.
That's pretty hard to give an exact answer on but with the install of the Derale Electra-Cool Combo Engine and Transmission Cooler Assembly w/ Fan #D15200 you'd see the fluid stay right around 175 degrees in traffic on a hot day since the fan…
Many of the Grand Design Imagine RV's are pre-wired for the Furrion Vision S Wireless RV Backup Camera System. This is available in two different configurations; #FOS43TASF for 4.3" or the #FOS05TASF for a 5"monitor. These are both…
Hello John, Yes, the Hellwig Adjustable Big Wig Rear Anti-Sway Bar - 1-1/4" Diameter #HE87FR will come with everything you need to install it on your 2017 Ram 2500, except the tools needed. I just installed a Hellwing rear ant-sway bar on our…
In regards to the Derale Thermal Fan Clutch with Reverse Rotation part #D22140, the distance from the mounting surface to the end of the shaft is 1-13/16" and the distance from the mounting surface to the end of the clutch is 1-3/4". I went…
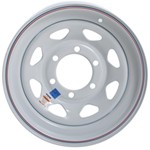
The Dexter Trailer Hub and Drum Assembly, part #84546UC3, is a trailer hub and drum with the lug nuts, bearings, bearing races, grease cap and grease seal included. It is designed to fit 3,500-lb axles. After removing your old drum and cleaning the…
The correct hub and drum assembly to use with the Dexter Trailer Axle Beam with E-Z Lube Spindles #6340624 is the Dexter Trailer Hub and Drum Assembly #8-201-5UC3-EZ. A set of this hub and drum have a 5,200 lb capacity just like the axle, has an E-Z…
Hey Brian, yes the grease seal of the Easy Grease Trailer Hub and Drum Assembly for 3.5K Axles #AKHD-545-35-EZ-K is designed to prevent grease from getting on the brake components. But what I would guess happened to you is that you overfilled the hub…
We will have several different pre packed hub assemblies for you to choose from depending on if you need a hub for drum brakes or hubs for an idler axle. Here is a list of hubs for both drum and idler axles in the different bolt patterns that use the…
Hey Jairo. So we do not offer a direct replacement for the Norcold N611, but we do have a good replacement option for you. It really comes down to what will fit in your cutout space. Take a look at the Norcold RV Refrigerator w/ Freezer - 8.2 cu ft -…
We have an abundance of steps for you to choose from whether you prefer to replace the current steps on your Jayco Eagle or use free-standing steps such as the Econo Porch Trailer Step, #EHS-102-R-HR. However, RV steps are not specific to the make,…
Radiator Fans with 19 Inch Diameter for tough cooling
Built to move serious air, 19 inch diameter radiator fans shine when towing, plowing, or tackling heavy loads, helping keep the coolant gauge steadier at slow road speeds. Choose standard or reverse rotation to match your belt system; standard appears clockwise when viewed from the front. Expect sturdy metal construction and smooth, well-balanced operation.
Yes, some 19 Inch Diameter belt-driven fans are designed to run without a clutch. If you're replacing a clutch-mounted setup, use a fan spacer to take up the clutch thickness so the blades sit correctly in the shroud. Confirm spacer length and hub bolt pattern, and center the blades in the shroud opening.
Pick rotation by how your engine drives the fan. Standard rotation appears counter-clockwise from the driver's seat and clockwise when facing the front of the engine. Match the blade pitch and rotation to your current fan and belt system. If the engine or front drive has been swapped, verify direction on your setup before ordering.
It can be a strong choice for slow-speed, heavy-load cooling. Reviewers note heavy-duty construction that pulls a good amount of air and improvements when plowing or carrying big frontal loads. Check shroud fit and blade clearance to maximize airflow. Make sure belt condition and tension are solid to help prevent slip under higher RPM.
Verify the fan's mounting pattern and that it mates cleanly to the clutch hub. One installer noted an almost zero-tolerance fit and excellent balance; aim for similarly tight alignment. Check rotation matches your drive, confirm blade-to-shroud and radiator clearance, and test balance before final tightening to reduce vibration.


 6000 RPM
 8000 RPM
 10000 RPM
 Radiator Fans Parts or Accessories
 Filters