
Curt T-Connector Vehicle Wiring Harness with 4-Way Flat Trailer Connector


To see if this custom-fit item will work for you please tell us what vehicle you'll use it with.


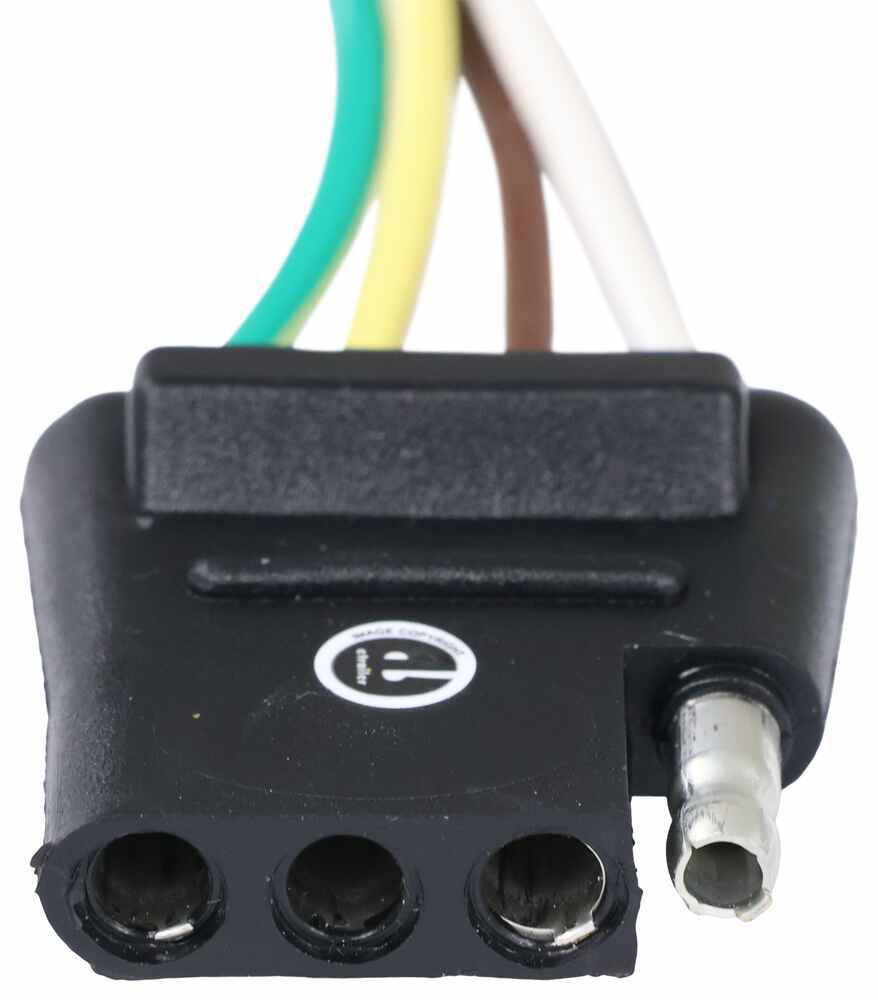
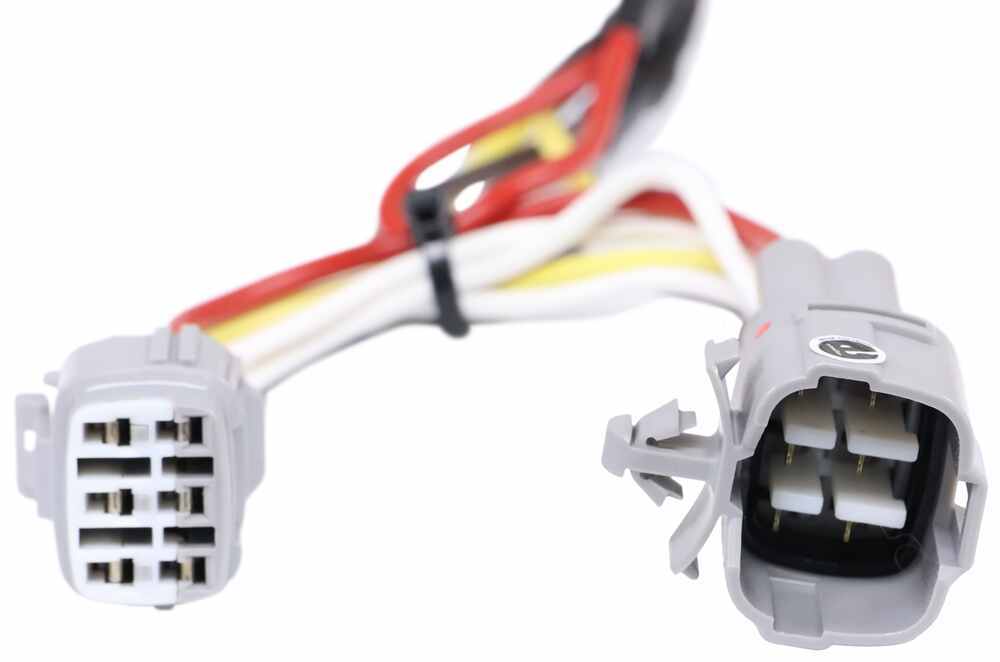


Wiring a trailer usually means cutting into factory wires, but this harness skips all that. The Curt T-Connector plugs straight into the vehicle’s existing wiring to give you a 4-way flat trailer connector. No splicing or wire tracing needed—just connect it and you’re ready to tow.
When a vehicle’s electrical system doesn’t match up with trailer wiring, lights can act up or overload circuits. This harness includes a powered converter that keeps the signal clean and balanced, making sure brake lights, turn signals, and running lights all work like they should.
The kit mounts out of sight for a factory-style finish. The wiring stays tucked away and protected from the elements, so you get a clean appearance and a long-lasting connection that doesn’t hang down or snag on anything underneath.
The 4-flat connector gives your trailer what it needs—running lights, turn signals, and brake lights. It’s the standard setup for small and mid-size trailers, utility haulers, or boat trailers, so you can plug in and go without extra adapters or parts.


Videos are provided as a guide only. Refer to manufacturer installation instructions and specs for complete information.
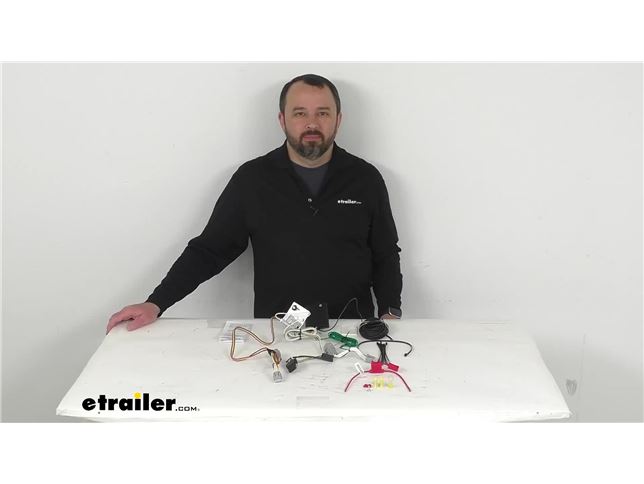
Hi everybody, Andy here with etrailer.com. Let's take a look together at this Curt T Connector Vehicle Wiring Harness with 4 Pole Flat Trailer Connector. Now this wiring harness is designed to specifically fit your 2022 and newer Subaru WRX and on custom fit parts such as this wiring harness, I do recommend taking advantage of our vehicle fit guide here at etrailer.com. Just input the year, make and model of your vehicle and our fit guide will confirm if this will work for you or if we have something comparable that will work for you. Now this harness is gonna give you a 4 pole flat trailer connector at the back of your vehicle to power your trailer signal lights. This is going to be compatible with your 5 pole, 6 pole, and 7 pole adapters.
And those adapters are sold separately. And included with this is going to be this dust cap that's going to cover that 4 pole flat connector when it's not in use. So you're not gonna have to worry about dust or moisture getting in there. So, and as you can see, you can just attach this to the wiring there itself. So it's not gonna be really easy to lose.
This black box here is a powered taillight converter and this is going to ensure that your vehicle's wiring matches that of your trailer. This is going to connect directly to your vehicle's battery to avoid overloading the electrical system. It's gonna reduce the strain on your wiring system of your car, and Curt builds each connector or each converter rather using surface mount technology for consistent reliable performance. This is going to maximize your trailer light yield and intensity while producing minimal heat, ensuring superior operation in rough road conditions. Now this harness is designed to connect quickly and easily.
You will need to locate your vehicle's wiring harness and that's typically located behind the driver's side and passenger side tail lights. So once you locate those connectors, you're then gonna separate them and you wanna be careful not to break the locking tabs. Then you're gonna insert these T connector ends between the vehicle wiring connectors and lock them into place. These T connectors are custom fitted for your vehicle, so they're gonna match up perfectly with the connection points on your vehicle. They're gonna snap and lock together for a tight secure fit.
So once you have those plugged in, you will need to make a good ground connection. And so this ground wire is, the ground wire is this white wire. As you can see it does have a ring terminal attached to it, also comes with a self-tapping screw that you see there on my table. And so you can get this grounded to a suitable location such as your vehicle's frame or cross member. You just wanna make sure that the surface is clean and rust free. Then you're going to want to mount the converter box to a safe out of the way location. You can do that with another mounting screw that you might have on hand or use the included double-sided adhesive tape or maybe even one of the many cable ties that's included with this kit. Then you're gonna wanna run this hot lead to the vehicle's battery. This short black wire coming out of the converter box is that hot lead and then this short black wire is going to get connected to one end of this included bundle of black wire. And you're gonna use one of the butt connectors that comes with this kit. And then the other end of this bundle is going to get routed to your vehicle's battery. Once you have this routed to the battery, you're going to take this fuse holder and then take the other butt connector and connect that routed end into the wire to this one wire or one of the wires of this fuse holder. And then you're going to take the ring terminal that you see here and attach that to the other wire on this fuse holder. And then that ring terminal will get attached to the positive posts of your vehicle's battery. This does come with a 10 amp fuse and so that fuse is going to slide right into that fuse holder and it's got a cap to protect that fuse and keep it safe. Now you're gonna be able to secure any slack of your wiring of your wiring, rather, with the many included cable ties that you see here. And once installation is complete, you'll want to stow this 4 way connector in an out of the way location, maybe within your cargo area, or you can check out our bracket options that we carry here and mount that near your trailer hitch receiver underneath your bumper if you so desire. Now the maximum amperage for the stop turn lights is three amps per circuit and for the taillights, it's six amps per circuit. Instructions are included to guide you through that installation process. It is also recommended that you use a small amount of dielectric grease on all of your electrical connections, like the plugs on your vehicle and the 4 pole connector itself. That grease is designed to help prevent electrical failures caused by corrosion and moisture. So on your screen, I am including the item number for that grease. You can just take that item number, pop it in the search field of our website, that will take you to that grease and you can add that to your order. Well, that's gonna wrap up our look today. I do hope that our time together was helpful for you. Again, my name is Andy, thank you for joining me.
Customer Satisfaction Score:
99% were satisfied with this product
1% of customers were not satisfied
Ratings & Reviews

Fits good, works as it should.
This wiring kit works as it should. However, the installation instructions could be much better and BEWARE - it requires running the kit's power supply wire from the rear bumper area all the way to the battery under the hood. It took a long time to route it into the trunk, into the passenger area under floor trim plastic pieces, then under the driver's side dash area, in front of the pedals, brackets, etc. and through the firewall into the under hood area and the battery. Be prepared for that time consuming & tedious task.
No mention of where to mount converter box-underneath car? I decided to drill some holes and put everything inside the car.
Do you have a question about this Custom Fit Vehicle Wiring?
Info for this part was:
At etrailer we provide the best information available about the products we sell. We take the quality of our information seriously so that you can get the right part the first time. Let us know if anything is missing or if you have any questions.

















Thank you! Your comment has been submitted successfully. You should be able to view your question/comment here within a few days.
Error submitting comment. Please try again momentarily.