
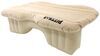
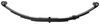
Draw-Tite Sportframe Trailer Hitch Receiver - Custom Fit - Class I - 1-1/4"


To see if this custom-fit item will work for you please tell us what vehicle you'll use it with.
Thank you! Your comment has been submitted successfully. You should be able to view your question/comment here within a few days.
Error submitting comment. Please try again momentarily.


This fully welded, corrosion-resistant vehicle trailer hitch receiver is perfect for your light-duty towing needs. Draw-Tite's Tested Tough guarantee ensures that this hitch exceeds industry standards. Drawbar sold separately.
Features:
Specs:
Draw-Tite's Tested Tough program provides testing standards far superior to those outlined by the Society of Automotive Engineers (SAE), the go-to source for engineering professionals.
Each Draw-Tite trailer hitch receiver undergoes extensive fatigue testing and static testing with the ball mount that is either supplied or recommended for use with that particular hitch, thus ensuring results that are applicable to real life use. Fatigue testing is also conducted on hitches rated for use with weight-distribution systems.
In addition, Draw-Tite performs static testing on a simulated automobile, as opposed to the rigid fixture used for SAE testing, resulting in a more true-to-life scenario.
At etrailer.com we're committed to the products we sell, and to our customers. Our experienced and knowledgeable staff are available via both phone and email to address your questions and concerns for the lifetime of your hitch. The technicians at etrailer perform hitch installations on a daily basis, making them a valuable resource for do-it-yourselfers. The one-on-one, personal service you'll receive comes straight from an expert in the towing and automotive field. We've installed it, we've wired it and we've towed with it, so whatever your question, we can answer it.

California residents: click here
Videos are provided as a guide only. Refer to manufacturer installation instructions and specs for complete information.
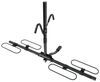
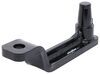
Speaker 1: Today in our 2014 Honda Crosstour we'll be having a look at and installing the Draw-Tite Sport Frame Class One Trailer Hitch Receiver Part Number 24852.All right, here's what our hitch looks like installed. As you'll notice, we have plenty of clearance around our receiver opening here making this a perfect hitch to use for bike racks and cargo carriers.On the side of our hitch here, we have our industry standard, half inch diameter hitch pin hole to secure any of our hitch mounted accessories. Welded onto the bottom of our receiver opening we have our rolled steel tubular safety chain loops to hook the safety chain hooks on from our trailer. This hitch features a 200 pound max towing rate rating, which is the amount forcing down in a 2,000 pound max gross trailer weight rating, which is the amount it can pull. You'll wanna consult with the owners manual and not exceed what the vehicles capable of towing or the hitch itself.Now for a few measurements to better assist you in choosing any hitch mounted accessory you may need, such as a bike rack or cargo carrier. You're looking at about 12 and a half inches from the ground to the top of the receiver opening and the center of the hitch pin hole is actually about even with the rear most part of our back bumper.
Now that we've gone over some features, we'll show you how to get it installed.All right, to begin our installation we find ourselves at the rear of the vehicle. We're going to have to lower the exhaust so I'm gonna put a strap in place to support the exhaust so it doesn't become damaged. Now our vehicle has dual exhaust, our exhaust hangers are the same on each muffler. We have one towards the center on the back, spray some lubricant on it so it will slide off nice and easy and then towards the front of the vehicle we have another one. We use a pry bar to pry our hanger off.We'll repeat the same process for our other muffler.
Now we'll safely lower our exhaust on down to get the necessary clearance. Now we'll remove our exhaust heat shields. They're held in place with three bolts per side. One, two, and three. These are ten millimeter bolts.
Keep in mind everything we're doing on one side we're gonna repeat on our other side.Marks out on our heat shield according to the instructions the area we need to trim out. Use a pair of tin snips to do this. You'll want to make sure you're wearing gloves when you do this because these edges are sharp.All right, with both of our heat shields trimmed out, we can reinstall them back in their original position. Now on the outer edge of where our bumper beam connects to our frame rails we have a 14 millimeter bolt. We need to remove these.
Now we have a well nut on the bottom of our frame rail right by our exhaust hangers. We'll spray some lubricant in there and we'll use a wire brush, part number 814092 on our website and run it in and out a couple times to clean up any debris or rust, which may be built up on the threads. Now we'll take one of our 10 millimeter metric bolts and a conical toothed washer, the teeth will face away from the bolt head and will face up towards the body of the vehicle and we'll secure our hitch up in place with an extra set of hands into this well nut here. So we'll raise it on up over the exhaust, place it against our flange there, and run our bolt on into position.Now we'll take another one of our 10 millimeter bolts, one of our flat washers and we'll put that through the inner hole here where there is no well nut. Now on the bolt we'll place on a conical toothed washer making sure the teeth face the body of the vehicle and we'll thread on one of our nuts. Now for our outer hole, we'll use one of our smaller metric bolts. Now that we have all of our hardware started, we'll snug down our bolt here using a 13 millimeter socket. Now we'll use a 17 millimeter wrench to hold our nut still and a 17 millimeter socket to tighten the bolt. Now we use a 17 millimeter socket to tighten our bottom bolt here. Now we'll torque all of our hardware to the amount specified in the instructions.Now that we have all of our hardware torqued down we'll raise our exhaust back up and resecure the hangers. Now we'll take down our strap. And that completes our look at and installation of the Draw-Tite Sport Frame Class One Trailer Hitch Receiver Part Number 24852 on our 2014 Honda Crosstour.

Works great, easy to install, definitely not a HIDDEN HITCH though.
Finally got around to installing the Christmas gift hitch on the Crosstour. My wife does crafts and sells the finished product. Some of which are fairly good sized, which would mean she would borrow my truck, usually when I need to use it! Therefore the need for a small trailer! This fits the bill nicely she can move her projects and I keep my truck! This was easy to install in the driveway, directions were clear and concise and the associated videos are extremely helpful!

This was easy to install and has worked well. The instructions are clear. This is a medium duty 1.25 inch receiver and it is more than strong enough to safely hold a trailer hitch or bike/carrier rack.
I ordered hitch for our Honda Crosstour last summer to pull a rental trailer from Colorado to the Snake River in Idaho and back. I had my mechanic install it quickly in an afternoon, fit perfectly. We had a pin drop out while on a highway, dropping the tongue to the asphalt. My son was able to easily and safely stop. Very well made and I am a happy customer.
Great hitch for my bicycle rack! Highly recommend, great value for a good price!
I have been very pleased with the hitch for my 2015 Honda Crosstour.
It seemed to be a great value, I spent about $85.00 to have it installed.
Shipping and service were excellent. These were good folks to do business with. Buddy
easy installation and easy to follow directions, very satisfied and pleased
Unfortunately I am not happy with it. I thought it would be flush mounted. Several people have injured themselves by banging their shin or leg on it.
Product seems well built and installed correctly however my hitch was damaged upon arrival. The powder coating was chipped and scratched in many places. The draw Tite sticker was scratched off also. This will lead to the hitch rusting sooner than expected. Disappointed.

Katrina B.
3/8/2023
What you can do is get some Rust-Oleum type of paint, and cover the scratches. This will help prevent rust and corrosion. I have a link below for your reference.
Helpful Links
I was very impressed with the packaging it is hard to get something buy UPS without them wrecking it. It was easy to install. Will buy again.
Thanks Craig
Hitch is working perfectly!
Info for this part was:
At etrailer we provide the best information available about the products we sell. We take the quality of our information seriously so that you can get the right part the first time. Let us know if anything is missing or if you have any questions.


Mary A.
6/24/2018
It’s been great! I only use it for our bike rack and it’s perfect!