
 Product Experts Available Now!
Call 1-800-940-8924


To see if this custom-fit item will work for you please tell us what vehicle you'll use it with.


Thank you! Your comment has been submitted successfully. You should be able to view your question/comment here within a few days.
Error submitting comment. Please try again momentarily.


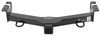
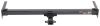
With a 3,500 lbs maximum gross trailer weight rating and 525 lbs maximum tongue weight, this Class III hitch opens up a lot of options for everyday hauling. It’s great for light trailers, small campers, or adding a cargo carrier for extra space when you need it. The 2" x 2" receiver works with the most common bike racks and towing accessories, so you can attach what you already have without needing adapters.
This hitch is built from sturdy, fully welded steel that’s designed to handle consistent use. The gloss black powder coat finish is applied over a protective base coat to resist rust and keep the hitch looking sharp through all kinds of weather. The round-tube design gives it a clean, finished look that fits right in under the bumper instead of standing out.
Installing this hitch doesn’t require welding or special equipment. It bolts directly to the vehicle’s frame using the included mounting hardware and basic tools most people already own. Clear instructions walk you through each step so you can get it installed in your driveway without hassle. Once it’s on, you’re ready to hook up a ball mount, bike rack, or cargo platform right away.

Videos are provided as a guide only. Refer to manufacturer installation instructions and specs for complete information.
Hey everybody, how's it going Today we're gonna be going over and showing you how to install the Curt Trailer Hitch Receiver here on your 2020 Mitsubishi Eclipse Cross. So this is what our trailer hitch looks like installed on our vehicle. Now it does have a visible cross too but that's all right. It has a nice black powder coated finish which is gonna help it blend in well the underbody paneling and it's also gonna help protect the hitch from rust over time, being that it is on the underside of the vehicle there subjected to the elements. So adding a trailer hitch to your Eclipse Cross, it's an excellent idea because it's gonna make your vehicle that much more versatile. Now we can obviously use the trailer hits for towing but let's say we wanted to hit the trails or free of some space inside the vehicle for us and the family on those long road trips.
We could easily attach either a hitch mounted bike rack or a hitch mounted cargo carrier. So in regards to towing, our trailer hitch here is gonna provide us with a 3,500 pound gross trailer weight rating. That's the amount we can pull outward and also have a 525 pound tongue weight rating, which is gonna be the downward force on the receiver tube. Now, keep in mind, these capacities are for the hitch only which is tested separately of the vehicle. Therefore, you do need to verify your vehicle's towing capacity in your owner's manual and abide by the lower of the two rated components, whether that's the hitch or the vehicle.
So we do have an industry standard two inch by two inch receiver tube opening and this is gonna allow us for the greatest amount of each of those hitch mounted accessories to choose from because there's a lot more options for that larger opening as opposed to the smaller one and a quarter inch. So I definitely recommend the two inch wind available just to the greater variety of choices you get. On the side of our receiver tube, we have a five eighth inch diameter hitch pin hole. So keep in mind your hitch pin and clip are actually sold separately, they don't come with the hitch and that's because most of your accessories are actually gonna come with their own. And then welded to the bottom of the receiver tube, we have our safety chain loops.
Those work great with both the larger clevver style as well as the smaller S-type. So a couple measurements for you guys here, the distance from the ground to the top inside edge of the receiver tube, you're looking right at about 13 inches. That'll be useful when you're selecting a ball mount, that way you can make sure you get the correct rise and drop to tow your trailer level. And then the distance from the center of the hitch pin hole to the outside the edge of the bumper. This one here isn't far at all, you're looking at about two inches and that'll be useful when you're selecting your folding accessories.
That way you can make sure that while they're in this towed position, they don't hit the vehicle. So in regards to installation, this one is pretty straightforward. It's really not that bad. We're gonna be able to do this with just common hand tools. There is one tool you might not have, that's a torque wrench. But you can actually rent this for free from most local auto parts store using their rental tool program. But in regards to the experience level, really, it's not gonna be that bad at all. If you get on a novice, I would definitely say, give yourselves around an hour or two, depending on your experience level. You don't need to lift or anything, you can do this on the ground. But with that being said, let's go ahead and walk you through the entire process now. So the first step of our installation, we actually need to lower our exhaust. So before we do that, we do need to support it. If you're working on the ground, a couple blocks of wood or Jack stand will work fine. Or if you're in the air like us, we're just gonna be using a cam buckle strap or a ratchet strap. Just hook it on the two points on the frame and then pull it tight. Now we're gonna take some sort of spray lubricant, we're gonna spray down each of our hangers to help them remove them. So you got a metal hanger going into a rubber isolator and they can be difficult to remove. We have to different tools we can use for this. A specialized tool for this job, an exhaust hanger removal tool or a tri bar, we'll show you both. This tool's definitely easiest but you guys are probably not gonna have that so we're not gonna do 'em all with this. Here we got that one out. Now we'll come to the other side here and remove this one with the tri bar. We're just gonna wedge it between the exhaust and the rubber isolator and then peel back just like so. So now we have one more, we can use our tool of choice here for this one. And there we go. So we're gonna look on the passenger side frame rail now. We're gonna be looking for a tail loop bracket, which is what we have here. Now keep in mind, not all models have this. So if you don't, you can just move on to the next step. But if you do have this, you're gonna need to take a 14 millimeter socket. And there's two bolts on the outside of the frame that go inwards, so we'll need to remove those. So that's what your bolt looks like. Once we have the other one out, the bracket should just slide right out. So next thing we're gonna do is, we're gonna take one of these plates here that comes in your kit, along with your two long carriage bolts. We'll just simply drop them into the slots on the plate just like so. Now, we're actually gonna install this on the outside of the frame rail with our bolt pointing in. So once we get everything lined up and inserted through there, we'll just simply repeat that same few steps there over on the other side. So to help us with our installation over on the driver's side, there is one bolt securing the carbon canister to the frame. Now they say it's not required in order to install our carriage bolts with our spacer but we are gonna go ahead and remove it because it will help us show you guys a little bit clearer what we're doing. Once we have that bolt down, we should be able to pull down on our bracket here and we will just simply take our space of block with those two bolts and then we're gonna slide it up into position and install it just like we did on the other side. Now, with an extra set of hands, we can raise our hitch up into position and then once you get everything lined up, you're gonna simply push your bolts through on the other side. So once we get everything lined up, you'll just simply reach around to the back there and shove your bolts through the hole there and hopefully it'll line up with the holes in the hitch there. So ours is a pretty tight fit up in there. So what you may need to do is take a rubber mallet and just sort of persuade it to get everything to line up there. Looks like we still need to go up a little bit. So now once you have both of your bolts through, we're simply gonna take our flange nuts and loosely secure each of the carriage bolts. So we need to do this on both sides. It's a little bit more tricky over on the driver's side because of that carbon canister but it's still possible. So next we're gonna take an M10 hex bolt, along with a conical tooth washer. We're gonna be securing the bottom hole into the hitch, into the weld nut in your frame. So if yours is a little dirty, ours was, you can take a spray lubricant as well as a wire brush and clean that out. And in some cases, extreme cases, you may even need to run a thread cap through there. Now that we have all of our fasteners secure, we'll take a three quarter inch and a 17 millimeter socket so we can tighten everything down. So now with our hitch secure, all we have left to do is resecure our carbon canister bolt, assuming we removed it and then put our exhaust back up into position. And that'll do it today for a look and installation of the Curt Trailer Hitch Receiver here on our 2020 Mitsubishi Eclipse Cross..
Customer Satisfaction Score:
97% were satisfied with this product
3% of customers were not satisfied
Ratings & Reviews




Sierra K.
6/3/2021
Thank you for your review. It sounds like you have a bad case of flex hitch which can sometimes happen in transit. There are a few ways to bend this back into shape to get it on. I will attach a help article to view.
Helpful Links
Do you have a question about this Trailer Hitch?
Info for this part was:
At etrailer we provide the best information available about the products we sell. We take the quality of our information seriously so that you can get the right part the first time. Let us know if anything is missing or if you have any questions.























Sierra K.
7/9/2021
Thank you for your review. etrailer.com takes care of any damage in shipping so we will reach out to you. We do need to cover any scratches with anti-corrosive spray paint to keep rust at bay.
Helpful Links
faq-rust-prevention-maintenance.aspx