


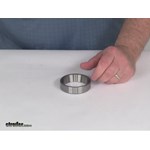
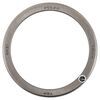
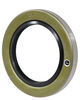
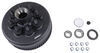
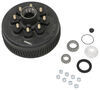
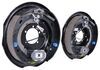
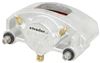
Race provides smooth surface for bearing to roll on inside of trailer hub. Works with 02475 bearing. Replacement part uses industry-standard number.
Features:
Videos are provided as a guide only. Refer to manufacturer installation instructions and specs for complete information.
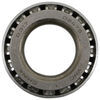
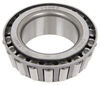
Today we're going to take a look at the bearing race for the 02475 bearing. The bearing race will provide the smooth surface for your bearings to roll inside of your trailer hub. Typically, if you have to get new bearings it is a good idea to also replace the bearing races at the same time. The bearing races will pressed into the trailer hub themselves. This was designed to work with the 02475 bearing. In replacement parts we use industry standard numbers, on this race, it is stamped on there 02420 for the race number.
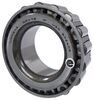
Again, the matching bearing used with this is the 02475. The measurement I want to give you on the races, they're measured outer diameter, edge to edge. What I'm going to do is put this down, the measurement is usually hundredths of and inch so I do want to use a caliper just to show you that. We're going to zoom in here, so we need to get a view. If we just go head, it's all zeroed out, we'll just go ahead and rotate this until we get it. Then once we put it on there you can see that it has a outer diameter of 2.68 inches. I also happen to have the bearing that is used in it, the 02475.
I pulled on of those, that's this one right here. As you can see it fits right into the bearing race. That should do it for the review on the bearing race on the 02475 bearing.
Customer Satisfaction Score:
98% were satisfied with this product
2% of customers were not satisfied
Ratings & Reviews

Great quality and price
Do you have a question about this Trailer Bearings Races Seals Cap?
Info for this part was:
At etrailer we provide the best information available about the products we sell. We take the quality of our information seriously so that you can get the right part the first time. Let us know if anything is missing or if you have any questions.


Thank you! Your comment has been submitted successfully. You should be able to view your question/comment here within a few days.
Error submitting comment. Please try again momentarily.