


To see if this custom-fit item will work for you please tell us what vehicle you'll use it with.


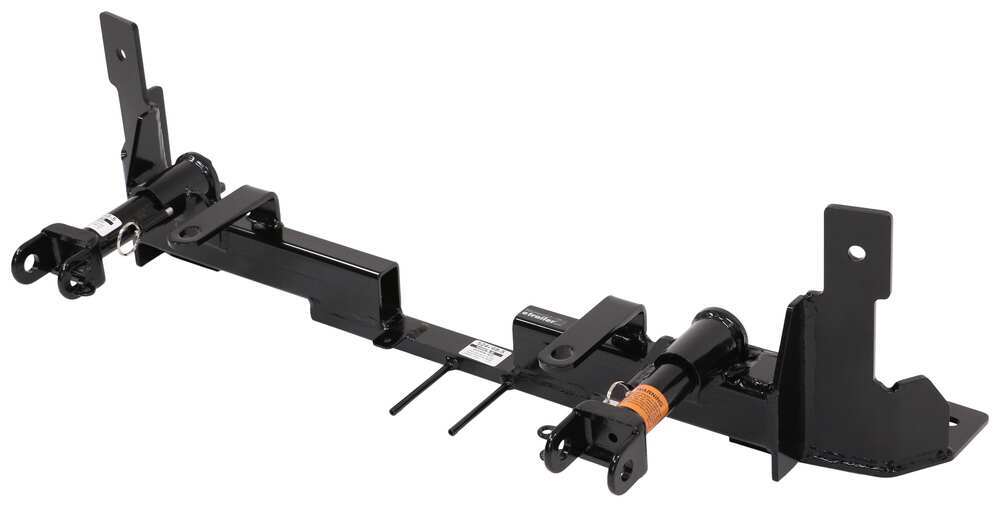
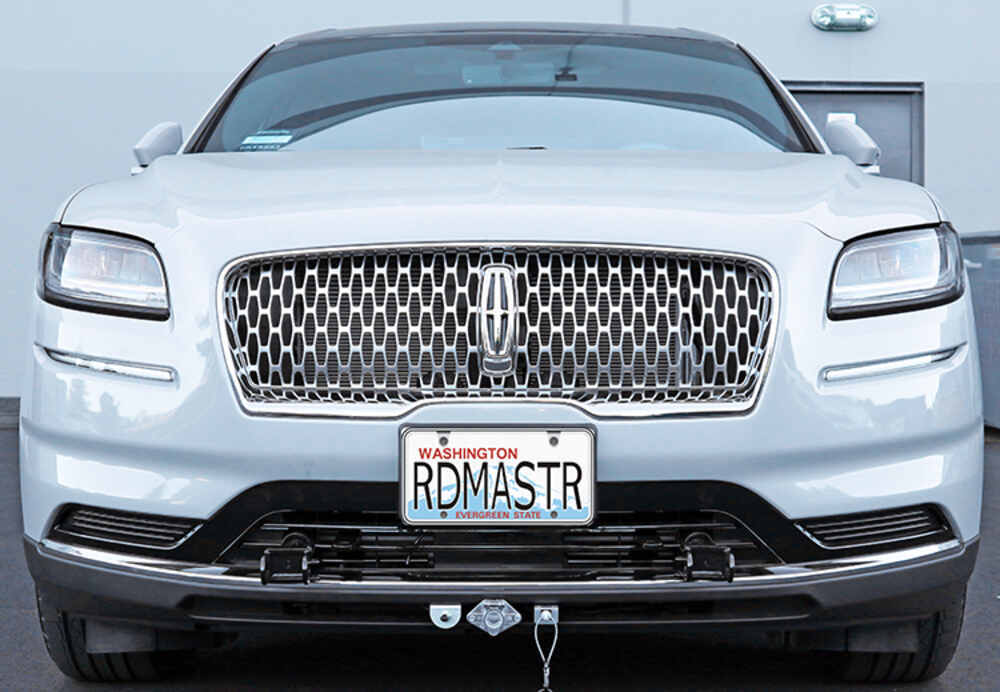
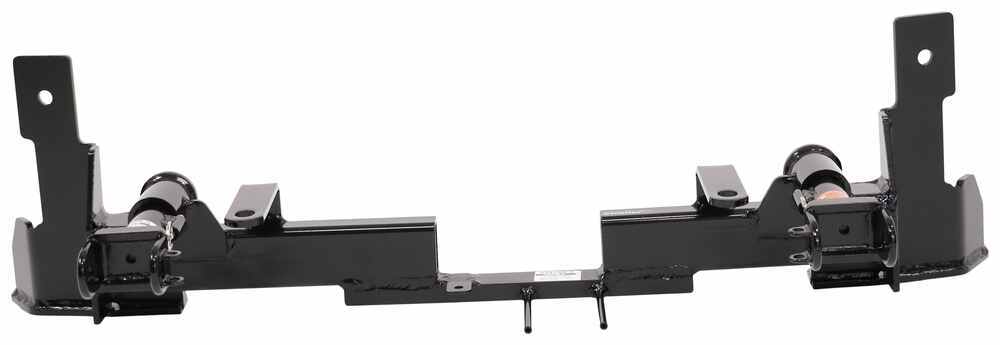
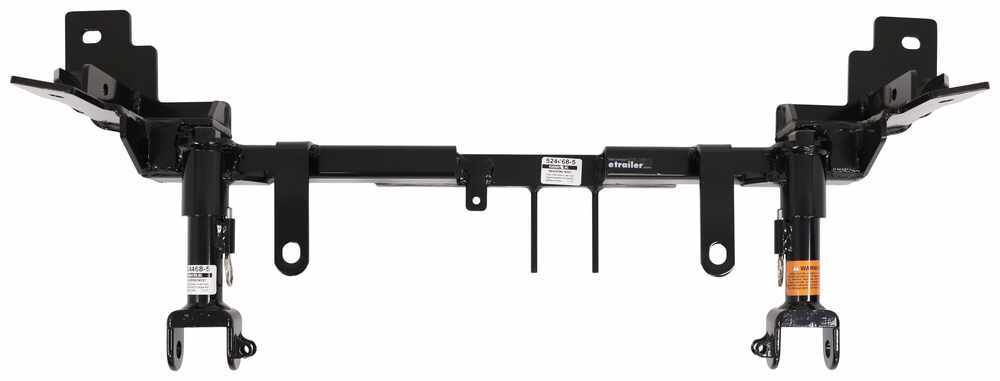
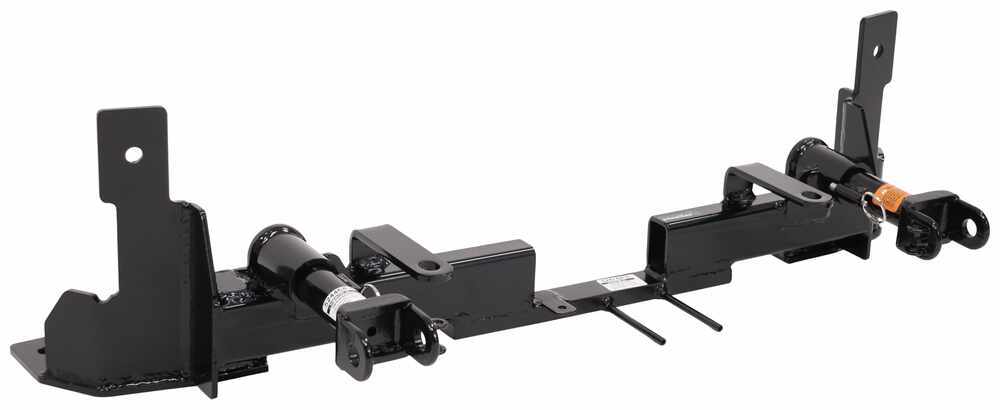
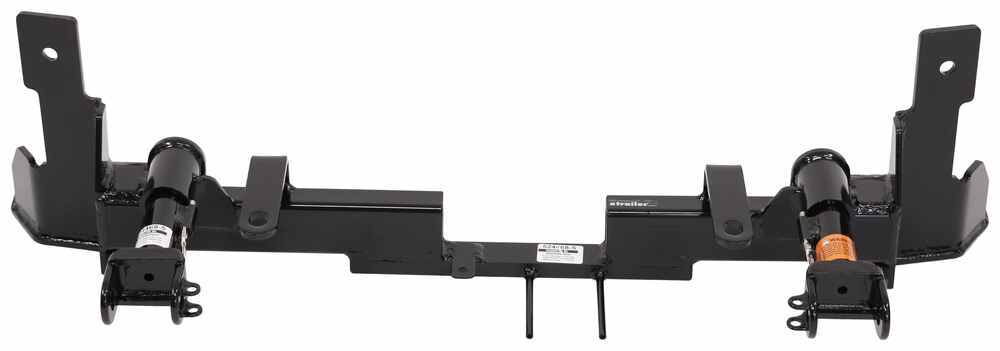


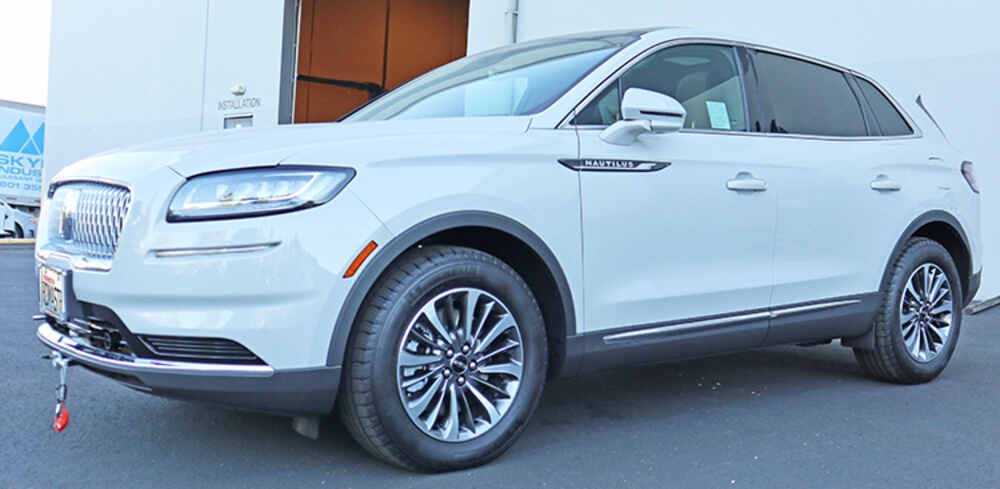

This setup keeps the front of your vehicle looking clean when you’re not towing. The hidden brackets sit farther back than standard ones, leaving almost nothing visible once the arms are removed. Because the drawbars are removable, you can take them off with a quick twist—no bulky hardware in sight, just a smooth, factory-style appearance.
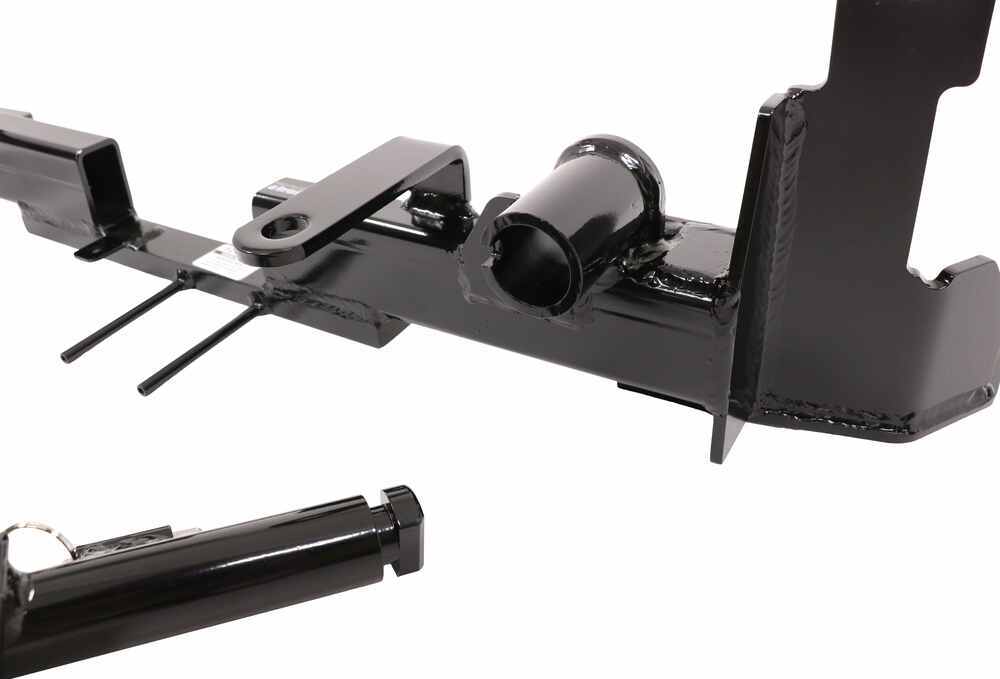
Connecting your tow bar is fast and straightforward with the twist-lock drawbars. Each arm slides into the bracket, clicks in place, and locks automatically. When it’s time to remove them, just pull the built-in ring to disengage and twist out. It’s a solid mechanical connection that gives confidence every time you hook up or disconnect.
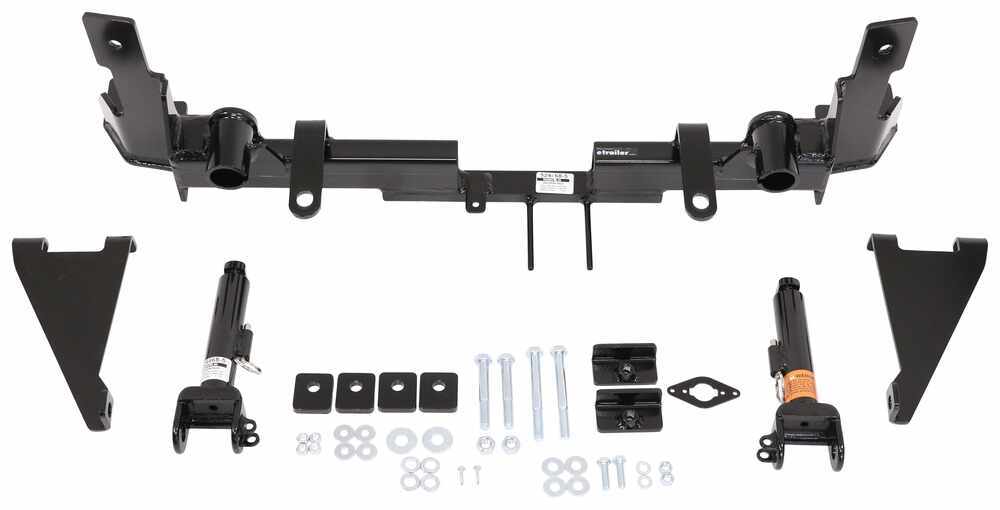
The computer-cut, all-steel build gives this base plate kit serious strength for long-haul towing. The black powder coat finish adds a layer of corrosion resistance, so it stays solid and looks good over the miles. The design mounts directly to the frame and spreads the load evenly without needing any welding.
This base plate eliminates the need for a quick-disconnect crossbar and pairs directly with motor-home-mounted Roadmaster tow bars like the Nighthawk, Blackhawk, Blackhawk 2, Falcon, or Falcon 2. It installs with included mounting hardware and instructions for a straightforward bolt-on fit. Pins to connect to the tow bar (RM-910029) are sold separately.
Roadmaster direct-connect base plates will only work with Roadmaster tow bars that slide into a trailer hitch, such as the Nighthawk, Blackhawk, Blackhawk 2, Falcon, or Falcon 2. These base plates will not work with tow bars that require a hitch ball.

Videos are provided as a guide only. Refer to manufacturer installation instructions and specs for complete information.
Hi, this is Scott with etrailer. Today we're taking a look at and installing our Roadmaster baseplate kit for 2021 Lincoln Nautilus. So your baseplate is going to be one of your main five components that you're going to need to get started with flat towing. So it's going to be your baseplate to hook up your tow bar to. So you're going to need your tow bar, then you're going to need your safety cables. You're going to need some form of diode wiring as well.
So that's something that's going to help you get your lights to the back of your vehicle. And some type of braking system, that's something you're definitely going to have to have as well. And it's definitely an essential part of your flat towing needs. Now we're underneath the hood of our Lincoln and there's a couple other things that I'm going to recommend that you get. And you're going to definitely need to get a battery disconnect system.
They're really nice. If you don't feel like getting out of your vehicle all the time to undo your battery when you're going to flat tow, this is really going to make things a lot easier for you. It's going to give you a button inside your vehicle that you can push, and that's one of the things you're probably going to need. Another thing you're going to need is the charge line kit and that's a pretty simple setup. We have it set up right over here.
And what that's going to do for you is going to charge your battery while you're going down the road and it's going to make sure that you have some charge in your battery once you get to your campsite. And another thing you want to remember is when you go to get your diode wiring set up and you order that part, you're going to want to pick up two more diodes for that just so you're going to be able to get power to your modules in the back of your taillights. One of the first things I noticed about this baseplate on our Lincoln is how nicely it blends in. You can't really even tell that it's on there. What's really cool about it is the whole trimming that you have to do on the fascia here really is minimal.
So it fits in here real nice and it's a really good design. One of the things that I like about this one as well, that really stands out to me and really makes a big difference when I'm installing these is having the access points for installing our plug in the front and having a place to put our breakaway switch. Those are really big deals when you're installing things like this because it takes away all the guesswork of having to try to figure out where you're going to mount either your breakaway switch or your plug. Another nice important setup for this is you're going to have the ability to quickly hook up. It's just going to go in real quick and then click right in place and you're all set to go. Now, you can get your tow bar all set up and that's going to work out on both sides. It's quick and easy to do. There's a quick quarter turn and you're all set. Now, if you have any questions or comments about this baseplate for your Lincoln Nautilus, feel free to get ahold of us here at etrailer. You can always get ahold of one of our experts and they'd be love to help you out or you can leave a question or comments down below. As far as installation goes, this one is pretty tricky. You're going to be doing a lot of removing the fascia and a lot of trimming and drilling, so it can be pretty intense to do. So if it's something you don't have time to do yourself or you really don't have the space or the tools to do it, you can also take a look at our dealer locator and get something done for you locally. If it's something you feel like tackling yourself, stick around, watch our video, and we'll help you get it installed. To start our installation, we have the hood open on our Lincoln and we're going to have 16 or so little plastic pop clips all over under this panel. Goal is we need to get all those out and get this panel out of the way. So all I'm going to do is just take a screwdriver and just pop in the center section and just get those worked out. And we're going to do that all across the panel until we can lift it out of the way. So what we're going to need to do is just take our screwdriver and get into that little piece there. Now you may need a trim panel tool like I'm going to use just to get up under it and get those pop loose. Just makes it a little bit easier. We'll go across our panel and get all of our clips removed. With all of our clips removed, we can remove our panel and set it aside. Now, underneath of our panel that we took off, we're going to have these fasteners here and these are going to be a T20 Torx across the front. Just want to use our Torx bit and we'll get those removed. (tool whirring) On each side of the front of our fender well, we're going to have five plastic fasteners that are similar to the ones we've been removing. We're going to do the same procedure with those and just get our center section popped out. Then we can use our trim panel tool, get behind those and pop those out. Now these can get to be a little tricky to get a lot of dirt and stuff built up in them, so you may need to wiggle them around a little bit. And trim panel tool, if you don't have one, we do offer them here at etrailer and they really do help out when you're doing this kind of stuff. Now, we just need to get our trim panel around our wheel well pulled back and we're going to get it to about this point and behind here we're going to have our inner fender well. We need to get that pulled down and back to give us access to that. Now, that we have our inner fender well pulled down, we're going to feel up right behind our trim piece and there's going to be two other fasteners that are going to be different and they're going to be a little arrow shaped and just need to push those little tabs in on that and that's going to release those. I'm going to get both of those released and they can be a little bit tricky, so just be patient with it. Sometimes you can slide a socket over it and that will help. Now, that I have that pulled back, I can show you those fasteners. Now this little fastener's going to have a tab on the top and a tab on the bottom. What you're trying to do is just get those pushed in to get that pulled out. Now that we have this pulled out, I'll just take a piece of shop rag or something and put behind here, and that'll hold our piece of trim back out of the way. With our inner fender well pulled down right here between where we have the seam where it comes between our front fascia and our fender, we're going to have three eight-millimeter fasteners here. The easiest way to get at these are going to be with a short stubby ratchet and it's kind of tricky to get at. And to make this a little easier, to get my inner fender well to come down a little further, about the middle here in the back, there was two more fasteners. I did remove those and it did allow me to get this pushed down a little bit further to give me a little more access to these eight-millimeter fasteners between our fender and our front fascia. So we got all of our fasteners out on both sides, these little eight millimeters, and they are tricky to reach and get at, so you kind of have to be creative on how you're getting them out of there. I started out with a short ratchet and just worked them out that way. And it took a little while, but we get them out on both sides. Now we can move to the underneath of our vehicle and start getting our panel out underneath of there. Underneath the front of our vehicle for our next step, we're going to have two plastic fasteners. We're going to go ahead and get those removed and then we're going to move on to these two on each side of these seven-millimeter fasteners and remove those. Now, we'll remove our seven millimeters on each side. (tool whirring) Those are going to be the ones here and here underneath. For the rest of our fasteners on our underbody panel, we're going to have 5.5-millimeter screws. We're going to start over here on our passenger side and we're just going to work all the way around the front until we reach this location on the other side. (tool whirring) Now, with all of our fasteners removed, we could remove our underbody panel. Now underneath of our panel, we're going to have three more fasteners and those are going to be the Christmas tree type. So having our panel tools really going to help out with that. Just want to get under those and pry those out. And those is basically hold in with that style of fastener. We'll have three of those to remove. Now, we're underneath of our vehicle and we can see up in our fender well, we're going to have a few electrical connections we're going to have to remove. We're going to have this large one here that's connected to our front harness that goes behind our fascia. We'll need to remove this one and we're going to have two more here that I can see that also connect into that same harness. We'll have to remove those as well. We could wait and do those when we pull our fascia back, but it's just going to be easier to do it while they're up in here. So I'm going to go ahead and get those removed. Start off on this one. I'm just going to push in on the tab and get that one removed and then we're going to have another one right above that. We'll pull back on the red tab. Behind the red tab. After we pull that tab back, right behind that tab is going to be a little clip, push in on that clip, pull down. For our larger connector, we just want to push down on this little center clip in the middle, and then push our gray tab up and that's going to unlock that. I'm going to rotate that up. So now we had a little bit of issues removing this connector, so we're just going to leave it now until we start pulling our fascia off. So we're just going to wait on that. Maybe it'll give us a little more room to get at it and we can maneuver a little bit and it'll kind of help to loosen that up and get a better grab on it. Now all you need to do now is just pull down on between the seam and this comes apart pretty easy. Make sure you have an extra set of hands, that way it doesn't just fall off. Now we're going to simply pull back a little bit and going to have somebody hold it. We're still going to have our connector on this side. And with that, it's a little bit easier to get my hands on it. Now we have one more connector that was high up, just want to remove that, and we can get our fascia put away in a safe location. On each side, we're going to have these plastic deflectors kind of behind our air intake here. So what I want to do is just take my clip tool and get those removed. Now we're going to take these out and these will not be replaced. Now what we need to do is unplug our horns in the front of our vehicle. And to do that, all we got to do is push in the little clip connected to our connector, and then pull that off. This is the little clip you need to push in to release that connector. Now, we'll follow our harness along and we're going to have pull off our wiring harness out of our clips. Just follow that along down our bumper bezel because we're going to be removing our bumper bezel. Now, we're going to have our temperature sensor. We just want to remove that from the front. Unclip all of our wiring from that. All that up, remove that from our bumper bezel. Now we can move that harness out of the way for now. Now across the front of our bumper bezel, we're going to have three more clips. We just need to remove those. Now, we can just pull down on our bezel and just get that to unclip. Now we can pull that out and get that moved out of the way for now. So now we need to do some trimming in the front in the area of our air inlet and we're going to have right around this area, we're going to have these tabs that kind of stick out. We're going to start with getting those cut out. And I'm just going to use my rotary cutting tool and just kind of get trimming that out. I'm going to start in the bottom and then I'll work my way around it. (tool grating) For our next part, we need to cut off a portion of our lower dam here. So we're going to be cutting right along this edge. They give us a brief explanation of where to cut in our instructions. And so when I looked at it, I've seen that we need to cut right above this upper tab, so I'm just going to start right in that area and work my way across. (tool grating) Now, in the instructions, I did see where this tab is there and I'm going to go just on the inside of that. Now keep in mind, when you get your baseplate going in place, you can always trim a little more out if you need to. So I'm just kind of going with the minimum requirements for now. If I need to, I can always come back in and trim a little more out. (tool grating) On each side, we have our frame horn that sticks out and we just want to trim a little bit off of the bottom of that. It'll show you in your instructions where you need to cut along. So what I'm going to do is I'm just going to use a cutoff wheel and just cut right across that line on both sides. (tool grating) After we made our cuts to the bottom of our frame horns, we went ahead and shot that with some black spray paint just to prevent any corrosion in the future. Underneath, we have our radiator support that comes across and you can use a jack stand or a jack to just kind of support this a little bit. What we need to do is we have two 10 millimeters on each side, bolts that go through. We need to back those out. And the main reason is we need to be able to make room to drill out this hole in the bottom of our frame horn. So what I'll do is I'll just remove these two on this side. (tool whirring) And then on the other side, I'll leave one in just snug. (tool blasting) And that should allow me to move it just enough back. Give me enough room to drill my hole. Now, if I need to, I can come in with a strap and I probably will just take up my strap and run a hook around this and then pull it so that it's holding it back out of the way because it wants to spring back to where I'm going to be drilling. We're going to have this smaller hole in the bottom of our frame horn and there's going to be another one directly on top of that. We're going to take a 17/32 drill bit and we're going to go from the underneath and drill all the way through this one up in through the top. All we're really doing is just enlarging this hole. (tool drilling) Now, I'm just going to come back through and get my radiator support remounted back in place. On the back portion of our frame, we're going to have two 13-millimeter nuts on each side and it's just below our bumper base beam here. And we need to get those removed. We're going to be replacing that hardware when we put in our new bracket. (tool blasting) Now after we've got the nuts off of all these, we're going to come back through with some red Loctite and just get that put on all of our studs. Now we'll take our bracket. These brackets are side specific, so make sure you take a look at your parts diagram in the front of your instruction manual and make sure you have them on the correct side. I'm just going to get that put in place. Now for our hardware in our kit, we're going to have a flat washer and we'll come back through with one of the nuts supplied in the kit. Now for our hardware, to get our baseplate put in place, we're going to have our long bolt. We're going to use a split washer, a flat washer, and we're going to take some red Loctite and get that on our bolt. Now we're going to have our spacer plate and our nut plate. We're going to have those setting off to the side. Now we want to get our baseplate slid into position. Now we want to get our spacer in place with our hole orientated to the rear. We're going to take our longer four-inch bolt in the kit with our lock washer and flat washer. And we're going to have our red Loctite on it and just run it through our baseplate up into our frame. And once we have that through, we're going to take our nut plate and just get that threaded on. And we're going to leave this loose for now because we will have to adjust some things. So now we'll just run that up finger tight. Now, I'm going to come back through and torque down our hardware that comes through the bottom of our baseplate. Now keep in mind, if you're at home and you're doing this, you probably want to make sure and leave your lower radiator support unbolted and kind of pushed back out of the way. But since I was doing ours on a lift and I had it up and I used a transmission jack, I had to bring it back down to get our baseplate put in place. So it made things a little more difficult. This will be a little easier for you guys at home torquing them down. Now, I'm just using what is called a crow's foot to get in there and torque these down and just want to follow your instructions and get them to the torque specs that are listed. For our next step, what we want to do is use a clamp. I'm just using a bar style clamp. And what that's doing for me is after I have these all torqued down where they're supposed to be, this is going to bring this up and get it centered along the center line of our bumper. And it's also going to bring up the bottom of it and just tighten things up underneath. So what I'm going to do now is I'm going to come back through and use my baseplate as a guide. But what I'm going to do is, I kind of recommend doing this, because we're going to be using a 17/32 drill bit, which is a pretty good size. With this type of thing, it's usually a good idea to go through and just run a pilot hole first and then just kind of step up until you get to your final size. It just makes things a little bit easier because this can be some pretty hard steel to drill through. And when you're doing this, make sure you're being careful. And once you start going through the backside of it, that you're going to have turbo inlet tubes and air tubes back here, and just be careful that you're not going too far and punching through any of those. So we're just going to go ahead and get our pilot hole started now. (tool drilling) Now we got through with our pilot hole. Now we'll come back through with our 17/16 bit and finish getting this drilled out. (tool drilling) Now we finally got through, this is going to be hard and steel. This is going to be really hard to drill through. So now we're going to take our backing plate and we're going to install this behind our bumper beam vertically. And we're going to run through with our bolt with a lock washer on first, a flat washer. We're going to run this behind here, hold it by hand, and get it lined up with our backer plate. Run that down as far as we can, finger tight. Now, I'm going to come back through and torque down this side to the specifications listed in my instruction manual. Now I'll remove my clamp, install it on the other side and follow the same procedure for the other side. After we got all the drilling done, now we're going to have to get our bolt through this little bracket and into our baseplate. Now this bracket I did go ahead and get everything lined up and then get these back here torqued down. So what I'm going to do is I'm going to take this bolt. And it's really tricky to get at, so I'm going to go with the bolt side coming from the inside out, that way it makes it easier to get my hardware on. So I'm just going to fish my bolt down through. And, again, this is really hard to get at, so you'll have to just take your time, have a magnet ready as well. That way if you drop it, you'll be able to retrieve it. Now I got it lined up. I just had to push my arm in behind the baseplate. Now, after we have our bolt through, I'm going to take a little bit of red Loctite. Now I'll get that on our bolt. Now that we have that, we'll take our flat washer followed by our lock washer, follow that up with our nut. Now, I'll get this snug down. Then I'll come back through and torque it to the specifications listed in our instruction manual. Now I just got a wrench, open-end wrench on the back of my bolt. And now I'm just going to go ahead and torque this down to the specifications listed. For our next step, we're going to need to get our bumper bezel and put back in place. So I marked a spot right here where I'm needing to trim to make clearance for our baseplate. So I'm just going to get these cut out on both sides and then it's going to allow me to get this set in place and figure out what I need to make for clearance for my bolts to stick out on the front of my bumper. Now, I'm just going to use my multi-tool cutter and just get that plastic cut out of the way. (tool grating) Now after I held my bumper bezel in place, I did get it up there and marked out where I need to cut to make clearance for my bolts. So now I'm just going to do the same thing, come back through and get these cut out. (tool grating) Now we'll just pop our bumper bezel back in place. We'll come back through and just start popping our harness back into our bezel, get the horns ran back up, and we'll get both of those plugged in. We're over here at our fascia and we're going to have to trim out one of these ribs down here and this is what's going to give room for our baseplate connectors to come through. So all I'm going to do is just mark them out and we're going by what the instruction shows. So we're just going to have them marked white and I'll do it on both sides. We're just going to cut them with our reciprocating cutting tool. (tool grating) With everything trimmed out, normally we'd go ahead and get our fascia put back in place. But for now we have a lot more components that we need to get installed. As you can see, we've already started getting some in place and it's just easier for us to do it with the fascia off. Now with everything trimmed out, we'll come back through and get our fascia put back in place. And that was a look at our Roadmaster baseplate kit for our 2021 Lincoln Nautilus. I'm Scott with etrailer and thanks for watching.
Customer Satisfaction Score:
94% were satisfied with this product
6% of customers were not satisfied
Ratings & Reviews

2017 f150
Customer service was very helpful. Easy to install. No bumper or grill cutting however, you do loose your front hooks. Nice low profile.
Couple issues, video for the install was completely inaccurate
Second issue was that none of the spacers included with the kit could be used as they were too thick.
I watched YouTube videos on how to install. I have used this a year now. It is well made and not some cheap junk. Heavy steel and I am pleased with it. As with all etrailer products I have purchased, I highly recommend. Their customer service is outstanding.
I am extremely satisfied with the installation and performance of this baseplate on my 2025 Ford Maverick hybrid. I was a little apprehensive as Ford changed the design of the front end on the 2025 model years and the older baseplates would not fit the new version. I hired a local shop to perform the installation and while there were some minor issues they managed to get everything in place exactly as designed. After one year of use I am very happy with the setup.
Bolted right up to my 2021 Ford Expedition Max Platinum. No issues and is a snap to hook up and unhook the tow bars. The units poke right out the factory openings and are hardly noticeable when the draw bars are removed. About the only complaint I have is that the draw bars fit sloppy in the base plate adapters. They wobble a LOT but are made of very thick steel. After about 3000 miles towing so far, the draw bars are pretty heavily worn where they contact the base plate adapters.
Quality product for my new 2024 Ford Escape Hybrid AWD ST Line. Came with decent instructions that got me through installation without issue. Installation required drilling only two holes through the plastic lower grille opening for the insertion of the tow arms. Everything else was completely "bolt-on". The breakaway switch, safety cable tabs, and the wiring receptacle all fit through existing openings in the lower grille providing a "clean" finished look.
I originally purchased a Blue Ox baseplate to install since I already had a tow bar. Upon removing the front grill, I was surprised to find the used Element I had purchased already had the front bumper caps removed and 2 braces installed. Thanks to the photos on etrailer reviews and product info, I was able to determine that the vehicle had previously had a roadmaster baseplate installed! I purchased this unit and it fit perfectly onto the already installed braces. Seems very solid and high-quality so far.
A clean look on my 2025 Ford Maverick Hybrid after following e-trailer's detailed installation instructions.
Put this on a 2014 Honda CR-V. This is a very well made base plate setup! The overall design, welds and powder coating are outstanding! Shipping was super fast too! The install video by etrailer was close to perfect and really helped to take the "scary" out of doing the job. The only change I would like to see in the video is during the grill removal. He says to just yank it forward to get the clips to release. Unfortunately, most of the specialized clips broke doing it this way. Had I known, I would have slipped a thin tool just below the grill to get the clips to unlock/release. Also, on the wrap around, bumper cover, some of the tabs on the bumper cover ripped out and I had to do some creative plastic welding or fiberglass resin/cloth to repair. These clips have a release tab also. I suggest finding specific videos on youtube to remove the plastic body parts and grill. I got it all done and it works perfectly! I really love the almost invisible tow receivers on the car (when the arms are removed). Our last toad was a 1997 Nissan Hardbody pickup that has permanent knee busting/shin smashing protrusions. I am super happy with everything we have bought from etrailer over the past 18 years!
It mounted up just as the instructions said it would. From previous research I was not surprised when some of the mounting did not align perfectly. Had to use a dremel tool to make it work. The product looks very sturdy from its design. I’m happy with it and look forward to RV traveling.
Good product. If you are reasonably handy and have some tools, you can install this yourself in a few hours. I'm a mechanic, it took me a little over 2 hours to install on my own toad. The fit is good, there are 4 holes you have to drill, otherwise it is plug and play. When you insert and twist lock the tow bar mounts into their sockets they feel a little sloppy but they are secure, and i never noticed any rattle when towing. Overall i give it a 4 out of 5 for easy install and clean look after install. Pic included of installed base plate.
This was a bit of a challenge to install on a 2026 Chevrolet Colorado Z71. One item to be aware of, as you take off the front Facia of the truck for the install, there are two Facia "brakets" that attach to the front fenders that seem like they are use once plastic snaps. Three of the 4 snaps broke off on both sides when I removed the facia. These are about $35 a piece from Chevy and prevent you from making this a 1 day job. Additionally, there are 2 7mm screws/bolts that connect one of the coolers to the back of the bumper support and these are a real problem to get back in - over an hour of time and every 1/4" tool in my arsenal was needed to find a way to get these started. Finally, one of the Connecting Plates (Passenger side) needed to holes to be elongated to enable all the bolts to be started. Finally - you need to put the Brakaway bracket on the driver side, to have enough cable to reach you brake system. Probably have 4 hours in the disassembly and installation of the Direct-Connect Plate. Now waiting a couple days for the plastic brackets from Chevy to complete the install. Good Luck!!
The folks at etrailer are fantastic. I didn't know everything I needed to tow my car behind our RV... but they did! Everything I needed was in the boxes and the videos made it all come together. Thank you to everyone at etrailer!
Awesome instructions! Install was fairly easy. Product is very high quality and solid construction. Thank you E Trailer!
Very fast shipping, and the install was easy. Great product
Easy to install needed to replace some fasteners as they broke removing front grill was able to get them from Amazon cheap
Easy installation! Etrailer videos are very informative and helpful! Always great to have a helper too!
This Road Master Direct connect base plate works perfectly for a 2020 ford transit cargo 250! Awesome service from etrailer as usual! The finished product can barely be seen through the front fascia!
It was shipped promply. I installed it myself using the included step by step instructions and videos from etrailer. It all went well (though I had to come back and reconnect the sensor plug- my bad).
I tow a Jeep Grand Cherokee Trailhawk and this base plate is nearly invisible when not towing. Works well.
I bought and installed this tow plate one year ago on my 2013 Jeep Wrangler. I bought this particular plate due to the jeep having a Barricade off-road bumper. This plate attaches a bit lower than other plates and prevented having to modify the bumper. Installation was easy involving only hand tools. The plate comes with all needed bolts and attachments. I have towed this Jeep several thousand miles behind my RV with absolutely no issues. As an aside, I use a Roadmaster Night Hawk tow bar which is also an excellent product. Both are expensive, but I believe cheaping-out on safety is no a good idea. I highly recommend this product.
This works perfect with my Roadmaster tow bar. It was a little difficult to install since I had to remove the front end of the Trailblazer, but with the good directions that came with it and some you tube videos made the installation easier.
Pathetic and just talking to Noah he states he will get to my issue later when he has time!! My car is on jacks all torn apart and I think Roadmaster gas misled advertising. This 523228-5 baseplate is NOT MADE FOR 2026 CHEVY TRAX!!!
Had these installed at Lester’s Automotive in Boerne,Texas…First class service all the way. Paul and his crew worked through lunch for over 4 hours to install these on our 2026 Ford Ranger. Also ran the wire and hooked up my auxiliary tow lights. The price for this was very reasonable and would highly recommend them for all r.v. needs even if not real close to the Boerne area. R.V park within reasonable distance if needed.
Etrailer comes through again! This was a great savings as a used kit, but it was even better than the description online. I have installed (4) baseplates on and etrailer.com has given me great videos to watch and good instructions to follow. Couldn't be more pleased with the quality, service and delivery times.
Do you have a question about this Tow Bar Base Plate?
Info for this part was:
At etrailer we provide the best information available about the products we sell. We take the quality of our information seriously so that you can get the right part the first time. Let us know if anything is missing or if you have any questions.



















Thank you! Your comment has been submitted successfully. You should be able to view your question/comment here within a few days.
Error submitting comment. Please try again momentarily.